第3集 剖析创建的第一个Flutter 应用程序
上篇我们创建了我们的第一个Flutter 应用程序,虽然对它做了一定的改变,但是还是一脸懵逼,但那是我们开始的第一步。
接下来我们就详细讲解下刚才创建的那一个Flutter 应用程序。
1.1 详解lib/main.dart
- 为了讲解方便,我们简化下刚才的lib/main.dart ,修改后后内容如下:
// Copyright 2018 The Flutter team. All rights reserved.
// Use of this source code is governed by a BSD-style license that can be
// found in the LICENSE file.

import 'package:flutter/material.dart';

void main() => runApp(MyApp());

class MyApp extends StatelessWidget {
  @override
  Widget build(BuildContext context) {
    return MaterialApp(
      title: 'Welcome to Flutter',
      home: Scaffold(
        appBar: AppBar(
          title: Text('Welcome to Flutter'),
        ),
        body: Center(
          child: Text('Hello World'),
        ),
      ),
    );
  }
}
注意,
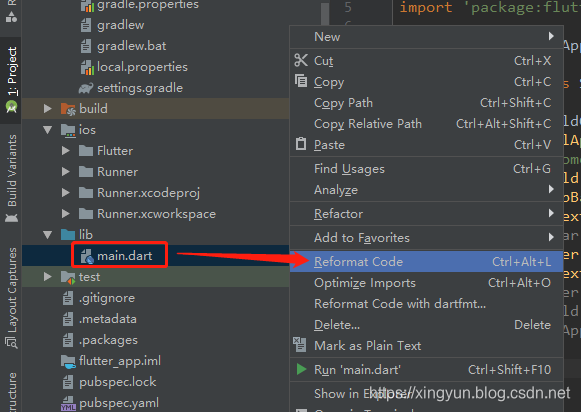
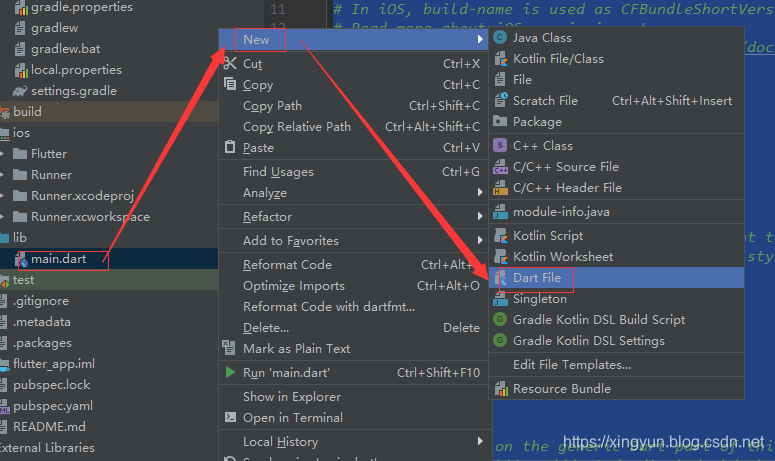
- 如果复制进去后,代码缩进出现问题,我们可以格式下代码
- 选中main.dart 右键 ——Reformat Code
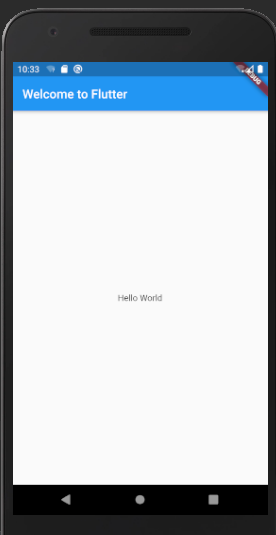
执行成功后,界面会变成这样:
接下来我们详细介绍下上述代码的意思。
- 上面这个示例创建了一个Material应用程序。
- Material是移动和Web上的标准视觉设计语言。
- Flutter提供了一组丰富的Material widget。
main()方法使用箭头(=>)表示法。 对于单行函数或方法,请使用箭头符号。- 该应用程序MyApp扩展(继承)了
StatelessWidget,这使该应用程序本身成为widget。 在Flutter中,几乎所有东西都是小部件widget,包括对齐,填充和布局。- 来自Material的Scaffold widget提供了默认的应用栏(AppBar),标题和body属性,其中包含主屏幕的widget 树。 widget子树可能非常复杂。
widget的主要工作是提供- 一个build()方法,该方法描述如何使用其他较低级别的widget显示widget。- 此示例的body由一个包含child: Text(‘Hello World’)文本子窗口widget的Center widget组成。 Center小部件将其widget 子树与屏幕中心对齐。
1.2 详解pubspec.yaml
1.2.1 如何添加第三方类库依赖?
接下里我们讲解如何使用第三方类库。
https://pub.dev/ 这个网址提供了类似Maven 中心仓库一样的功能,可以供我们查找和使用第三方类库。
打开我们的项目工程,可以看到
- pubspec.yaml: 类似之前的bulild.gradle 或pom.xml
name: flutter_app
description: A new Flutter application.

# The following defines the version and build number for your application.
# A version number is three numbers separated by dots, like 1.2.43
# followed by an optional build number separated by a +.
# Both the version and the builder number may be overridden in flutter
# build by specifying --build-name and --build-number, respectively.
# In Android, build-name is used as versionName while build-number used as versionCode.
# Read more about Android versioning at https://developer.android.com/studio/publish/versioning
# In iOS, build-name is used as CFBundleShortVersionString while build-number used as CFBundleVersion.
# Read more about iOS versioning at
# https://developer.apple.com/library/archive/documentation/General/Reference/InfoPlistKeyReference/Articles/CoreFoundationKeys.html
version: 1.0.0+1

environment:
  sdk: ">=2.1.0 <3.0.0"

dependencies:
  flutter:
    sdk: flutter

  # The following adds the Cupertino Icons font to your application.
  # Use with the CupertinoIcons class for iOS style icons.
  cupertino_icons: ^0.1.2
  # new added lib
  english_words: ^3.1.0

dev_dependencies:
  flutter_test:
    sdk: flutter


# For information on the generic Dart part of this file, see the
# following page: https://dart.dev/tools/pub/pubspec

# The following section is specific to Flutter.
flutter:

  # The following line ensures that the Material Icons font is
  # included with your application, so that you can use the icons in
  # the material Icons class.
  uses-material-design: true

  # To add assets to your application, add an assets section, like this:
  # assets:
  #  - images/a_dot_burr.jpeg
  #  - images/a_dot_ham.jpeg

  # An image asset can refer to one or more resolution-specific "variants", see
  # https://flutter.dev/assets-and-images/#resolution-aware.

  # For details regarding adding assets from package dependencies, see
  # https://flutter.dev/assets-and-images/#from-packages

  # To add custom fonts to your application, add a fonts section here,
  # in this "flutter" section. Each entry in this list should have a
  # "family" key with the font family name, and a "fonts" key with a
  # list giving the asset and other descriptors for the font. For
  # example:
  # fonts:
  #   - family: Schyler
  #     fonts:
  #       - asset: fonts/Schyler-Regular.ttf
  #       - asset: fonts/Schyler-Italic.ttf
  #         style: italic
  #   - family: Trajan Pro
  #     fonts:
  #       - asset: fonts/TrajanPro.ttf
  #       - asset: fonts/TrajanPro_Bold.ttf
  #         weight: 700
  #
  # For details regarding fonts from package dependencies,
  # see https://flutter.dev/custom-fonts/#from-packages
值得注意的是,新加的类库的位置在dependencies 的下一个节点。
如下所示:
dependencies:
  flutter:
    sdk: flutter

  # The following adds the Cupertino Icons font to your application.
  # Use with the CupertinoIcons class for iOS style icons.
  cupertino_icons: ^0.1.2
1.2.2 如何下载第三方依赖?
配置完成后我们可以看到右上角有个Packages get
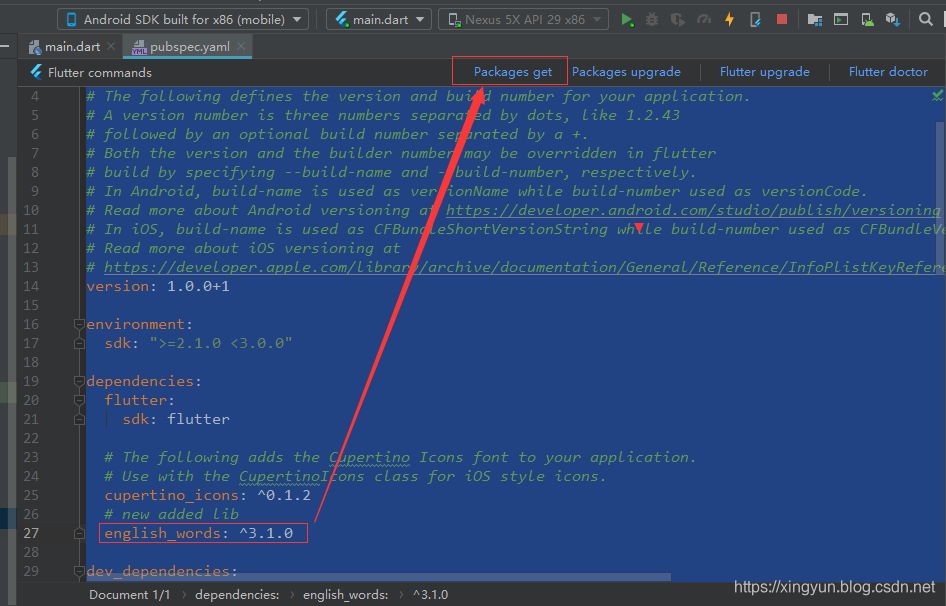
然后就会执行如下命令
flutter.bat --no-color packages get
执行成功如下所示:

1.2.3 如何使用第三方依赖
- 在lib/main.dart 导入如下依赖
import 'package:flutter/material.dart';
import 'package:english_words/english_words.dart';
- 完整代码修改后如下
main.dart
// Copyright 2018 The Flutter team. All rights reserved.
// Use of this source code is governed by a BSD-style license that can be
// found in the LICENSE file.

import 'package:english_words/english_words.dart';
import 'package:flutter/material.dart';

void main() => runApp(MyApp());

class MyApp extends StatelessWidget {
  @override
  Widget build(BuildContext context) {
    final wordPair = WordPair.random();
    return MaterialApp(
      title: 'Welcome to Flutter',
      home: Scaffold(
        appBar: AppBar(title: Text('Welcome to Flutter')),
        body: Center(
          child: Text(wordPair.asPascalCase),
        ),
      ),
    );
  }
}
- wordPair.asPascalCase 函数是什么意思呢?
- 其实就是著名的驼峰命名法,比如之前字符串是这个
uppercamelcase,执行后就变成了UpperCamelCase
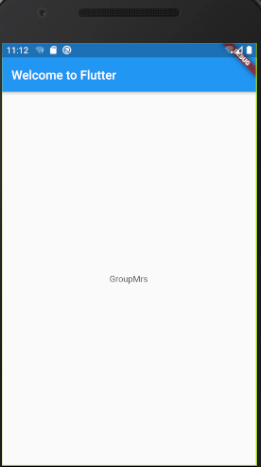
- 多次单击闪电图标,会看到界面上随机出现不同的英文单词。

- 由于我们使用了WordPair.random() 函数,会随机生成不同的英文单词。
比如第一次是这个 DeepShore
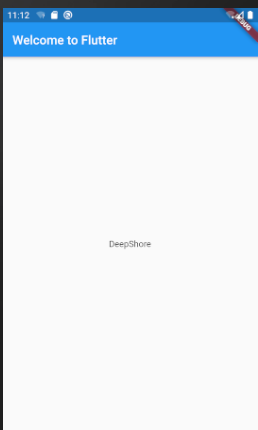
再点击一次就变成了GroupMrs
1.3 添加Stateful (有状态的)widget
Stateless (无状态的)widgets 是不可变的,这意味着它们的属性无法更改-所有值都是final的。
Stateful 的widget 维持在widget的生命周期中可能会改变的状态。 实现Stateful 的widget至少需要两个类:
1)创建实例的StatefulWidget类;
2)状态类。 StatefulWidget类本身是不可变的,但是State类在widget的整个生命周期内都保持不变。
接下来我们将添加一个stateful (有状态的)widget RandomWords,以创建其State类,即RandomWordsState。 然后,您将在现有的MyApp stateless widget内将RandomWords用作子级。
通过下面的方法创建RandomWords.dart 和 RandomWordsState.dart
- RandomWordsState.dart 内容如下:
import 'package:english_words/english_words.dart';
import 'package:flutter/material.dart';
import 'package:flutter_app/RandomWords.dart';

class RandomWordsState extends State<RandomWords> {
  @override
  Widget build(BuildContext context) {
    final wordPair = WordPair.random();
    return Text(wordPair.asPascalCase);
  }
}
- RandomWords.dart 内容如下:
import 'package:flutter/material.dart';
import 'package:flutter_app/RandomWordsState.dart';

class RandomWords extends StatefulWidget {
  @override
  RandomWordsState createState() => RandomWordsState();
}
- lib/main.dart 修改后内容如下:
// Copyright 2018 The Flutter team. All rights reserved.
// Use of this source code is governed by a BSD-style license that can be
// found in the LICENSE file.

import 'package:flutter/material.dart';
import 'package:flutter_app/RandomWords.dart';

void main() => runApp(MyApp());

class MyApp extends StatelessWidget {
  @override
  Widget build(BuildContext context) {
    return MaterialApp(
      title: 'Welcome to Flutter',
      home: Scaffold(
        appBar: AppBar(title: Text('Welcome to Flutter')),
        body: Center(
          child: RandomWords(),
        ),
      ),
    );
  }
}
重启App ,我们会发现和之前的效果是一样的。
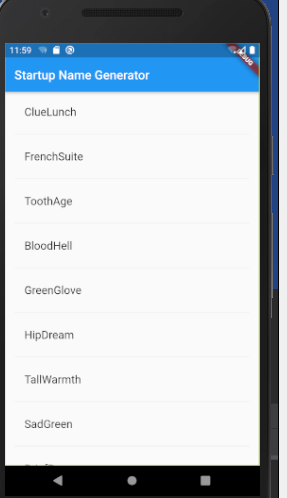
1.4 创建一个无限滚动的ListView
在此步骤中,我们将展开RandomWordsState以生成并显示单词配对列表。 随着用户滚动,ListView小部件中显示的列表将无限增长。 ListView的构建器工厂构造器使您可以按需延迟构建列表视图。
注意:在标识符前加上下划线会增强Dart语言的隐私性。
这个比较复杂,上面的代码其实我们也可以都写到main.dart 文件里。
完整代码如下所示:
// Copyright 2018 The Flutter team. All rights reserved.
// Use of this source code is governed by a BSD-style license that can be
// found in the LICENSE file.

import 'package:flutter/material.dart';
import 'package:english_words/english_words.dart';

void main() => runApp(MyApp());

// #docregion MyApp
class MyApp extends StatelessWidget {
  // #docregion build
  @override
  Widget build(BuildContext context) {
    return MaterialApp(
      title: 'Startup Name Generator',
      home: RandomWords(),
    );
  }
// #enddocregion build
}
// #enddocregion MyApp

// #docregion RWS-var
class RandomWordsState extends State<RandomWords> {
  final _suggestions = <WordPair>[];
  final _biggerFont = const TextStyle(fontSize: 18.0);
  // #enddocregion RWS-var

  // #docregion _buildSuggestions
  Widget _buildSuggestions() {
    return ListView.builder(
        padding: const EdgeInsets.all(16.0),
        itemBuilder: /*1*/ (context, i) {
          if (i.isOdd) return Divider(); /*2*/

          final index = i ~/ 2; /*3*/
          if (index >= _suggestions.length) {
            _suggestions.addAll(generateWordPairs().take(10)); /*4*/
          }
          return _buildRow(_suggestions[index]);
        });
  }
  // #enddocregion _buildSuggestions

  // #docregion _buildRow
  Widget _buildRow(WordPair pair) {
    return ListTile(
      title: Text(
        pair.asPascalCase,
        style: _biggerFont,
      ),
    );
  }
  // #enddocregion _buildRow

  // #docregion RWS-build
  @override
  Widget build(BuildContext context) {
    return Scaffold(
      appBar: AppBar(
        title: Text('Startup Name Generator'),
      ),
      body: _buildSuggestions(),
    );
  }
// #enddocregion RWS-build
// #docregion RWS-var
}
// #enddocregion RWS-var

class RandomWords extends StatefulWidget {
  @override
  RandomWordsState createState() => RandomWordsState();
}
执行成功如下所示:
本节完~
