目录如下
- 效果演示
- 相关代码
- 注意事项
一、效果演示
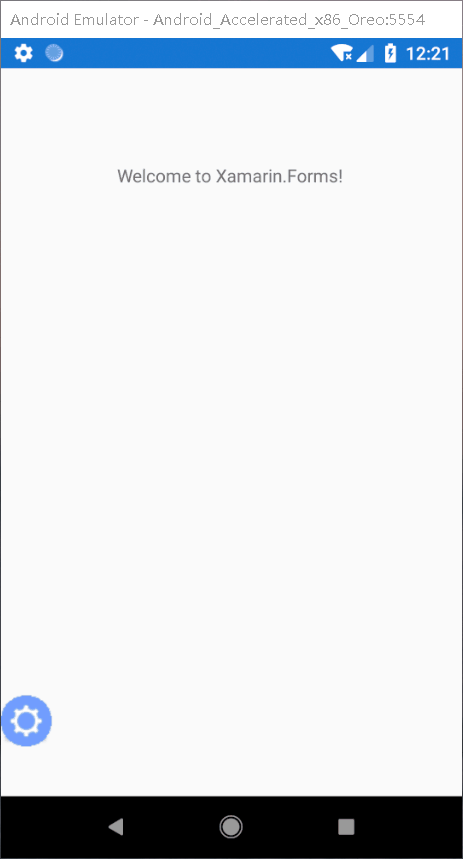
本人前段时间用Xamarin.Forms写一了个小应用,里面用到了这样的一个点击散开的按钮控件。这里记录并分享一下实现过程,希望可以帮到更多新入坑的小伙伴。
注意这里只支持以母按钮为圆心90度扩散,若你想180度扩散则需要稍微改改代码。
二、相关代码
这里需要说明一下,该控件以xaml自定义控件的方式实现,理论上在Xamarin.Forms中可以实现跨平台使用。本人的Android手机亲测可用,ios方面因为没有苹果手机所以没有测试。
首先看一下我们需要准备的东西。

我们只需要在项目中添加SplashButton.xaml和对应的cs文件即可,养成良好的习惯,自定义的控件统一放在Conpoments命名空间里。
SplashButton.xaml
<?xml version="1.0" encoding="UTF-8"?>
<RelativeLayout xmlns="http://xamarin.com/schemas/2014/forms"
             xmlns:x="http://schemas.microsoft.com/winfx/2009/xaml"
             x:Class="SplashBtnExample.Component.SplashButton"
             VerticalOptions="End" HorizontalOptions="Start">
    <Button x:Name="MenuBtn" HorizontalOptions="Start" VerticalOptions="End"/>
</RelativeLayout>
SplashButton.cs
namespace SplashBtnExample.Component
{
    /// <summary>
    /// 子按钮
    /// </summary>
    public class SubButton
    {
        /// <summary>
        /// 点击事件
        /// </summary>
        public Action<object, EventArgs> Action { get; set; }

        /// <summary>
        /// 图片地址
        /// </summary>
        public string ImageUrl { get; set; }
    }
    [XamlCompilation(XamlCompilationOptions.Compile)]
    public partial class SplashButton : RelativeLayout
    {
        private int diameter;
        /// <summary>
        /// 按钮直径(px)默认30
        /// </summary>
        public int ButtonDiameter
        {
            get { return diameter; }
            set
            {
                diameter = value;
                //MenuBtn.CornerRadius = diameter;
                MenuBtn.HeightRequest = diameter;
                MenuBtn.WidthRequest = diameter;
                this.WidthRequest = diameter;
            }
        }

        /// <summary>
        /// 子按钮集合
        /// </summary>
        public List<SubButton> BtnList { get; private set; }

        /// <summary>
        /// 当前是否展开
        /// </summary>
        private bool isOpen { get; set; }

        /// <summary>
        /// 子按钮的按钮实例集合
        /// </summary>
        private List<Button> subButtons;

        public SplashButton()
        {
            InitializeComponent();
            ButtonDiameter = 30;
            MenuBtn.Clicked += new EventHandler(MenuBtn_Clicked);
        }

        /// <summary>
        /// 设置主按钮的图片
        /// </summary>
        /// <param name="menuImgUrl">图片路径</param>
  	public void SetMenuImage(string menuImgUrl)
        {
            isOpen = false;
            MenuBtn.Image = menuImgUrl;
        }

        /// <summary>
        /// 设置子按钮
        /// </summary>
        /// <param name="subButtons">子按钮集合</param>
        public void SetMenuButton(List<SubButton> subButtons)
        {
            this.BtnList = subButtons;
            this.subButtons = new List<Button>();
            int distance = GetDisrance(diameter, subButtons.Count);
            RelativeLayout parentView = this.Parent as RelativeLayout;
            for (int i = 0; i < subButtons.Count; i++)
            {
                var item = subButtons[i];
                Button subBtn = new Button();
                subBtn.CornerRadius = diameter;
                subBtn.WidthRequest = diameter;
                subBtn.HeightRequest = diameter;
                subBtn.Clicked += MenuBtn_Clicked;
                subBtn.Clicked += new EventHandler(item.Action);
                subBtn.Image = item.ImageUrl;

                var position = GetOffset(distance, i, subButtons.Count);
                int x = position.Item1;         //当前左下角,右下角需要乘-1
                int y = -1 * position.Item2;
                subBtn.Scale = 0;
                this.subButtons.Add(subBtn);
                parentView.Children.Add(subBtn, Constraint.RelativeToView(this, (parent, sibling) => {
                    return sibling.X + x;
                }), Constraint.RelativeToView(this, (parent, sibling) => {
                    return sibling.Y + y;
                }));
            }
        }

        /// <summary>
        /// 计算每个子按钮到主按钮的距离(按钮越多距离越远)
        /// </summary>
        /// <param name="diameter">子按钮直径</param>
        /// <param name="count">子按钮数量</param>
        /// <returns></returns>
        private int GetDisrance(int diameter, int count)
        {
            int ret = 0;
            if (count <= 2)
            {
                ret = (int)(diameter * 1.2);
            }
            else
            {
                double partDegree = 0;
                partDegree = 90 / (count - 1);
                partDegree = partDegree / 2;
                ret = (int)((diameter / (2 * Math.Sin((Math.PI / 180) * partDegree))) * 1.2);
            }

            return ret;
        }

        /// <summary>
        /// 计算每个子按钮到主按钮的偏移
        /// </summary>
        /// <param name="distance">子按钮到主按钮的距离</param>
        /// <param name="position">第几个子按钮 从0开始</param>
        /// <param name="count">一共多少个子按钮</param>
        /// <returns>(x坐标偏移,y坐标偏移)</returns>
        private (int, int) GetOffset(int distance, int position, int count)
        {
            double partDegree = 0;
            if (count > 0)
            {
                partDegree = 90 / (count - 1);
            }
            double degree = position * partDegree;
            //角度转弧度再计算sin
            double temp = Math.Sin((Math.PI / 180) * degree);
            int x = (int)(temp * distance);
            //角度转弧度再计算cos
            temp = Math.Cos((Math.PI / 180) * degree);
            int y = (int)(temp * distance);
            return (x, y);
        }

        private void MenuBtn_Clicked(object sender, EventArgs e)
        {
            isOpen = !isOpen;
            Splash();
        }

        /// <summary>
        /// 散开/闭合 动画
        /// </summary>
        private async void Splash()
        {
            if (isOpen)
            {
                // animation
                foreach (var item in subButtons)
                {
                    await item.ScaleTo(1, 100);
                }
            }
            else
            {
                // animation
                foreach (var item in subButtons)
                {
                    await item.ScaleTo(0, 100);
                }
            }
        }
    }
}
以上就是整个控件的所有代码
下面是上面效果演示中的代码,调用的方法其实也很简单。
1.xaml页面直接添加组件的标签(注意标签的父容器一定要是RelativeLayout,后面会解释)
2.页面初始化时设置主按钮的图片和大小,设置子按钮的图片和点击时间
MainPage.xaml
<?xml version="1.0" encoding="utf-8" ?>
<ContentPage xmlns="http://xamarin.com/schemas/2014/forms"
             xmlns:x="http://schemas.microsoft.com/winfx/2009/xaml"
             xmlns:local="clr-namespace:SplashBtnExample"
             xmlns:component="clr-namespace:SplashBtnExample.Component"
             x:Class="SplashBtnExample.MainPage">
    <!--xmlns:component="...." 用于引用控件所在的命名空间-->

    <Grid>
        <Grid.RowDefinitions>
            <RowDefinition Height="3*"/>
            <RowDefinition Height="7*"/>
        </Grid.RowDefinitions>
        <Label Text="Welcome to Xamarin.Forms!"
           HorizontalOptions="Center"
           VerticalOptions="CenterAndExpand" Grid.Row="0"/>

        <!--控件必须包含在RelativeLayout中,且RelativeLayout的大小必须足够按钮伸展-->
        <RelativeLayout Grid.Row="1" HorizontalOptions="StartAndExpand" VerticalOptions="FillAndExpand">
            <component:SplashButton x:Name="menuBtn" RelativeLayout.YConstraint="{ConstraintExpression Type=RelativeToParent, Factor=.8,Property=Height,Constant=0}"/>
        </RelativeLayout>
    </Grid>
</ContentPage>
MainPage.cs
    public partial class MainPage : ContentPage
    {
        public MainPage()
        {
            InitializeComponent();
            InitMenuBtn();
        }

        /// <summary>
        /// 初始化分散按钮的设置
        /// </summary>
        private void InitMenuBtn()
        {
            // 设置子按钮
            List<SubButton> subs = new List<SubButton>();
            subs.Add(new SubButton { ImageUrl = "icon_setting.png", Action = TestMethod });
            subs.Add(new SubButton { ImageUrl = "icon_setting.png", Action = TestMethod });
            subs.Add(new SubButton { ImageUrl = "icon_setting.png", Action = TestMethod });
            subs.Add(new SubButton { ImageUrl = "icon_setting.png", Action = TestMethod });
            subs.Add(new SubButton { ImageUrl = "icon_setting.png", Action = TestMethod });

            // 设置按钮的直径为40px
            menuBtn.ButtonDiameter = 40;
            // 设置主按钮的按钮图片
            menuBtn.SetMenuImage("icon_setting.png");
            // 绑定子按钮
            menuBtn.SetMenuButton(subs);
        }

        private void TestMethod(object obj, EventArgs args)
        {
            // your code
            // 子按钮的点击事件绑定到这个方法
        }
    }
三、注意事项
1.控件所在的父容器一定要是RelativeLayout,且父容器的大小必须要能容纳所有按钮散开后的尺寸。
为什么一定要RelativeLayout呢?因为控件实际上是用过以主按钮位置为基准计算子按钮应该出现的位置,然后动态地添加到父容器里面,这个添加的过程就需要相对布局,子按钮相对主按钮的位置进行布局。
那为什么要添加到父容器里面呢?不能在控件自身的容器里添加吗?是可以的,但是会出现一个很奇怪的BUG:子按钮点击不了。因为控件自身的容器大小只有主按钮大小,而子按钮的位置在控件容器外,所以点击不了,这也就是为什么父容器的大小一定要能容纳所有按钮散开后的位置,否则也会点不了。

如图所示,控件的容器大小是图中的黄色框,控件的父容器是红色框。如果控件的子按钮生成在控件自己的容器内就会在黄色框外,这样就会只能显示不能点击。所以这里子按钮选择生成在父容器里面。
2.示例中的主按钮在左下角,子按钮出现在主按钮的右上方,如果你想要主按钮显示在其他方,则需要修改SetMenuButton方法了,代码里已有注释。

3.暂时只支持90度散开,想要其他散开方式的小伙伴欢迎修改补充。
GitHub: https://github.com/YinRunhao/SplashButton.git
欢迎各路大侠补充
