关于Bean的注入
在上一篇中,已经说到虽然注入确实可以降低类与类之间的耦合,但并没有解决调用者必须知道类的创建方法的问题,也可以说是没有实现调用者与类实现的解耦,我们也提到,为了实现两者的解耦,可以采取工厂模式,而事实上Spring也是这么做的,因此接下来我们就了解一下在Spring中Bean是如何被注入到对应实体类中的。
Spring提供了两种类型来实现Bean容器,一个是bean工厂,另一个是应用上下文,其中bean工厂对大多数应用而言太低级,所以直接讨论如何使用应用上下文来获取Bean对象。
Spring自带了多种类型的应用上下文,其中有:
① AnnotationConfigApplicationContext:从一个或多个基于java的配置类中加载上下文定义,适用于java注解的方式;
② ClassPathXmlApplicationContext:从类路径下的一个或多个xml配置文件中加载上下文定义,适用于xml配置的方式;
③ FileSystemXmlApplicationContext:从文件系统下的一个或多个xml配置文件中加载上下文定义,也就是说系统盘符中加载xml配置文件;
④ AnnotationConfigWebApplicationContext:专门为web应用准备的,适用于注解方式;
⑤ XmlWebApplicationContext:从web应用下的一个或多个xml配置文件加载上下文定义,适用于xml配置方式。
这里我还没有看到Web应用,所以就只看一下前两个(第三个与第二个一样,只不过是变成从任意位置而不单单是从类路径下查找了),他们分别代表了两种不同的Bean装配方式:Java中装配和xml中装配,当然装配还有第三种方式:自动化装配,这也是最为推荐的一种方式。
接下来,就先从Java中装配开始看起吧。
我是使用Maven来构建的Spring项目,下面是需要引入的依赖
    <!-- 定义maven变量 -->
    <properties>
        <!-- spring -->
        <spring.version>5.1.4.RELEASE</spring.version>
    </properties>

    <dependencies>
        <!-- Spring IOC 核心容器 -->
        <dependency>
            <groupId>org.springframework</groupId>
            <artifactId>spring-core</artifactId>
            <version>${spring.version}</version>
        </dependency>

        <!-- https://mvnrepository.com/artifact/junit/junit -->
        <dependency>
            <groupId>junit</groupId>
            <artifactId>junit</artifactId>
            <version>4.12</version>
        </dependency>


        <dependency>
            <groupId>org.springframework</groupId>
            <artifactId>spring-beans</artifactId>
            <version>${spring.version}</version>
        </dependency>

        <dependency>
            <groupId>org.springframework</groupId>
            <artifactId>spring-context</artifactId>
            <version>${spring.version}</version>
        </dependency>

        <dependency>
            <groupId>org.springframework</groupId>
            <artifactId>spring-expression</artifactId>
            <version>${spring.version}</version>
        </dependency>

        <!-- Spring AOP 切面 模块 -->
        <dependency>
            <groupId>org.springframework</groupId>
            <artifactId>spring-aop</artifactId>
            <version>${spring.version}</version>
        </dependency>

        <dependency>
            <groupId>org.aspectj</groupId>
            <artifactId>aspectjrt</artifactId>
            <version>1.9.2</version>
        </dependency>

        <dependency>
            <groupId>org.aspectj</groupId>
            <artifactId>aspectjweaver</artifactId>
            <version>1.9.2</version>
        </dependency>
        <dependency>
            <groupId>log4j</groupId>
            <artifactId>log4j</artifactId>
            <version>1.2.17</version>
        </dependency>
    </dependencies>
一、Java中装配
对于可传入构造器的对象类型,共有:int、float之类的基本类型,自定义类型、列表集合等类型,我们先从无参构造看起:
①无参构造
先定义一个接口
public interface Animal {
    public void eat();
}
其次,我们定义其实现类:
public class Panda implements Animal {
    @Override
    public void eat() {
        System.out.println("熊猫吃竹子");
    }
}
在使用java配置的时候,需要写一个配置类:
配置类其实跟普通的类并没有什么区别,只不过需要加一些注释。先看一下配置类的书写,再对里面的注解一一理解:
在同包下定义一个Java类,取名为ContextTestConfig:
@Configuration
public class ContextTestConfig {
    @Bean
    public Animal Panda(){
        return new Panda();
    }
}
这样就算完成了一个配置类,其中有两个注解:@Configuration和@Bean
@Configuration:表明这是一个配置类,在上面写的几种应用上下文类型中,有一种类型为:AnnotationConfigApplicationContext:从一个或多个基于java的配置类中加载上下文定义,适用于java注解的方式;当选用的应用上下文用这个类来生成的时候,就要传入对应的配置类来作为参数,从而使获得的应用上下文可以得到此配置类所配置的Bean对象。加上注解后变为配置类,可以启动组件扫描,用来将带有@Bean的实体进行实例化bean等。
@Bean:表示要创建一个Bean对象,并将该对象交给Spring管理。看一下@Bean的源码,里面有这样的属性:
@Target({ElementType.METHOD, ElementType.ANNOTATION_TYPE})
@Retention(RetentionPolicy.RUNTIME)
@Documented
public @interface Bean {
    @AliasFor("name")
    String[] value() default {};

    @AliasFor("value")
    String[] name() default {};

    /** @deprecated */
    @Deprecated
    Autowire autowire() default Autowire.NO;

    boolean autowireCandidate() default true;

    String initMethod() default "";

    String destroyMethod() default "(inferred)";
}
其中,现在注意的是里面的name和value属性,他们是一个效果,都是表示给该Bean对象起一个别名,如果不写,那么默认Bean的id就是函数名。
现在,配置已经完成了,来使用测试方法来看看装配有没有成功,新建一个ContextJavaTest类,代码如下:
public class ContextJavaTest {
    public static void main(String[] args) {
        ApplicationContext applicationContext = new AnnotationConfigApplicationContext(com.xiaoxin.ContextTest.ContextTestConfig.class);
        Animal panda = applicationContext.getBean("Panda",Panda.class);
        panda.eat();
    }
}
输出正常,为“熊猫吃竹子”。
我们再来试一试对应的name属性:现在我在配置类中的代码给@Bean给上name属性,再次测试:
//Panda类修改后的代码
@Bean("Panda02")
    public Animal Panda(){
        return new Panda();
    }
发现报错了,错误为:
也就是没有找到一个叫"Panda"的Bean对象,因为此时在配置类中,Panda对象已经改名为Panda02了,当把ContextJavaTest中名字改为Panda02后,又可以找到对应的Bean对象,正常执行。
这是无参的情况,若是有参数的情况下,在Java中配置其实也是很方便的:
②含参构造和Set方法
现在假设有Person这样一个接口和Man的实现类,对应代码为:
public interface Person {
    public void give();
    public void playWithAnimal();
}
public class Man implements Person {
    Animal animal;
    public Man(Animal animal) {
        this.animal = animal;
    }
    @Override
    public void give() {
        System.out.println("给动物食物");
    }
    @Override
    public void playWithAnimal() {
        give();
        animal.eat();
    }
}
现在,Man对象在创建的时候,必须要传入一个Animal的对象,有了实现类和创建逻辑以后,我们看配置类如何配置:
@Bean("Man")
    public Person Man(){
        return new Man(new Panda());
    }
只需要这样配置,就可以在测试代码中直接获得对应的类了。
如果不是用构造器传入,而是用set方法传入,是一样的:
Animal animal;
    public Man(){}

    public void setAnimal(Animal animal) {
        this.animal = animal;
    }
那么只需在配置类里,用创建对象的方法写上即可,如果是列表之类的,也是同样的办法,这也是Java配置要比xml配置好的地方,配置类其实跟创建对象是一样的,只是加注释来表明是一个配置类而已。
二、xml装配
这种方法就是直接在xml中配置对应的bean对象。
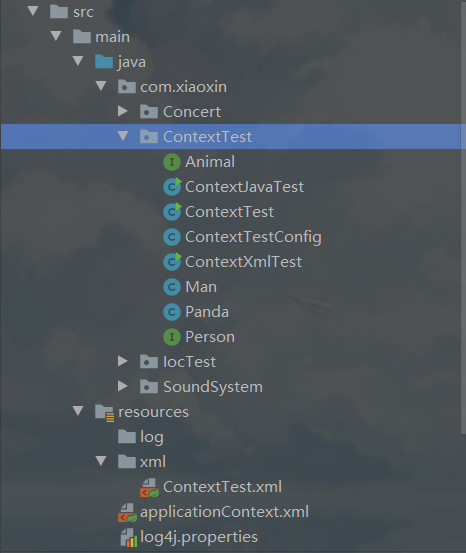
在resources下创建xml文件夹,内放ContextTest.xml
文件结构如图:
在创建好文件结构后,就可以开始写xml文件了
在一开始,xml基本的样子是:
<?xml version="1.0" encoding="UTF-8"?>
<beans xmlns="http://www.springframework.org/schema/beans"
       xmlns:xsi="http://www.w3.org/2001/XMLSchema-instance"
       xsi:schemaLocation="http://www.springframework.org/schema/beans
           http://www.springframework.org/schema/beans/spring-beans-3.2.xsd">
<beans>
如果要使用无参构造的话,直接加入一个Bean标签即可:
<bean id="Panda" class="com.xiaoxin.ContextTest.Panda"/>
如果使用含参构造函数的话,可以使用<constructor-arg>标签来注入对应属性
<bean id="Man" class="com.xiaoxin.ContextTest.Man">
        <constructor-arg name="animal" ref="Panda"></constructor-arg>
</bean>
如果注入的是对象的话,那么需要使用ref来引入,当然,引入的对象也必须是在xml中定义的bean。
如果注入只是字面值的话,可以使用value,比如给Man注入一个Name属性:
<bean id="Man" class="com.xiaoxin.ContextTest.Man">
        <constructor-arg name="animal" ref="Panda"></constructor-arg>
        <constructor-arg name= "name" value="小新"></constructor-arg>
</bean>
这些都是直接使用构造器构造,也可以使用set方法来注入属性:
<bean id="Man2" class="com.xiaoxin.ContextTest.Man">
        <property name="animal" ref="Panda"></property>
        <property name="name" value="小新"></property>
</bean>
其实跟上面没啥区别,只不过把<constructor-arg>标签换成了<property>标签。
如果还需要使用列表等注入,里面有专门的<list>、<set>等标签来使用:
现在创建一个Woman类:
public class Woman implements Person {
    List<Animal> animals;
    List<String> strs;
    public void setStrs(List<String> strs) {
        this.strs = strs;
    }
    public void setAnimals(List<Animal> animals) {
        this.animals = animals;
    }
    @Override
    public void give() {
    }
    @Override
    public void playWithAnimal() {
    }
}
在这个类中,有String类型的列表,也有自定义对象类型的列表,那么注入方法为:
<bean id="Woman" class="com.xiaoxin.ContextTest.Woman">
        <property name="animals">
            <list>
                <ref bean="Panda"/>
            </list>
        </property>
        <property name="strs">
            <list>
                <value>一盒</value>
            </list>
        </property>
</bean>
如果是构造器实现注入,也只需要把标签改一下即可。
三、注解装配
注解装配是最为推荐的类型,配置起来也很方便。
使用注解装配需要几个方面:
①在创建的实体类上加@Component注解,在@Component上,可以用name属性来设定id,如果没有的话,默认为类名首字母小写为这个bean对象的id。
②在需要注入的属性上加@Autowired,这个会首先进行类型匹配,如果只有一个类型的话,那可以直接匹配,但如果有多个类型的类,那么spring会不知道注入哪一个,因此如果所依赖的接口有多个实现类的话,必须有另外的方式来匹配。
③需要配置扫描包,有两种方式:在applicationContext.xml中进行配置,或者直接在对应类包上使用@ComponentScan注解。
现在有以下的几个类:
定义一个Animal_2接口:
public interface Animal_2 {
    public void doSomething();
}
对应的有一个Ear类:
@Component
public class Ear {
    public void move(){
        System.out.println("耳朵动");
    }
}
还有一个Animal_2的实现类:
@Component
public class Cat implements Animal_2{
    private Ear ear;
    private String name;
    @Autowired
    public void setEar(Ear ear) {
        this.ear = ear;
    }
    @Value("小黄")
    public void setName(String name) {
        this.name = name;
    }
    public void doSomething(){
        ear.move();
        System.out.println(name+"猫猫");
    }
}
这些类都有@Component注解,表示这是一个组件,当扫描的时候,可以作为Bean对象被扫描到。
对应的还有@Service、@Mapper、@Controller等,他们其实跟@Component的功能是一样的,只是分成那么多以后,可以清楚地分清楚层次结构。
在这几个类中,有两个注解:一个是@Autowired,另一个是@Value。
@Autowired注解对应的是自动注入Bean对象,推荐使用在set方法上,而不是对象名上。
而@Value也是用于注入的,它所注入的是基本类型的值。
在配置扫描包的时候,有两种方法:
第一个是基于xml文件来进行配置,在applicationContext.xml中配置:
<context:component-scan base-package="com.xiaoxin.ContextTest"></context:component-scan>
其中base-package表示要扫描的包
第二种方法是使用注解来配置,在对应的包下面建立类:Config
@ComponentScan
public class Config {
}
使用这个代码,会自动扫描该类所在包下的所有组件。
下面我们进行测试:
测试使用junit进行测试:
@RunWith(SpringJUnit4ClassRunner.class)
@ContextConfiguration(
//        locations = {"classpath:applicationContext.xml"}
    classes = com.xiaoxin.ContextTest.Config.class
)
public class ContextAnnotationTest {
    @Autowired
    private Animal_2 animal;
    @Test
    public void name() {
        animal.doSomething();
    }
}
其中@Runwith和@ContextConfiguration经常在一起使用,@ContextConfiguration里面有两个类型,分别表示使用xml和使用注解设置包扫描的两种配置方法。
但如果有多个Animal_2的实现类的时候,如何自动装配呢?(使用@Quariter)
这样就算自动装配,也只能装配一个对应的类对象,如果要装配的对象是同一个类的多个呢,那要怎么变化?(xml/java与自动装配结合)