Spring Cloud -Feign实例详解
1. 创建注册中心 cloud-server
创建spring boot项目cloud-server
(1. pom.xml文件依赖
	<dependency>
		<groupId>org.springframework.boot</groupId>
		<artifactId>spring-boot-starter-web</artifactId>
	</dependency>
	<dependency>
		<groupId>org.springframework.cloud</groupId>
		<artifactId>spring-cloud-starter-netflix-eureka-server</artifactId>
	</dependency>

	<dependency>
		<groupId>org.springframework.boot</groupId>
		<artifactId>spring-boot-devtools</artifactId>
		<scope>runtime</scope>
		<optional>true</optional>
	</dependency>
	<dependency>
		<groupId>org.springframework.boot</groupId>
		<artifactId>spring-boot-starter-test</artifactId>
		<scope>test</scope>
	</dependency>
(2. application.yml文件配置
#配置服务端的端口号
server:
  port: 7771

#eureka本身即是服务端又是客户端,只做服务需要把科户端关掉
eureka:
  client:
    register-with-eureka: false
    fetch-registry: false
#配置注册中心的注册地址
    service-url:
        defaultZone: http://localhost:7771/eureka
#应用名称
spring:
  application:
    name: server
(3. 启动类添加注解
@SpringBootApplication
@EnableEurekaServer
public class CloudServerApplication {
	public static void main(String[] args) {
		SpringApplication.run(CloudServerApplication.class, args);
	}
}
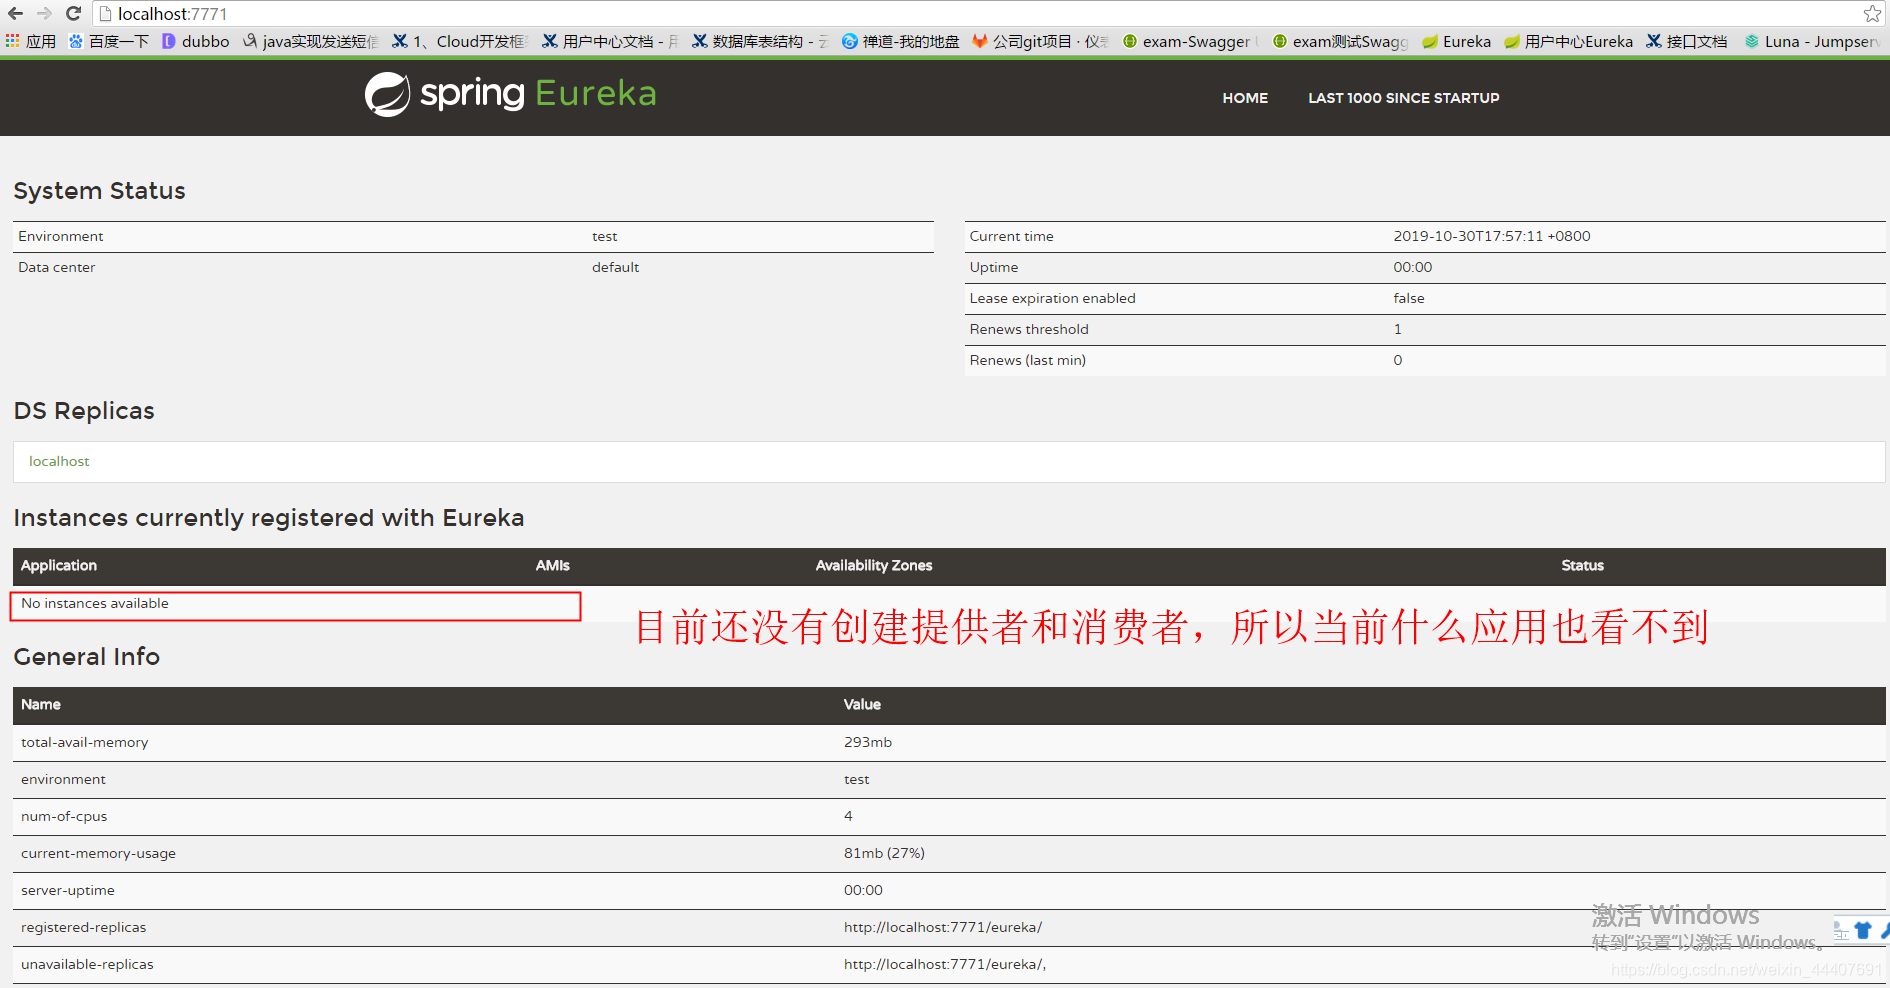
(4. 启动项目,浏览器访问 http://localhost:7771/ 看到如下界面
2. 创建服务提供者 cloud-service-provider1、cloud-service-provider2
创建spring boot项目cloud-service-provider1
(1. pom.xml依赖
<dependency>
		<groupId>org.springframework.boot</groupId>
		<artifactId>spring-boot-starter-web</artifactId>
	</dependency>
	<dependency>
		<groupId>org.springframework.cloud</groupId>
		<artifactId>spring-cloud-starter-netflix-eureka-client</artifactId>
	</dependency>
	<dependency>
		<groupId>org.springframework.boot</groupId>
		<artifactId>spring-boot-devtools</artifactId>
		<scope>runtime</scope>
		<optional>true</optional>
	</dependency>
	<dependency>
		<groupId>org.springframework.boot</groupId>
		<artifactId>spring-boot-starter-test</artifactId>
		<scope>test</scope>
	</dependency>
(2. application.yml配置
#配置端口号
server:
  port: 8771
#引入注册中心
eureka:
  client:
    service-url:
      defaultZone: http://localhost:7771/eureka

#配置应用名称
spring:
  application:
    name: provider
(3. 启动类配置注解
@SpringBootApplication
@EnableEurekaClient
public class CloudServiceProviderApplication {
	public static void main(String[] args) {
		SpringApplication.run(CloudServiceProviderApplication.class, args);
	}
}
(4. 创建Controller层
package org.lhj.pro.controller;

import javax.servlet.http.HttpServletRequest;
import org.apache.commons.lang.ArrayUtils;
import org.apache.commons.lang.StringUtils;
import org.lhj.pro.service.ProviderService;
import org.slf4j.Logger;
import org.slf4j.LoggerFactory;
import org.springframework.beans.factory.annotation.Autowired;
import org.springframework.boot.autoconfigure.AutoConfigureOrder;
import org.springframework.web.bind.annotation.RequestMapping;
import org.springframework.web.bind.annotation.RequestParam;
import org.springframework.web.bind.annotation.RestController;

@RestController
public class ProviderController {

@Autowired
private ProviderService aservice;

@RequestMapping("/hellofeign")
public String sayHello(HttpServletRequest request) {
	String uri = request.getRequestURI();
	int port = request.getLocalPort();
	String ip = request.getRemoteAddr();
	return aservice.hello() + ip + ":" + port + uri;
}
}
(5. 创建Service层和实现类
service接口
package org.lhj.pro.service;

public interface ProviderService {
    String hello();
}
service实现类
package org.lhj.pro.service;

import org.springframework.stereotype.Service;

@Service
public class ProviderServiceImpl implements ProviderService{

@Override
public String hello() {
	return "feign跑通了";
}
}
3. 将创建的项目cloud-service-provider1复制一份,修改项目名称为cloud-service-provider2
并且将application.yml的端口号改为8772,应用名称不用改,和provider1项目的一样即可。
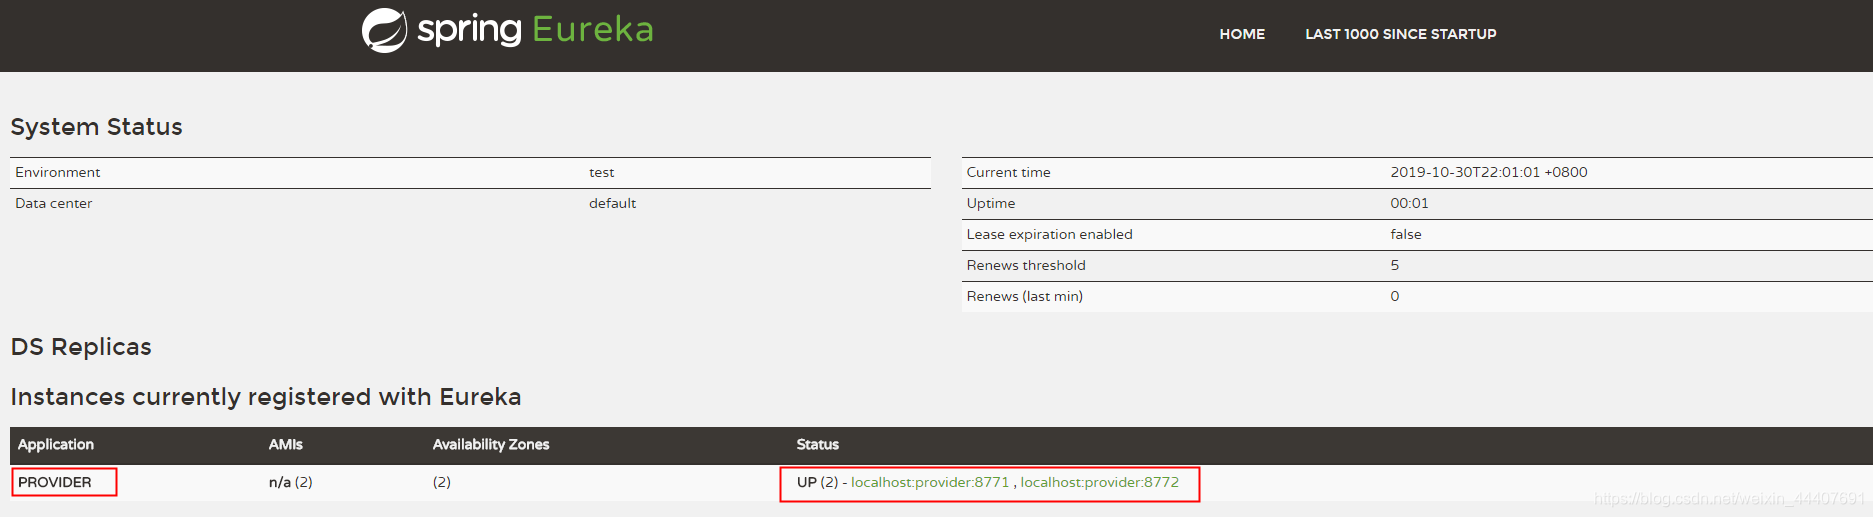
启动注册中心cloud-server和两个服务提供者cloud-service-provider1、cloud-service-provider2,会发现 注册中心多了一个应用,并且有两个服务可用8771和8772
4. 创建服务消费者 cloud-consumer-feign
(1. pom.xml配置依赖
	<dependency>
		<groupId>org.springframework.boot</groupId>
		<artifactId>spring-boot-starter-web</artifactId>
	</dependency>
	<dependency>
		<groupId>org.springframework.cloud</groupId>
		<artifactId>spring-cloud-starter-netflix-eureka-client</artifactId>
	</dependency>
	<dependency>
		<groupId>org.springframework.boot</groupId>
		<artifactId>spring-boot-starter-test</artifactId>
		<scope>test</scope>
	</dependency>
 <!--    feign的相关配置 -->
	 <dependency>
        <groupId>org.springframework.cloud</groupId>
        <artifactId>spring-cloud-starter-openfeign</artifactId>
   </dependency>
(2. 添加application.yml配置
#定义端口号
server:
  port: 9771
#引入注册中心
eureka:
  client:
    service-url:
      defaultZone: http://localhost:7771/eureka
#设置应用名称
spring:
  application:
    name: consumer-feign
(3. 启动类添加注解
package org.lhj.pro;

import org.springframework.boot.SpringApplication;
import org.springframework.boot.autoconfigure.SpringBootApplication;
import org.springframework.cloud.netflix.eureka.EnableEurekaClient;
import org.springframework.cloud.openfeign.EnableFeignClients;

@SpringBootApplication
@EnableEurekaClient
@EnableFeignClients
public class CloudFeignApplication {
	public static void main(String[] args) {
		SpringApplication.run(CloudFeignApplication.class, args);
	}

}
(4. 创建FeignController
package org.lhj.pro.controller;

import org.lhj.pro.service.FeignService;
import org.springframework.beans.factory.annotation.Autowired;
import org.springframework.web.bind.annotation.RequestMapping;
import org.springframework.web.bind.annotation.RestController;

@RestController
@RequestMapping("/feign")
public class FeignController {
	@Autowired
	private FeignService aservice;

	@RequestMapping("/hello")
	public String sayHello() {
		return aservice.differenthello();
	}
}
(5. 创建FeignService
package org.lhj.pro.service;
import org.springframework.cloud.openfeign.FeignClient;
import org.springframework.web.bind.annotation.RequestMapping;
/**
   *    这里的服务名不区分大小写,"provider"是服务提供者的应用名称
 * hellofeign与服务提供者的requestmapping设置的接口名称一致
 *
 */
@FeignClient(value="provider")
public interface FeignService {
    @RequestMapping("/hellofeign")
	String differenthello();
}
启动服务消费者cloud-consumer,发现注册中心有多了一个应用

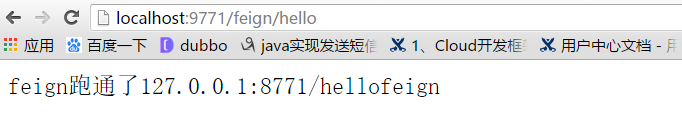
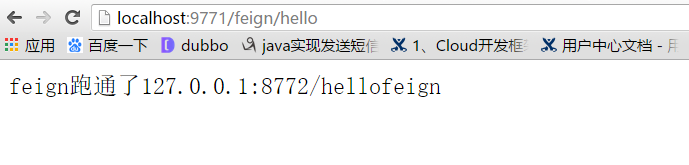
访问消费者的控制层接口 http://localhost:9771/feign/hello 效果如下:
到此为止,spring cloud 之feign调用成功!
