目录
前言
单点登录,简称SSO,本篇还会与spring security集成
spring security 基础 https://blog.csdn.net/yzj17025693/article/details/89437179
SSO介绍
假如我们登录了一个帐号,但是我们的项目有很多子系统,用户信息存储在sesion中
系统与系统之间传递就需要session传递,这个无法解决,这时候就需要点单登录,具体的解决方案是CAS

CAS的介绍


初始化帐号密码是 casuser/Mellon

修改CAS服务端配置
在WEB-INF下的deployerConfigContext.xml能增加用户名和密码

端口修改

去除https认证


授权凭证侧脸

cookie警告策略

点单示例
工程1
引入依赖

配置web.xml
退出配置(选配)


认证配置(必配)


Ticket校验配置(必配)


HttpServletRequest包裹配置
比如允许开发者通过HttpServletRequest的getRemoteUser()方法获得SSO登录用户的登录名,可选配置


在jsp页面可以直接获取到用户名

工程2


单点退出


服务器数据库设置


这个dbAuthHandler是我们上面自己写的

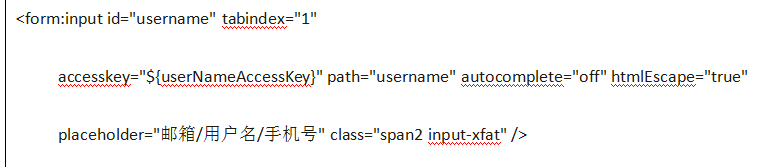
更改默认登录页


这个class是一个样式,commandName是spring mvc标签的属性
关于spring mvc的form标签参考 https://cloud.tencent.com/developer/article/1187380
commandName和modelAttribute是一样的功能

commandName是绑定一个对象,这样在表单里可以直接用path使用对象的属性


加入错误提示
编码可以在idea的配置文件里写中文,然后会自动转换成编码,再复制过来

spring security集成CAS
从上面可以看出,CAS的配置繁琐,使用spring security集成CAS后,这些配置就转移到了spring security配置文件中了
引入依赖
下面排除了一些包,是为了不重复,因为spring包里有这个包
<dependency>
	   <groupId>org.springframework.security</groupId>
	   <artifactId>spring-security-cas</artifactId>
	   <version>4.1.0.RELEASE</version>
</dependency>
<dependency>
        <groupId>org.jasig.cas.client</groupId>
        <artifactId>cas-client-core</artifactId>
        <version>3.3.3</version>
        <exclusions>
            <exclusion>
                <groupId>org.slf4j</groupId>
                <artifactId>log4j-over-slf4j</artifactId>
            </exclusion>
        </exclusions>
</dependency>
web.xml里
<!--spring的监听器-->
  	 <context-param>
		<param-name>contextConfigLocation</param-name>
		<param-value>classpath:spring-security.xml</param-value>
	 </context-param>
	 <listener>
		<listener-class>
			org.springframework.web.context.ContextLoaderListener
		</listener-class>
	 </listener>

		<!--spring security拦截器-->
	 <filter>
		<filter-name>springSecurityFilterChain</filter-name>
		<filter-class>org.springframework.web.filter.DelegatingFilterProxy</filter-class>
	 </filter>
	 <filter-mapping>
		<filter-name>springSecurityFilterChain</filter-name>
		<url-pattern>/*</url-pattern>
	 </filter-mapping>


	<!--前端控制器-->
	<servlet>
	<servlet-name>springmvc</servlet-name>
	<servlet-class>org.springframework.web.servlet.DispatcherServlet</servlet-class>
	<!-- 指定加载的配置文件 ,通过参数 contextConfigLocation 加载-->
		<init-param>
		<param-name>contextConfigLocation</param-name>
		<param-value>classpath:springmvc.xml</param-value>
		</init-param>
	</servlet>
	<servlet-mapping>
		<servlet-name>springmvc</servlet-name>
		<url-pattern>*.do</url-pattern>
	</servlet-mapping>
spring-security的配置文件
<?xml version="1.0" encoding="UTF-8"?>
<beans:beans xmlns="http://www.springframework.org/schema/security"
	xmlns:beans="http://www.springframework.org/schema/beans"
	xmlns:xsi="http://www.w3.org/2001/XMLSchema-instance"
	xsi:schemaLocation="http://www.springframework.org/schema/beans
	http://www.springframework.org/schema/beans/spring-beans.xsd
	http://www.springframework.org/schema/security
	http://www.springframework.org/schema/security/spring-security.xsd">


	<!--
	整合配置
	entry-point-ref  入口点引用
	-->
	<http use-expressions="false" entry-point-ref="casProcessingFilterEntryPoint">

	<!--
	spring security原生配置
	拦截所有请求,/**是所有,/*是根目录下的所有资源,不包含目录
	只能由USER角色通过
	-->
        <intercept-url pattern="/**" access="ROLE_USER"/>

	<!--
	spring security原生配置
	关闭跨域请求的保护机制
	-->
        <csrf disabled="true"/>

        <!--
	整合配置(spring security的)
	custom-filter为过滤器,原本在CAS配置上有一个负责用户认证的过滤器,casAuthenticationFilter就是替代它的
	position 表示将过滤器放在指定的位置上
	before表示放在指定位置之前  ,after表示放在指定的位置之后
	-->
        <custom-filter ref="casAuthenticationFilter"  position="CAS_FILTER" />
        <custom-filter ref="requestSingleLogoutFilter" before="LOGOUT_FILTER"/>
        <custom-filter ref="singleLogoutFilter" before="CAS_FILTER"/>
    </http>

  	<!--
	整合配置
	CAS入口点 开始
	-->
    <beans:bean id="casProcessingFilterEntryPoint" class="org.springframework.security.cas.web.CasAuthenticationEntryPoint">
        <!-- 单点登录服务器登录URL -->
        <beans:property name="loginUrl" value="http://localhost:9100/cas/login"/>
        <beans:property name="serviceProperties" ref="serviceProperties"/>
    </beans:bean>

    <beans:bean id="serviceProperties" class="org.springframework.security.cas.ServiceProperties">
        <!--
	service 配置自身工程的根地址+/login/cas
	加号后面的地址是spring-security-cas集成包里自动加的
	和上面服务器登录URL不同,这个是固定写法
	-->
        <beans:property name="service" value="http://localhost:9003/login/cas"/>
    </beans:bean>
    <!-- CAS入口点 结束 -->

    <!--
    整合配置
    认证过滤器 开始
    -->
    <beans:bean id="casAuthenticationFilter" class="org.springframework.security.cas.web.CasAuthenticationFilter">
        <beans:property name="authenticationManager" ref="authenticationManager"/>
    </beans:bean>

   <!-- 认证管理器 -->
   <authentication-manager alias="authenticationManager">
		<authentication-provider  ref="casAuthenticationProvider">
		</authentication-provider>
   </authentication-manager>

  <!-- 认证提供者 -->
  <beans:bean id="casAuthenticationProvider"     class="org.springframework.security.cas.authentication.CasAuthenticationProvider">

		 <!-- 验证用户表单服务 -->
		<beans:property name="authenticationUserDetailsService">
		    <beans:bean class="org.springframework.security.core.userdetails.UserDetailsByNameServiceWrapper">
			<!-- 注入容器,也就是我们自己写的认证类-->
			<beans:constructor-arg ref="userDetailsService" />
		    </beans:bean>
		</beans:property>

		<!-- 这个也需要引入serviceproperties,得到地址-->
		<beans:property name="serviceProperties" ref="serviceProperties"/>

		<!-- ticketValidator 票据(凭证)验证器 -->
		<beans:property name="ticketValidator">
		    <beans:bean class="org.jasig.cas.client.validation.Cas20ServiceTicketValidator">
			<beans:constructor-arg index="0" value="http://localhost:9100/cas"/>
		    </beans:bean>
		</beans:property>
		<beans:property name="key" value="an_id_for_this_auth_provider_only"/>
</beans:bean>


   	<!-- 注册认证类 -->
      <beans:bean id="userDetailsService" class="cn.itcast.demo.service.UserDetailServiceImpl"/>

	<!-- 认证过滤器 结束 -->
	<!-- 单点登出  开始  -->
    <beans:bean id="singleLogoutFilter" class="org.jasig.cas.client.session.SingleSignOutFilter"/>
    <beans:bean id="requestSingleLogoutFilter" class="org.springframework.security.web.authentication.logout.LogoutFilter">

		<beans:constructor-arg value="http://localhost:9100/cas/logout?service=http://www.baidu.com"/>

		<beans:constructor-arg>
		    <beans:bean class="org.springframework.security.web.authentication.logout.SecurityContextLogoutHandler"/>
		</beans:constructor-arg>

		<beans:property name="filterProcessesUrl" value="/logout/cas"/>
    </beans:bean>

</beans:beans>
认证类,和之前是一模一样的

