文章目录
单机编排之 Docker Compose:
当在宿主机启动较多的容器时候,如果都是手动操作会觉得比较麻烦而且容器出错这个时候推荐使用 docker 单机编排工具 docker-compose, docker-compose是 docker 容器的一种单机编排服务, docker-compose 是一个管理多个容器的工具,比如可以解决容器之间的依赖关系, 就像启动一个 nginx 前端服务的时候会调用后端的 tomcat,那就得先启动 tomcat,但是启动 tomcat 容器还需要依赖数据库, 那就还得先启动数据库, docker-compose 就可以解决这样的嵌套依赖关系,其完全可以替代 docker run 对容器进行创建、 启动和停止。
docker-compose 项目是 Docker 官方的开源项目,负责实现对 Docker 容器集群的快速编排, docker-compose 将所管理的容器分为三层,分别是工程(project),服务(service)以及容器(container)。
github 地址 https://github.com/docker/compose
基础环境准备:
server1:192.168.99.21,Harbor
server2:192.168.99.22,docker-compose
下面开始在server1上安装harbor并且创建nginx、tomcat、haproxy镜像备用
配置安装 Harbor:
- 下载 Harbor 离线安装包:
cd /usr/local/src/
wget https://storage.googleapis.com/harbor-releases/release-1.7.0/harbor-offline-installer-v1.7.5.tgz
- 解压
tar xf harbor-offline-installer-v1.7.5.tgz
ln -sv /usr/local/src/harbor /usr/local/
- 下载docker-compose
Ubuntu:
apt update
apt install -y python-pip
pip install docker-compose
Centos:
yum install epel-release
yum install -y python-pip
pip install --upgrade pip
pip install docker-compose
- 修改配置文件,最终配置如下
# vim harbor.cfg
...
hostname = 192.168.99.22
...
harbor_admin_password = root123
...
- 安装
./install.sh
- 编辑 docker 配置文件:
注意:如果我们配置的是 https 的话,本地 docker 就不需要有任何操作就可以访问 harbor 了
vim /lib/systemd/system/docker.service
在ExecStart追加
ExecStart=/usr/bin/dockerd -H fd:// --containerd=/run/containerd/containerd.sock --insecure-registry 192.168.99.21
其中 192.168.99.21 是我们部署 Harbor 的地址,即 hostname 配置项值。配置完后需要重启 docker 服务。

- 重启 docker 服务:
systemctl daemon-reload
systemctl restart docker
- 重启docker-compose
docker-compose restart
- 验证能否登录 harbor:
docker login 192.168.99.21
https://docs.docker.com/compose/reference/ 官方文档
制作nginx镜像
- 下载镜像并初始化系统:
docker pull centos
mkdir -pv /opt/dockerfile/web/nginx/html
- 编写 Dockerfile:
cd /opt/dockerfile/web/nginx
vim Dockerfile
From centos:latest

MAINTAINER chen [email protected]

ADD nginx-1.10.3.tar.gz /usr/local/src/

RUN rpm -ivh http://mirrors.aliyun.com/epel/epel-release-latest-7.noarch.rpm \
        && yum install -y vim wget tree lrzsz gcc gcc-c++ automake pcre pcre-devel zlib zlib-devel openssl openssl-devel iproute net-tools iotop \
        && cd /usr/local/src/nginx-1.10.3 \
        && ./configure --prefix=/usr/local/nginx --with-http_sub_module \
        && make \
        && make install \
        && cd /usr/local/nginx/
ADD nginx.conf /usr/local/nginx/conf/nginx.conf
RUN useradd nginx -s /sbin/nologin \
        && ln -sv /usr/local/nginx/sbin/nginx /usr/sbin/nginx \
        && echo "test nginx page" > /usr/local/nginx/html/index.html

EXPOSE 80 443

CMD ["nginx","-g","daemon off;"]
- 准备网页
cd /opt/dockerfile/web/nginx/html
echo "test nginx" > index.html
cd /opt/dockerfile/web/nginx
vim nginx.conf
#user  nobody;
worker_processes  1;

#pid        logs/nginx.pid;

events {
    worker_connections  1024;
}

http {
    include       mime.types;
    default_type  application/octet-stream;

    #log_format  main  '$remote_addr - $remote_user [$time_local] "$request" '
    #                  '$status $body_bytes_sent "$http_referer" '
    #                  '"$http_user_agent" "$http_x_forwarded_for"';

    #access_log  logs/access.log  main;

    sendfile        on;
    #tcp_nopush     on;

    #keepalive_timeout  0;
    keepalive_timeout  65;

    #gzip  on;
    server {
        listen       80;
        server_name  localhost;

        #charset koi8-r;

        #access_log  logs/host.access.log  main;

        location / {
            root   /usr/local/nginx/html;
            index  index.html index.htm;
        }

        #error_page  404              /404.html;

        # redirect server error pages to the static page /50x.html
        #
        error_page   500 502 503 504  /50x.html;
        location = /50x.html {
            root   html;
        }
    }
}
- 目录如下
# cd ..
# tree .
.
├── Dockerfile
├── html
│   └── index.html
├── nginx-1.10.3.tar.gz
└── nginx.conf
- 执行镜像构建
docker build -t mynginx:v1 /opt/dockerfile/web/nginx
- 查看是否生成本地镜像
docker images
- 从镜像启动容器
docker run --rm -p 81:80 --name nginx-web1 \
	-v /opt/dockerfile/web/nginx/html/:/usr/local/nginx/html/ \
	-v /opt/dockerfile/web/nginx/nginx.conf:/usr/local/nginx/conf/nginx.conf \
	mynginx:v1
-
访问 web 界面
 扫描二维码关注公众号,回复: 9549002 查看本文章
-
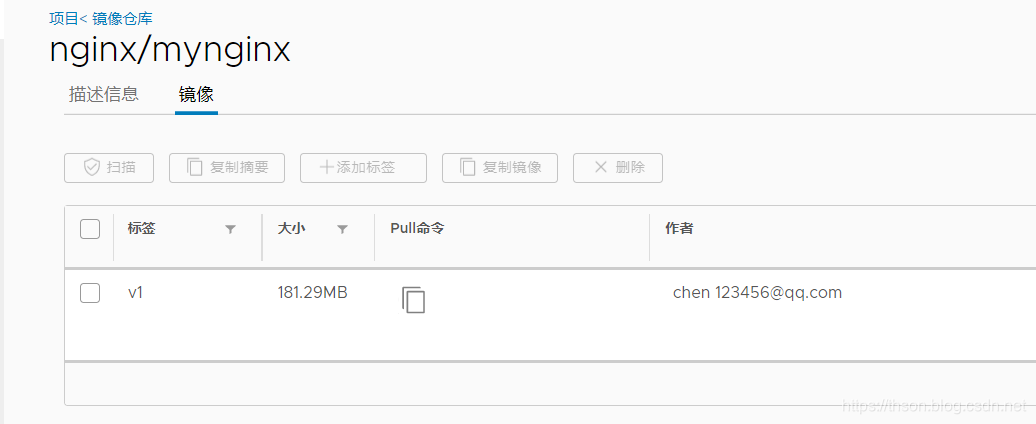
镜像打 tag:
docker tag mynginx:v1 192.168.99.21/nginx/mynginx:v1
-
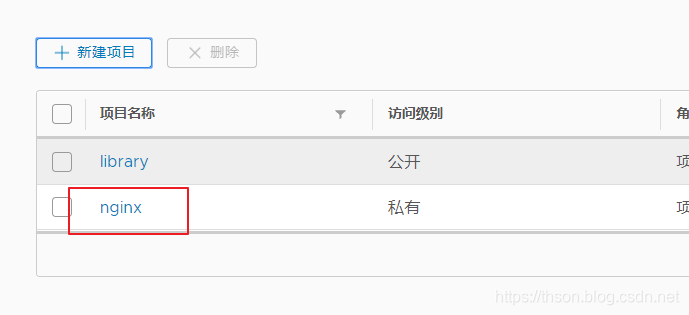
在 harbor 管理界面创建项目(需要先创建项目再上传镜像)
-
将镜像 push 到 harbor:
docker push 192.168.99.21/nginx/mynginx:v1
- 上传完成
制作JDK镜像
- 执行构建 JDK 镜像:
mkdir -p /opt/dockerfile/web/jdk
cd /opt/dockerfile/web/jdk/
- 编辑Dockerfile
vim Dockerfile
#JDK Base Image
FROM centos:latest

ADD jdk-8u211-linux-x64.tar.gz /usr/local/src/
RUN ln -sv /usr/local/src/jdk1.8.0_211 /usr/local/jdk
ADD profile /etc/profile
ENV JAVA_HOME /usr/local/jdk
ENV JRE_HOME $JAVA_HOME/jre
ENV CLASSPATH $JAVA_HOME/lib/:$JRE_HOME/lib/
ENV PATH $PATH:$JAVA_HOME/bin

RUN rm -rf /etc/localtime \
      && ln -snf /usr/share/zoneinfo/Asia/Shanghai/etc/localtime \
      && echo "Asia/Shanghai" > /etc/timezone
- 准备profile文件
vim profile
# /etc/profile

# System wide environment and startup programs, for login setup
# Functions and aliases go in /etc/bashrc

# It's NOT a good idea to change this file unless you know what you
# are doing. It's much better to create a custom.sh shell script in
# /etc/profile.d/ to make custom changes to your environment, as this
# will prevent the need for merging in future updates.

pathmunge () {
    case ":${PATH}:" in
        *:"$1":*)
            ;;
        *)
            if [ "$2" = "after" ] ; then
                PATH=$PATH:$1
            else
                PATH=$1:$PATH
            fi
    esac
}


if [ -x /usr/bin/id ]; then
    if [ -z "$EUID" ]; then
        # ksh workaround
        EUID=`/usr/bin/id -u`
        UID=`/usr/bin/id -ru`
    fi
    USER="`/usr/bin/id -un`"
    LOGNAME=$USER
    MAIL="/var/spool/mail/$USER"
fi

# Path manipulation
if [ "$EUID" = "0" ]; then
    pathmunge /usr/sbin
    pathmunge /usr/local/sbin
else
    pathmunge /usr/local/sbin after
    pathmunge /usr/sbin after
fi

HOSTNAME=`/usr/bin/hostname 2>/dev/null`
HISTSIZE=1000
if [ "$HISTCONTROL" = "ignorespace" ] ; then
    export HISTCONTROL=ignoreboth
else
    export HISTCONTROL=ignoredups
fi

export PATH USER LOGNAME MAIL HOSTNAME HISTSIZE HISTCONTROL

# By default, we want umask to get set. This sets it for login shell
# Current threshold for system reserved uid/gids is 200
# You could check uidgid reservation validity in
# /usr/share/doc/setup-*/uidgid file
if [ $UID -gt 199 ] && [ "`/usr/bin/id -gn`" = "`/usr/bin/id -un`" ]; then
    umask 002
else
    umask 022
fi

for i in /etc/profile.d/*.sh /etc/profile.d/sh.local ; do
    if [ -r "$i" ]; then
        if [ "${-#*i}" != "$-" ]; then
            . "$i"
        else
            . "$i" >/dev/null
        fi
    fi
done

unset i
unset -f pathmunge

export JAVA_HOME=/usr/local/jdk
export TOMCAT_HOME=/apps/tomcat
export PATH=$JAVA_HOME/bin:$JAVA_HOME/jre/bin:$TOMCAT_HOME/bin:$PATH
export CLASSPATH=.$CLASSPATH:$JAVA_HOME/lib:$JAVA_HOME/jre/lib:$JAVA_HOME/lib/tools.jar
- 上传
jdk-8u211-linux-x64.tar.gz
# tree /opt/dockerfile/web/jdk
/opt/dockerfile/web/jdk
├── Dockerfile
├── jdk-8u211-linux-x64.tar.gz
└── profile
- 构建镜像
cd /opt/dockerfile/web/jdk
docker build -t myjdk:v1 .
- 镜像打上tag
docker tag myjdk:v1 192.168.99.21/jdk/myjdk:v1
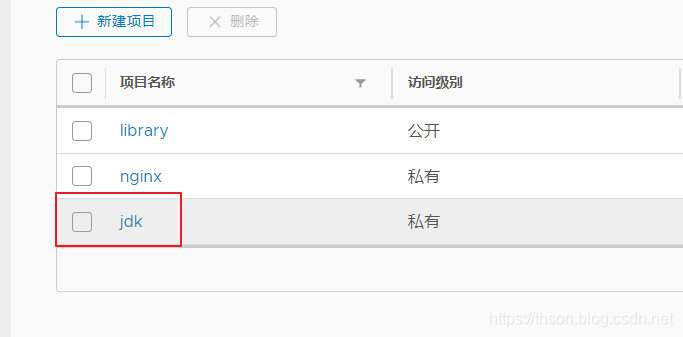
-
在harbor页面上创建jdk项目
-
将镜像上传到 harbor (下面有讲)
docker push 192.168.99.21/jdk/myjdk:v1
从 JDK 镜像构建 tomcat镜像
- 进入tomcat目录:
mkdir -p /opt/dockerfile/web/tomcat
cd /opt/dockerfile/web/tomcat
- 编辑Dockerfile文件
vim Dockerfile
FROM 192.168.99.21/jdk/myjdk:v1
RUN useradd www -u 2019

ENV TZ "Asia/Shanghai"
ENV LANG en_US.UTF-8
ENV TERM xterm
ENV TOMCAT_MAJOR_VERSION 8
ENV TOMCAT_MINOR_VERSION 8.0.49
ENV CATALINA_HOME /apps/tomcat
ENV APP_DIR ${CATALINA_HOME}/webapps

RUN mkdir /apps
ADD apache-tomcat-8.5.45.tar.gz /apps
RUN ln -sv /apps/apache-tomcat-8.5.45 /apps/tomcat
- 上传 tomcat 压缩包:
apache-tomcat-8.5.45.tar.gz
tree /opt/dockerfile/web/tomcat
/opt/dockerfile/web/tomcat
├── apache-tomcat-8.5.45.tar.gz
└── Dockerfile
- 通过脚本构建 tomcat 基础镜像
docker build -t mytomcat:v1 .
- 验证镜像构建完成
docker images
- 镜像打上tag
docker tag mytomcat:v1 192.168.99.21/tomcat/mytomcat:v1
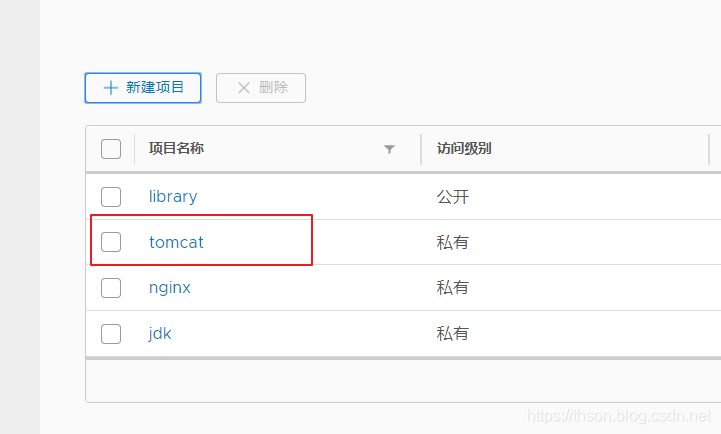
-
在harbor页面上创建tomcat项目
-
上传
docker push 192.168.99.21/tomcat/mytomcat
构建tomcat-app业务镜像:
- 准备目录
mkdir -pv /opt/dockerfile/web/tomcat-app
cd /opt/dockerfile/web/tomcat-app
- 准备 Dockerfile:
vim Dockerfile
FROM 192.168.99.21/tomcat/mytomcat:v1
ADD run_tomcat.sh /apps/tomcat/bin/run_tomcat.sh
ADD myapp/* /apps/tomcat/webapps/myapp/
RUN chown www.www /apps/ -R
RUN chmod +x /apps/tomcat/bin/run_tomcat.sh
EXPOSE 8080 8009
CMD ["/apps/tomcat/bin/run_tomcat.sh"]
- 准备自定义 myapp 页面:
mkdir myapp
echo "MyTomcat Web app Page1" > myapp/index.html
- 准备容器启动执行脚本
run_tomcat.sh:
vim run_tomcat.sh
#!/bin/bash
echo "nameserver 223.5.5.5" > /etc/resolv.conf
su - www -c "/apps/tomcat/bin/catalina.sh start"
su - www -c "tail -f /etc/hosts"
- 文件目录
# tree
.
├── Dockerfile
├── myapp
│   └── index.html
└── run_tomcat.sh
- 构建
docker build -t mytomcat-app:v1 .
- 查看镜像
docker images
- 给镜像打tag
docker tag mytomcat-app:v1 192.168.99.21/tomcat/mytomcat-app:v1
- 上传镜像
docker push 192.168.99.21/tomcat/mytomcat-app:v1
制作 haproxy 镜像:
- 进入目录
mkdir -pv /opt/dockerfile/app/haproxy
cd /opt/dockerfile/app/haproxy
- 准备 Dockerfile:
vim Dockerfile
#Haproxy Base Image
FROM centos
ADD haproxy-2.0.5.tar.gz /usr/local/src/

RUN yum -y install gcc gcc-c++ glibc glibc-devel pcre \
                pcre-devel openssl openssl-devel systemd-devel \
                net-tools vim iotop bc zip unzip zlib-devel lrzsz \
                tree screen lsof tcpdump wget ntpdate  \
      && cd /usr/local/src/haproxy-2.0.5 \
      && make ARCH=x86_64 TARGET=linux-glibc \
              USE_PCRE=1 USE_OPENSSL=1 USE_ZLIB=1 \
              USE_SYSTEMD=1 USE_CPU_AFFINITY=1 \
              PREFIX=/usr/local/haproxy \
      && make install PREFIX=/usr/local/haproxy \
      && cp haproxy /usr/sbin/ \
      && mkdir /usr/local/haproxy/run
ADD haproxy.cfg /etc/haproxy/
ADD run_haproxy.sh /usr/bin
RUN chmod +x /usr/bin/run_haproxy.sh
EXPOSE 80 9999
CMD ["/usr/bin/run_haproxy.sh"]
- 准备
run_haproxy.sh脚本
vim run_haproxy.sh
#!/bin/bash
haproxy -f /etc/haproxy/haproxy.cfg
tail -f /etc/hosts
- 准备
haproxy.cfg配置文件:
vim haproxy.cfg
global
	chroot /usr/local/haproxy
	#stats socket /var/lib/haproxy/haproxy.sock mode 600 level admin
	uid 99
	gid 99
	daemon
	nbproc 1
	pidfile /usr/local/haproxy/run/haproxy.pid
	log 127.0.0.1 local3 info

defaults
	option http-keep-alive
	option forwardfor
	mode http
	timeout connect 300000ms
	timeout client 300000ms
	timeout server 300000ms

listen stats
	mode http
	bind 0.0.0.0:9999
	stats enable
	log global
	stats uri /haproxy-status
	stats auth haadmin:q1w2e3r4ys

listen web_port
	bind 0.0.0.0:80
	mode http
	log global
	balance roundrobin
	server web1 192.168.99.22:81 check inter 3000 fall 2 rise 5
调度到后端nginx服务的81端口
- 准备 haproxy 源码文件:
haproxy-2.0.5.tar.gz
# tree /opt/dockerfile/app/haproxy
/opt/dockerfile/app/haproxy
├── Dockerfile
├── haproxy-2.0.5.tar.gz
├── haproxy.cfg
└── run_haproxy.sh
- 准备构建脚本:
docker build -t haproxy:v1 .
- 给镜像打tag
docker tag haproxy:v1 192.168.99.21/haproxy/haproxy:v1
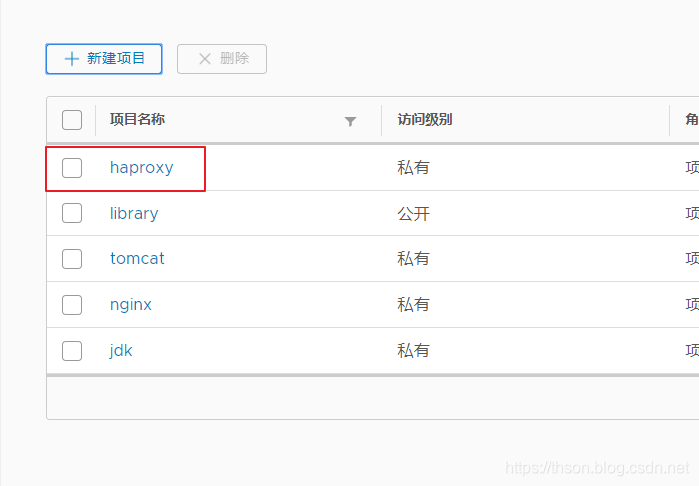
-
harbor创建haproxy项目
-
上传镜像
docker push 192.168.99.21/haproxy/haproxy:v1
从 docker compose 启动单个容器
换成server2继续:
-
安装docker-18.09.9
过程略 -
下载docker-compose
Ubuntu:
apt update
apt install -y python-pip
pip install docker-compose
Centos:
yum install epel-release
yum install -y python-pip
pip install --upgrade pip
pip install docker-compose
- 验证 docker-compose 版本
docker-compose -v
- 查看 docker-compose 帮助
docker-compose --help
- 编辑 docker 配置文件:
vim /lib/systemd/system/docker.service
在ExecStart追加
ExecStart=/usr/bin/dockerd -H fd:// --containerd=/run/containerd/containerd.sock --insecure-registry 192.168.99.21
- 重启 docker 服务:
systemctl daemon-reload
systemctl restart docker
- 测试连接
docker login 192.168.99.21

- 创建网页存放目录,给容器挂载用
mkdir -pv /opt/dockerfile/web/nginx/html
cd /opt/dockerfile/web/nginx/html
echo "test nginx" > index.html
- 目录可以在任意目录, 推荐放在有意义的位置。如:
cd /opt/
mkdir docker-compose
cd docker-compose
- 单个容器的 docker compose 文件:
编写一个 yml 格式的配置 docker-compose 文件, 启动一个 nginx 服务
vim docker-compose.yml
service-nginx-web:
  image: 192.168.99.21/nginx/mynginx:v1
  container_name: nginx-web1
  expose:
    - 80
    - 443
  ports:
    - "80:80"
    - "443:443"
  volumes:
    - "/opt/dockerfile/web/nginx/html/:/usr/local/nginx/html/"
service-nginx-web:服务名
image:镜像名
container_name:容器名
expose:开放端口
post:宿主机映射端口
volume:数据卷挂载
- 启动容器
docker-compose up -d
不加是 d 前台启动

- 启动完成
# docker ps  | grep nginx
1e453106ca9c        192.168.99.21/nginx/mynginx:v1           "nginx -g 'daemon of…"   49 seconds ago      Up 47 seconds          443/tcp, 0.0.0.0:80->80/tcp
- 查看容器进程
docker-compose ps

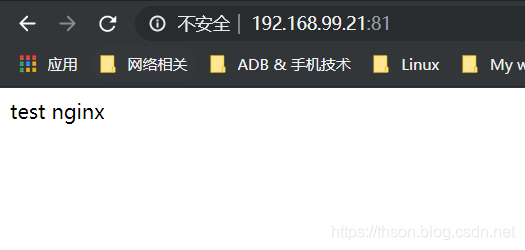
- web 访问测试
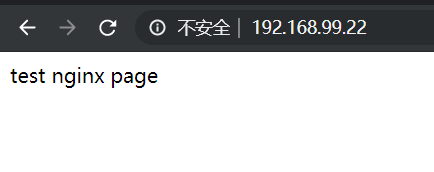
启动多个容器
docker pull 192.168.99.21/tomcat/mytomcat-app:v1
- 编辑配置文件
cd /opt/docker-compose/
vim docker-compose.yml
service-nginx-web:
  image: 192.168.99.21/nginx/mynginx:v1
  container_name: nginx-web1
  expose:
    - 80
    - 443
  ports:
    - "81:80"
    - "443:443"
  volumes:
    - "/opt/dockerfile/web/nginx/html/:/usr/local/nginx/html/"

service-tomcat-app1:
  image: 192.168.99.21/tomcat/mytomcat-app:v1
  container_name: tomcat-app1
  expose:
    - 8080
  ports:
    - "8080:8080"
- 重启容器
docker-compose stop
docker-compose up -d
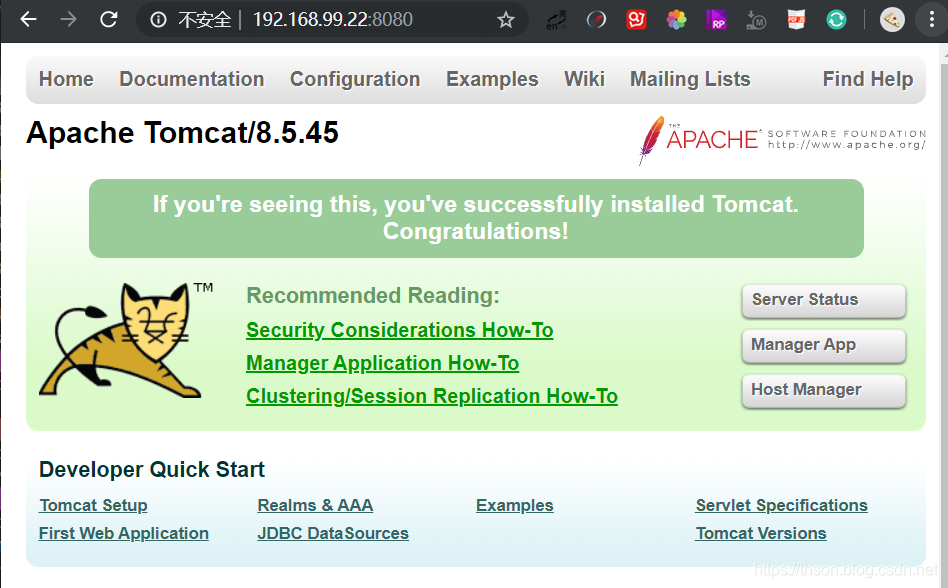
-
web 访问测试
-
重启/停止/启动单个指定容器
docker-compose restart/stop/start service-nginx-web
写容器的 service 名称,则是指定。
不指定则是所有
- 重启所有容器:
docker-compose restart
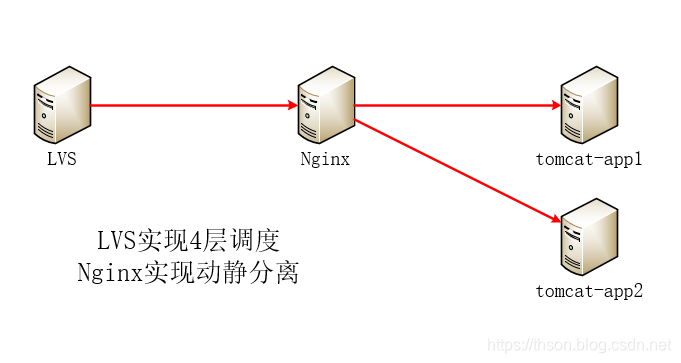
实现Nginx反向代理Tomcat
创建nginx配置文件
- 创建nginx目录
mkdir /opt/app
mkdir -p nginx/html/app{1..2}
cd /opt/app
mkdir -p nginx/conf
cd nginx/conf
- 创建nginx配置文件
vim nginx.conf
#user  nobody;
worker_processes  1;

#pid        logs/nginx.pid;

events {
    worker_connections  1024;
}

http {
    include       mime.types;
    default_type  application/octet-stream;

    #log_format  main  '$remote_addr - $remote_user [$time_local] "$request" '
    #                  '$status $body_bytes_sent "$http_referer" '
    #                  '"$http_user_agent" "$http_x_forwarded_for"';

    #access_log  logs/access.log  main;

    sendfile        on;
    #tcp_nopush     on;

    #keepalive_timeout  0;
    keepalive_timeout  65;

    #gzip  on;
upstream tomcat_webserver {
      server service-tomcat-app1:8080;
      server service-tomcat-app2:8080;
}
    server {
        listen       80;
        server_name  localhost;

        #charset koi8-r;

        #access_log  logs/host.access.log  main;

        location /app1 {
            root   /apps/nginx/html;
            index  index.html index.htm;
        }
        location /app2 {
            root   /apps/nginx/html;
            index  index.html index.htm;
        }
        location /tomcat-app {
            proxy_pass http://tomcat_webserver;
            proxy_set_header Host $host;
            proxy_set_header X-Forwarded-For $proxy_add_x_forwarded_for;
            proxy_set_header X-Real-IP $remote_addr;
        }

        #error_page  404              /404.html;

        # redirect server error pages to the static page /50x.html
        #
        error_page   500 502 503 504  /50x.html;
        location = /50x.html {
            root   html;
        }
    }
}
- 创建网页
echo app111111 > /opt/app/nginx/html/app1/index.html
echo app222222 > /opt/app/nginx/html/app2/index.html
创建haproxy配置文件
cd /opt/app
mkdir -p haproxy/conf
vim ./haproxy/conf/haproxy.cfg
global
        chroot /usr/local/haproxy
        uid 99
        gid 99
        daemon
        nbproc 1
        pidfile /usr/local/haproxy/run/haproxy.pid
        log 127.0.0.1 local3 info

defaults
        option http-keep-alive
        option forwardfor
        mode http
        timeout connect 300000ms
        timeout client 300000ms
        timeout server 300000ms

listen stats
        mode http
        bind 0.0.0.0:9999
        stats enable
        log global
        stats uri /haproxy-status
        stats auth admin:123

listen web_port
        bind 0.0.0.0:80
        mode http
        log global
        balance roundrobin
        server web1 nginx-web1:80 check inter 3000 fall 2 rise 5
nginx-web1:80 这里写的是容器内部的端口,所以nginx容器开放的什么端口就写多少,默认80。因为没有对宿主机映射,所以可以不会端口冲突。
nginx-web1 是容器名
准备tomcat配置文件
cd /opt/app
mkdir -p tomcat/conf
vim tomcat/conf/server.xml
<?xml version="1.0" encoding="UTF-8"?>
<!--
Licensed to the Apache Software Foundation (ASF) under one or more
contributor license agreements. See the NOTICE file distributed with
this work for additional information regarding copyright ownership.
The ASF licenses this file to You under the Apache License, Version 2.0
(the "License"); you may not use this file except in compliance with
the License. You may obtain a copy of the License at
http://www.apache.org/licenses/LICENSE-2.0
Unless required by applicable law or agreed to in writing, software
distributed under the License is distributed on an "AS IS" BASIS,
WITHOUT WARRANTIES OR CONDITIONS OF ANY KIND, either express or implied.
See the License for the specific language governing permissions and
limitations under the License.
-->
<!-- Note: A "Server" is not itself a "Container", so you may not
define subcomponents such as "Valves" at this level.
Documentation at /docs/config/server.html
-->
<Server port="8005" shutdown="SHUTDOWN">
<Listener className="org.apache.catalina.startup.VersionLoggerListener" />
<!-- Security listener. Documentation at /docs/config/listeners.html
<Listener className="org.apache.catalina.security.SecurityListener" />
-->
<!--APR library loader. Documentation at /docs/apr.html -->
<Listener className="org.apache.catalina.core.AprLifecycleListener" SSLEngine="on" />
<!-- Prevent memory leaks due to use of particular java/javax APIs-->
<Listener className="org.apache.catalina.core.JreMemoryLeakPreventionListener" />
<Listener className="org.apache.catalina.mbeans.GlobalResourcesLifecycleListener" />
<Listener className="org.apache.catalina.core.ThreadLocalLeakPreventionListener" />
<!-- Global JNDI resources
Documentation at /docs/jndi-resources-howto.html
-->
<GlobalNamingResources>
<!-- Editable user database that can also be used by
UserDatabaseRealm to authenticate users
-->
<Resource name="UserDatabase" auth="Container"
type="org.apache.catalina.UserDatabase"
description="User database that can be updated and saved"
factory="org.apache.catalina.users.MemoryUserDatabaseFactory"
pathname="conf/tomcat-users.xml" />
</GlobalNamingResources>
<!-- A "Service" is a collection of one or more "Connectors" that share
a single "Container" Note: A "Service" is not itself a "Container",
so you may not define subcomponents such as "Valves" at this level.
Documentation at /docs/config/service.html
-->
<Service name="Catalina">
<!--The connectors can use a shared executor, you can define one or more named thread pools-->
<!--
<Executor name="tomcatThreadPool" namePrefix="catalina-exec-"
maxThreads="150" minSpareThreads="4"/>
-->
<!-- A "Connector" represents an endpoint by which requests are received
and responses are returned. Documentation at :
Java HTTP Connector: /docs/config/http.html
Java AJP Connector: /docs/config/ajp.html
APR (HTTP/AJP) Connector: /docs/apr.html
Define a non-SSL/TLS HTTP/1.1 Connector on port 8080
-->
<Connector port="8080" protocol="HTTP/1.1"
connectionTimeout="20000"
redirectPort="8443" />
<!-- A "Connector" using the shared thread pool-->
<!--
<Connector executor="tomcatThreadPool"
port="8080" protocol="HTTP/1.1"
connectionTimeout="20000"
redirectPort="8443" />
-->
<!-- Define a SSL/TLS HTTP/1.1 Connector on port 8443
This connector uses the NIO implementation. The default
SSLImplementation will depend on the presence of the APR/native
library and the useOpenSSL attribute of the
AprLifecycleListener.
Either JSSE or OpenSSL style configuration may be used regardless of
the SSLImplementation selected. JSSE style configuration is used below.
-->
<!--
<Connector port="8443" protocol="org.apache.coyote.http11.Http11NioProtocol"
maxThreads="150" SSLEnabled="true">
<SSLHostConfig>
<Certificate certificateKeystoreFile="conf/localhost-rsa.jks"
type="RSA" />
</SSLHostConfig>
</Connector>
-->
<!-- Define a SSL/TLS HTTP/1.1 Connector on port 8443 with HTTP/2
This connector uses the APR/native implementation which always uses
OpenSSL for TLS.
Either JSSE or OpenSSL style configuration may be used. OpenSSL style
configuration is used below.
-->
<!--
<Connector port="8443" protocol="org.apache.coyote.http11.Http11AprProtocol"
maxThreads="150" SSLEnabled="true" >
<UpgradeProtocol className="org.apache.coyote.http2.Http2Protocol" />
<SSLHostConfig>
<Certificate certificateKeyFile="conf/localhost-rsa-key.pem"
certificateFile="conf/localhost-rsa-cert.pem"
certificateChainFile="conf/localhost-rsa-chain.pem"
type="RSA" />
</SSLHostConfig>
</Connector>
-->
<!-- Define an AJP 1.3 Connector on port 8009 -->
<Connector port="8009" protocol="AJP/1.3" redirectPort="8443" />
<!-- An Engine represents the entry point (within Catalina) that processes
every request. The Engine implementation for Tomcat stand alone
analyzes the HTTP headers included with the request, and passes them
on to the appropriate Host (virtual host).
Documentation at /docs/config/engine.html -->
<!-- You should set jvmRoute to support load-balancing via AJP ie :
<Engine name="Catalina" defaultHost="localhost" jvmRoute="jvm1">
-->
<Engine name="Catalina" defaultHost="localhost">
<!--For clustering, please take a look at documentation at:
/docs/cluster-howto.html (simple how to)
/docs/config/cluster.html (reference documentation) -->
<!--
<Cluster className="org.apache.catalina.ha.tcp.SimpleTcpCluster"/>
-->
<!-- Use the LockOutRealm to prevent attempts to guess user passwords
via a brute-force attack -->
<Realm className="org.apache.catalina.realm.LockOutRealm">
<!-- This Realm uses the UserDatabase configured in the global JNDI
resources under the key "UserDatabase". Any edits
that are performed against this UserDatabase are immediately
available for use by the Realm. -->
<Realm className="org.apache.catalina.realm.UserDatabaseRealm"
resourceName="UserDatabase"/>
</Realm>
<Host name="localhost" appBase="/data/tomcat/webapps/app"
unpackWARs="true" autoDeploy="true">
<!-- SingleSignOn valve, share authentication between web applications
Documentation at: /docs/config/valve.html -->
<!--
<Valve className="org.apache.catalina.authenticator.SingleSignOn" />
-->
<!-- Access log processes all example.
Documentation at: /docs/config/valve.html
Note: The pattern used is equivalent to using pattern="common" -->
<Valve className="org.apache.catalina.valves.AccessLogValve" directory="logs"
prefix="localhost_access_log" suffix=".txt"
pattern="%h %l %u %t "%r" %s %b" />
</Host>
</Engine>
</Service>
</Server>
- 准备tomcat动态页面
cd /opt/app
mkdir -p tomcat/app1/tomcat-app
cd tomcat/app1/tomcat-app
注意这里:因为nginx中location配置的配置路径是tomcat-app,往tomcat调度的时候会带上这个路径,所以,挂载进去的路径也要与之匹配。即:要能够访问http://tomcat-app1:8080/tomcat-app,才能通过nginx来调度
- 动态页面示例
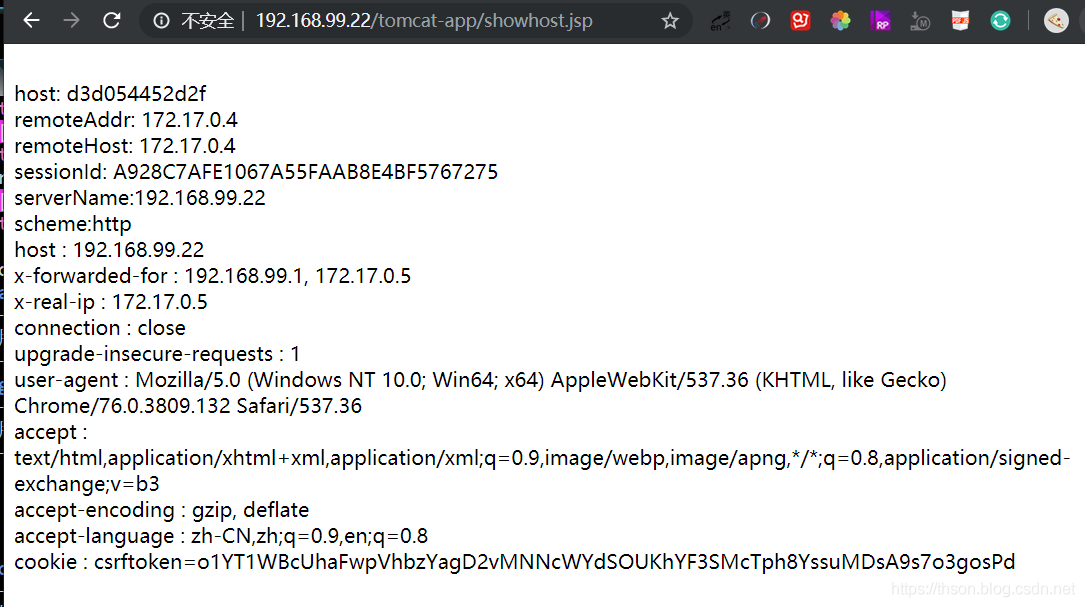
vim showhost.jsp
<%@page import="java.util.Enumeration"%>
<br />
host:
<%try{out.println(""+java.net.InetAddress.getLocalHost().getHostName());}catch(Exception e){}%>
<br />
remoteAddr: <%=request.getRemoteAddr()%>
<br />
remoteHost: <%=request.getRemoteHost()%>
<br />
sessionId: <%=request.getSession().getId()%>
<br />
serverName:<%=request.getServerName()%>
<br />
scheme:<%=request.getScheme()%>
<br />
<%request.getSession().setAttribute("t1","t2");%>
<%
Enumeration en = request.getHeaderNames();
while(en.hasMoreElements()){
String hd = en.nextElement().toString();
out.println(hd+" : "+request.getHeader(hd));
out.println("<br />");
}
%>
创建docker-compose.yml
mkdir -p /opt/app
cd /opt/app
vim docker-compose.yml
service-haproxy:
  image: 192.168.99.21/haproxy/haproxy:v1
  container_name: haproxy
  volumes:
    - ./haproxy/conf/haproxy.cfg:/etc/haproxy/haproxy.cfg
  expose:
    - 80
    - 443
    - 9999
  ports:
    - "80:80"
    - "443:443"
    - "9999:9999"
  links:
    - service-nginx-web

service-nginx-web:
  image: 192.168.99.21/nginx/mynginx:v1
  container_name: nginx-web1
  volumes:
    - ./nginx/html/app1:/apps/nginx/html/app1
    - ./nginx/html/app2:/apps/nginx/html/app2
    - ./nginx/conf/nginx.conf:/usr/local/nginx/conf/nginx.conf
  expose:
    - 80
    - 443
  links:
    - service-tomcat-app1
    - service-tomcat-app2

service-tomcat-app1:
  image: 192.168.99.21/tomcat/mytomcat-app:v1
  container_name: tomcat-app1
  volumes:
    - ./tomcat/app1:/data/tomcat/webapps/app/ROOT
    - ./tomcat/conf/server.xml:/apps/tomcat/conf/server.xml
  expose:
    - 8080

service-tomcat-app2:
  image: 192.168.99.21/tomcat/mytomcat-app:v1
  container_name: tomcat-app2
  volumes:
    - ./tomcat/app1:/data/tomcat/webapps/app/ROOT
    - ./tomcat/conf/server.xml:/apps/tomcat/conf/server.xml
  expose:
    - 8080
最终文件目录
cd /opt/app
# tree
.
├── docker-compose.yml
├── haproxy
│   └── conf
│       └── haproxy.cfg
│
├── nginx
│   ├── conf
│   │   └── nginx.conf
│   └── html
│       ├── app1
│       │   └── index.html
│       └── app2
│           └── index.html
└── tomcat
    ├── app1
    │   └── tomcat-app
    │       └── showhost.jsp
    └── conf
        └── server.xml
测试访问
http://192.168.99.22/tomcat-app/showhost.jsp