目录
- api详情页
- 接口表
- 请求参数
- 参数表
- ApiVO.java
- SQL
- ApiMapper.java的代码修改
- ApiService.java的代码修改
- ApiServiceImpl.java的代码修改
- ApiController.java的代码修改
- apiView.html的代码修改
- 接口详情的请求和响应
- 接口预览页的效果图
- 接口请求参数ApiRequestParamMapper.java的代码
- ApiMapper.java的代码修改
- 加上requestParams的接口详情的请求和响应
- apiView.html的代码修改:
- jquery api中文文档
- 接口预览页的请求参数的效果图
- 遇到的问题汇总
api详情页
apiView.html
两个地方都可以进入api详情页:
- 左边接口分类页
- 右边接口列表页
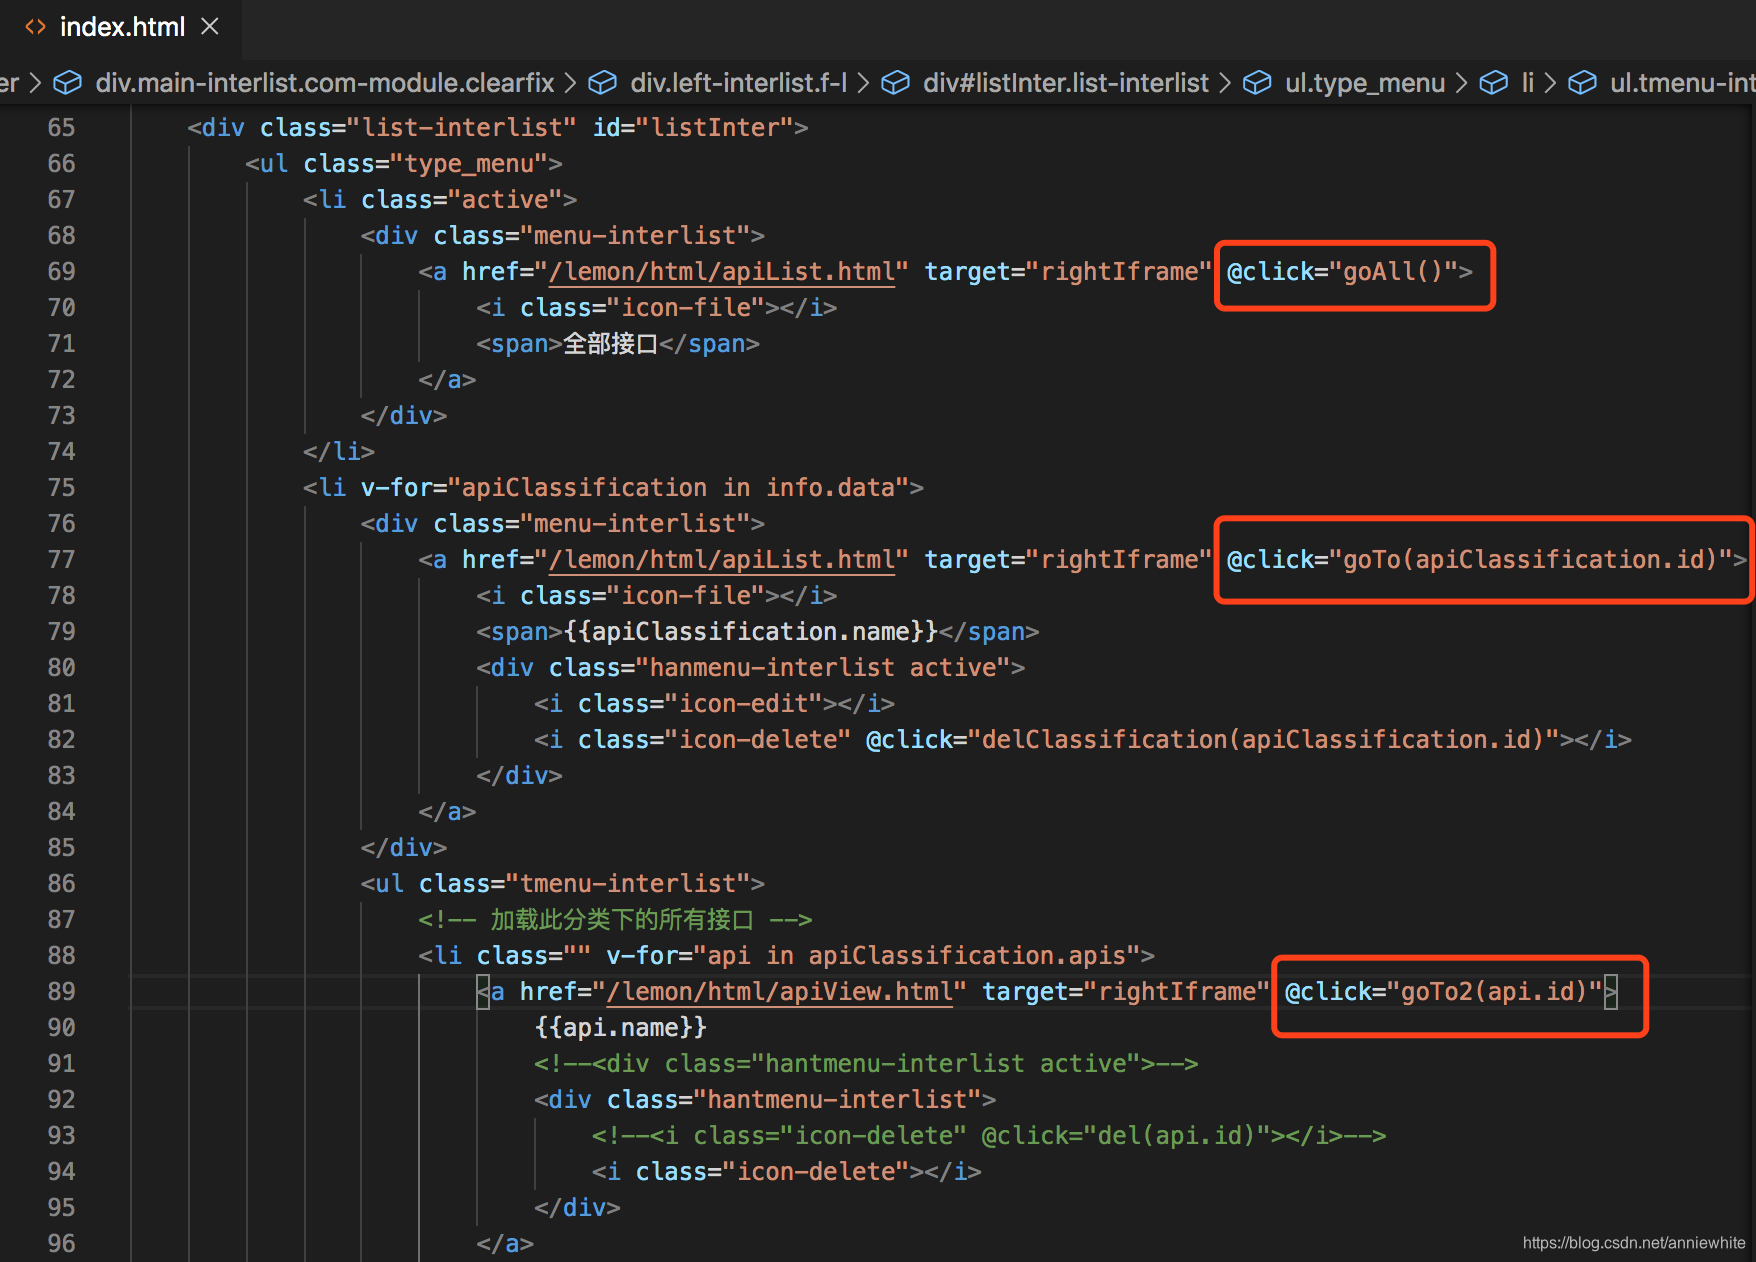
根据api id去DB查询,修改index.html代码,跳转到apiView.html页面。
<!-- 加载此分类下的所有接口 -->
<a href="/lemon/html/apiView.html" target="rightIframe" @click="goTo2(api.id)">
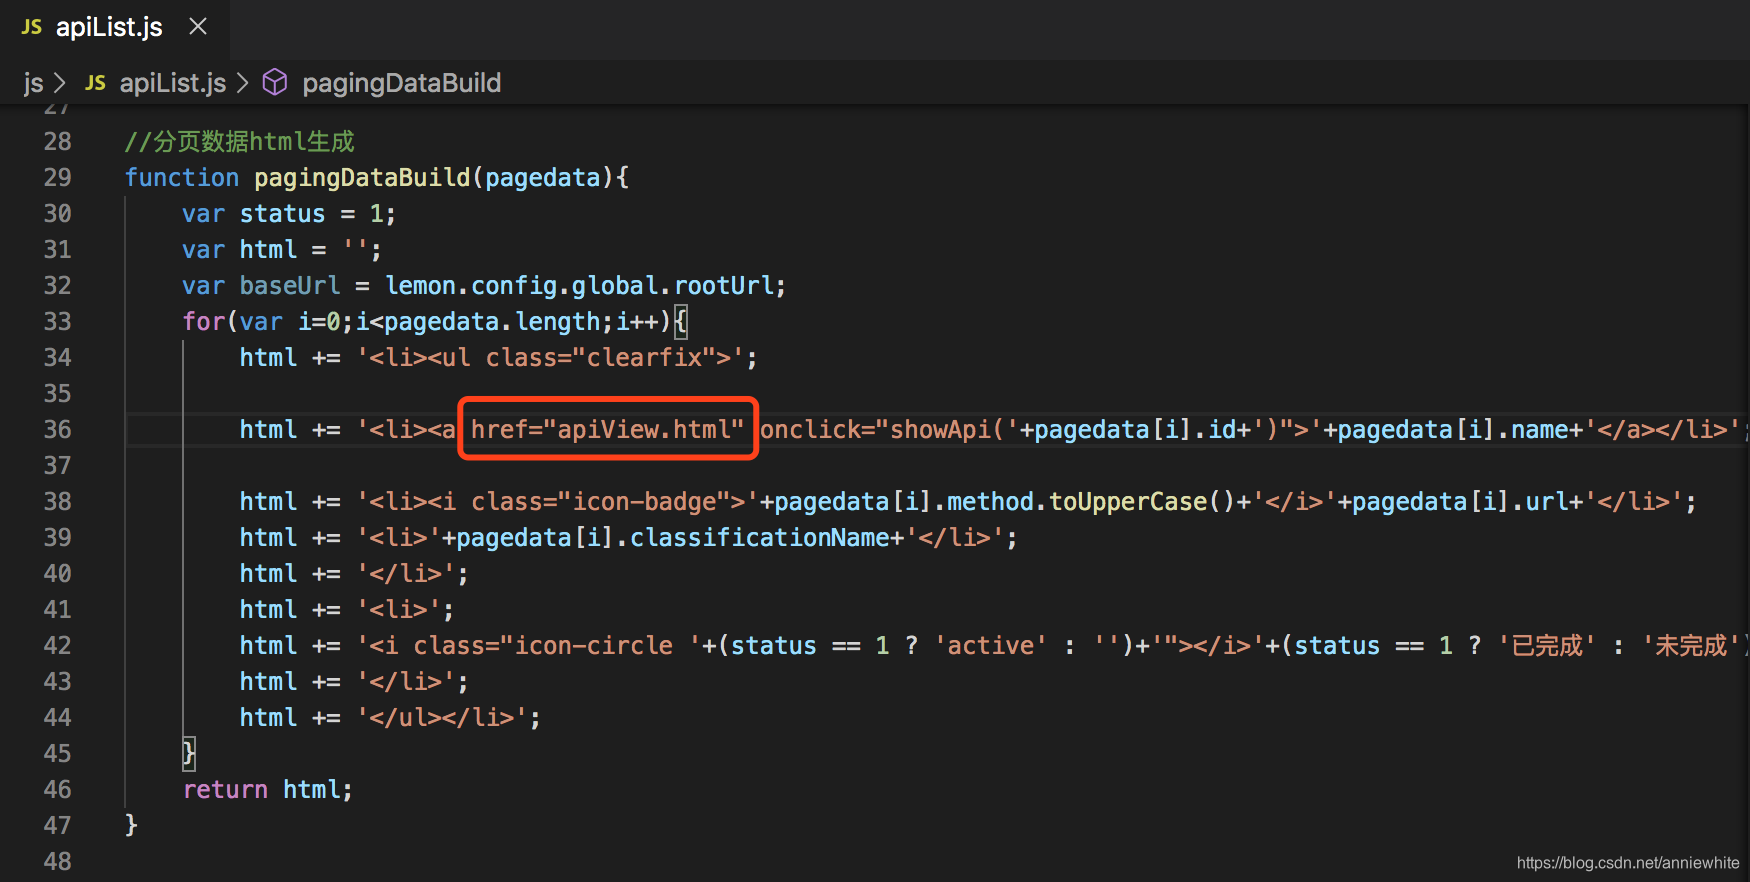
修改apiList.html代码,跳转到apiView.html页面。
function showApi(apiId){
	sessionStorage.setItem("apiId",apiId);
}
接口表
api:接口表
- id:主键,自动增长。
- api_classification_id:外键。接口分类id。
- 【核心】name:接口名称。
- method:接口请求方式。
- url:接口路径地址。接口本身的url,调用这个接口的时候,还需要加上基准路径host。
- description:对于接口的简单描述。
- 【外键】create_user:创建者。mybatis-plus自动填充,创建用户就是登录用户。api join user表。
- create_time:创建时间。添加分类的时间。

请求参数
queryParam?name=value
headParam
参数表
api_request_param:参数表
- id:主键,自动增长。
- api_id:外键。接口id。api join api_request_param表。
- 【核心】name:参数名。
- param_type:数据性质。数据性质是什么数据类型?
- type:请求参数的类型。1——queryParam,2——bodyParam(application/form),3——headParam,4——bodyParam(application/json)。
- example_data:举例子,给示范。
- description:参数描述。起到提示作用。
- 【外键】create_user:创建者。mybatis-plus自动填充,创建用户就是登录用户。api join user表。
- create_time:创建时间。添加分类的时间。

ApiVO.java
在com.one.common下新建类ApiVO.java
package com.one.common;

import java.util.ArrayList;
import java.util.List;

import com.one.pojo.Api;
import com.one.pojo.ApiRequestParam;

import lombok.Data;

@Data
public class ApiVO extends Api {
	private String createUsername;
	private String host;

	private List<ApiRequestParam> requestParams = new ArrayList<ApiRequestParam>();
	private List<ApiRequestParam> queryParams = new ArrayList<ApiRequestParam>();
	private List<ApiRequestParam> bodyParams = new ArrayList<ApiRequestParam>();
	private List<ApiRequestParam> headerParams = new ArrayList<ApiRequestParam>();
	private List<ApiRequestParam> bodyRawParams = new ArrayList<ApiRequestParam>();
}
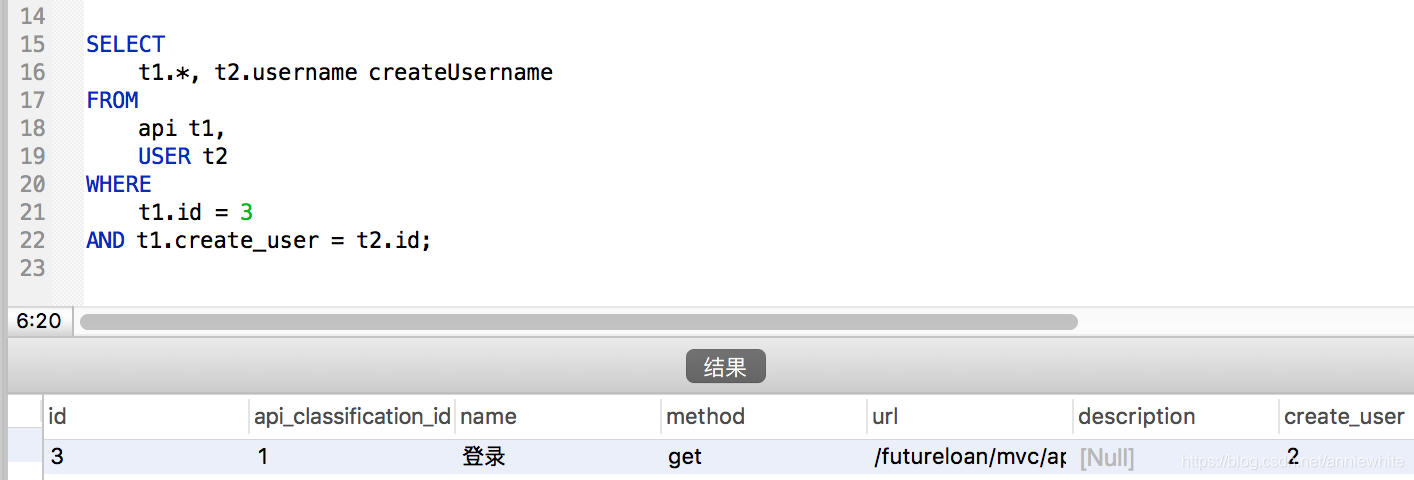
SQL
SELECT
	t1.*, t2.username createUsername
FROM
	api t1,
	USER t2
WHERE
	t1.id = 3
AND t1.create_user = t2.id;
ApiMapper.java的代码修改
增加如下代码:
	@Select("SELECT t1.*, t2.username createUsername FROM api t1, USER t2 WHERE t1.id = #{apiId} AND t1.create_user = t2.id")
	public ApiVO findApiViewVO(Integer apiId);
ApiService.java的代码修改
增加如下代码:
public ApiVO findApiViewVO(Integer apiId);
ApiServiceImpl.java的代码修改
增加如下代码:
	public ApiVO findApiViewVO(Integer apiId){
		return apiMapper.findApiViewVO(apiId);
	}
ApiController.java的代码修改
增加如下代码:
	@GetMapping("/toApiView")
	public Result findApiViewVO(Integer apiId){
		ApiVO api = apiService.findApiViewVO(apiId);
		Result result = new Result("1",api);
		return result;
	}
apiView.html的代码修改
增加如下代码:
<script src="/lemon/js/vue.js"></script>
<script src="/lemon/js/axios.min.js"></script>
<script type="text/javascript" src="/lemon/js/jquery.cookie.js" charset="UTF-8"></script>
<script type="text/javascript">
    var app = new Vue({
        el: ".del-interpre",
        data: {
            info: {},
        },
        methods: {
        },
        created () {
            let apiId = sessionStorage.getItem("apiId");
            axios.get(lemon.config.global.adminUrl +"/api/toApiView",{
                headers: {"Authorization":$.cookie("sessionId")},
                params: {"apiId": apiId}
            }).then(response=>{
                this.info = response.data.data;
                if(this.info.status==1&this.info.message=="未登陆"){
                    location.href = lemon.config.global.rootUrl+"/html/login.html";
                }
			})
			.catch(error=>console.log(error));
        }
    })
</script>
<script type="text/javascript" src="/lemon/js/base.js"></script>
接口详情的请求和响应
请求:
Request URL: http://admin.ck.org/lemon/api/toApiView?apiId=3
返回:
{
	"status": "1",
	"data": {
		"id": 3,
		"apiClassificationId": 1,
		"name": "登录",
		"method": "get",
		"url": "/futureloan/mvc/api/member/login",
		"description": null,
		"createUser": 2,
		"createTime": "2019-08-16T06:23:31.000+0000",
		"createUsername": "[email protected]",
		"host": null,
		"requestParams": [],
		"queryParams": [],
		"bodyParams": [],
		"headerParams": [],
		"bodyRawParams": []
	},
	"message": null
}
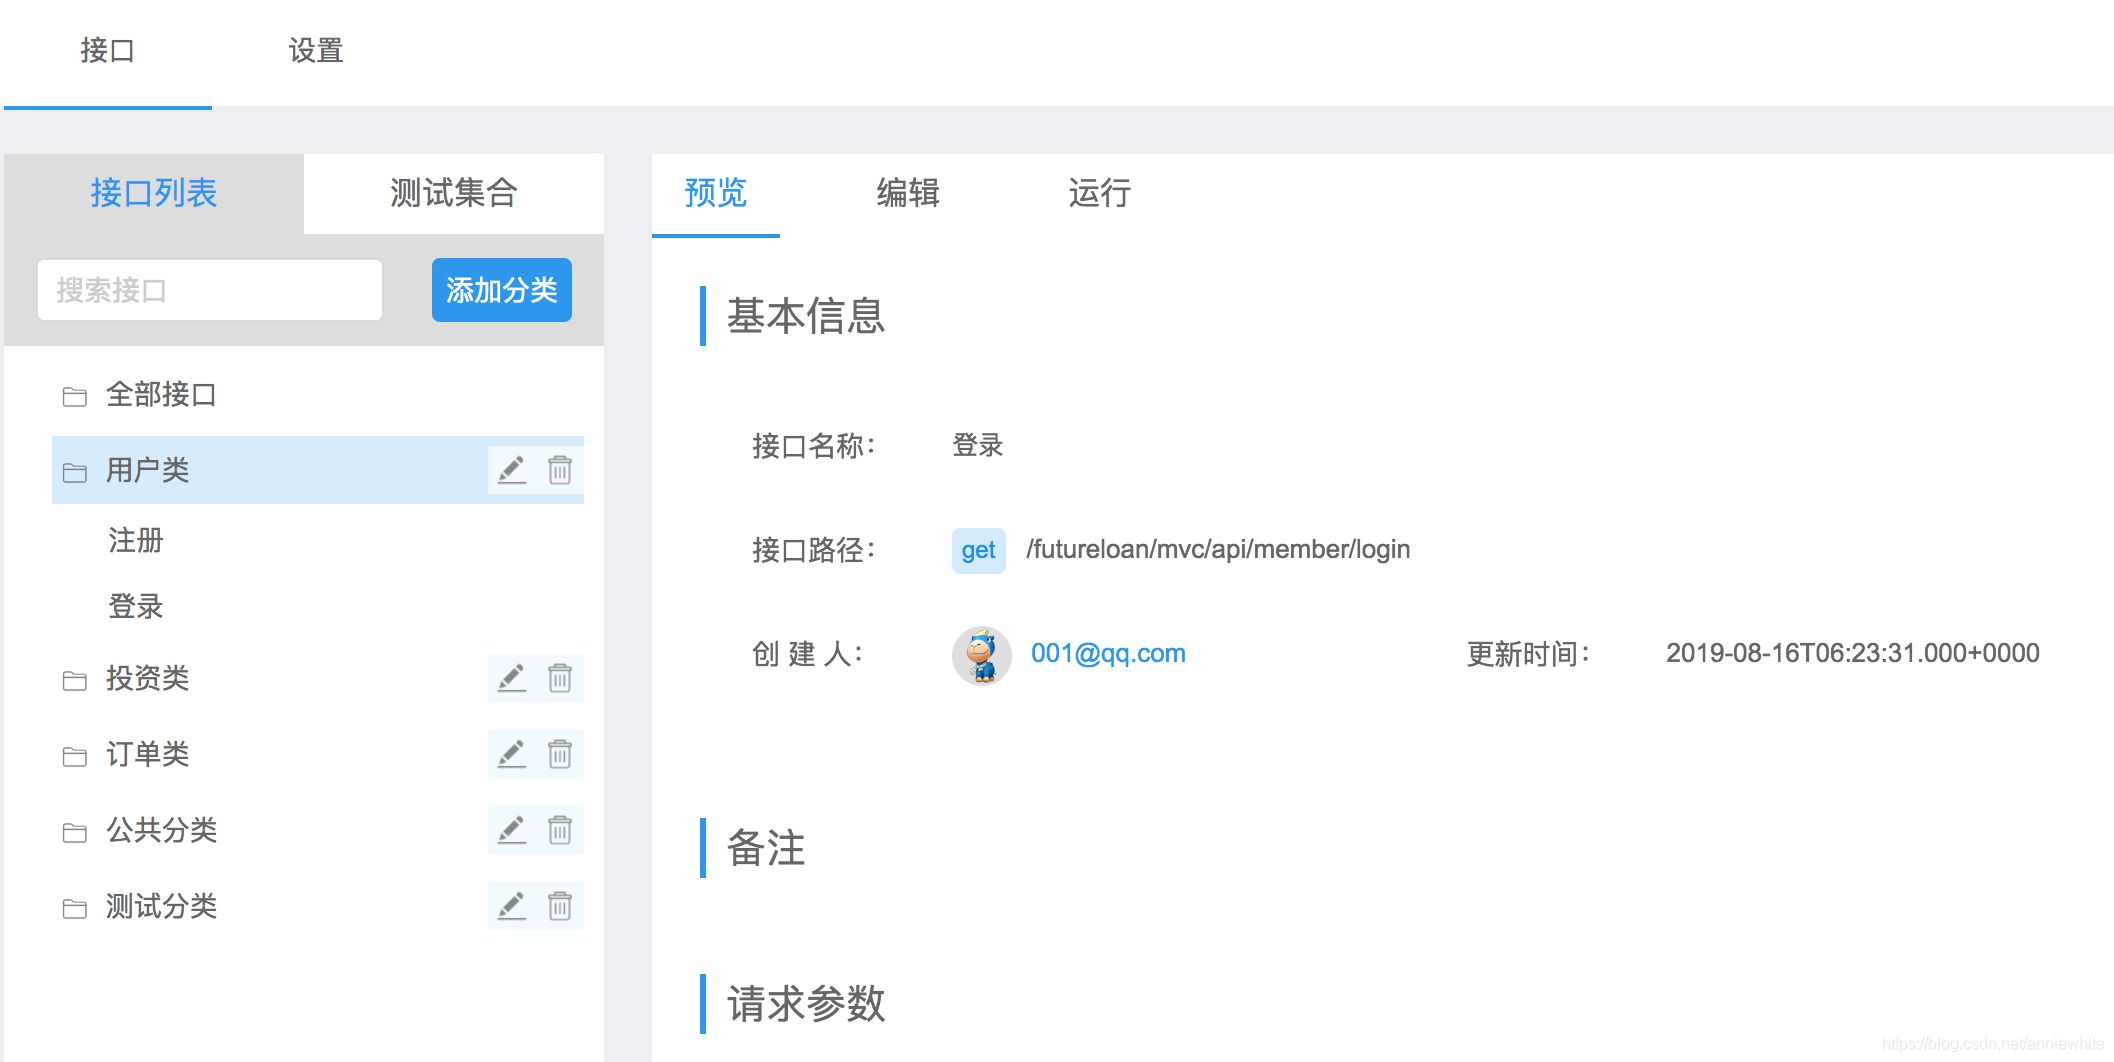
接口预览页的效果图
登录接口详情:
注册接口详情:

接口请求参数ApiRequestParamMapper.java的代码
package com.one.mapper;

import com.one.pojo.ApiRequestParam;

import java.util.List;

import org.apache.ibatis.annotations.Select;

import com.baomidou.mybatisplus.core.mapper.BaseMapper;

/**
 * <p>
 *  Mapper 接口
 * </p>
 *
 * @author annie
 * @since 2020-02-16
 */
public interface ApiRequestParamMapper extends BaseMapper<ApiRequestParam> {
	@Select("select * from api_request_param where api_id=#{apiId}")
	public List<ApiRequestParam> findAll(Integer apiId);
}
ApiMapper.java的代码修改
	@Select("SELECT t1.*, t2.username createUsername FROM api t1, USER t2 WHERE t1.id = #{apiId} AND t1.create_user = t2.id")
	@Results({
		@Result(property="id",column="id"),
		@Result(property="requestParams",column="id",many=@Many(select="com.one.mapper.ApiRequestParamMapper.findAll")),
		})
	public ApiVO findApiViewVO(Integer apiId);
加上requestParams的接口详情的请求和响应
请求:
Request URL: http://admin.ck.org/lemon/api/toApiView?apiId=2
返回:
{
	"status": "1",
	"data": {
		"id": 2,
		"apiClassificationId": 1,
		"name": "注册",
		"method": "post",
		"url": "/futureloan/mvc/api/member/register",
		"description": "",
		"createUser": 2,
		"createTime": "2019-08-16T06:23:28.000+0000",
		"createUsername": "[email protected]",
		"host": null,
		"requestParams": [{
			"id": 88,
			"apiId": 2,
			"name": "mobilephone",
			"paramType": "string",
			"type": 2,
			"exampleData": "",
			"description": ""
		}, {
			"id": 93,
			"apiId": 2,
			"name": "pwd",
			"paramType": "string",
			"type": 2,
			"exampleData": "",
			"description": ""
		}, {
			"id": 94,
			"apiId": 2,
			"name": "Content-Type",
			"paramType": "string",
			"type": 3,
			"exampleData": "application/x-www-form-urlencoded;charset=utf-8",
			"description": ""
		}],
		"queryParams": [],
		"bodyParams": [],
		"headerParams": [],
		"bodyRawParams": []
	},
	"message": null
}
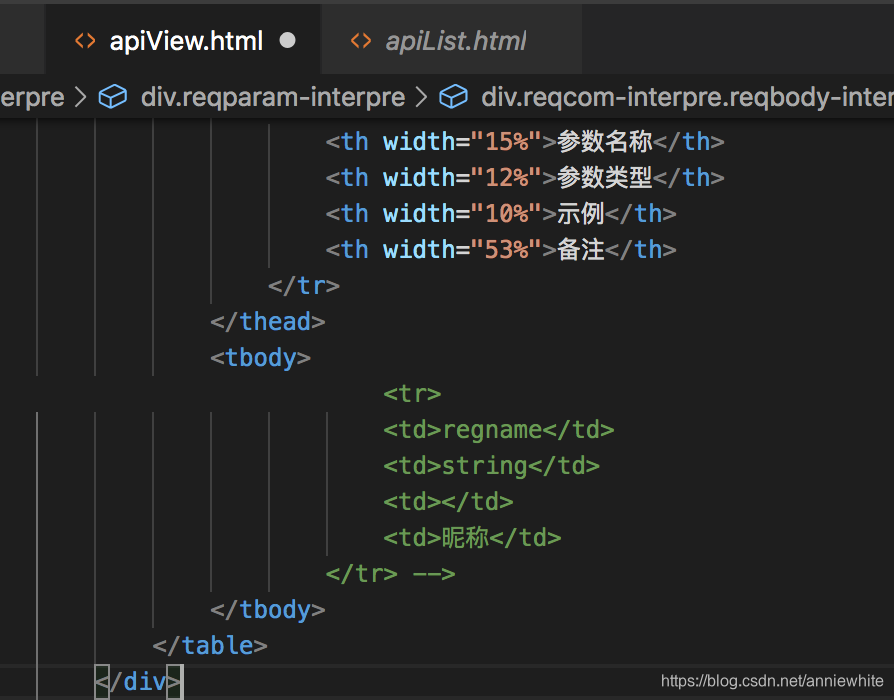
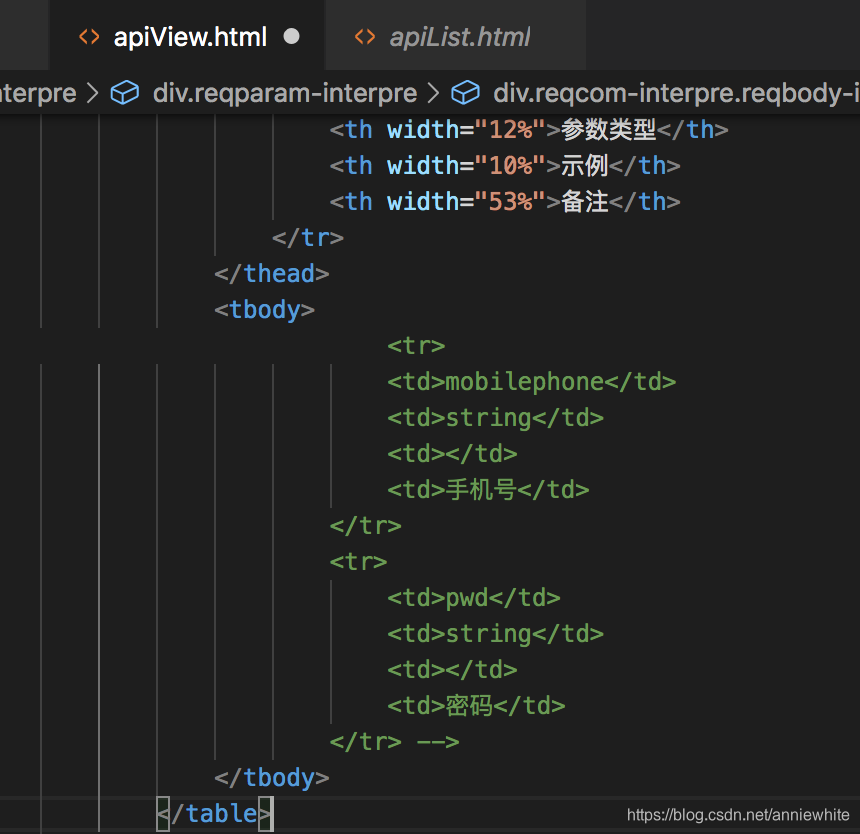
apiView.html的代码修改:
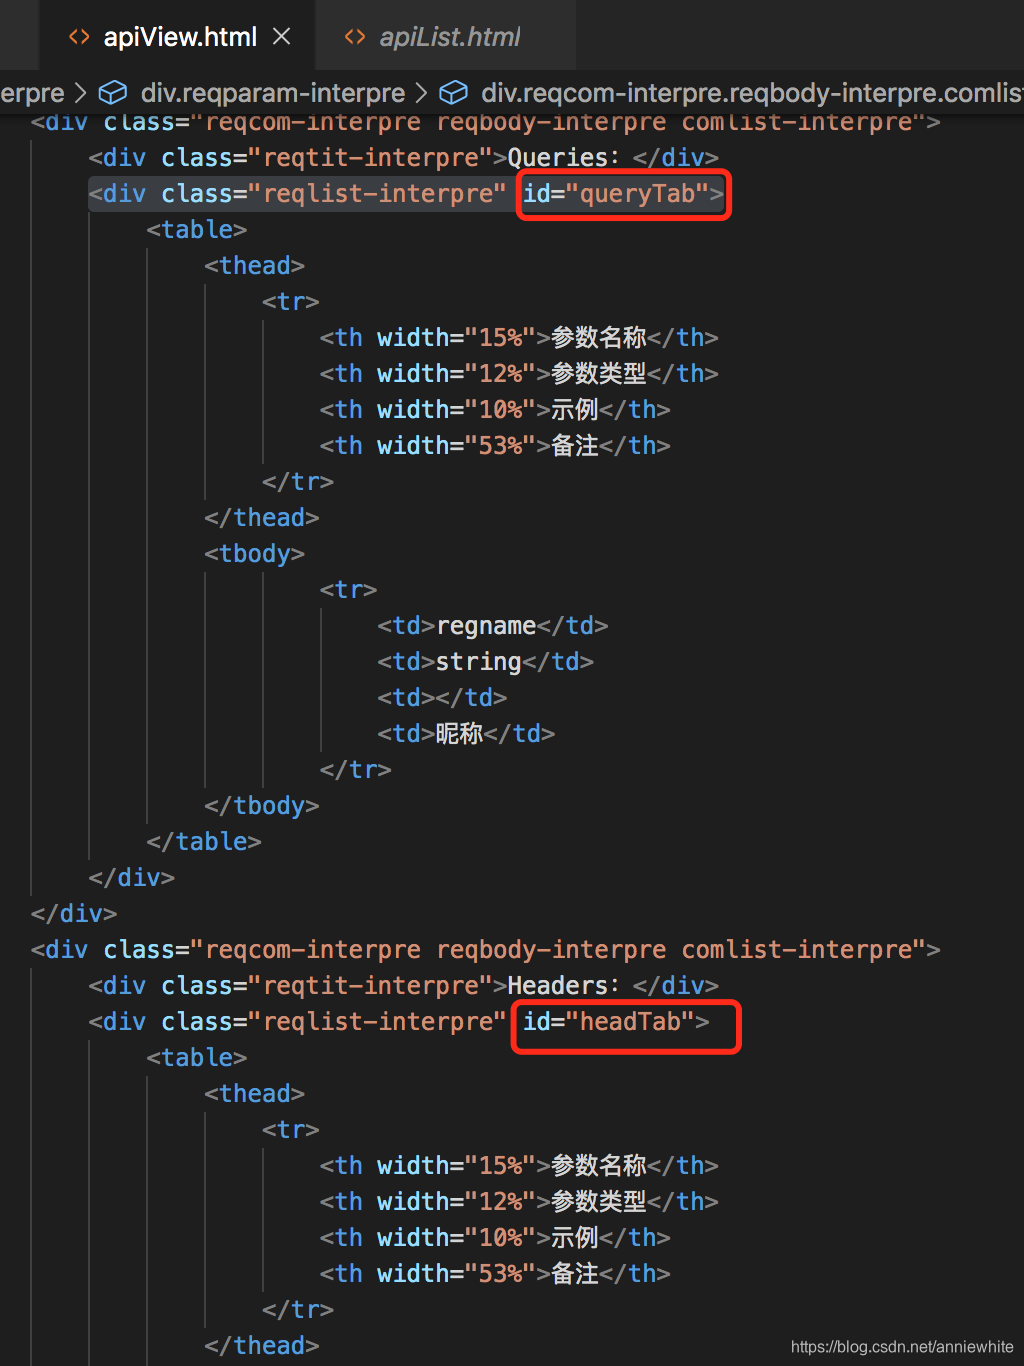
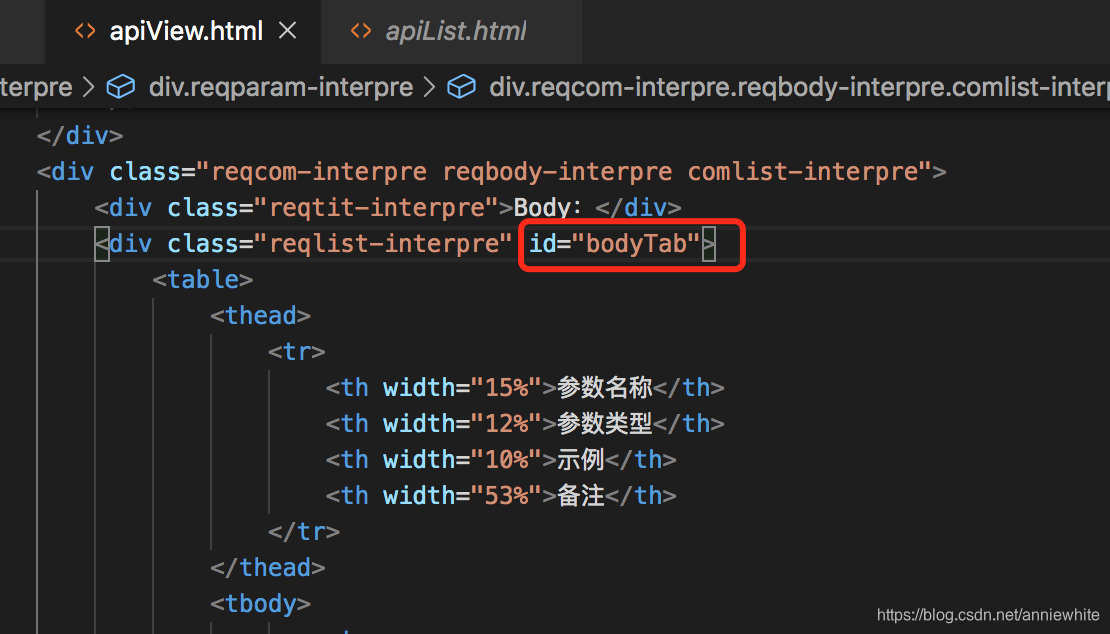
如下部分注释掉:

<script src="/lemon/js/vue.js"></script>
<script src="/lemon/js/axios.min.js"></script>
<script type="text/javascript" src="/lemon/js/jquery.cookie.js" charset="UTF-8"></script>
<script type="text/javascript">
    var app = new Vue({
        el: ".del-interpre",
        data: {
            info: {},
        },
        methods: {
        },
        created () {
            let apiId = sessionStorage.getItem("apiId");
            axios.get(lemon.config.global.adminUrl +"/api/toApiView",{
                headers: {"Authorization":$.cookie("sessionId")},
                params: {"apiId": apiId}
            }).then(response=>{
                this.info = response.data.data;
                if(this.info.status==1&this.info.message=="未登陆"){
                    location.href = lemon.config.global.rootUrl+"/html/login.html";
				}
				let requestParams = this.info.requestParams;
				for(let i=0;i<requestParams.length;i++){
					let param = requestParams[i];
					let str = `<tr>
												<td>${param.name}</td>
												<td>${param.paramType}</td>
												<td>${param.exampleData}</td>
												<td>${param.description}</td>
											</tr>`;
					if(param.type==1){
						$("#queryTab tbody").append(str);
					}else if(param.type==2){
						$("#bodyTab tbody").append(str);
					}else if(param.type==3){
						$("#headTab tbody").append(str);
					}else{

					}
				}
			})
			.catch(error=>console.log(error));
        }
    })
</script>
<script type="text/javascript" src="/lemon/js/base.js"></script>
jquery api中文文档
可以百度jquery api搜索最新文档。
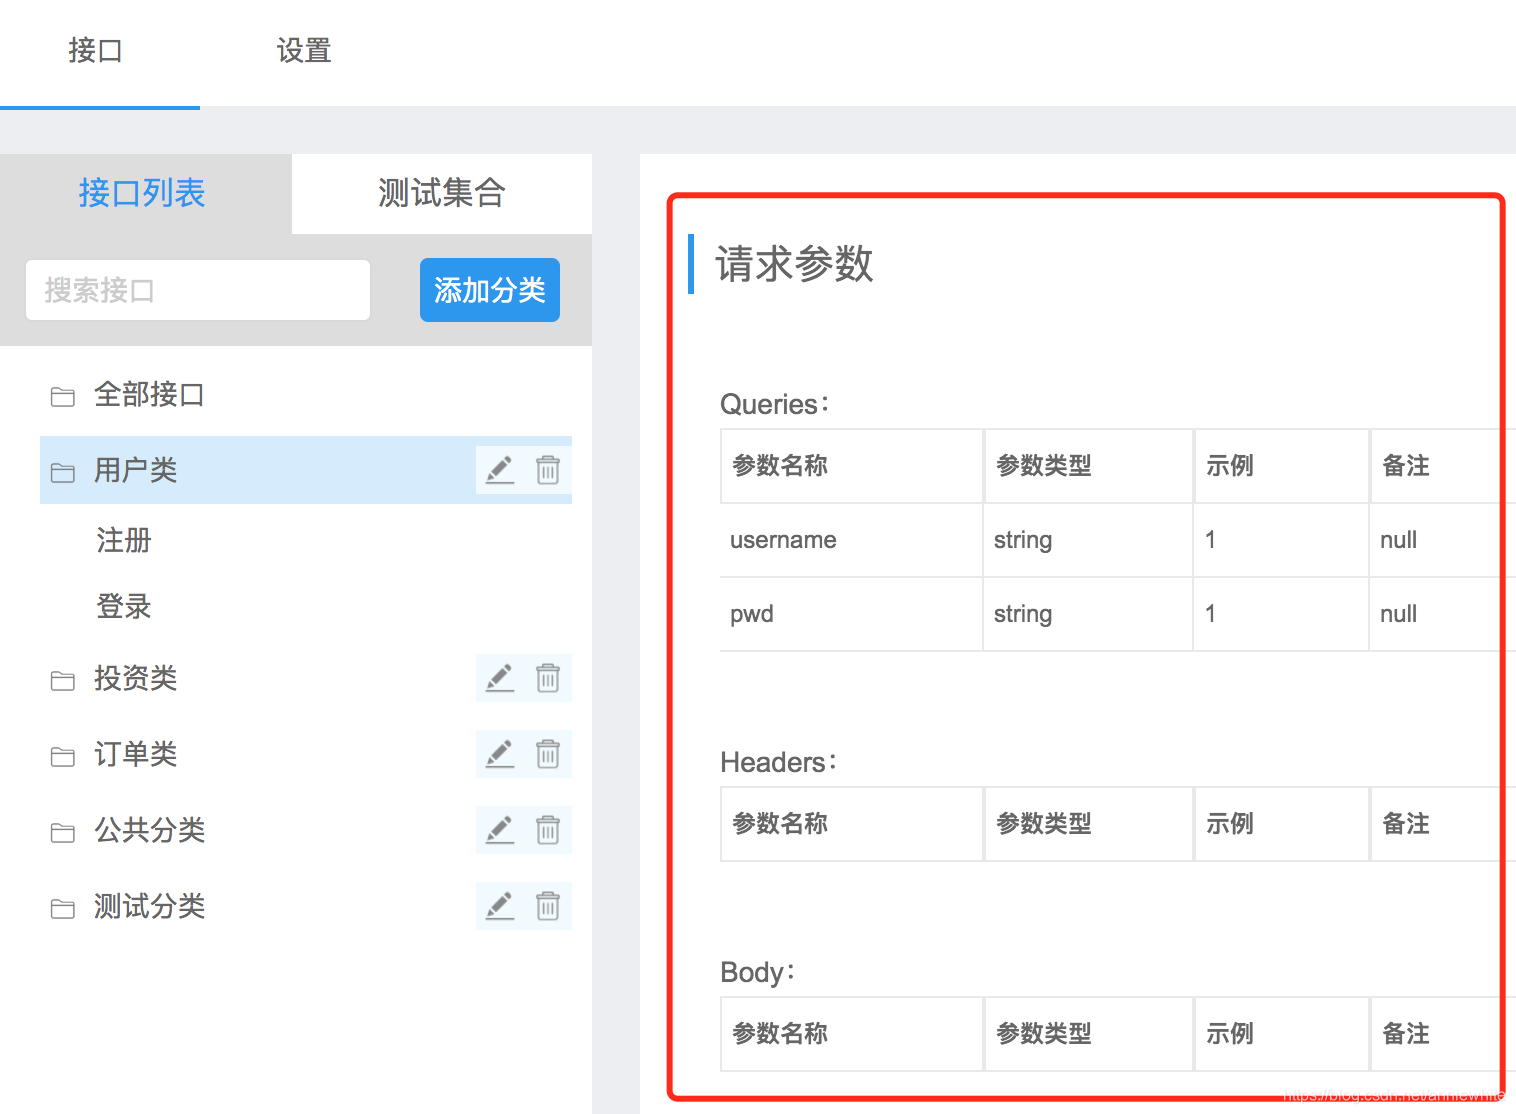
接口预览页的请求参数的效果图
注册接口请求参数:
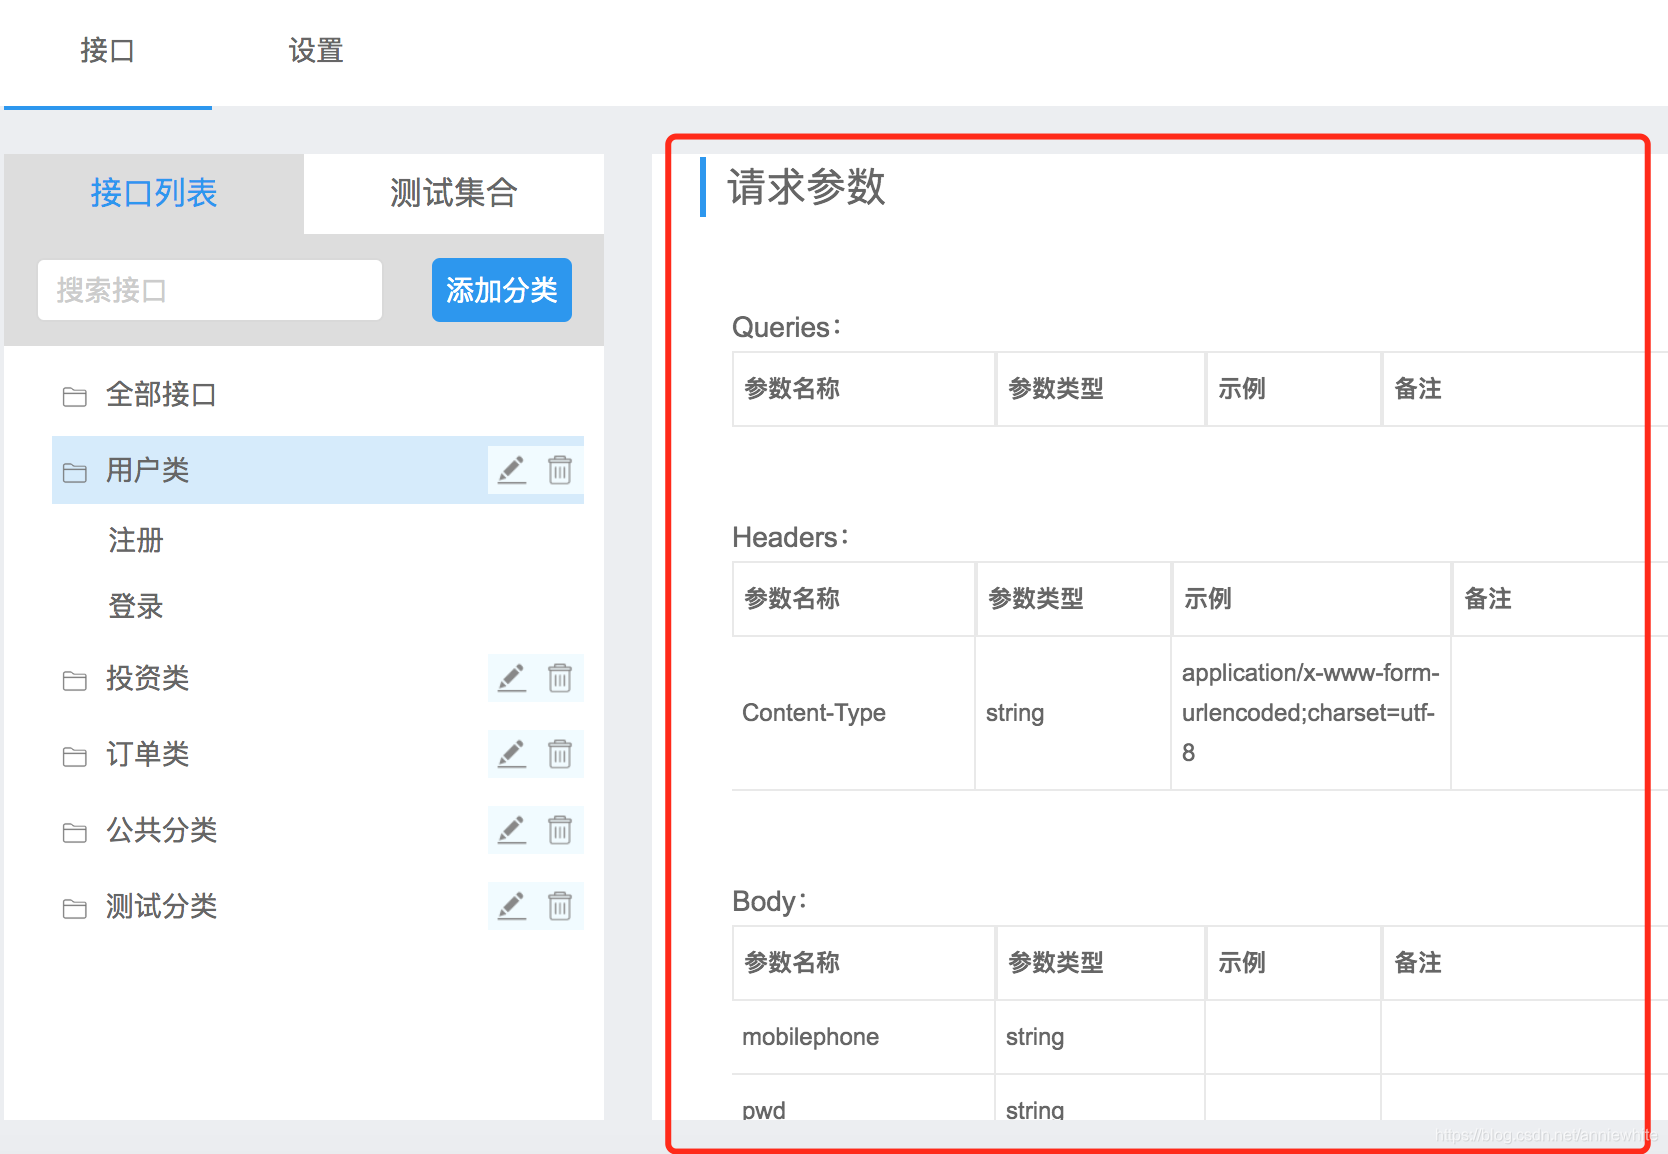
登录接口请求参数:
遇到的问题汇总
@Many报错:Many cannot be resolved to a type

解决方法:手动import这个类
import org.apache.ibatis.annotations.Many;
