Implementation functions:
1: First add data to the database (SQLite)
2: Use RecyclerView to display the data in the database
// Remarks: ImageButton with plus sign is used to add data, ImageButton with tick is used to obtain data and display
//First press the plus sign and then the tick. The
first step is to create an entity class Event
code as follows:
public class Event { private String Title; private String Time; private double Money; public Event(){
}
public Event(String Title, String Time, double Money)
{
    this.Title = Title;
    this.Time = Time;
    this.Money = Money;
}

public String getTitle() {
    return Title;
}

public String getTime() {
    return Time;
}

public double getMoney() {
    return Money;
}

public void setTitle(String Title) {
    this.Title = Title;
}

public void setTime(String Time) {
    this.Time = Time;
}

public void setMoney(double Money) {
    this.Money = Money;
}
}The
second step is to create a MyHelper class to inherit the SQLiteOpenHelper class. The
code is as follows:
public class MyHelper extends SQLiteOpenHelper { public static final String DataBaseName = "Bookkeeping.db"; public static final SQLiteDatabase.CursorFactory factory = null; public static final int version = 1;
public static final String Title = "Title";
public static final String Time = "Time";
public static final String Money = "Money";

public static final String TableName = "BookkeepingTable";
public MyHelper(@Nullable Context context) {
    super(context, DataBaseName, factory, version);
}

@Override
public void onCreate(SQLiteDatabase db) {
    String sql = "create table "+ TableName +" ( "+Title+" varchar(20) primary key, "+Time+" varchar(20), "+Money+" Double);";
// String sql = “create table BookkeepingTable (”
// + "Title text primary key, "
// + "Time text, "
// + “Money double)”;
db.execSQL(sql);
}
@Override
public void onUpgrade(SQLiteDatabase db, int oldVersion, int newVersion) {
    db.execSQL("drop table if exists "+TableName);
    onCreate(db);
}
}The
third step: Establish the Dao class to implement the insert function. The
code is as follows:
public class Dao { public static final String TAG = "Bookkeeping"; private SQLiteDatabase DB; private MyHelper helper; public Dao(Context context){ helper = new MyHelper( context); } public void Insert(Event event){ DB = helper.getReadableDatabase(); if (DB.isOpen()) { ContentValues values = new ContentValues(); values.put(MyHelper.Title,event.getTitle() ); values.put(MyHelper.Time,event.getTime()); values.put(MyHelper.Money,event.getMoney()); long RowId = DB.insert(MyHelper.TableName,null,values); if( RowId == -1) Log.i(TAG, "Data insertion failed!");
else
Log.i(TAG, "Data inserted successfully!"+RowId);
DB.close();
}
}
}
Step 4: Create a recyclerview_item.xml for matching with the Recyclerview adapter. The
effect diagram is as follows:
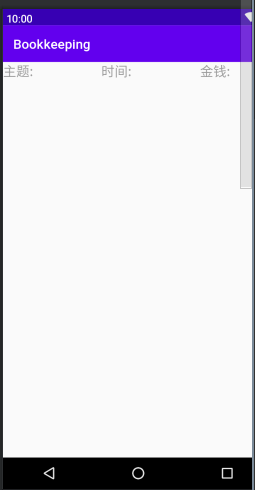
code show as below:
<?xml version="1.0" encoding="utf-8"?>
}
Step 6: Create an AddThing activity to get the input data and insert the
AddThing.java code into the database as follows:
public class AddThing extends AppCompatActivity implements DatePicker.OnDateChangedListener{ private RadioGroup Group; private RadioButton Pay,InCome; private DatePicker datePicker; private TextView TipsTitle,TipsTime,TipsMoney,TipsMoneyType; private EditText editTitle,editTime,editMoney; private Button btn_Submit; public static int MoneyType = 0; public static String DatePickerTime = null; public static String Title = null; public static String Time = null; public static double Money = 0; Dao dao = null; Event event = null;
@Override
protected void onCreate(Bundle savedInstanceState) {
    super.onCreate(savedInstanceState);
    setContentView(R.layout.activity_add_thing);


    btn_Submit = (Button) findViewById(R.id.submit);

    datePicker = (DatePicker) findViewById(R.id.addThing);

    Group = (RadioGroup) findViewById(R.id.Group);
    Pay = (RadioButton) findViewById(R.id.Pay);
    InCome = (RadioButton) findViewById(R.id.InCome);

    TipsMoneyType = (TextView) findViewById(R.id.TipsMoneyType);
    TipsTitle = (TextView) findViewById(R.id.TipsTitle);
    TipsTime = (TextView) findViewById(R.id.TipsTime);
    TipsMoney = (TextView) findViewById(R.id.TipsMoney);

    editTitle = (EditText) findViewById(R.id.editTitle);
    editTime = (EditText) findViewById(R.id.editTime);
    editMoney = (EditText) findViewById(R.id.editMoney);

    Calendar calendar = Calendar.getInstance();
    int year = calendar.get(Calendar.YEAR);
    int monthOfYear = calendar.get(Calendar.MONTH);
    int dayOfMonth = calendar.get(Calendar.DAY_OF_MONTH);
    datePicker.init(year, monthOfYear, dayOfMonth, this);

    Group.setOnCheckedChangeListener(new RadioGroup.OnCheckedChangeListener() {
        @Override
        public void onCheckedChanged(RadioGroup group, int checkedId) {
            RadioButton radioButton = (RadioButton) group.findViewById(checkedId);
            if (radioButton.getText().equals("支付")) {
                MoneyType = 1;
            } else {
                MoneyType = 0;
            }
        }
    });

    btn_Submit.setOnClickListener(new View.OnClickListener() {
        @Override
        public void onClick(View v) {
            dao = new Dao(AddThing.this);//创建数据库和表

            Title = editTitle.getText().toString().trim();
            Time = editTime.getText().toString();
            try {
                Money = Double.valueOf(editMoney.getText().toString());
            } catch (NumberFormatException e) {
                e.printStackTrace();
            }
            if ("".equals(Title))
            {
                Toast.makeText(AddThing.this,"不能为空",Toast.LENGTH_SHORT).show();
                return;
            }

            dao.Insert(new Event(Title,Time,Money));
            Log.d(Dao.TAG,"succees!");
        }
    });
}

@Override
public void onDateChanged(DatePicker view, int year, int monthOfYear, int dayOfMonth) {
    editTime.setText(year + "-"+ monthOfYear+ "-"+ dayOfMonth+ "");
}
} The
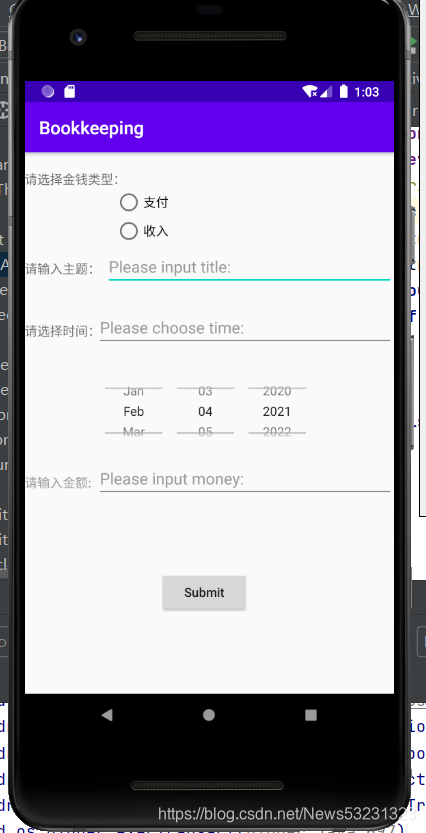
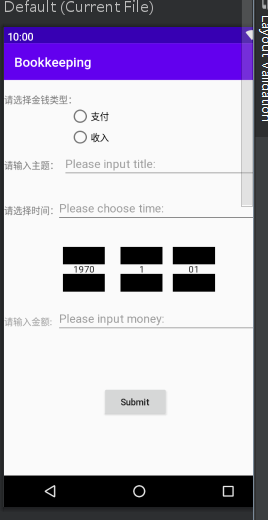
activity_add_thing.xml file is as follows: The
renderings are as follows:
//Note: RadioGroup has not been used for the time being, and you can count the amount of income or expenditure for a month or longer. The
code is as follows:
<RadioGroup
    android:id="@+id/Group"
    android:layout_width="match_parent"
    android:layout_height="wrap_content"
    android:layout_marginLeft="100dp">
    <RadioButton
    android:id="@+id/Pay"
    android:layout_width="match_parent"
    android:layout_height="wrap_content"
    android:text="支付"/>
    <RadioButton
    android:id="@+id/InCome"
    android:layout_width="match_parent"
    android:layout_height="wrap_content"
    android:text="收入"/>
</RadioGroup>
</LinearLayout>
<TextView
    android:id="@+id/TipsTitle"
    android:layout_width="match_parent"
    android:layout_height="wrap_content"
    android:text="请输入主题:"
    android:layout_marginTop="120dp"/>
<EditText
    android:id="@+id/editTitle"
    android:layout_width="match_parent"
    android:layout_height="wrap_content"
    android:hint="Please input title:"
    android:layout_marginLeft="90dp"
    android:layout_marginTop="105dp"/>
<TextView
    android:id="@+id/TipsTime"
    android:layout_width="match_parent"
    android:layout_height="wrap_content"
    android:text="请选择时间:"
    android:layout_below="@id/TipsTitle"
    android:layout_marginTop="50dp"/>
<EditText
    android:id="@+id/editTime"
    android:layout_width="match_parent"
    android:layout_height="wrap_content"
    android:hint="Please choose time:"
    android:layout_below="@id/editTitle"
    android:layout_marginTop="23dp"
    android:layout_marginLeft="80dp"/>
<DatePicker
    android:id="@+id/addThing"
    android:layout_width="match_parent"
    android:layout_height="100dp"
    android:calendarViewShown="false"
    android:spinnersShown="true"
    android:datePickerMode="spinner"
    android:headerBackground="#ffffff"
    android:layout_below="@id/editTime"
    android:layout_marginTop="20dp"/>
<TextView
    android:id="@+id/TipsMoney"
    android:layout_width="match_parent"
    android:layout_height="wrap_content"
    android:hint="请输入金额:"
    android:layout_marginTop="20dp"
    android:layout_below="@id/addThing"/>
<EditText
    android:id="@+id/editMoney"
    android:layout_width="match_parent"
    android:layout_height="wrap_content"
    android:hint="Please input money:"
    android:layout_below="@id/addThing"
    android:layout_marginLeft="80dp"
    android:layout_marginTop="3dp"/>
<Button
    android:id="@+id/submit"
    android:layout_height="wrap_content"
    android:layout_width="100dp"
    android:text="Submit"
    android:layout_below="@id/editMoney"
    android:textAllCaps="false"
    android:layout_marginTop="80dp"
    android:gravity="center"
    android:layout_marginLeft="150dp"/>
@Override
protected void onCreate(Bundle savedInstanceState) {
    super.onCreate(savedInstanceState);
    setContentView(R.layout.activity_main);

    Recyclerview = (RecyclerView) findViewById(R.id.EventDisplayInterface);
    imageButton = (ImageButton) findViewById(R.id.AddButton);
    imageButtonGet = (ImageButton) findViewById(R.id.getInformation);

    //绑定适配器
    LinearLayoutManager manager = new LinearLayoutManager(MainActivity.this);
    Recyclerview.setLayoutManager(manager);

    adapter = new MyRecyclerView(EventList);
    Recyclerview.setAdapter(adapter);

    imageButton.setOnClickListener(new View.OnClickListener() {
        @Override
        public void onClick(View v) {
            Intent intent = new Intent(MainActivity.this,AddThing.class);
            startActivity(intent);
        }
    });

    imageButtonGet.setOnClickListener(new View.OnClickListener() {
       Event event = new Event();
        @Override
        public void onClick(View v) {
            String Title = AddThing.Title;
            String Time = AddThing.Time;
            double Money = AddThing.Money;
            if ( ("".equals(Title)) && ( "".equals(Time)))
            {
                Toast.makeText(MainActivity.this,"内容不能为空",Toast.LENGTH_SHORT).show();
            }
            else {
                event = new Event(Title, Time, Money);
                EventList.add(event);
                adapter.notifyItemChanged(EventList.size() - 1);
                Recyclerview.scrollToPosition(EventList.size() - 1);
                Toast.makeText(MainActivity.this,"111111111",Toast.LENGTH_SHORT).show();
            }
        }
    });
}
} The
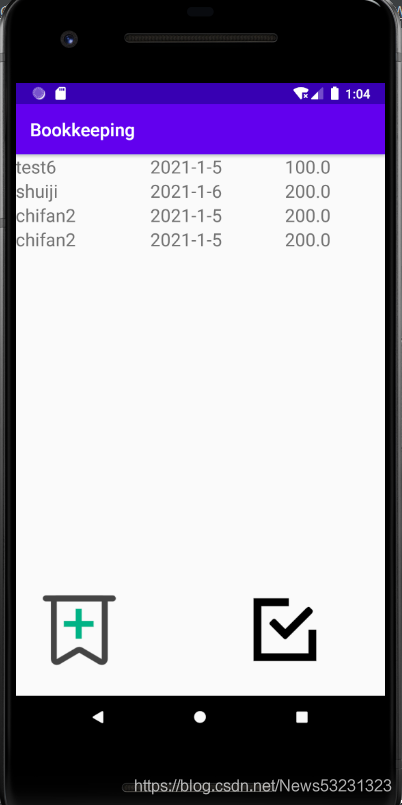
activity_main.xml file is as follows: The
renderings are as follows:

//Note: ImageButton with plus sign is used to add data, and ImageButton with tick is used to obtain data and display it.
//First press the
code with plus sign and then click the tick as follows :
<androidx.recyclerview.widget.RecyclerView
android:id="@+id/EventDisplayInterface"
android:layout_width=“match_parent”
android:layout_height=“wrap_content”/>
/ So the code has ended here, the following is the AVD running effect chart **************/