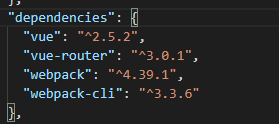
The current project I use is webpack3.6. The application is a project installed by vue-cli. Since the official webpack4 has not yet scaffolded, we need to upgrade it manually if we upgrade to webpack4. I followed the steps below to upgrade.
Note: The version of npm I use is 6.4.1; you can execute npm -v in the terminal to view the current npm version.
1. Upgrade webpack first (uninstall the previous webpack first)
npm uninstall webpack
After uninstalling, install webpack. In this case, the corresponding webpack version will be installed according to your npm. Of course, you can also specify the version to install webpack.
npm i webpack
2. After installing webpack, we then install webpack-cli. Why do I need to use webpack-cli? The main function is: a simple client, used to connect to the corresponding service with the webpack protocol.
npm i webpack-cli
3. After upgrading webpack and installing webpack-cli, let's start the project first
npm run dev
Found an error:
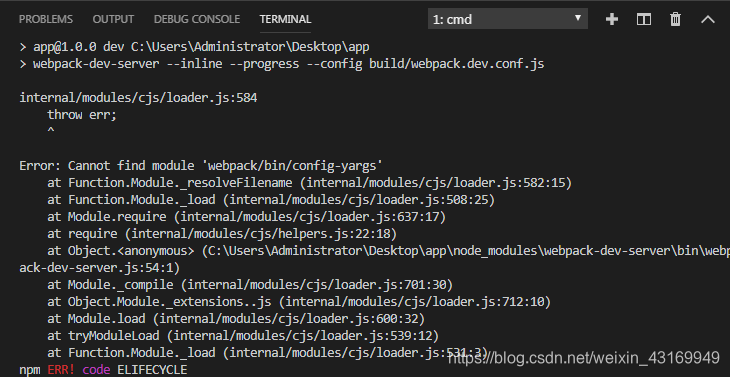
This is mainly caused by the version of webpack-dev-serve that does not match the current version of webpack.
According to international practice, first uninstall the previous webpack-dev-server, and then install webpack-dev-server
npm i webpack-dev-server
4. After upgrading webpack-dev-server (3.8.0), execute npm run dev and
continue to report the error:
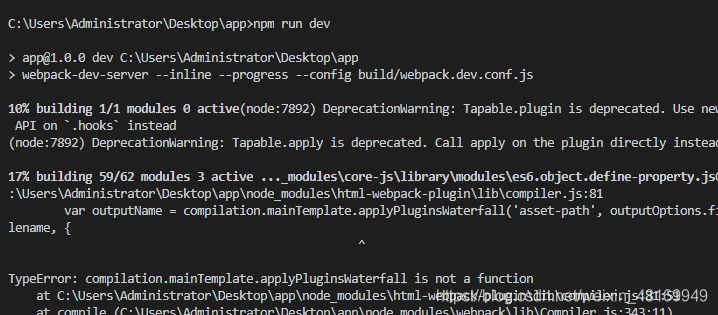
This error is caused by a mismatch between the version of html-webpack-pligun and the current webpack. We still continue to uninstall it first Install html-webpack-plugin
npm i html-webpack-plugin
5. After upgrading the html-webpack-plugin, the
following error occurs when executing npm run dev :
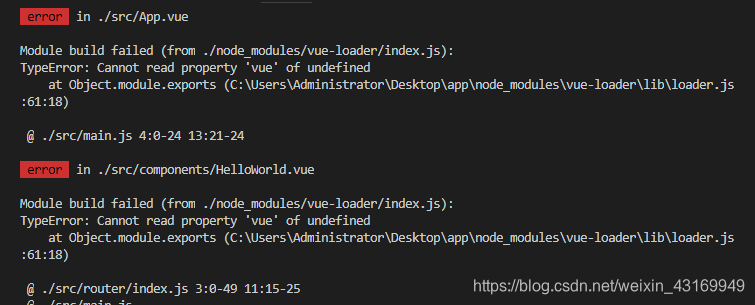
This error is mainly caused by a mismatch between the vue-loader and the current webpack version, uninstall and then install
npm i vue-loader
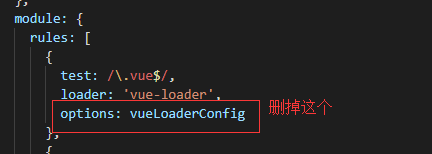
After installation, we need to change the configuration in build/webpack.base.conf.js;
before that,
const vueLoaderConfig = require('./vue-loader.conf')
we need to delete this piece of code and change the following import method:
const {VueLoaderPlugin} = require('vue-loader')
Then delete this line of code as shown in the figure. The
new vue-loader is used in the form of a plug-in, so we configure a vue-loader plug-in, and then configure a parameter: mode to inform the current environment, which is unique to webpack4
  plugins:[
     new VueLoaderPlugin()
  ],
 mode:process.env.NODE_ENV,
6. Execute the npm run dev command, the terminal did not report an error, but the browser did not open automatically, so we also need to change the configuration to automatically open the browser: find in config/index.js, find autoOpenBrowser: false, change this Ture
autoOpenBrowser:ture
Why is it changed here? Because of the dev-server configuration in build/webpack.dev.conf.js: open takes the value configured here.
Then execute npm run dev
At this moment, you must be very excited, because the terminal did not report an error, and finally saw "Compiled successfully in 5130ms", but the browser is not satisfied and will not give you the whole mistake. You are an escort when you are a browser, yes, the browser We have no way of reporting the error. This question on Baidu will tell you that module.exports and import cannot be used together. You will definitely say "mmp" in your heart. Where did I use it together? I can’t find this error report on the Internet.
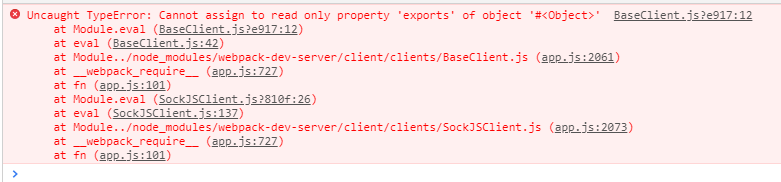
To solve this problem is very simple, you only need to find the .babelrc file, and then find "plugins": ["transform-vue-jsx", "transform-runtime"], change this to
"plugins": ["transform-vue-jsx"]
Then, if you let me report an error, I will uninstall you
npm uninstall babel-plugin-transform-runtime
At this point we have completed the configuration upgrade required by dev. Next we have to complete the build upgrade.
7. Execute the npm run build command.
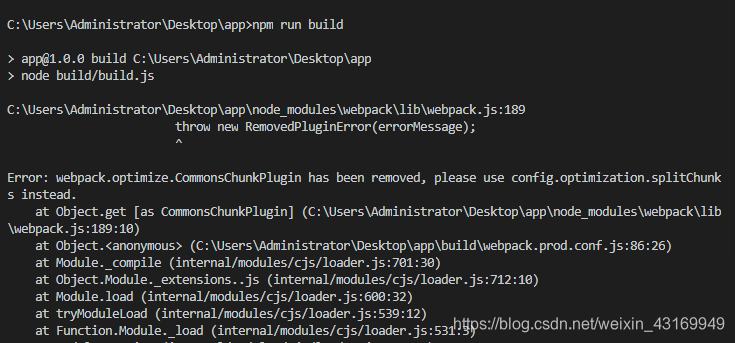
Here is to tell us that the way to split code in webpack4 is different, and we have new rules of the game. Okay, it's not enough to change it. Find build/webpack.prod.conf.js and comment or delete all the code that is tainted with CommonsChunkPlugin.
Then configure the new packaging method according to the new game rules
optimization: {
        splitChunks: {
          cacheGroups: {
            styles: {
              name: 'styles',
              test: /\.css$/,
              chunks: 'all',
              enforce: true
            },
            vendor:{
              test: /node_modules/,
              name: 'vendor',
              chunks:'all'
          }
        }
        }
      },
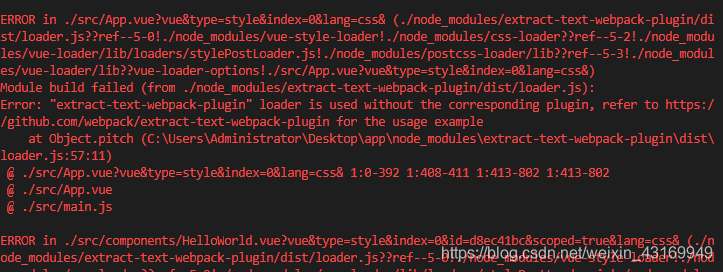
8. Execute npm run build again, and the following error appears.
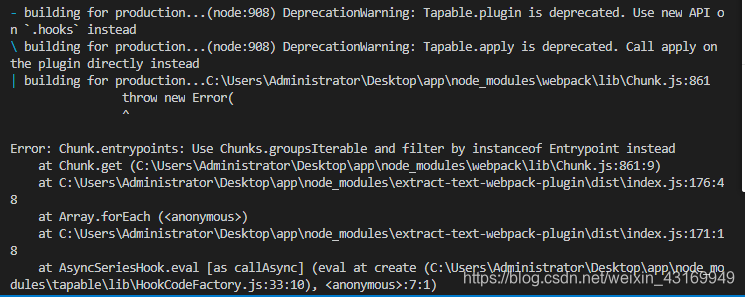
This error is mainly because the extract-text-plugin does not match the current webpack version. After webpack4, the mini-css-extract-plugin is used to extract css. This plugin is called: ①Asynchronous
loading
② No repeated compilation, better performance
③ Easier to use
④ Only for the
powerful look of CSS , we install and use it to check if there is any bragging! ! !
npm uninstall extract-text-plugin
npm i mini-css-extract-plugin
Then find build/webpack.prod.conf.js
const ExtractTextPlugin = require('extract-text-webpack-plugin')
Change this introduction to:
const MiniCssExtractPlugin=require('mini-css-extract-plugin')
Then replace the new ExtractTextPlugin () in pulgins with new MiniCssExtractPlugin
9. Continue to execute npm run build and
find that the packaging can be completed, but an error was reported after packaging. I have a bad temper. Wherever there is a bug, I delete the code.
Reporting this error, we mainly used a production loader. We found it in build/utils.js, because extract-text-plugin was introduced here, so here we changed it to mini-css-extract-plugin
const ExtractTextPlugin = require('extract-text-webpack-plugin')
Change to
const MiniCssExtractPlugin=require('mini-css-extract-plugin')
Then the following configuration
  return ExtractTextPlugin.extract({
        use: loaders,
        fallback: 'vue-style-loader'
      })
``
改成
return [MiniCssExtractPlugin.loader].concat(loaders)
Ok, here we have completed the basic upgrade work.
Since webpack4 comes with js packaging function, uglifyjs-webpack-plugin is not used, you can uninstall uglifyjs-webpack-plugin
I have been using rimraf since 9102, why not use clean-webpack-plugin, so interested students can follow the steps below to continue to upgrade your project
npm uninstall rimraf
Then install clean-webpack-plugin
npm i clean-webpack-plugin
Change the startup command of package.json
"dev": "cross-env NODE_ENV=development webpack-dev-server --config build/webpack.dev.conf.js",
"build": "cross-env NODE_ENV=production webpack --config build/webpack.prod.conf.js"
Just introduce the plug-in in build/webpack.prod.conf.js
const {CleanWebpackPlugin}=require('clean-webpack-plugin')

plugins:[
  new CleanWebpackPlugin()
]
Install another progress bar
npm i progress-bar-webpack-plugin
Introduced in build/webpack.base.conf.js
require('./check-versions')() //检验版本插件是否对应
const ProgressBarPlugin = require('progress-bar-webpack-plugin')
  plugins:[
     new VueLoaderPlugin(),
     new ProgressBarPlugin()
  ],
Finally, change a small place:
config/index.js Find the build configuration:
  build: {
    // Template for index.html
    index: path.resolve(__dirname, '../dist/index.html'),

    // Paths
    assetsRoot: path.resolve(__dirname, '../dist'),
    assetsSubDirectory: 'static',
    assetsPublicPath: '/',
Change to
  build: {
    // Template for index.html
    index: path.resolve(__dirname, '../dist/index.html'),

    // Paths
    assetsRoot: path.resolve(__dirname, '../dist'),
    assetsSubDirectory: '',
    assetsPublicPath: '',
The packaged files can be accessed
The last point is to uninstall unnecessary plug-ins, such as uglifyjs-webpack-plugin, ora, chalk, and delete the build/bulild.js file
The work is done, you can already use your code