The address of the previous section: SpringBoot diary system live broadcast 01: first get the framework up~~
So good evening everyone, I am the main lecturer this evening, I am Rabbit Brother.
In the previous lecture, we have completed the construction of the project, so in this lecture, we will create the login page.
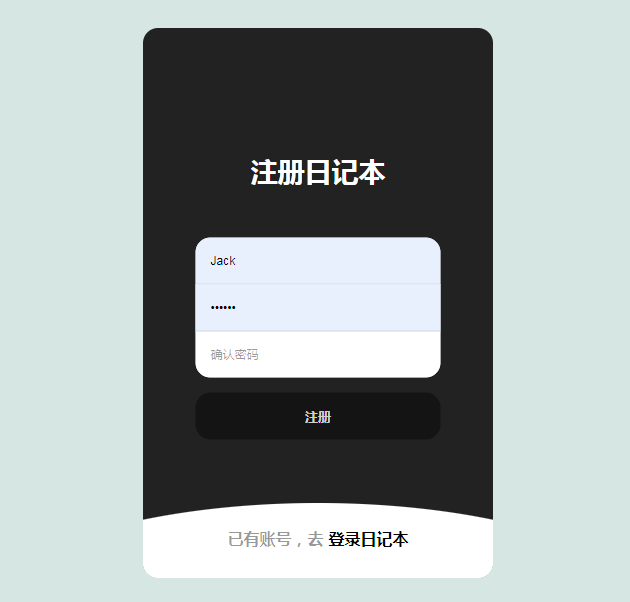
The login page is as follows:
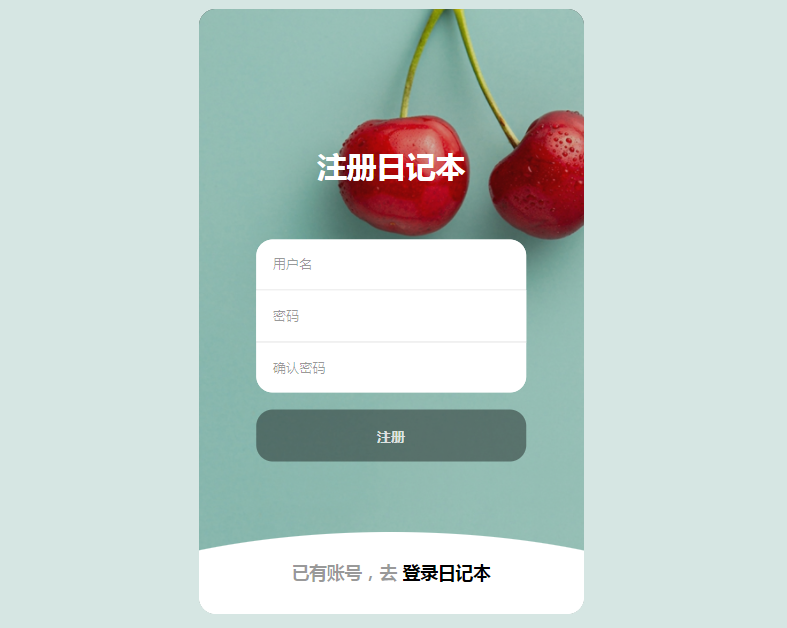
It is a small and fresh style. Of course, the focus of this project is still the development of the SpringBoot project.
Because it is a front-end and back-end project, we use the template engine method. I personally don't like thymeleaf very much, so use jsp. Classic, not easy to go wrong.
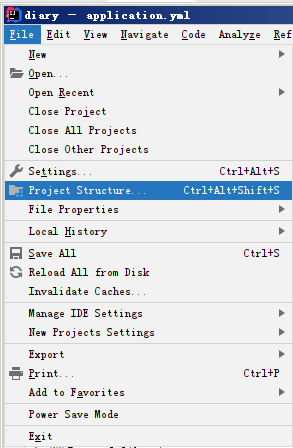
Open the configuration file, add a view resolver, and be the same level as the DataSource
spring:
  #视图解析器
  mvc:
    view:
      prefix: /WEB-INF/jsp/
suffix: .jsp 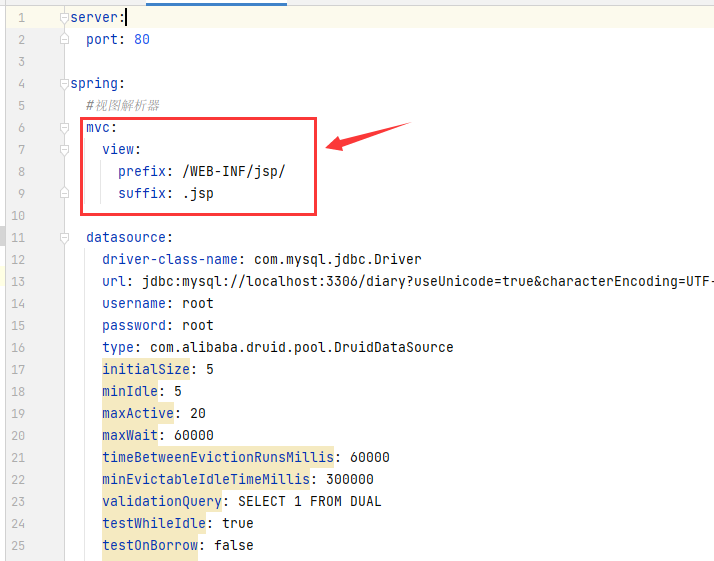
Posted in this location, make no mistake.
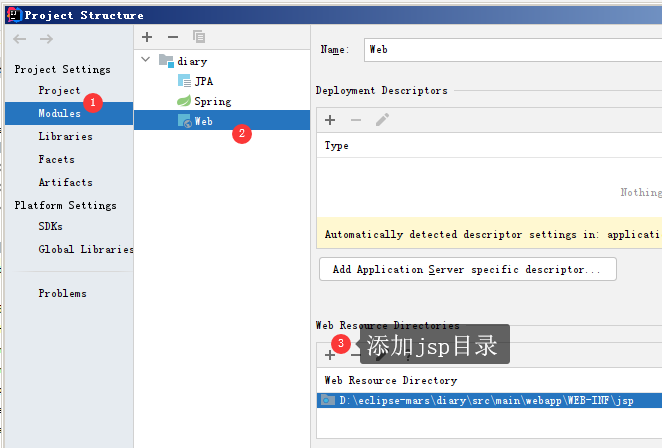
Create a new directory under main: webapp
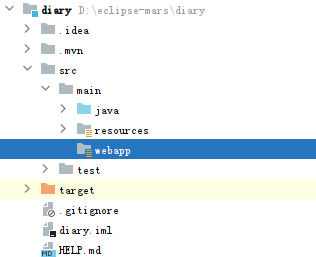
It will remind you when it is created
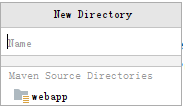
Select the webapp below, we have to ensure that there is a yellow mark in the lower right corner of the folder, which represents the resource directory.
Next, create the WEB-INF (uppercase) directory inside
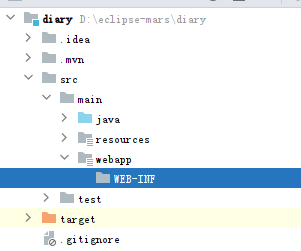
Next is the jsp directory
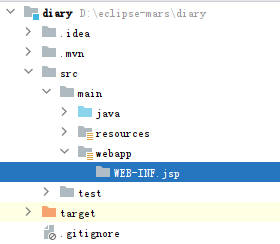
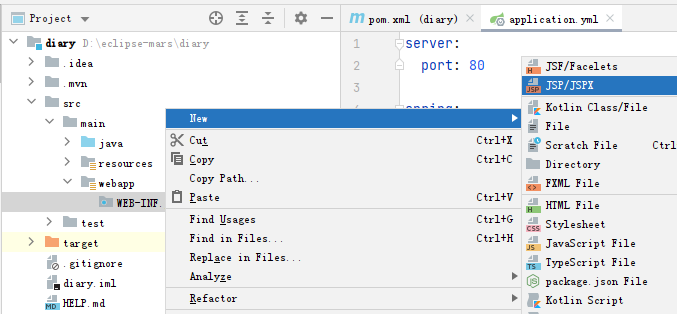
Then, we need to create JSP files in this directory.
By default, idea can't right-click to create JSP, we need to do a little operation.
Click this:
Then you can create a new JSP
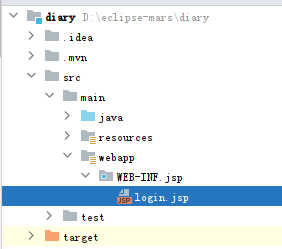
Create login.jsp
The HTML code is as follows:
<%@ page contentType="text/html;charset=UTF-8" language="java" %>
<!DOCTYPE html>
<html>

<head>
    <meta http-equiv="content-type" content="text/html; charset=utf-8">
    <meta name="viewport" content="width=device-width,initial-scale=1,maximum-scale=1,user-scalable=no">

    <title>剽悍一小兔-日记本系统</title>
    <style>
		*{
			margin: 0;
			padding: 0;
		}
		body{
			min-height: 100vh;
			/* 弹性布局 居中 */
			display: flex;
			justify-content: center;
			align-items: center;
			background-color: #94bfb560;
		}
		.container{
			background-color: #222;
			width: 350px;
			height: 550px;
			border-radius: 15px;
			overflow: hidden;
			position: relative;
		}
		.container::after{
			content: "";
			position: absolute;
			/* inset为0,相当于top、left、bottom、right都为0的缩写 */
			inset: 0;
			background: url("images/bg.jpg") no-repeat;
			background-size: 500px;
			background-position: left bottom;
			opacity: 0.8;
		}
		/* 注册区域(登录区域很多样式和注册区域的一样,故而一些统一的样式写在了一起) */
		.register-box{
			width: 70%;
			position: absolute;
			z-index: 1;
			top: 50%;
			left: 50%;
			transform: translate(-50%,-50%);
			transition: 0.3s ease;
		}
		.register-title,
		.login-title{
			color: #fff;
			font-size: 27px;
			text-align: center;
		}
		.register-title span,
		.login-title span{
			color: rgba(0,0,0,0.4);
			display: none;
		}
		.register-box .input-box,
		.login-box .input-box{
			background-color: #fff;
			border-radius: 15px;
			overflow: hidden;
			margin-top: 50px;
			opacity: 1;
			visibility: visible;
			transition: 0.6s ease;
		}
		.register-box input,
		.login-box input{
			width: 100%;
			height: 30px;
			border: none;
			border-bottom: 1px solid rgba(0,0,0,0.1);
			font-size: 12px;
			padding: 8px 0;
			text-indent: 15px;
			outline: none;
		}
		.register-box input:last-child,
		.login-box input:last-child{
			border-bottom: none;
		}
		.register-box input::placeholder,
		.login-box input::placeholder{
			color: rgba(0,0,0,0.4);
		}
		.register-box button,
		.login-box button{
			width: 100%;
			padding: 15px 45px;
			margin: 15px 0;
			background: rgba(0,0,0,0.4);
			border: none;
			border-radius: 15px;
			color: rgba(255,255,255,0.8);
			font-size: 13px;
			font-weight: bold;
			cursor: pointer;
			opacity: 1;
			visibility: visible;
			transition: 0.3s ease;
		}
		.register-box button:hover,
		.login-box button:hover{
			background-color: rgba(0,0,0,0.8);
		}
		/* 登录区域 */
		.login-box{
			position: absolute;
			inset: 0;
			top: 20%;
			z-index: 2;
			background-color: #fff;
			transition: 0.3s ease;
		}
		.login-box::before{
			content: "";
			background-color: #fff;
			width: 200%;
			height: 250px;
			border-radius: 50%;
			position: absolute;
			top: -20px;
			left: 50%;
			transform: translateX(-50%);
		}
		.login-box .center{
			width: 70%;
			position: absolute;
			z-index: 3;
			left: 50%;
			top: 40%;
			transform: translate(-50%,-50%);
		}
		.login-title{
			color: #000;
		}
		.login-box .input-box{
			border: 1px solid rgba(0,0,0,0.1);
		}
		.login-box button{
			background-color: #75a297;
		}
		/* 注册、登录区域收起 */
		.login-box.slide-up{
			top: 90%;
		}
		.login-box.slide-up .center{
			top: 10%;
			transform: translate(-50%,0%);
		}
		.login-box.slide-up .login-title,
		.register-box.slide-up .register-title{
			font-size: 16px;
			cursor: pointer;
		}
		.login-box.slide-up .login-title span,
		.register-box.slide-up .register-title span{
			margin-right: 5px;
			display: inline-block;
		}
		.login-box.slide-up .input-box,
		.login-box.slide-up .button,
		.register-box.slide-up .input-box,
		.register-box.slide-up .button{
			opacity: 0;
			visibility: hidden;
		}
		.register-box.slide-up{
			top: 6%;
			transform: translate(-50%,0%);
		}
	</style>
</head>

<body>
    <div class="container">
        <div class="register-box">
            <h2 class="register-title">
                <span>没有账号,去</span>注册日记本
            </h2>
            <div class="input-box">
                <input type="text" placeholder="用户名">
                <input type="password" placeholder="密码">
                <input type="password" placeholder="确认密码">
            </div>
            <button>注册</button>
        </div>
        <div class="login-box slide-up">
            <div class="center">
                <h2 class="login-title">
                    <span>已有账号,去</span>登录日记本
                </h2>
                <div class="input-box">
                    <input type="text" placeholder="用户名">
                    <input type="password" placeholder="密码">
                </div>
                <button>登录</button>
            </div>
        </div>
    </div>
    <script>
		// 获取要操作的元素
		let login_title=document.querySelector('.login-title');
		let register_title=document.querySelector('.register-title');
		let login_box=document.querySelector('.login-box');
		let register_box=document.querySelector('.register-box');

		// 绑定标题点击事件
		login_title.addEventListener('click',()=>{
			// 判断是否收起,收起才可以点击
			if(login_box.classList.contains('slide-up')){
				register_box.classList.add('slide-up');
				login_box.classList.remove('slide-up');
			}
		})
		register_title.addEventListener('click',()=>{
			if(register_box.classList.contains('slide-up')){
				login_box.classList.add('slide-up');
				register_box.classList.remove('slide-up');
			}
		})
	</script>
</body>

</html>
JSP is ready, next, we have to use the controller to access it.
Create a PageController specifically for accessing certain pages
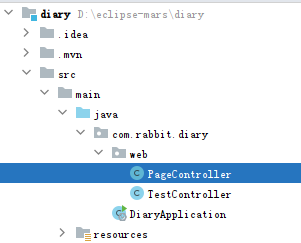
package com.rabbit.diary.web;

import org.springframework.stereotype.Controller;
import org.springframework.web.bind.annotation.RequestMapping;

@Controller
public class PageController {

    @RequestMapping("login")
    public String login(){
        return "login";
    }
}
The login method returns a string, because we configured the view parser, so it returns the string login, which is actually found in WEB-INF/jsp/login.jsp.
There is another place to pay attention to, that is, SpringBoot needs a dependency to access jsp, let's add it to pom.xml
<dependency>
	<groupId>org.apache.tomcat.embed</groupId>
	<artifactId>tomcat-embed-jasper</artifactId>
</dependency>
Ok, now restart the project and visit http://localhost/login
I found out how dark the background is, because the background image was not introduced.
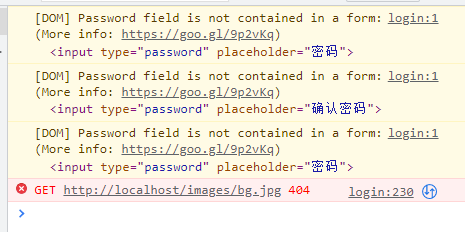
For this kind of static resource, we need to configure the static resource path, because we are using the version of SpringBoot (2.6.4) here, which may be different from what you have seen before, which needs attention. Still a yml file, we add:
web:
  resources:
    static-locations: classpath:static/
web and mvc are at the same level, if you really don't know where to add it, it doesn't matter, just go back and download the source code. How to get the source code: Pay attention to the public account at the bottom and reply to [Diary]!
This configuration means that you can directly access resources in the static directory in the future.
For example, now there is such a directory structure, find bg.jpg
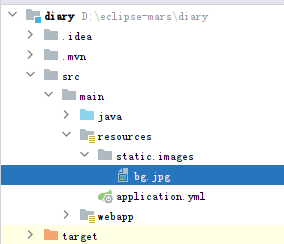
We want to access it, just http://localhost/images/bg.jpg !
Next, we modify login.jsp
Add project root path:
<c:set var="basePath" value="${pageContext.request.contextPath}"></c:set>The function of this code is to get the root of the project. For example, if the root of the project is changed to diary in the future, then the basePath is diary. When we access the background, we have to add diary after localhost.
Find the place to get the background image in css and change it to:
.container::after{
    content: "";
    position: absolute;
    /* inset为0,相当于top、left、bottom、right都为0的缩写 */
    inset: 0;
    background: url("${basePath}/images/bg.jpg") no-repeat;
    background-size: 500px;
    background-position: left bottom;
    opacity: 0.8;
}
OK, reboot.
Visit http://localhost/login
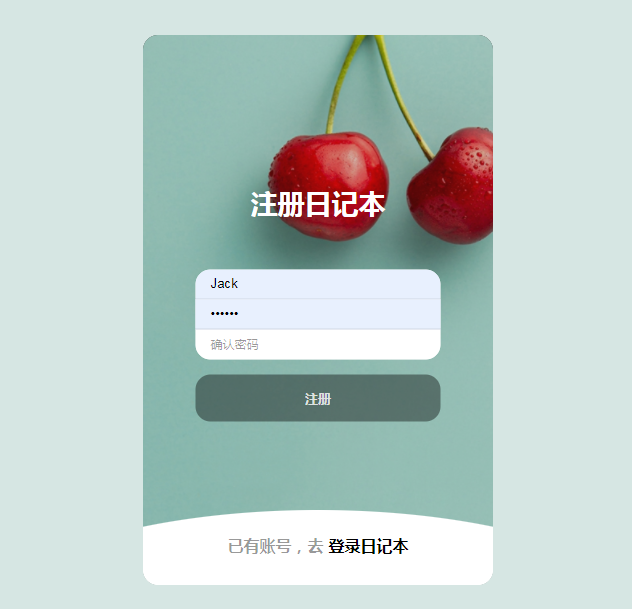
You're done!
Summarize
In this lecture, we integrated jsp, learned how springboot accesses jsp, and how springboot 2.6 version accesses static resources.