K210
Article directory

foreword
Before learning K210, I only learned the target inspection of K210, and did not systematically study this development board. Learning the first development board starts with lighting.
1. Schematic diagram
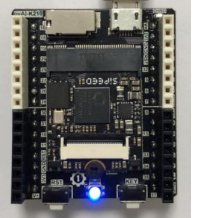
There are a total of 3 LEDs on the pyAI-K210, located in the middle of the 2 buttons, three-color integrated LED. They are LED_B (blue), LED_G (red), and LED_R (red).

K210 is an external IO and an internal IO, and the corresponding pins of its on-chip peripherals (such as GPIO, I2C, etc.) can be set arbitrarily, while the correspondence between most traditional MCU on-chip peripherals and pins has been fixed, and only some pins Can be reused, compared to K210 more degrees of freedom.
2. Correlation function
When programming using GPIO, you need to register the corresponding relationship between hardware IO and K210 internal IO. The registration method uses fpioa_manager: fm for short
1.fm.register(pin,function,force=False)

#将将LED外部IO注册到内部GPIO,K210引脚支持任意配置
fm.register(12, fm.fpioa.GPIO0)
fm.register(13, fm.fpioa.GPIO1)
fm.register(14, fm.fpioa.GPIO2)
2.GPIO(ID,MODE,PULL,VALUE)

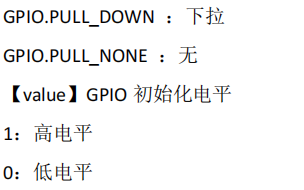
#构建LED对象,并初始化输出高电平,关闭LED
LED_B = GPIO(GPIO.GPIO0, GPIO.OUT,value=1)
LED_G = GPIO(GPIO.GPIO1, GPIO.OUT,value=1)
LED_R = GPIO(GPIO.GPIO2, GPIO.OUT,value=1)

3. Experimental code

from Maix import GPIO
from fpioa_manager import fm
#将蓝灯引脚 IO12 配置到 GPIO0,K210 引脚支持任意配置
fm.register(12, fm.fpioa.GPIO0,force=True)
LED_B = GPIO(GPIO.GPIO0, GPIO.OUT) #构建 LED 对象
LED_B.value(0) #点亮LED
Then implement his running water lamp, there is also a function utime which is used for delay in python

from Maix import GPIO
from fpioa_manager import fm
import utime

#将将LED外部IO注册到内部GPIO,K210引脚支持任意配置
fm.register(12, fm.fpioa.GPIO0)
fm.register(13, fm.fpioa.GPIO1)
fm.register(14, fm.fpioa.GPIO2)

#构建LED对象,并初始化输出高电平,关闭LED
LED_B = GPIO(GPIO.GPIO0, GPIO.OUT,value=1)
LED_G = GPIO(GPIO.GPIO1, GPIO.OUT,value=1)
LED_R = GPIO(GPIO.GPIO2, GPIO.OUT,value=1)

#定义数组方便循环语句调用
LED=[LED_B, LED_G, LED_R]

while True:

    for i in range(0,3):
        LED[i].value(0) #点亮LED
        utime.sleep(1)
        LED[i].value(1) #关闭LED

4. Button
The buttons and lights are actually the same, so I won't introduce them one by one. First, look at the schematic diagram.

When setting the mode, you can set the input.
KEY = GPIO(GPIO.GPIO1, GPIO.IN)
from Maix import GPIO
from fpioa_manager import fm
#注册IO,蓝灯-->IO12,KEY-->IO16
fm.register(12, fm.fpioa.GPIO0)
fm.register(16, fm.fpioa.GPIO1)
#初始化IO
LED_B = GPIO(GPIO.GPIO0, GPIO.OUT)
KEY = GPIO(GPIO.GPIO1, GPIO.IN)
while True:
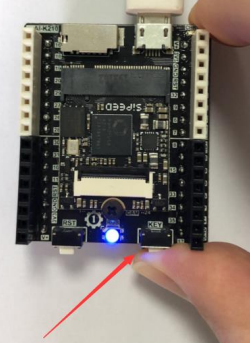
if KEY.value()==0: #按键被按下接地
LED_B.value(0) #点亮LED_B,蓝灯
else:
LED_B.value(1) #熄灭LED
Summarize
GPIO is a very general function. After learning GPIO, you can use all the pins of the development board for your own use, which is very flexible.