Unity Render Streaming
Article Directory
- Unity Render Streaming
- foreword
- Show results
- open scene
- version selection
- web server
- Unity project settings
- interact
- Extranet server deployment
- Custom WebServer
- Web and Unity send custom messages to each other
- How Enterprise Projects Are Applied
-
- 1. The choice between clear and smooth external network access
- 2. Web button to replace the button operation of Unity
- 3. Resolution synchronization, refer to the resolution synchronization method in iOS and Android below
- 4. Precautions when accessing the default vertical screen on the mobile phone and displaying the horizontal screen
- 5. Detect whether the Unity side is disconnected from the service
- 6. Obtain whether there is a successful user connection
- How to make iOS and Android
- update plan
foreword
Original link
UnityRenderStreaming official document
Unity: 2021.3.8f1c1
RenderStreaming: 3.1.0-exp.4 (Pre-release)
RenderStreaming WebServer: 3.1.0-exp.3
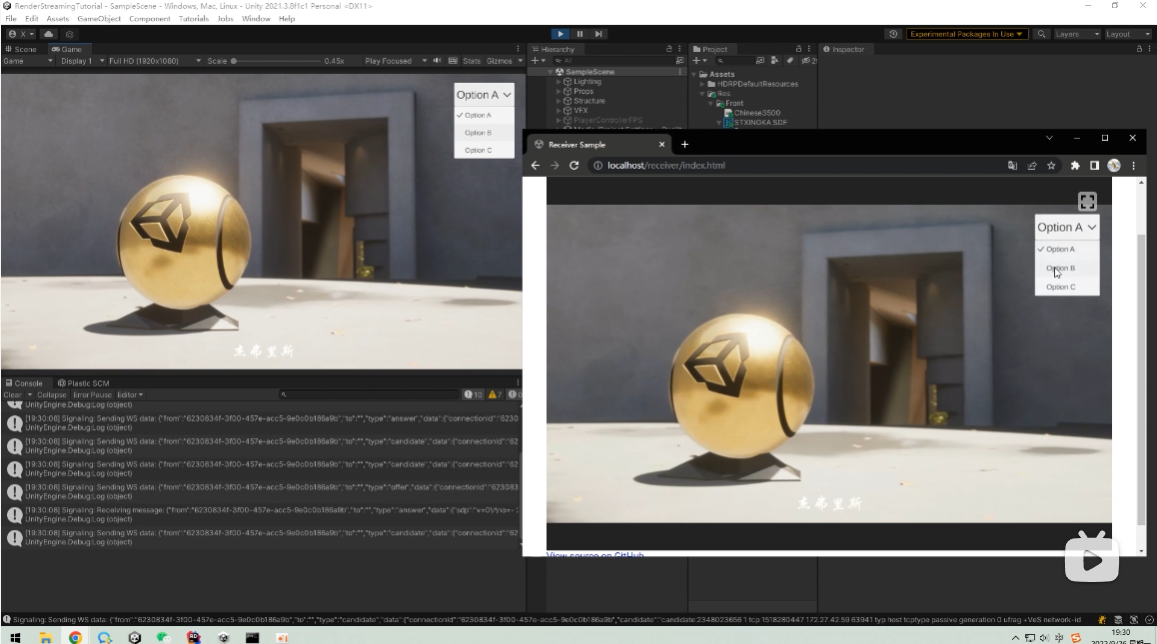
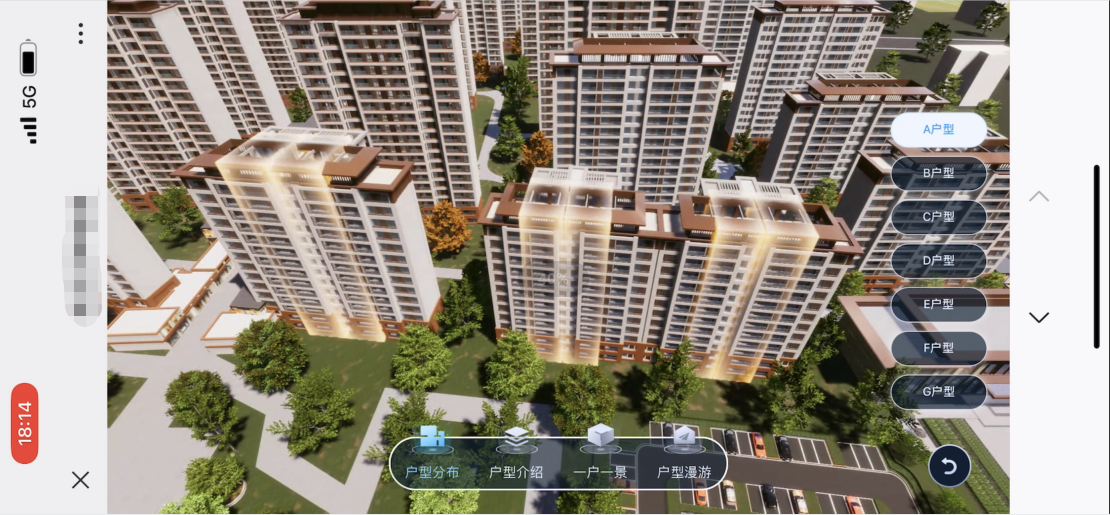
Show results
External network video demonstration
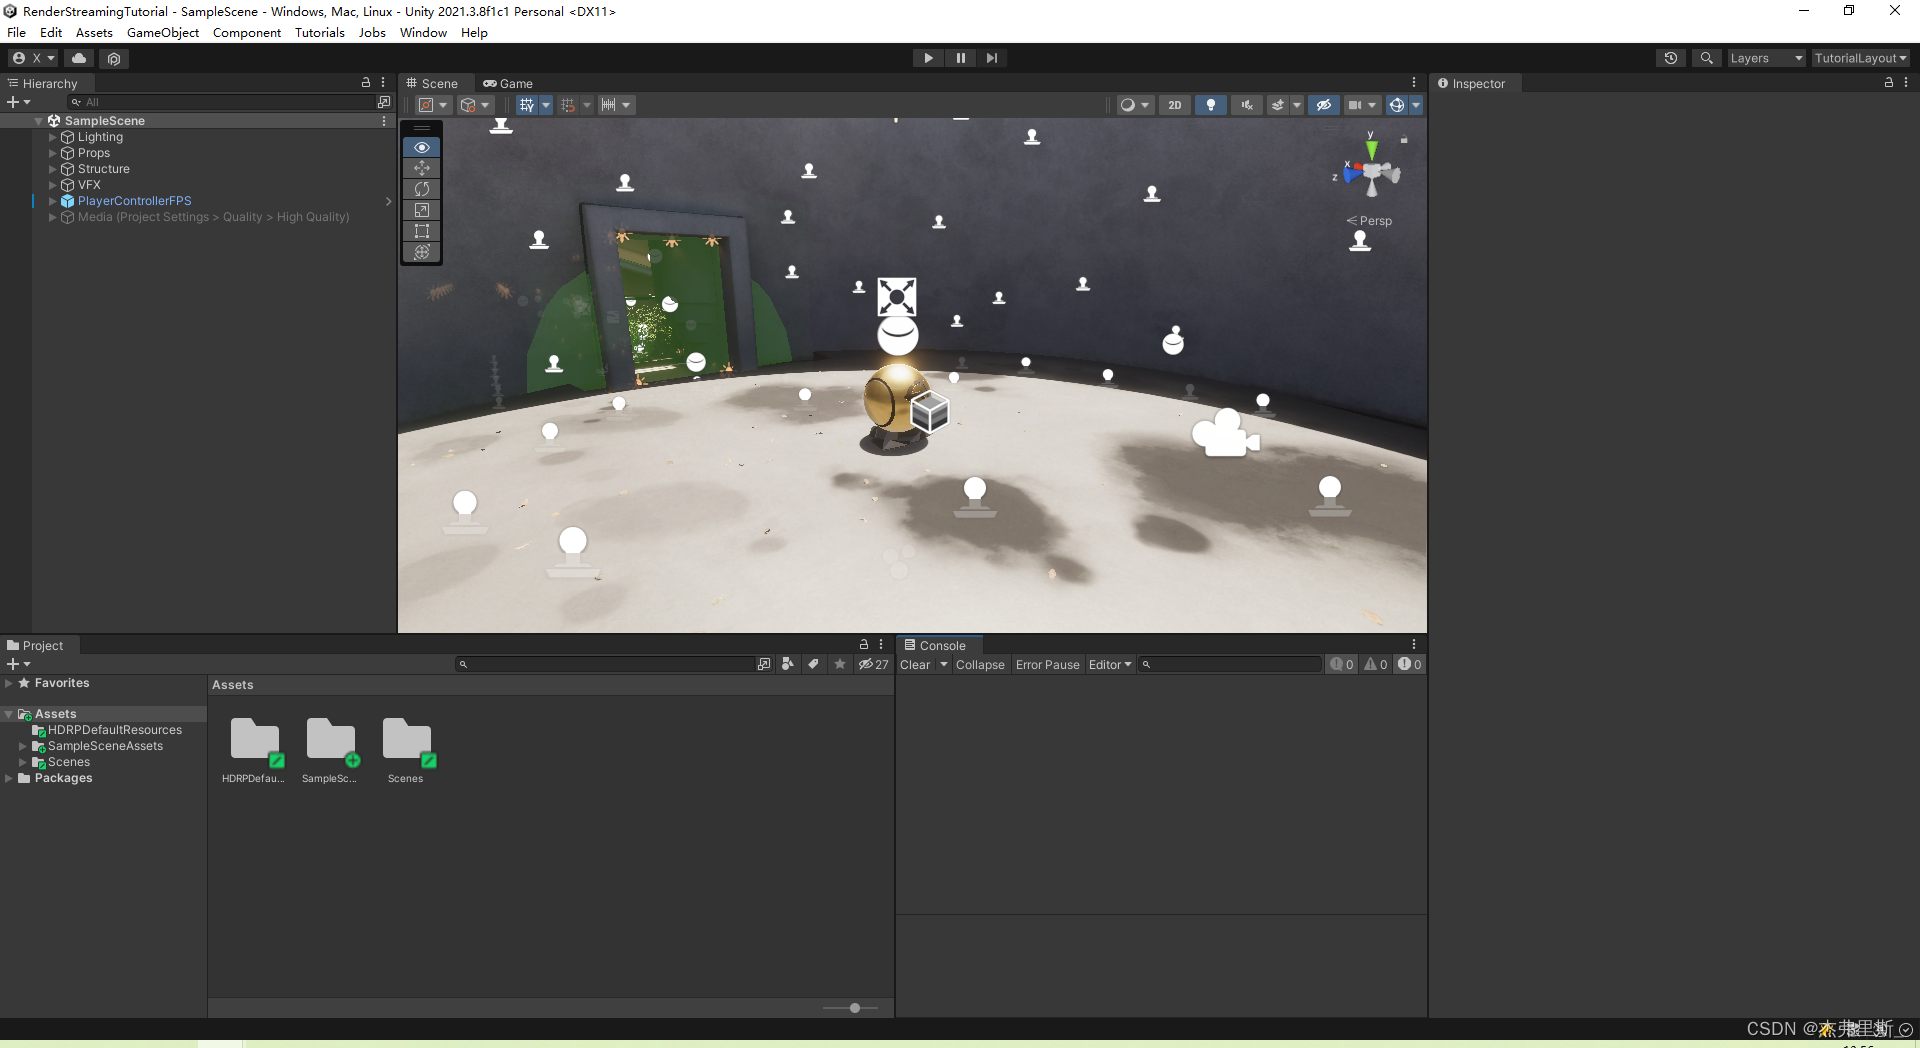
open scene
Use the HDRP sample template as a test scenario
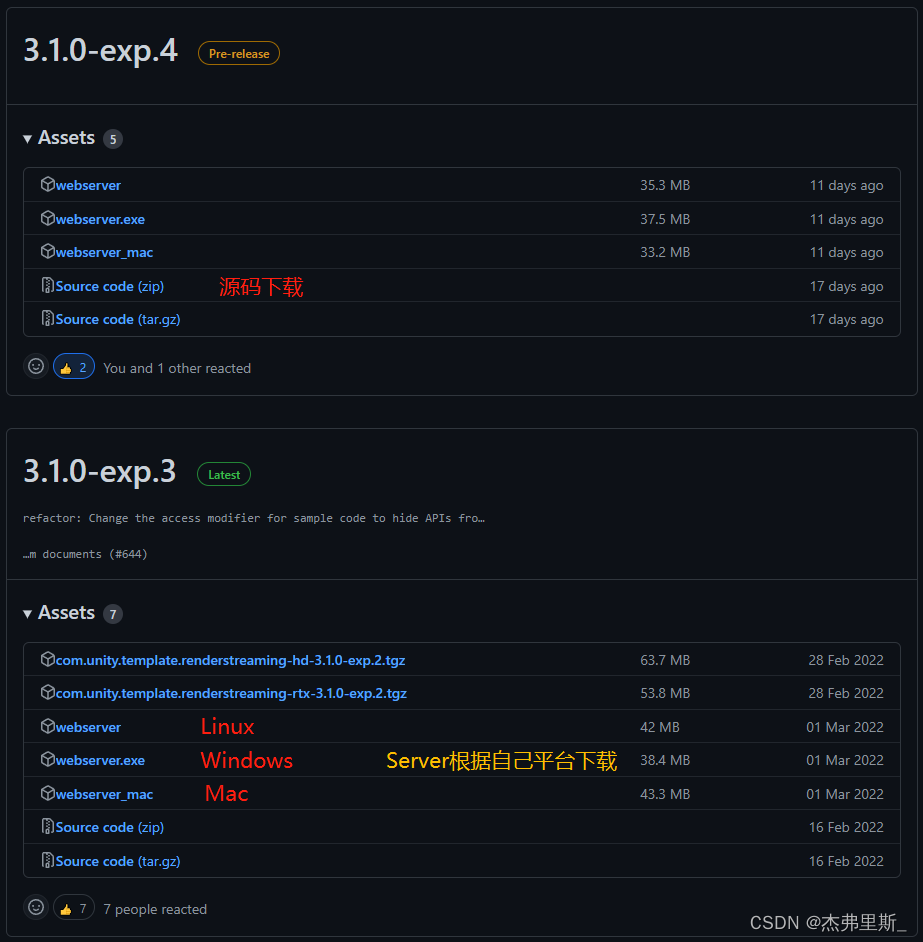
version selection
This RenderStreamingPackage uses3.1.0-exp.4, and there is no official version, but exp.4 has more settings for video stream encoding, frame rate, bit rate, zoom ratio, etc. than exp.3 version. It is also very stable in use, and it is convenient to adjust according to your own project needs.
WebServer uses3.1.0-exp.3, because of the exp.4 version of Server, there is a problem with the web page access path check.
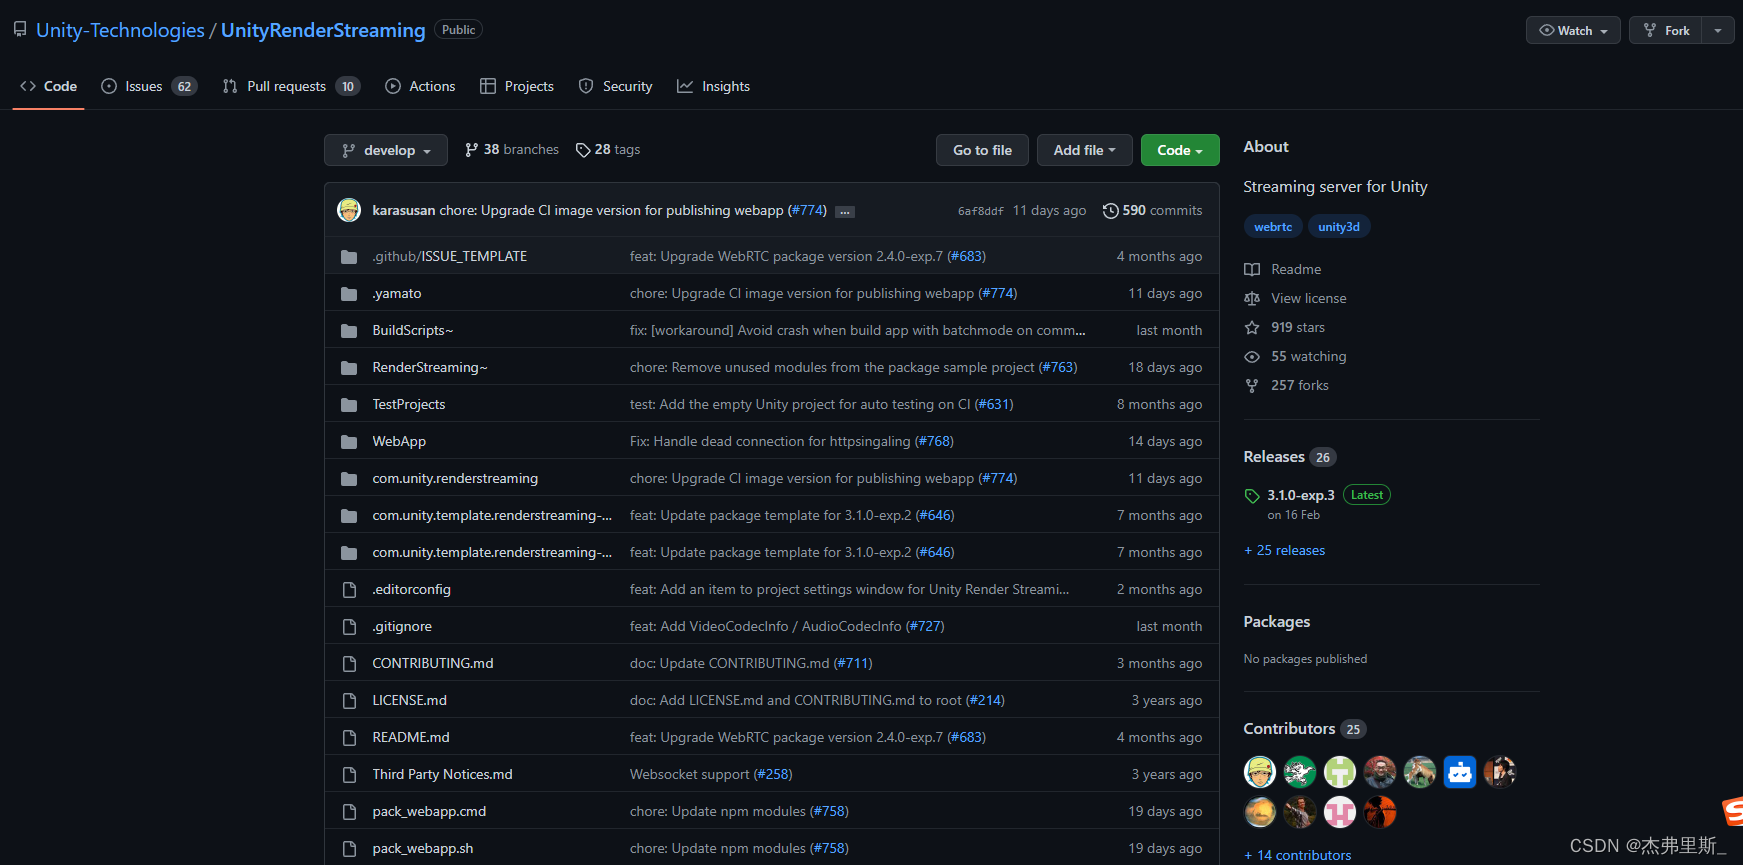
Git address: UnityRenderStreaming
web server
1. Server download, Node.js installation
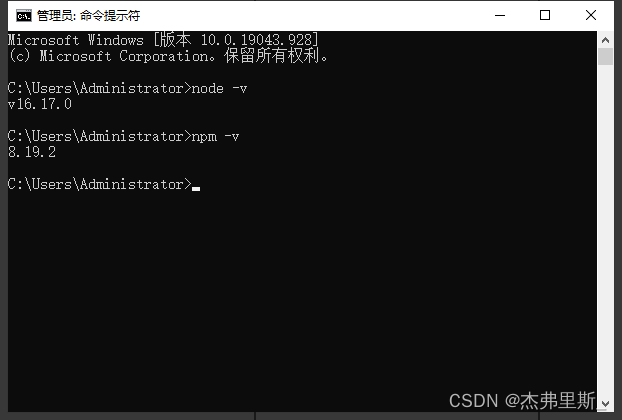
Choose Server according to your own platform, you need to install Node.js to download
and use node -v npm -vto check whether the installation is successful
2. Server start
The Windows startup method is as follows (refer to the official documentation for other platform startup methods )
. Find webserver.exe, enter cmd in the address bar, and press Enter
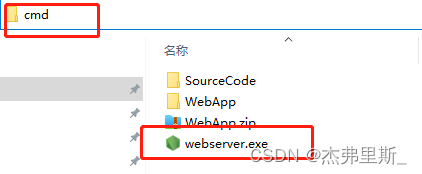
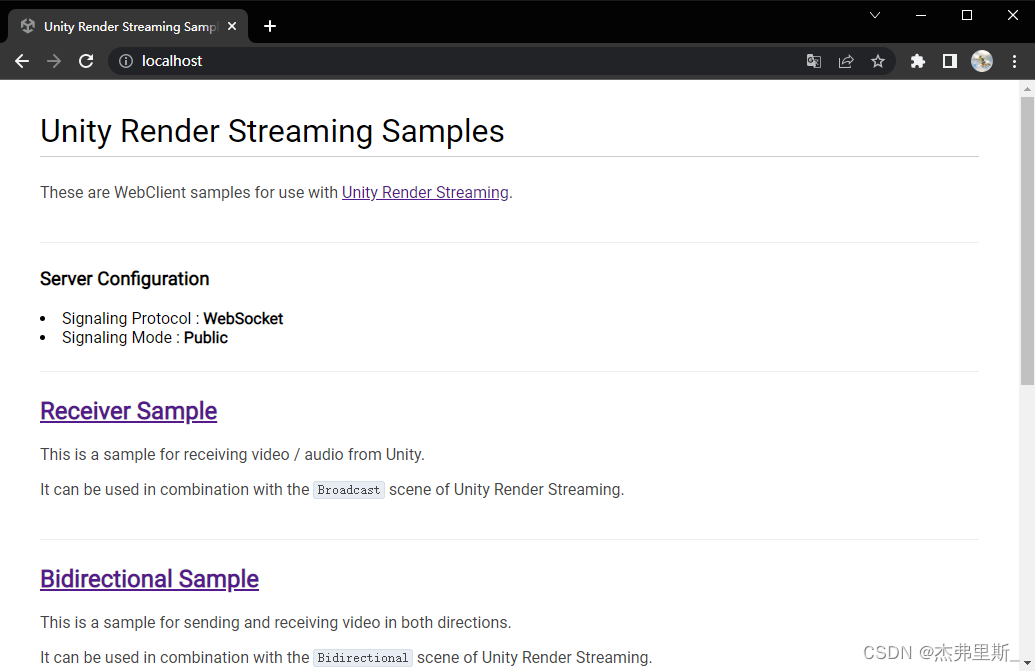
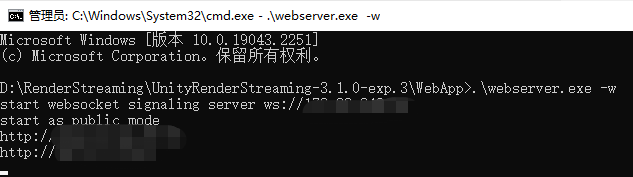
Input .\webserver.exe -w, start with WebSocket
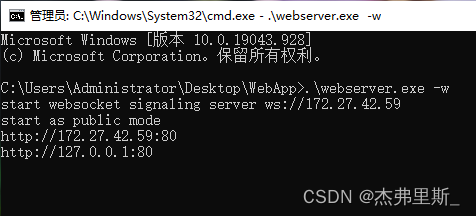
Open the browser, enter the local IP, the following figure is the content after starting with WebSocket
Unity project settings
1. Install Render Streaming
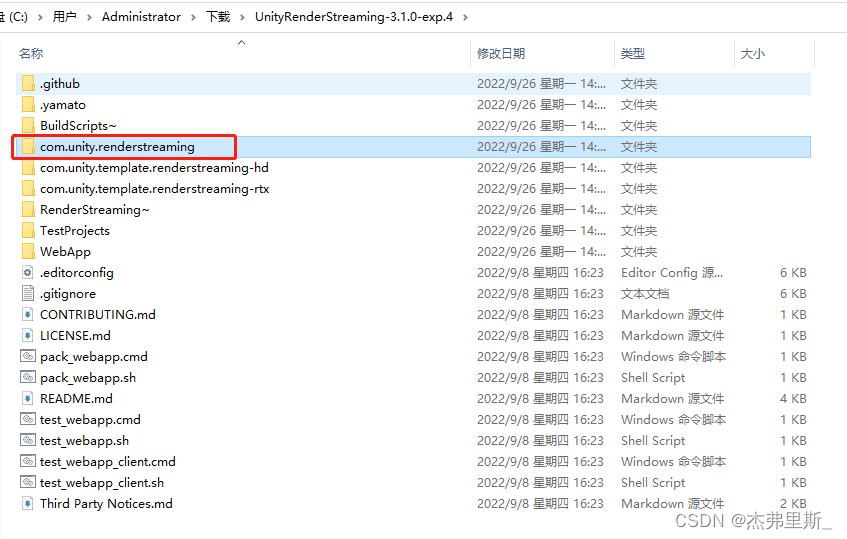
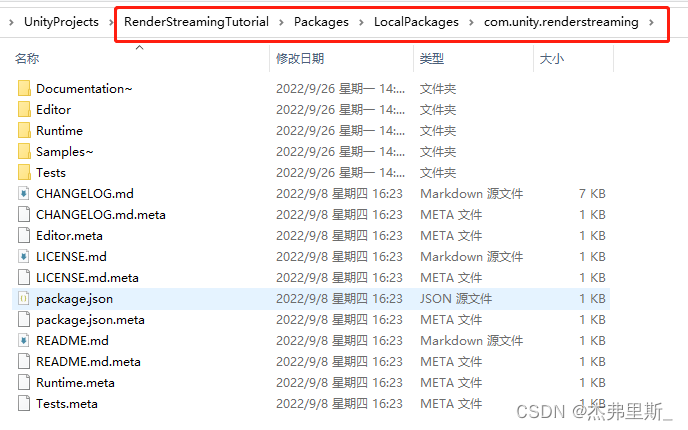
After the source code is decompressed, copy com.unity.renderstreamingthe file, and I put it under the Packages of the sample project, and create a new folder. (Store according to your preference)
Open PackageManager
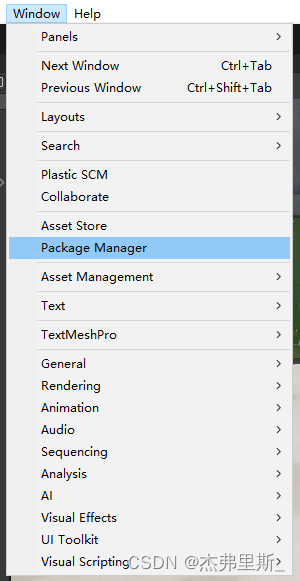
and click + , select Add package from disk
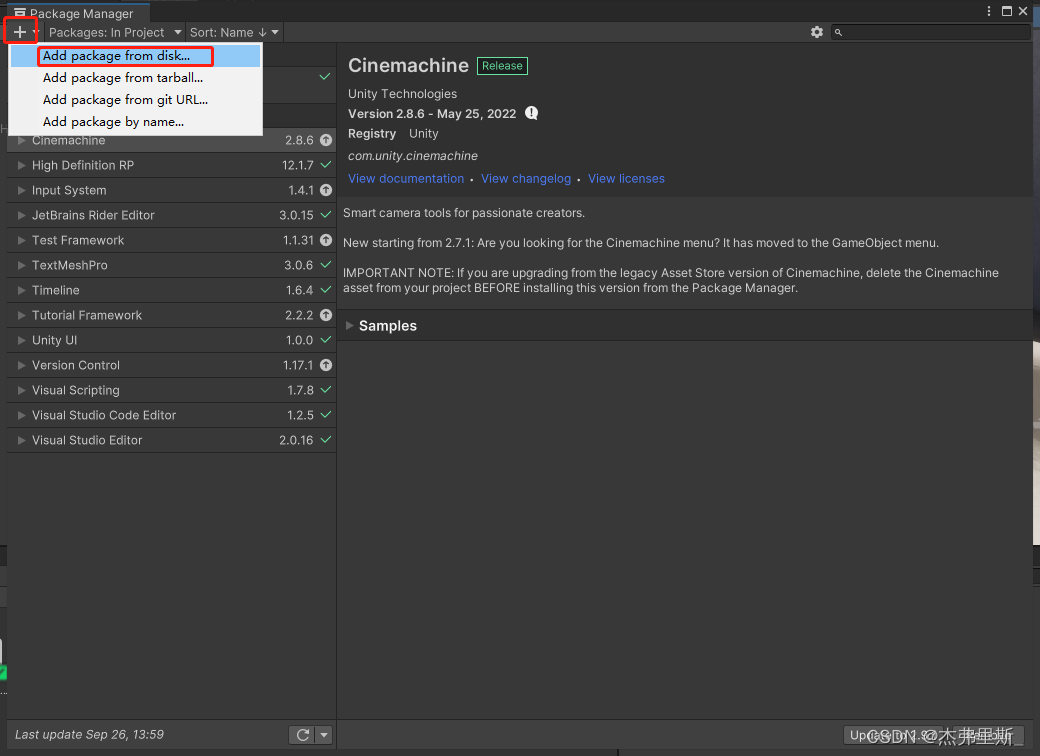
to find the file just now package.json, open it
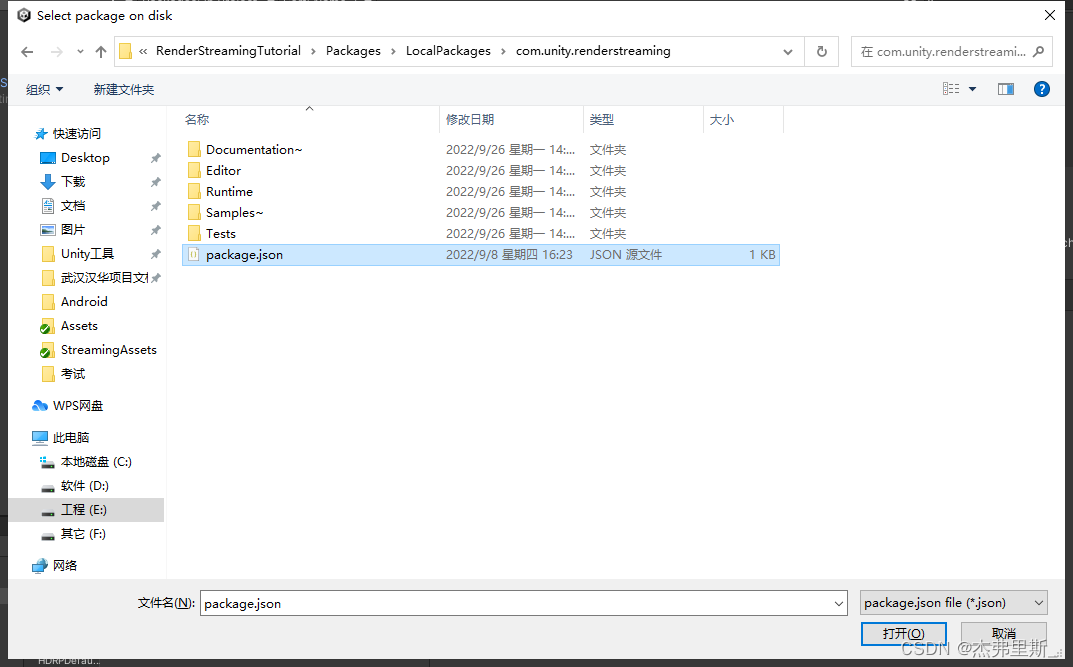
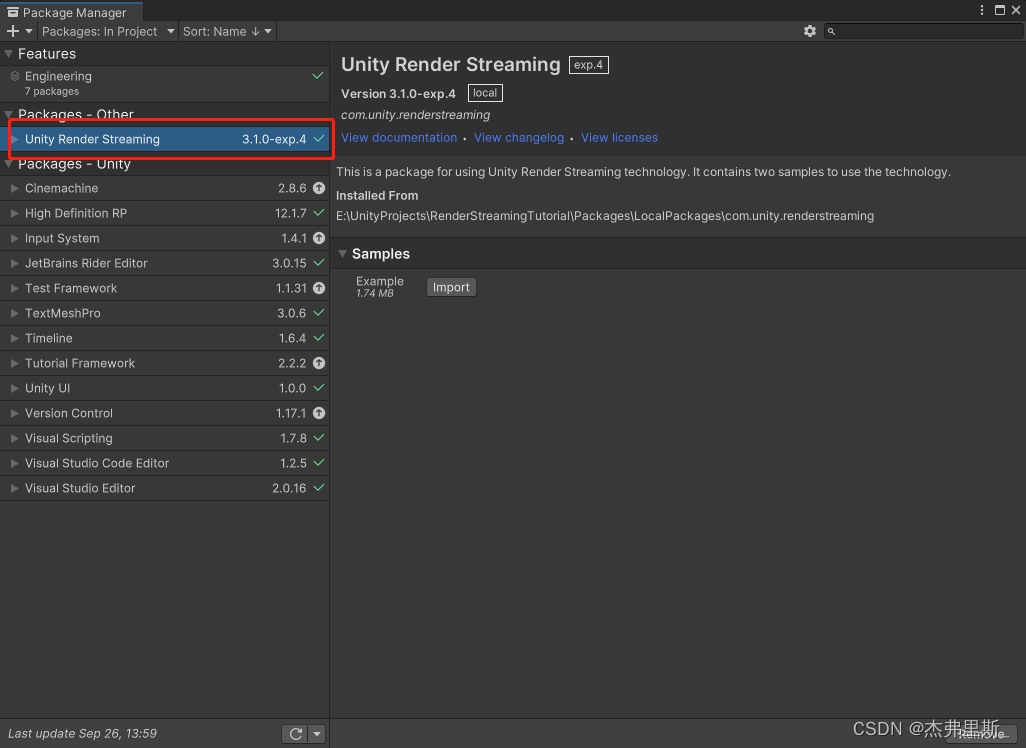
and open it as follows
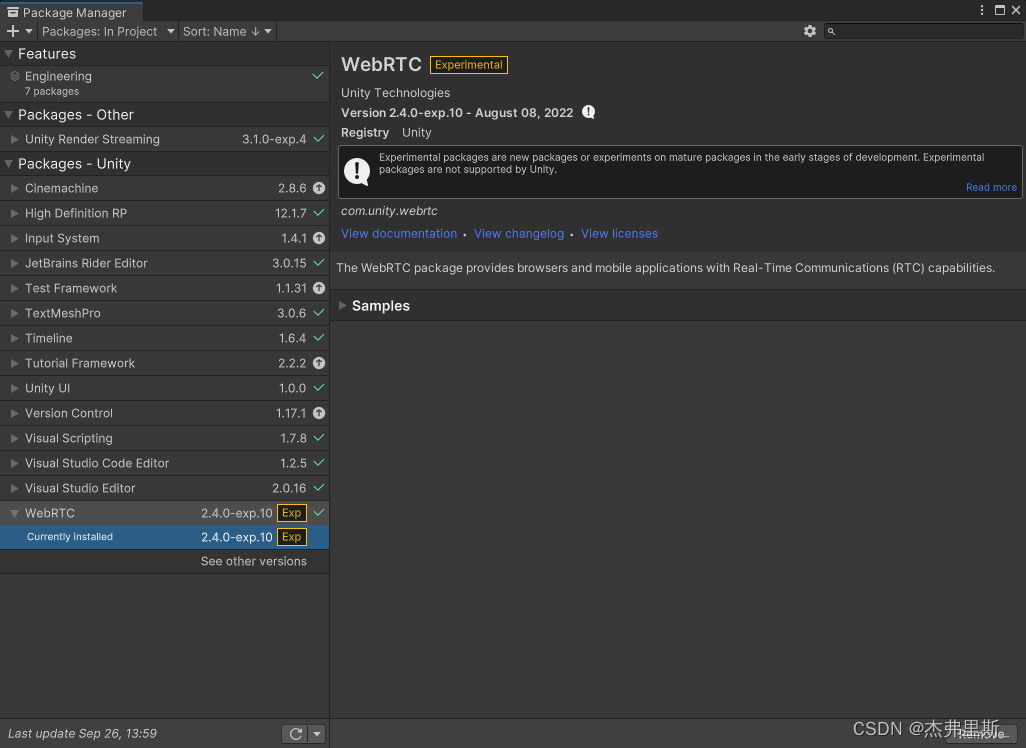
2. Install WebRTC
Select Add package by name
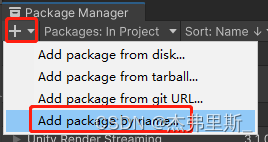
input com.unity.webrtc, click Add
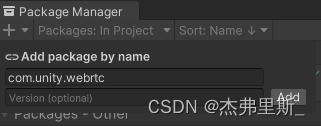
to install as follows:
3. Render Streaming settings
Create an empty object, name it RenderStreaming
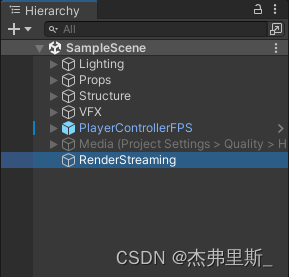
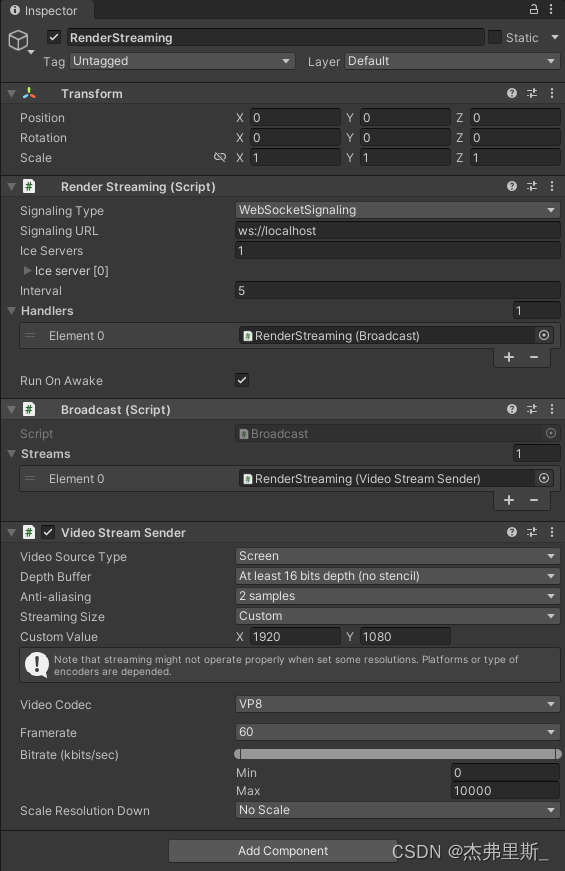
and add RenderStreaming, , Broadcastand VideoStreamSendercomponents.
Modify the parameters as follows:
4. Audio transmission (add according to your needs)
Add AudioStreamSenderthe component above AudioListener, this component must be in an object
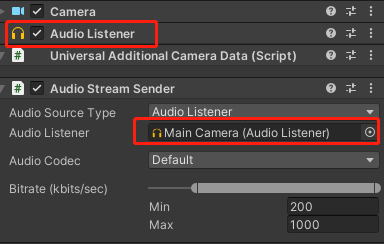
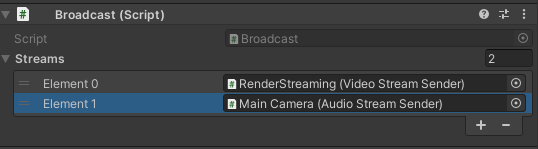
Broadcastcomponent remember to add AudioStreamSenderthe component
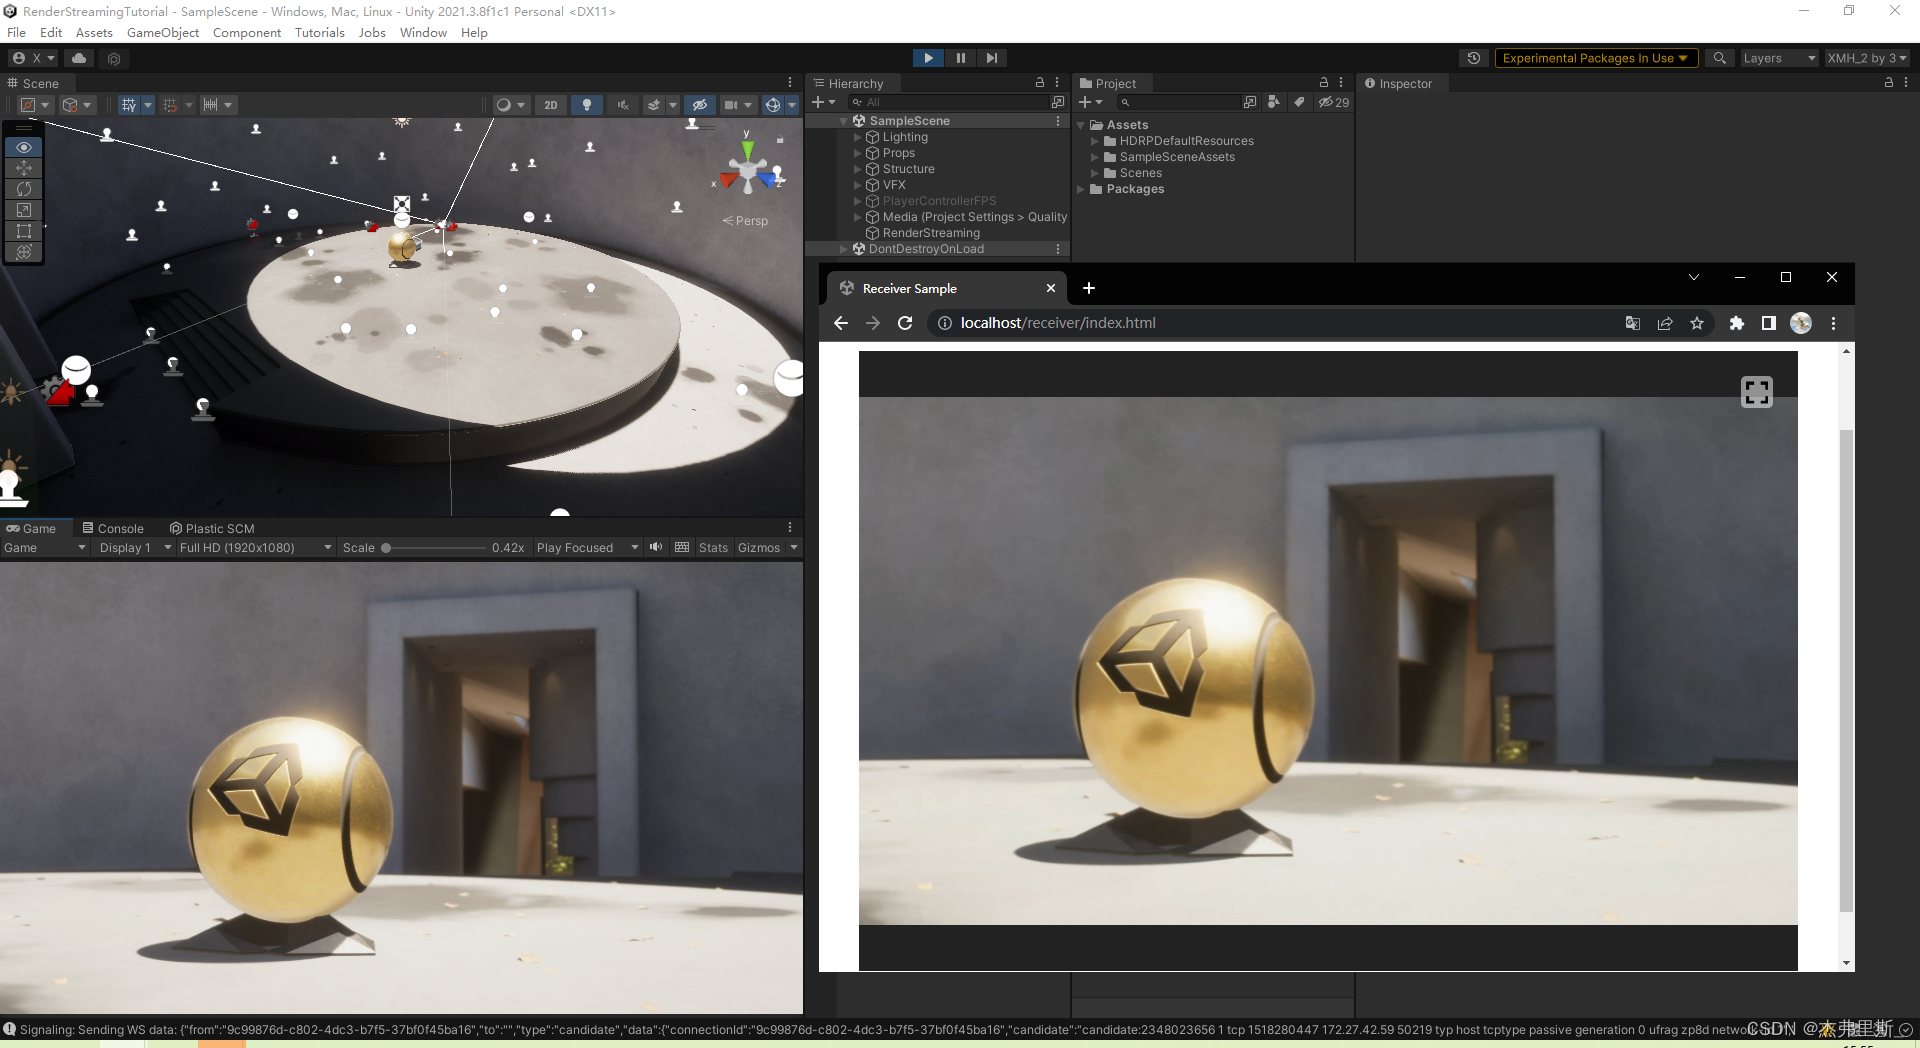
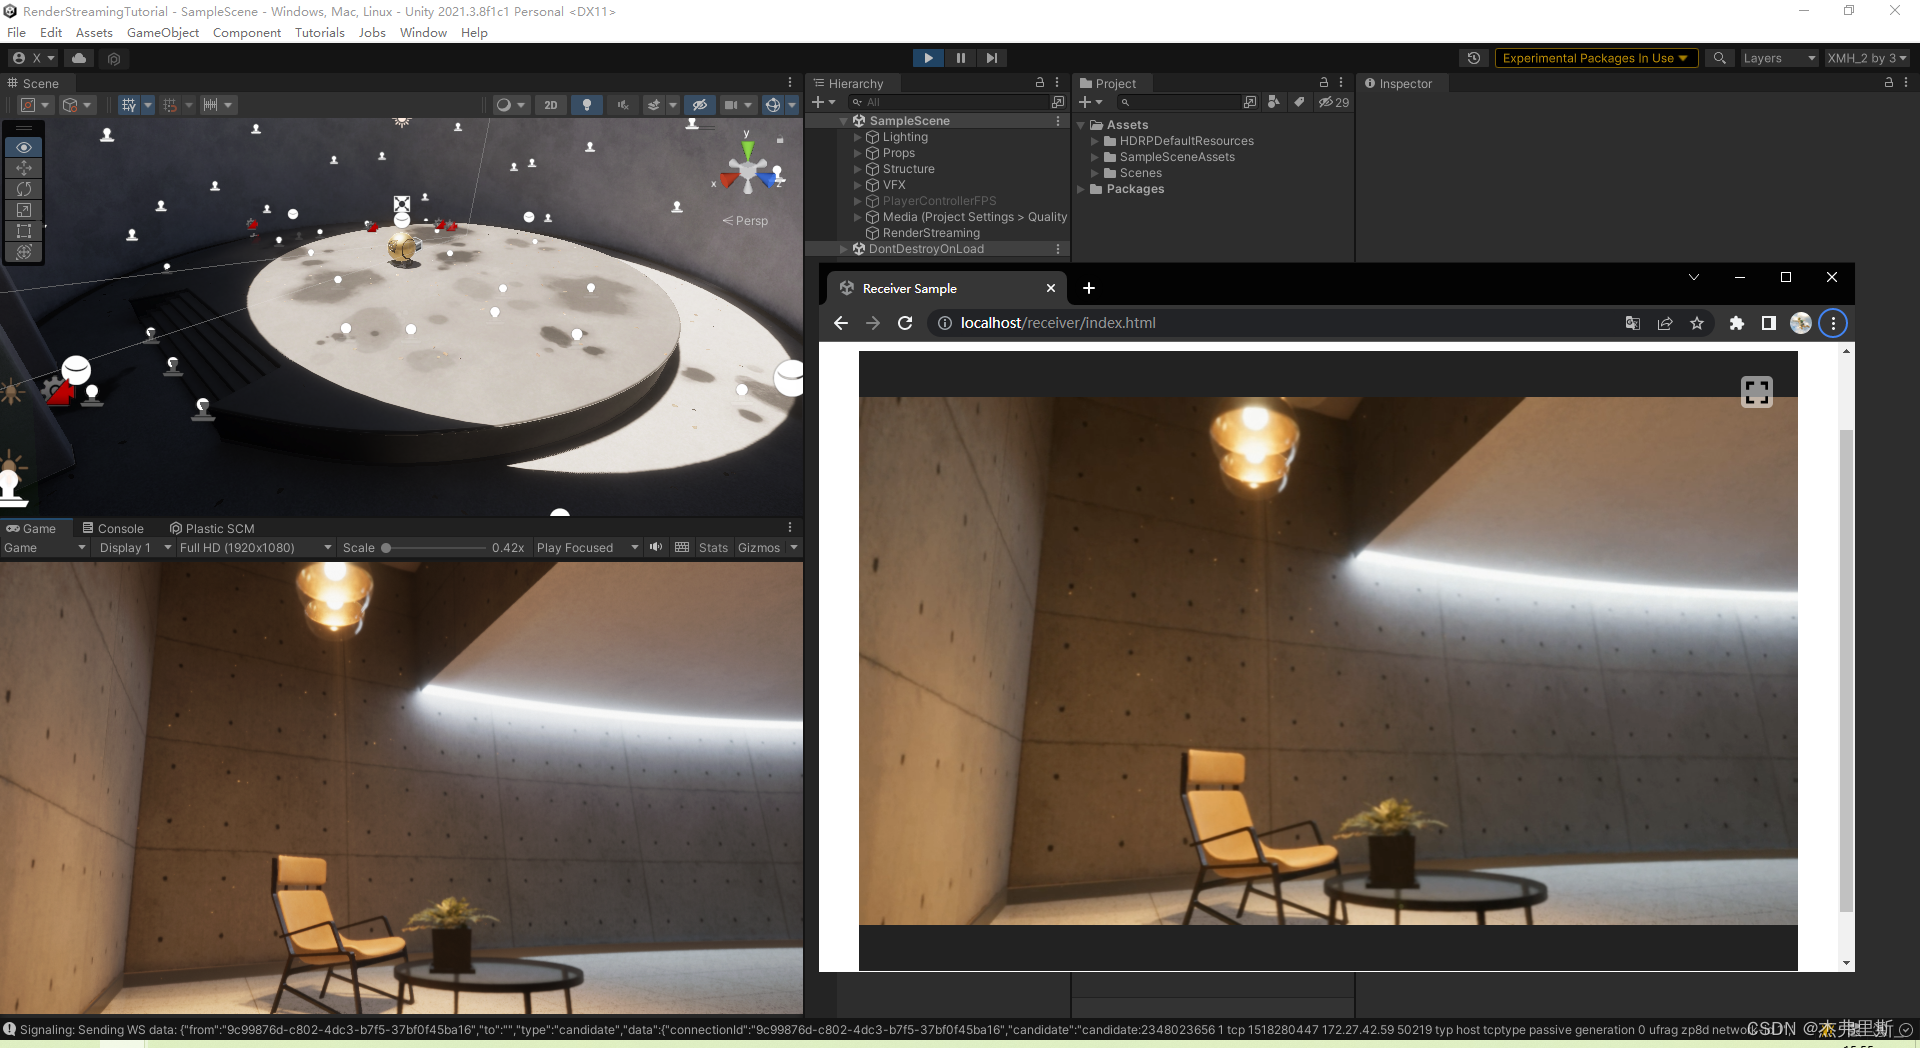
5. Unity starts the test
The effect of selection is as follows, you can adjust the parameters in ReceiverSample
according to your own needsVideoStreamSender
interact
1. Basic interactive project settings
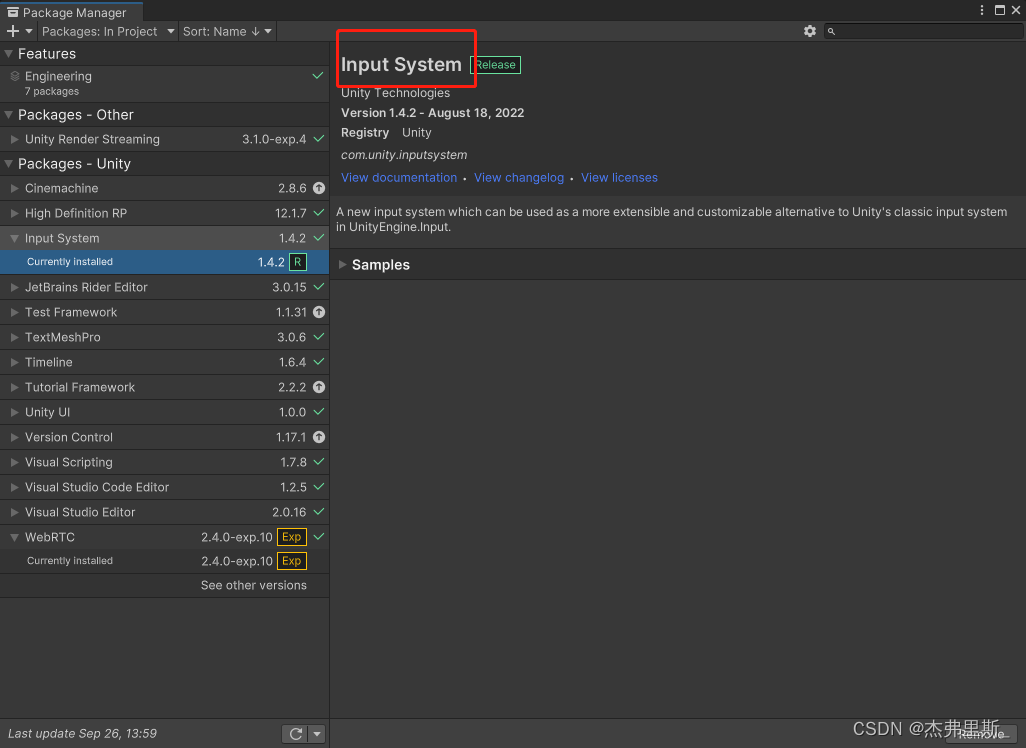
Install InputSystem
and some of the following settings are aimed atUnity2021.2Above version, low version reference link
(InputSystem has been used by default in this HDRP example)
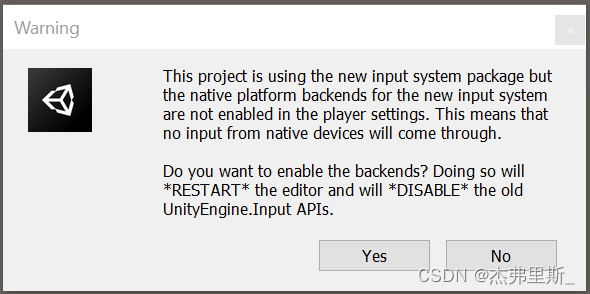
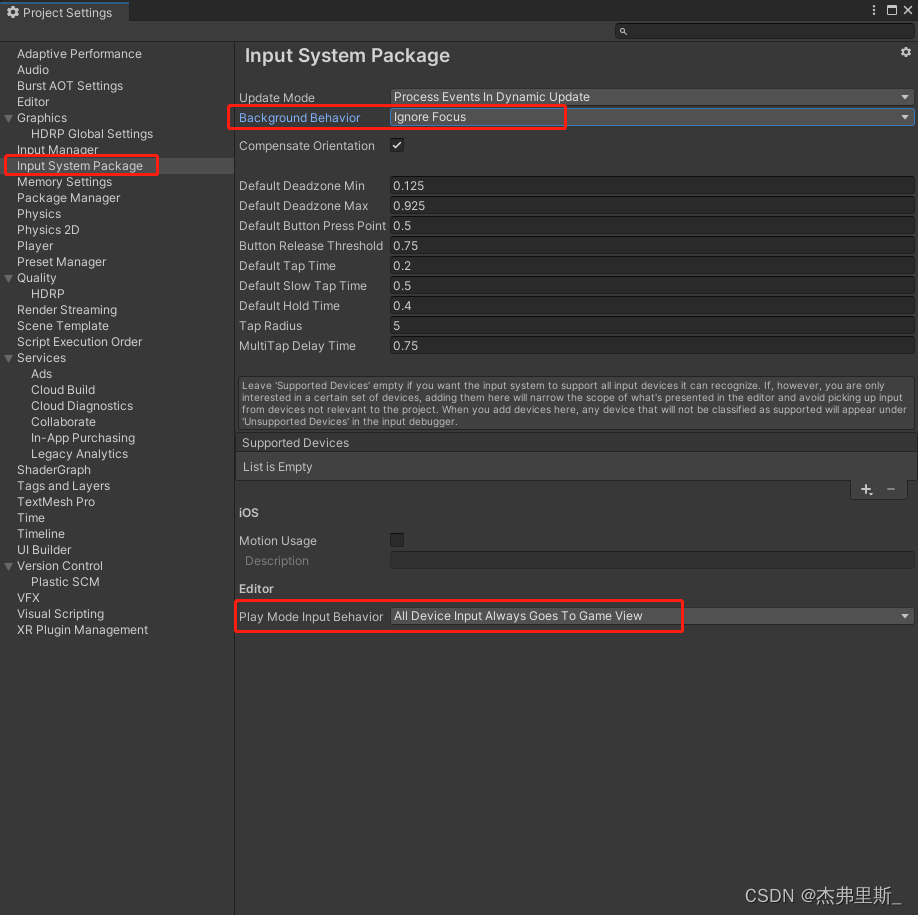
After the pop-up window appears, selectYes, agree to use New Input Sytem or select New or Both Run In Background
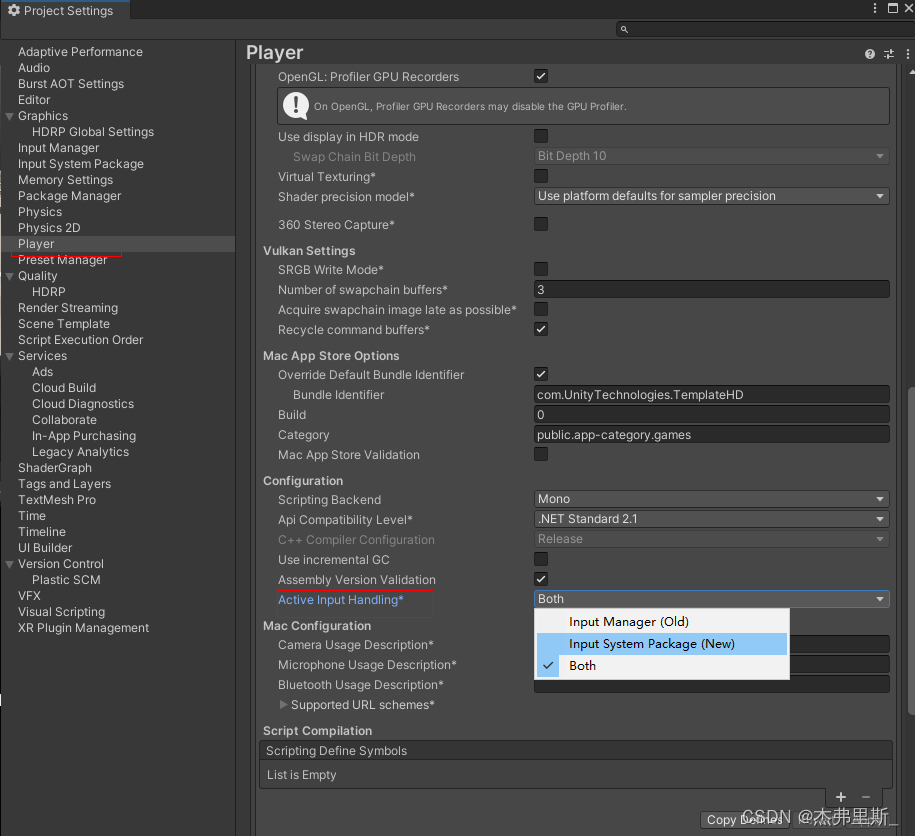
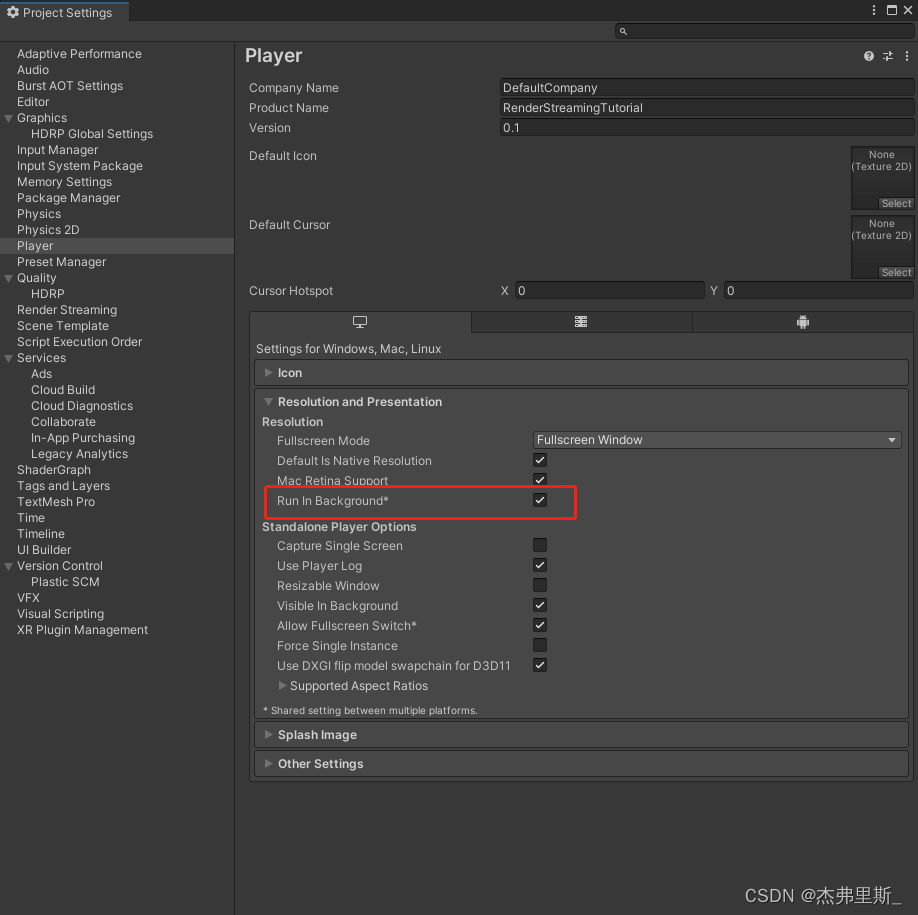
in ProjectSettings/Player/OtherSettings/ActiveInputHanding to open (2021.2) Input System Package setting modification (2021.2)
ProjectSettings/Player/Resolution and Presentation/Run in background
2. Scene interaction settings
Official documentation reference
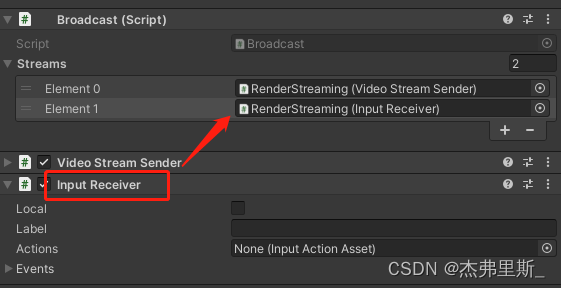
Add InputReceivercomponents and add Broadcastto
3. Keyboard and mouse interaction
Open after creating InputActions, operation: Create/InputActions
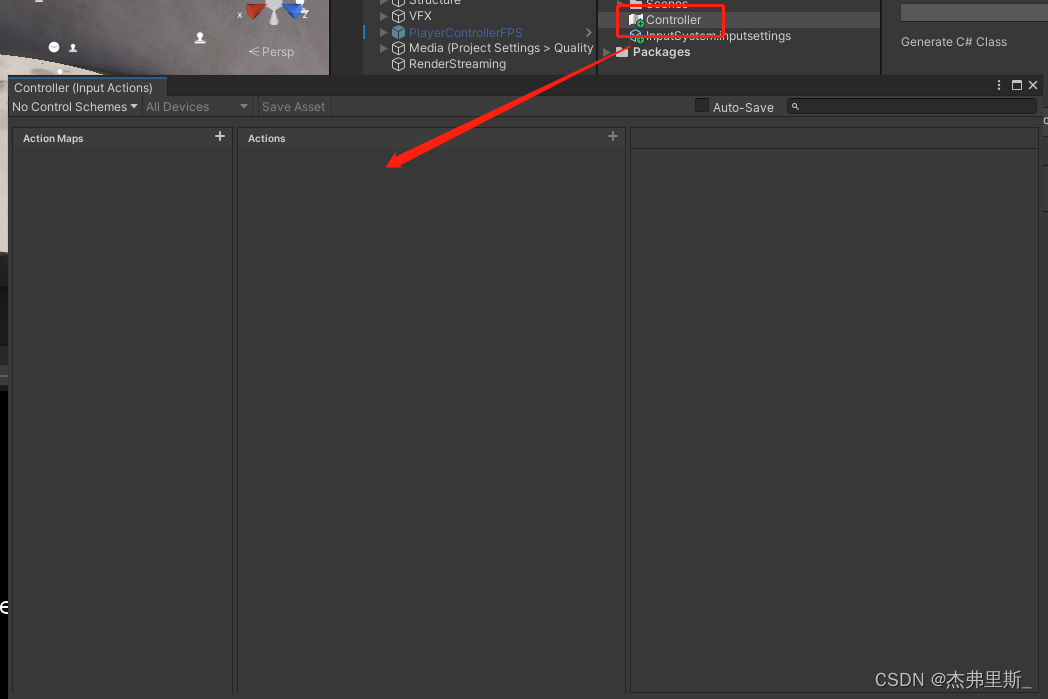
Configure Actions according to your own project requirements
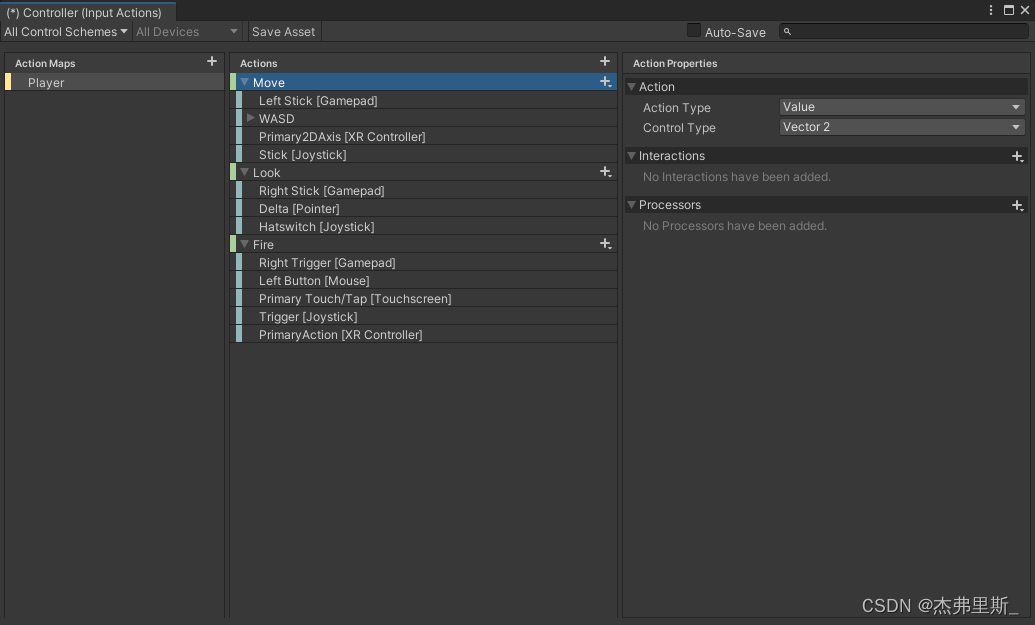
Drag the configured InputActions file into it InputReceiver/Actions, expand Events, you can see the events corresponding to the configured Actions, and bind them according to your needs

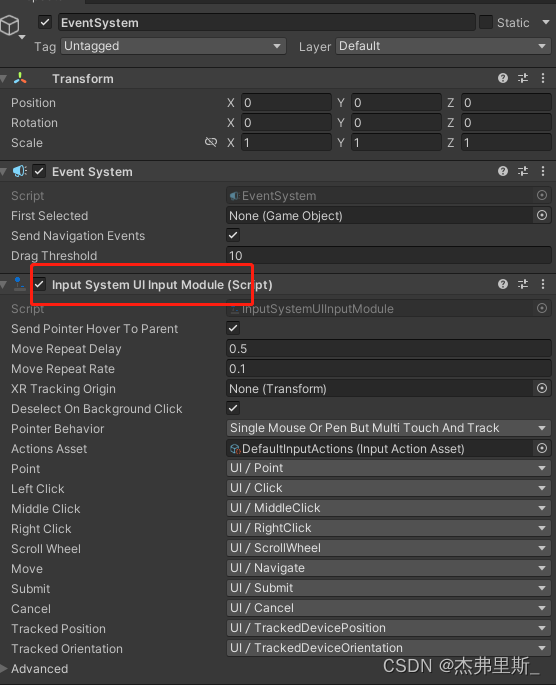
4. UI interaction
EventSystem uses InputSystemUIInputModule
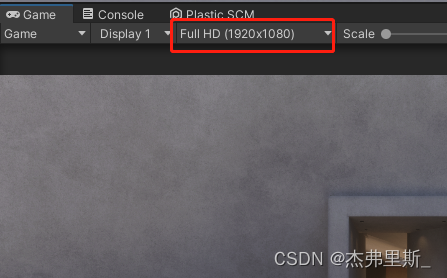
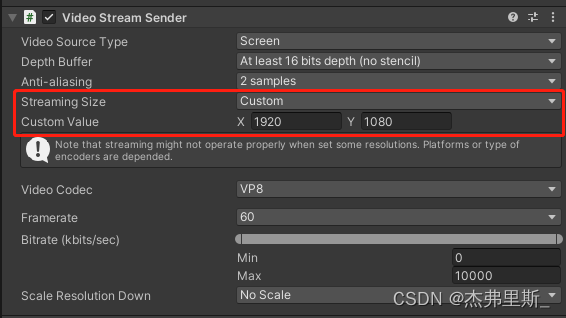
the display resolution to be consistent VideoStreamSenderwith that StreamingSize, otherwise the recognition point will be shifted
Extranet server deployment
For most WebRTC applications, the server needs to relay traffic between peers, since direct sockets are usually not possible between clients (unless the applications are on the same local network). A common solution to this problem is to use a TURN server . The term denotes traversal using relay NAT, a protocol for relaying network traffic.
Refer to the TURN server settings in the Unity documentation
The port used by the TURN server needs to be public, and the maximum and minimum values can be set
| protocol | port |
|---|---|
| TCP | 32355-65535, 3478-3479 |
| UDP | 32355-65535, 3478-3479 |
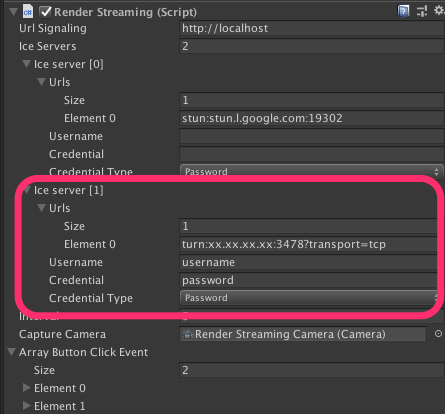
config.jsChange the file in the web sideconfig.iceServers
config.iceServers = [{


    urls: ['stun:stun.l.google.com:19302']
    }, {


    urls: ['turn:xx.xx.xx.xx:3478?transport=tcp'],
    username: 'username',
    credential: 'password'
  }
];
Modifying RenderStreamingcomponents in UnityIce Server
Custom WebServer
The following is how to make your own WebServer, see the official documentation for more details
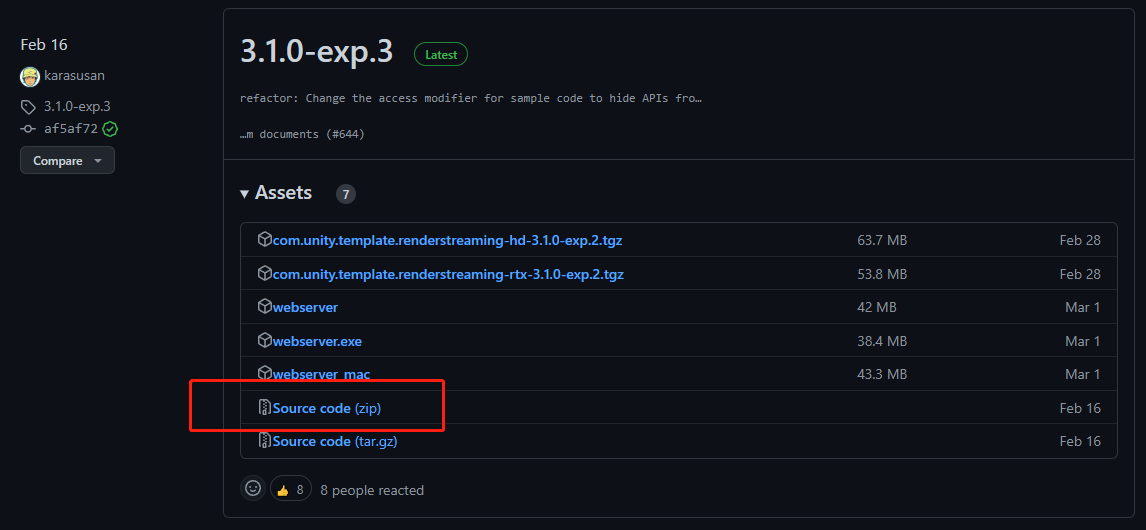
1. Download the source code of exp.3
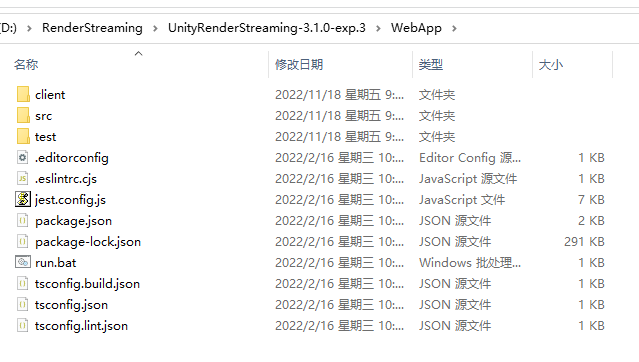
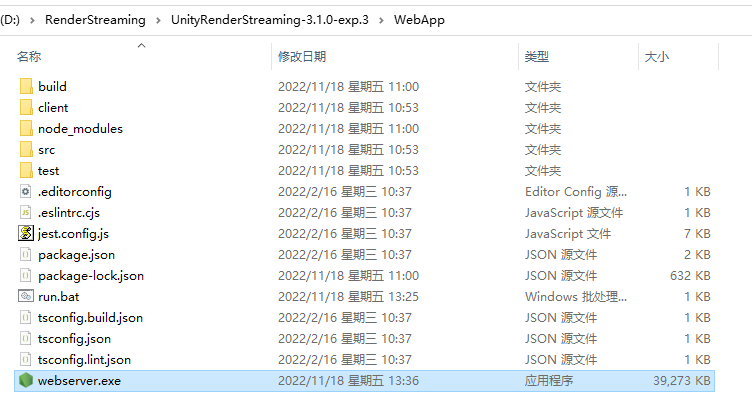
2. Find the WebApp after decompression 3.
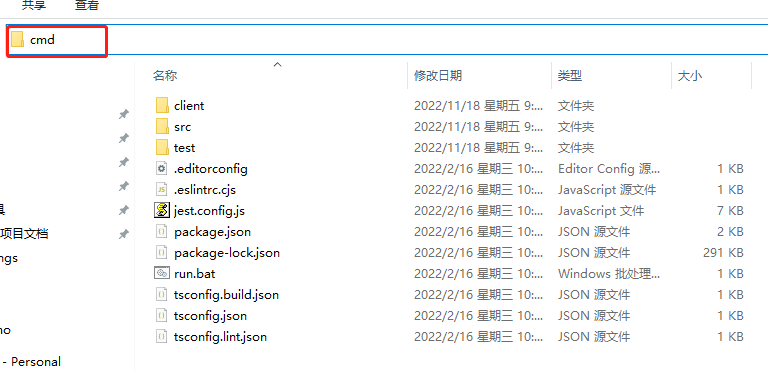
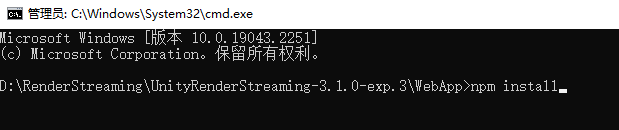
Enter cmd in the address bar
4. Input npm installor npm iinstall dependencies
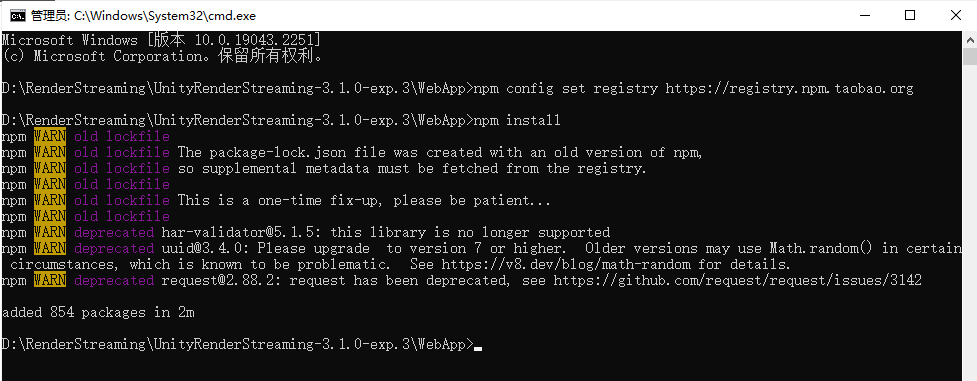
If the installation is too slow or fails due to timeout, You can enter it first
npm config set registry https://registry.npm.taobao.org
to replace the npm installation image source with a domestic one.
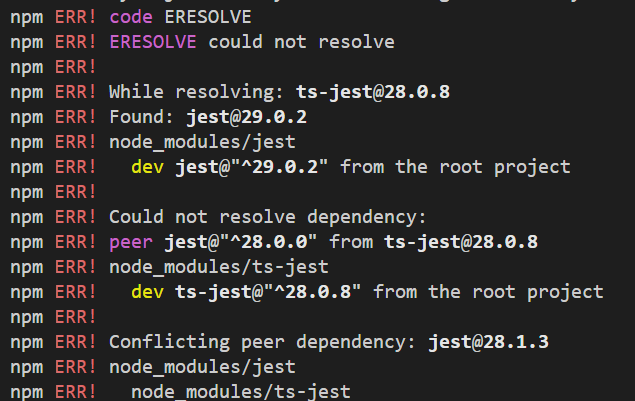
If the following errors occur, you can enter it npm config set legacy-peer-deps true, and then enter it again npm installor npm iinstall dependencies**
5. Build Server, enter npm run build

6. Start Server, enternpm run start -- -w
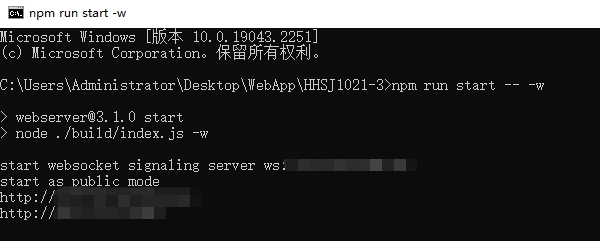
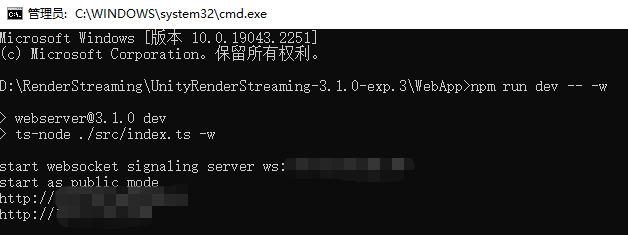
If the startup is abnormal, as shown in the figure below, use npm run dev -- -wStart
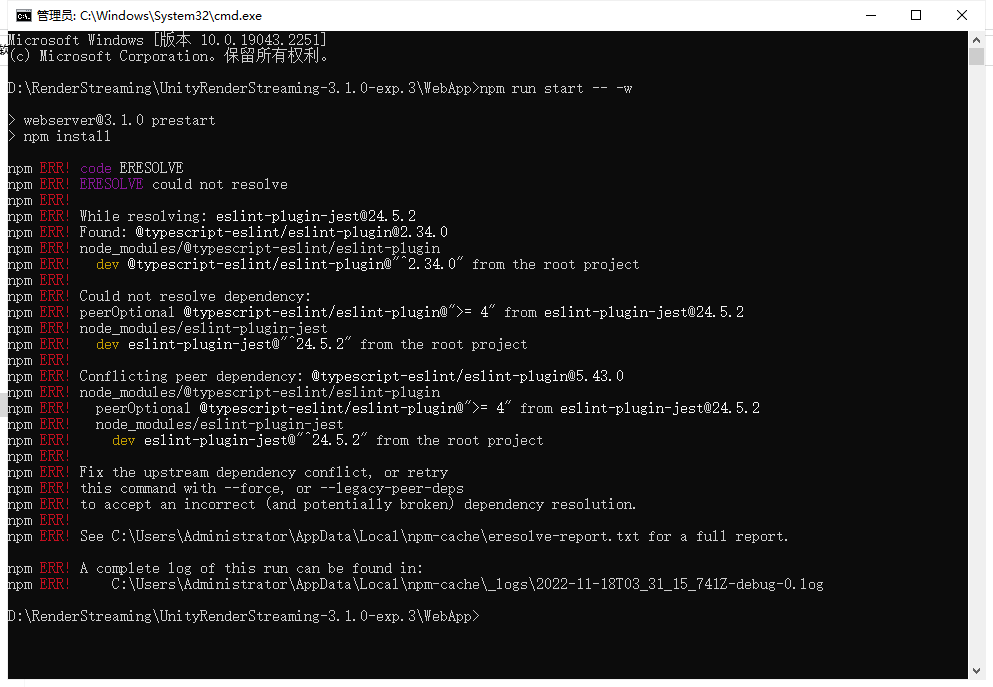
to start as follows. It is not clear why the above situation occurs. If you know the reason, please tell me, thank you.
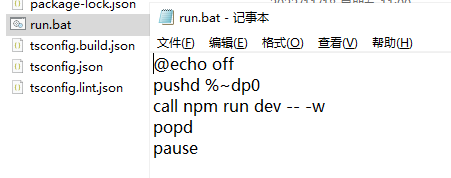
7. Make a startup shortcut.
In order to facilitate the quick startup in the future, you can make the following files.
8. Pack,npm run pack
wait for the progress to be completed, and pack it into an exe
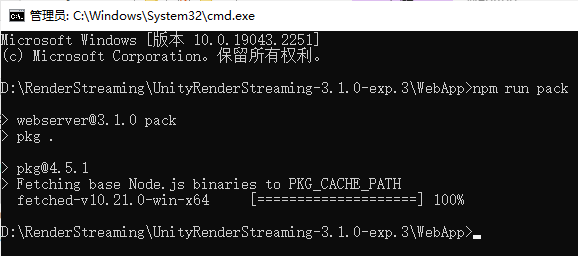
startup method as above.\webserver.exe -w
9. Modify web files according to your needs

Web and Unity send custom messages to each other
WebRTCThe function in RTCDataChanneluse to send a message Send, use the function to receive a messageOnMessage
1. Unity sends a message to the Web
The script created in the Unity project is as follows, using the objects inputReceiverin theChannelSend
using Unity.RenderStreaming;
using UnityEngine;

public class RenderStreamingManager : MonoBehaviour
{


    private InputReceiver inputReceiver;

    private void Awake()
    {


        inputReceiver = transform.GetComponent<InputReceiver>();
    }

    public void SendMsg(string msg)
    {


        inputReceiver.Channel.Send(msg);
    }

    private void Update()
    {


        if (Input.GetKeyDown(KeyCode.P))
        {


            SendMsg("Send Msg to web");
        }
    }
}
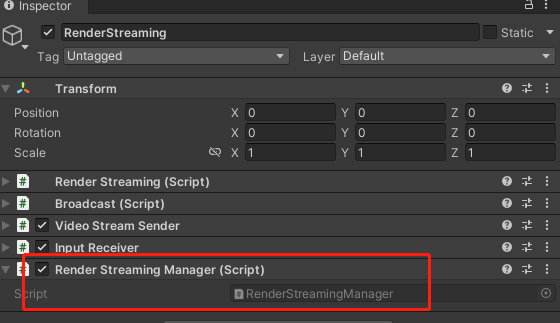
Remember to add it to the project
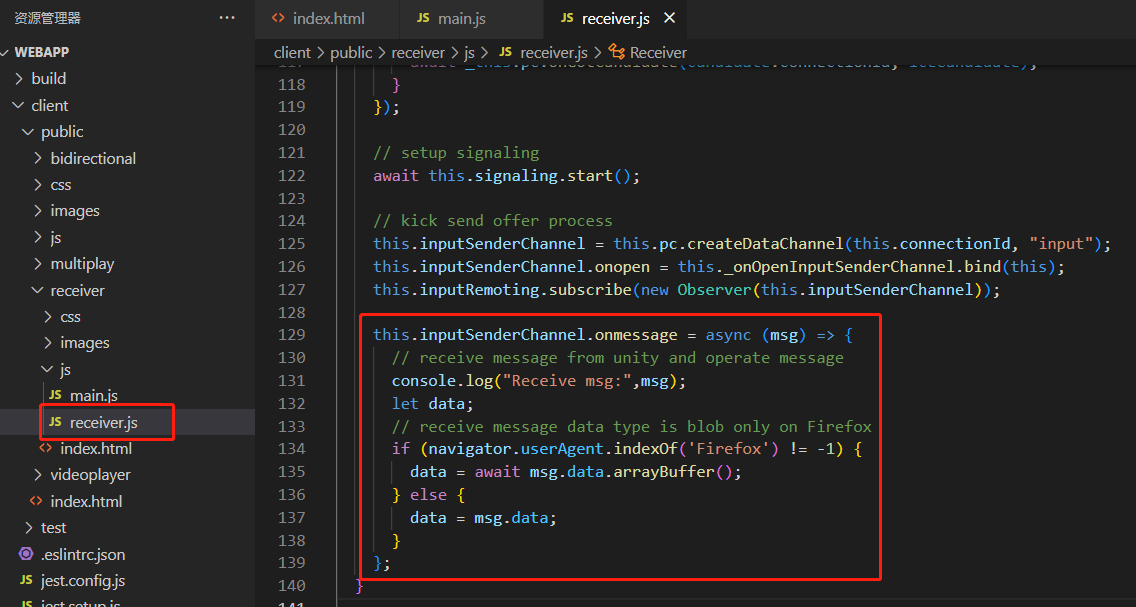
Web to receive as follows
Find the object receiver.jsin the file and use the received information The content of the received message is as follows, the string will be in datainputSenderChannelonmessage

2. The web sends a message to Unity
Use the send function to send messages in the web
this.inputSenderChannel.send("msg to unity");
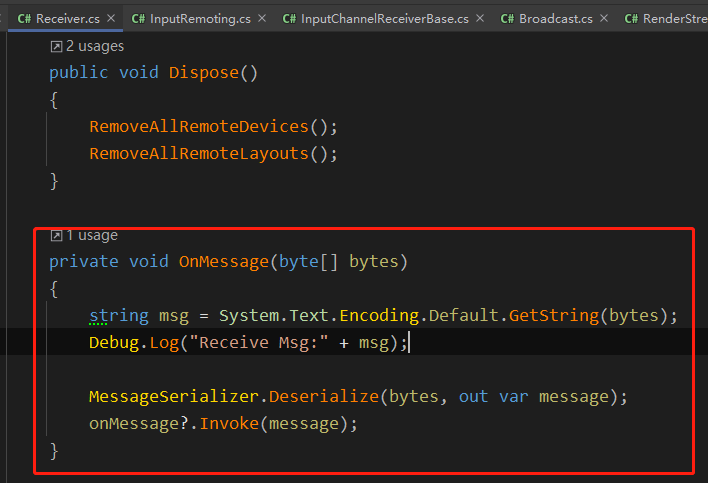
In OnMessage in Unity Receiver.cs, the message sent by the web is received through RTCDataChannel
How Enterprise Projects Are Applied
1. The choice between clear and smooth external network access
Under the premise that the server bandwidth allows, improve the transmission quality as much as possible, as follows, which are my settings in the project
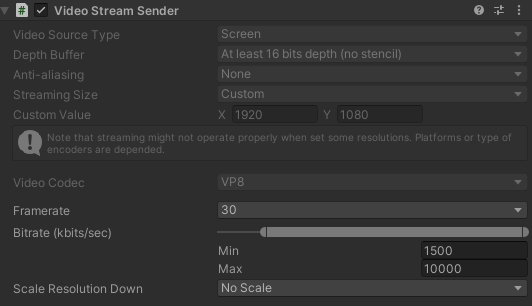
You can adjust it according to your own bandwidth DepathBuffer,StreamingSize,Framerate,Bitrate,ScaleResolution.
You can also obtain the VideoStreamSender component and modify the corresponding parameters during runtime to facilitate post-release testing.
VideoStreamSender videoStreamSender = transform.GetComponent<VideoStreamSender>();
videoStreamSender.SetTextureSize(new Vector2Int(gameConfig.RSResolutionWidth,gameConfig.RSResolutionHeight));
videoStreamSender.SetFrameRate(gameConfig.RSFrameRate);
videoStreamSender.SetScaleResolutionDown(gameConfig.RSScale);
videoStreamSender.SetBitrate((uint)gameConfig.RSMinBitRate,(uint)gameConfig.RSMaxBitRate);
2. Web button to replace the button operation of Unity
Due to the current limitation of resolution changes, Unity buttons often cannot be clicked correctly, so Web students make corresponding buttons, and send messages to Unity through the Web to respond to corresponding button operations.
My side is to configure the id for all buttons, the web sends the button id, Unity traverses the configuration table after receiving it, and performs Invoke
    private void OnClickButton(int elementId)
    {


        // 在配置表中根据id,获取UIName,FunctionName,Para
        List<UIMatchFuncModel> uiMatchFuncModels = UniversalConfig.Instance.GetUIMatchModels();
        foreach (var item in uiMatchFuncModels.Where(item => item.id == elementId))
        {


            ExecuteFunction(item);
            break;
        }
    }
    private void ExecuteFunction(UIMatchFuncModel matchFuncModel)
    {


        UIPanel uiPanel = UIKit.GetPanel(matchFuncModel.uiName);
        if (uiPanel == null)
        {


            uiPanel = UIKit.OpenPanel(matchFuncModel.uiName);
        }
        uiPanel.Invoke(matchFuncModel.functionName,0);
    }
3. Resolution synchronization, refer to the resolution synchronization method in iOS and Android below
Match different device resolutions, obtain the current device resolution through the web, and send a device width and height message to Unity after the connection is successful, and reset the output resolution in Unity to keep the web device fully displayed.
public void ChangeScreenSize(int width,int height)
{


	videoStreamSender.SetTextureSize(new Vector2Int(width,height));
}
4. Precautions when accessing the default vertical screen on the mobile phone and displaying the horizontal screen
Because the vertical screen display screen on the mobile phone is too small, it usually displays the horizontal screen content in the vertical screen state. Therefore:
1. When setting the resolution mentioned in the previous point, you need to pay attention to whether the device on the web side is a horizontal screen or a vertical screen;
2. Project If there is a sliding operation in , you need to pay attention to reverse the operation according to the horizontal and vertical screens.
5. Detect whether the Unity side is disconnected from the service
In the project, the service will be disconnected every half hour to one hour, so heartbeat detection is added, and the reconnection operation is
as follows, ISignalingadd inOnHeartBeatHandler
using Unity.WebRTC;

namespace Unity.RenderStreaming.Signaling
{


    public delegate void OnStartHandler(ISignaling signaling);
    public delegate void OnConnectHandler(ISignaling signaling, string connectionId, bool polite);
    public delegate void OnDisconnectHandler(ISignaling signaling, string connectionId);
    public delegate void OnOfferHandler(ISignaling signaling, DescData e);
    public delegate void OnAnswerHandler(ISignaling signaling, DescData e);
    public delegate void OnIceCandidateHandler(ISignaling signaling, CandidateData e);
    // add
    public delegate void OnHeartBeatHandler(ISignaling signaling);

    public interface ISignaling
    {


        void Start();
        void Stop();

        event OnStartHandler OnStart;
        event OnConnectHandler OnCreateConnection;
        event OnDisconnectHandler OnDestroyConnection;
        event OnOfferHandler OnOffer;
        event OnAnswerHandler OnAnswer;
        event OnIceCandidateHandler OnIceCandidate;
        // add
        event OnHeartBeatHandler OnHeartBeat;

        string Url {

     get; }

        float Interval {

     get; }

        void OpenConnection(string connectionId);
        void CloseConnection(string connectionId);
        void SendOffer(string connectionId, RTCSessionDescription offer);
        void SendAnswer(string connectionId, RTCSessionDescription answer);
        void SendCandidate(string connectionId, RTCIceCandidate candidate);
        // add
        void SendHeartBeat();
    }
}
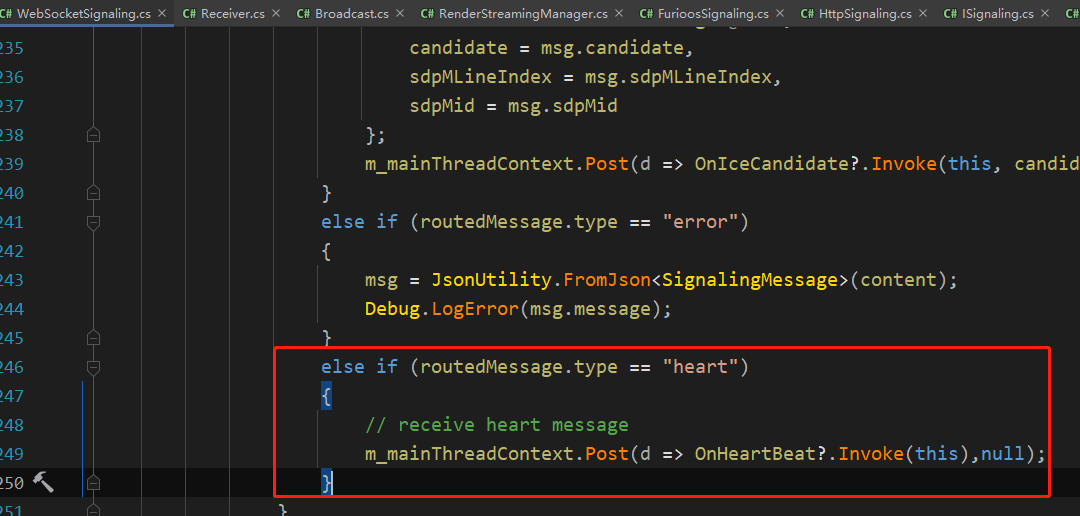
Modify
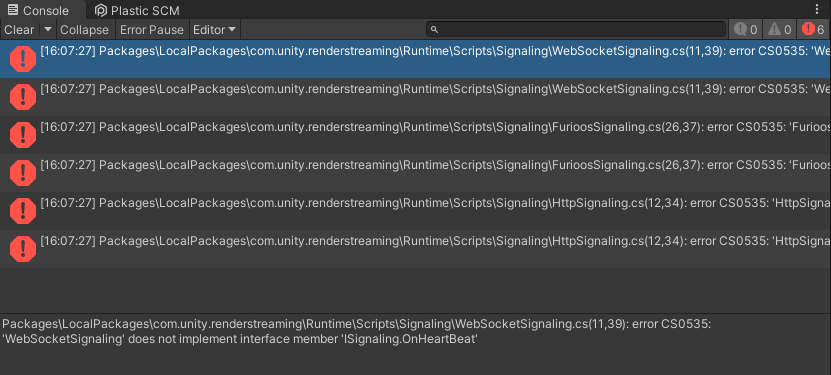
the SendHeartBeat function in the error reporting WebSocketSignaling and add the following content
public void SendHeartBeat()
{


   this.WSSend($"{

     {\"type\":\"heart\"}}");
}
Create RenderStreamingManagera script, the code is as follows
using System.Collections;
using System.Threading;
using Unity.RenderStreaming;
using Unity.RenderStreaming.Signaling;
using UnityEngine;

public class RenderStreamingManager : MonoBehaviour
{


    private RenderStreaming _renderStreaming;
    private VideoStreamSender _videoStreamSender;
    private ISignaling _signaling;
    private InputReceiver _inputReceiver;

    // heartbeat check
    private Coroutine _heartBeatCoroutine;
    private bool _isReceiveHeart;
    private float _heartBeatInterval;

    private void Awake()
    {


        // websocket
        _signaling =  new WebSocketSignaling($"{

      "ws"}://{

      "192.0.0.0"}", 5, SynchronizationContext.Current);

        if (_signaling != null)
        {


            _renderStreaming = transform.GetComponent<RenderStreaming>();
            _videoStreamSender = transform.GetComponent<VideoStreamSender>();
            _inputReceiver = transform.GetComponent<InputReceiver>();

            _renderStreaming.Run(_signaling);

            // heart beat
            _signaling.OnStart += OnWebSocketStart;
            _signaling.OnHeartBeat += OnHeatBeat;
        }
    }

    #region HeartBeat
    private void OnWebSocketStart(ISignaling signaling)
    {


        StartHeartCheck();
    }

    private void OnHeatBeat(ISignaling signaling)
    {


        _isReceiveHeart = true;
    }

    private void StartHeartCheck()
    {


        _isReceiveHeart = false;
        _signaling.SendHeartBeat();
        _heartBeatCoroutine = StartCoroutine(HeartBeatCheck());
    }

    private IEnumerator HeartBeatCheck()
    {


        yield return new WaitForSeconds(5);
        if (!_isReceiveHeart)
        {


            // not receive msg
            Reconnect();
        }
        else
        {


            StartHeartCheck();
        }
    }

    private void Reconnect()
    {


        StartCoroutine(ReconnectDelay());
    }

    private IEnumerator ReconnectDelay()
    {


        _signaling.Stop();
        yield return new WaitForSeconds(1);
        _signaling.Start();
    }
    #endregion
}
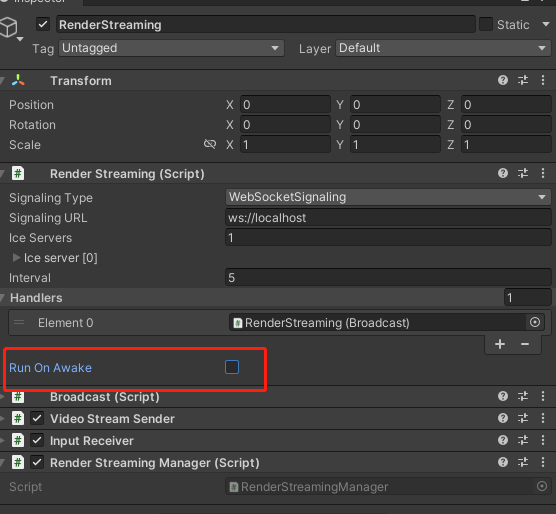
Remember to close RenderStreamingand find and RunOnAwake
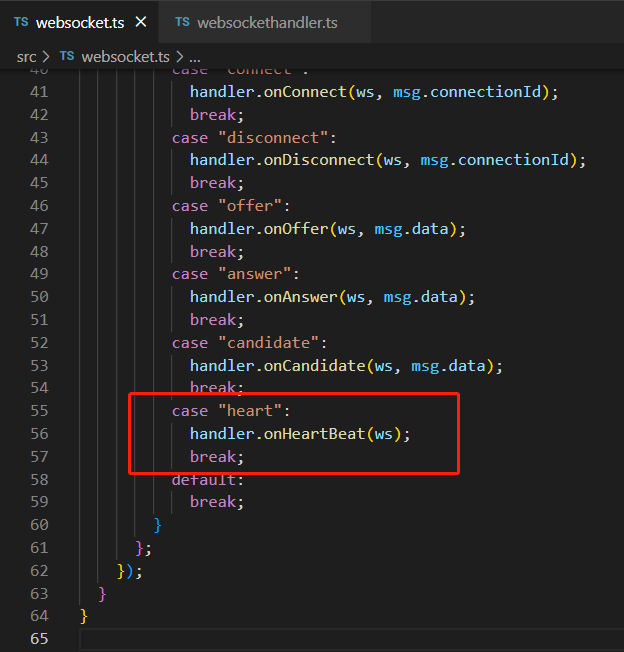
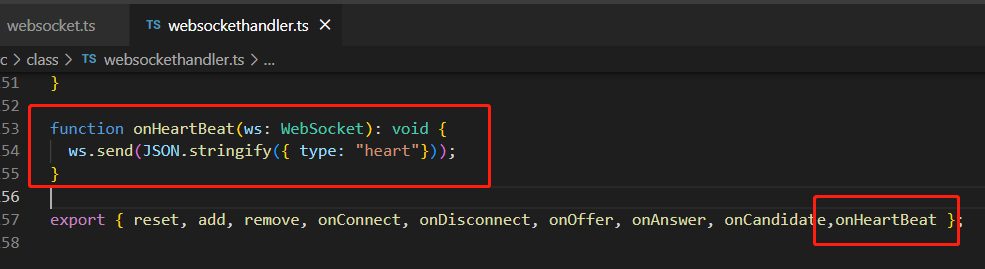
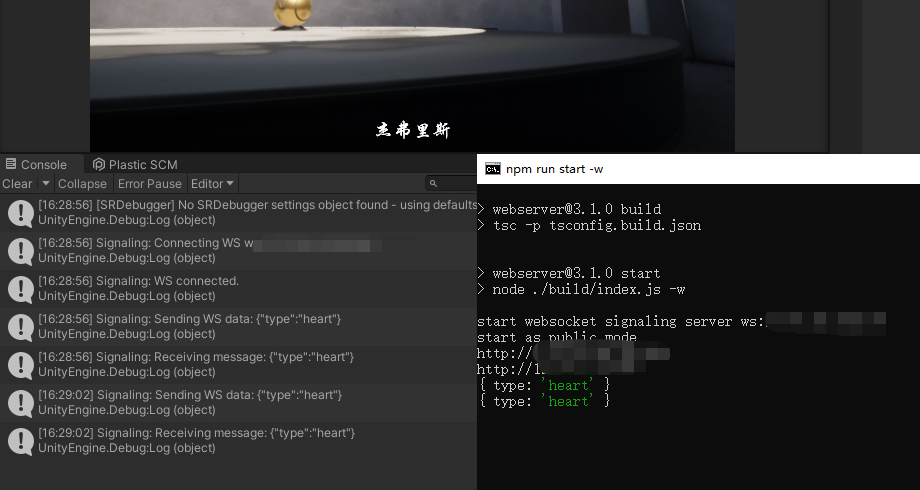
WebServeradd the following content Rebuild the service and start the Server, so that Unity can send and receive heartbeat messages with the Server through WebSocketwebsocket.tswebsockethandler.ts
6. Obtain whether there is a successful user connection
RenderStreamingManagerBind events in
private void Awake()
{


	// connect & disconnect
    _inputReceiver.OnStartedChannel += OnStartChannel;
    _inputReceiver.OnStoppedChannel += OnStopChannel;
}
private void OnStartChannel(string connectionid)
{


}
private void OnStopChannel(string connectionid)
{


}
How to make iOS and Android
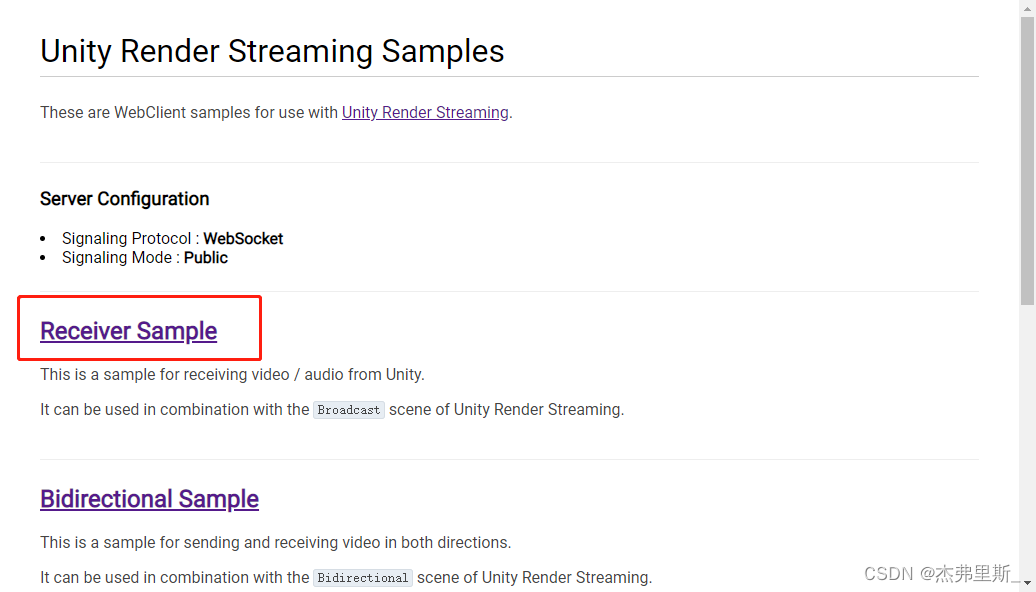
1. Refer to the Receiver scene in Sample
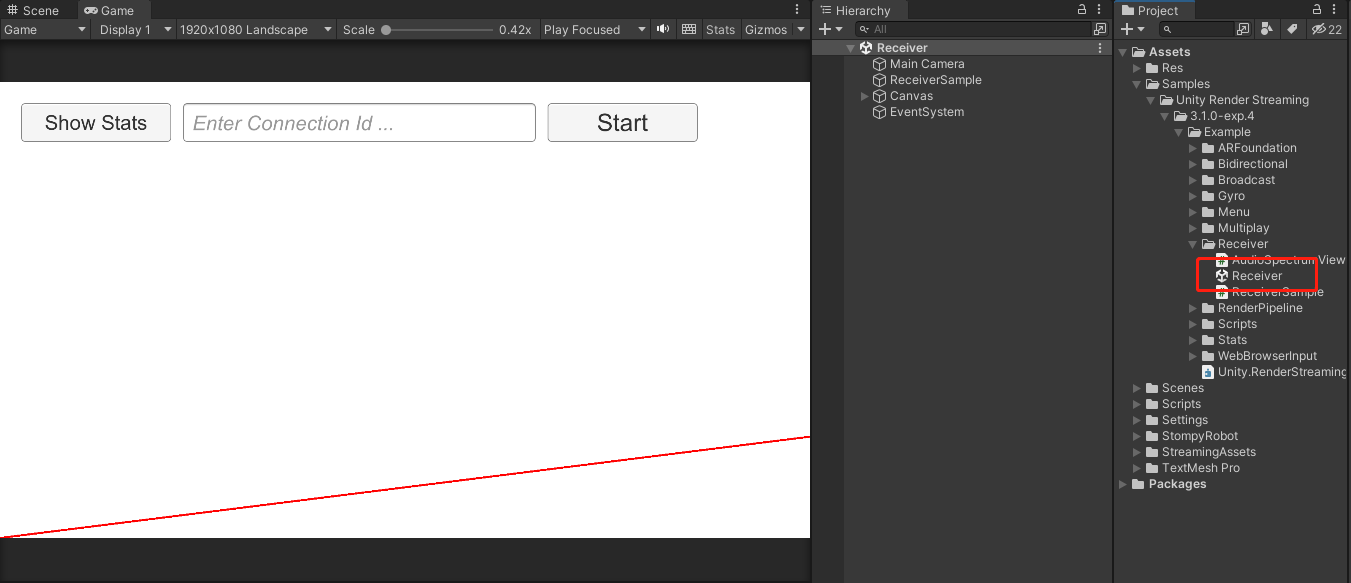
2. Customize Receiver scene content
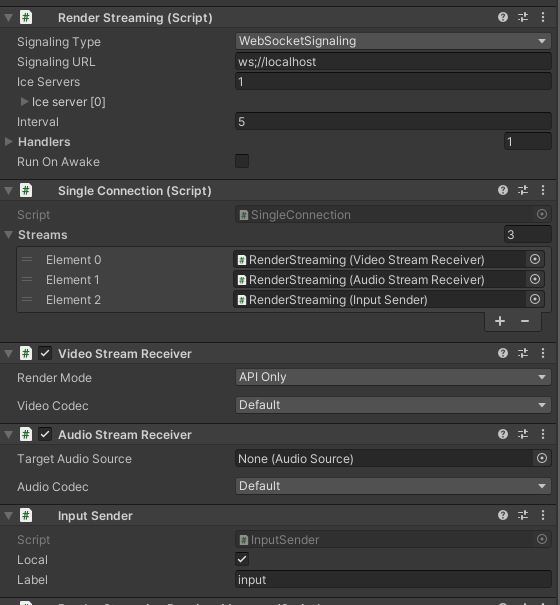
Create an object as shown in the figure, add RenderStreaming SingleConnection VideoStreamReceiver InputSendercomponents
AudioStreamReceiverrelated to sound, add
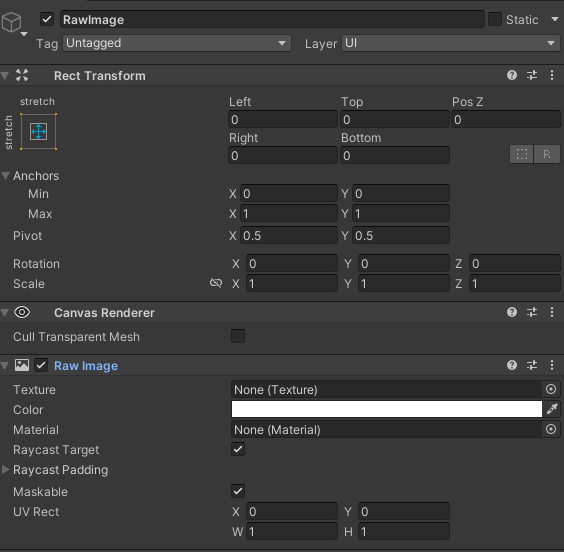
a new Canvas according to your own needs, create a RawImage, and use it as a carrier for receiving Texture
Audio-related content, according to the configuration in the Sample, do not need sound-related content can be ignored

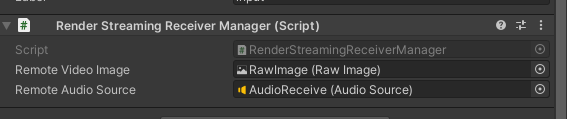
3. Create the management script
Get components and binding events in Awake and
call StartConnect to start connecting to websocket. After the connection is successful, start webrtc connection, and then the OnUpdateReceiveTexture event bound to VideoStreamReceiver updates the picture in RawImage.
In OnStartedChannel, the current device resolution information is added, and the message structure can be customized. I created a ScreenMessage here, added width and height information, and sent it to the client.
The script is as follows:
using System;
using System.Threading;
using Unity.RenderStreaming;
using Unity.RenderStreaming.Signaling;
using UnityEngine;
using UnityEngine.UI;

public class RenderStreamingReceiverManager : MonoSingleton<RenderStreamingReceiverManager>
{


    private RenderStreaming _renderStreaming;
    private VideoStreamReceiver _videoStreamReceiver;
    private AudioStreamReceiver _audioStreamReceiver;
    private InputSender _inputSender;
    private SingleConnection _connection;

    [SerializeField] private RawImage remoteVideoImage;
    [SerializeField] private AudioSource remoteAudioSource;

    private ISignaling _signaling;
    private string _connectionId;

    private void Awake()
    {


        // Get Component
        _renderStreaming = transform.GetComponent<RenderStreaming>();
        _videoStreamReceiver = transform.GetComponent<VideoStreamReceiver>();
        _inputSender = transform.GetComponent<InputSender>();
        _connection = transform.GetComponent<SingleConnection>();

        // Connect DisConnect
        _inputSender.OnStartedChannel += OnStartedChannel;
        _inputSender.OnStoppedChannel += OnStopChannel;

        _videoStreamReceiver.OnUpdateReceiveTexture += OnUpdateReceiveTexture;

        _audioStreamReceiver = transform.GetComponent<AudioStreamReceiver>();
        if (_audioStreamReceiver)
        {


            _audioStreamReceiver.OnUpdateReceiveAudioSource += source =>
            {


                source.loop = true;
                source.Play();
            };
        }
    }
	// 外部调用Start
    public void StartConnect()
    {


        _signaling = new WebSocketSignaling(
            $"{

      "ws"}://172.0.0.1:80",
            5, SynchronizationContext.Current);
        _signaling.OnStart += OnWebSocketStart;
        _renderStreaming.Run(_signaling);
    }
	// 外部调用Stop
    public void StopConnect()
    {


        StopRenderStreaming();
        _signaling.OnStart -= OnWebSocketStart;
        _renderStreaming.Stop();
    }

    private void OnWebSocketStart(ISignaling signaling)
    {


        StartRenderStreaming();
    }

    private void StartRenderStreaming()
    {


        if (string.IsNullOrEmpty(_connectionId))
        {


            _connectionId = Guid.NewGuid().ToString("N");
        }

        if (_audioStreamReceiver)
        {


            _audioStreamReceiver.targetAudioSource = remoteAudioSource;
        }

        _connection.CreateConnection(_connectionId);
    }

    private void StopRenderStreaming()
    {


        _connection.DeleteConnection(_connectionId);
        _connectionId = String.Empty;
    }

    void OnUpdateReceiveTexture(Texture texture)
    {


        remoteVideoImage.texture = texture;
        SetInputChange();
    }

    void OnStartedChannel(string connectionId)
    {


        Debug.Log("连接成功:" + connectionId);
        // 发送当前设备的分辨率到Client
        SendScreenToClient();
        SetInputChange();
    }

    private void OnStopChannel(string connectionId)
    {


        Debug.Log("断开连接:" + connectionId);
    }

    void SetInputChange()
    {


        if (!_inputSender.IsConnected || remoteVideoImage.texture == null)
            return;
        // correct pointer position
        Vector3[] corners = new Vector3[4];
        remoteVideoImage.rectTransform.GetWorldCorners(corners);
        Camera camera = remoteVideoImage.canvas.worldCamera;
        var corner0 = RectTransformUtility.WorldToScreenPoint(camera, corners[0]);
        var corner2 = RectTransformUtility.WorldToScreenPoint(camera, corners[2]);
        var region = new Rect(
            corner0.x,
            corner0.y,
            corner2.x - corner0.x,
            corner2.y - corner0.y
        );
        var size = new Vector2Int(remoteVideoImage.texture.width, remoteVideoImage.texture.height);
        _inputSender.SetInputRange(region, size);
        _inputSender.EnableInputPositionCorrection(true);
    }

    private void SendScreenToClient()
    {


        ScreenMessage screenMessage = new ScreenMessage(MessageType.Screen, Screen.width, Screen.height);
        string msg = JsonUtility.ToJson(screenMessage);
        SendMsg(msg);
    }

    private void SendMsg(string msg)
    {


        _inputSender.Channel.Send(msg);
    }
}
Message defines the structure, write according to your own preferences
    public enum MessageType
    {


        Screen
    }

    public class RenderStreamingMessage
    {


        public MessageType MessageType;
    }

    public class ScreenMessage : RenderStreamingMessage
    {


        public int Width;
        public int Height;

        public ScreenMessage(MessageType messageType, int width, int height)
        {


            MessageType = messageType;
            Width = width;
            Height = height;
        }
    }
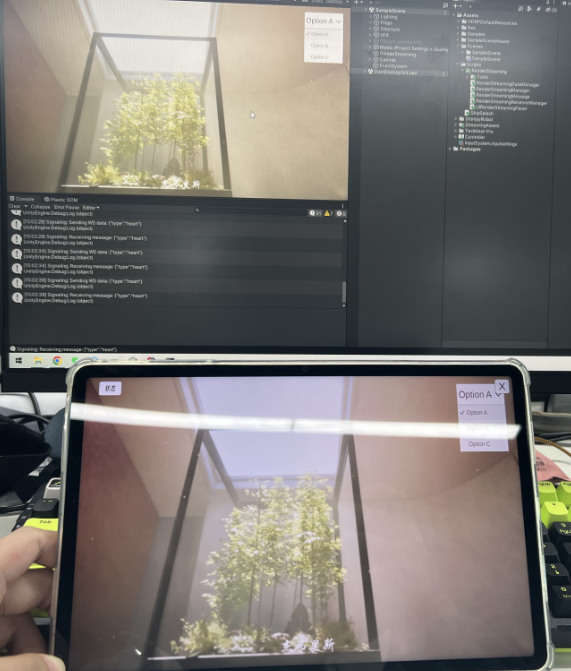
4. Screen adaptive processing after the client receives the ScreenMessage
After receiving the message, parse to get the width and height, and calculate the appropriate resolution according to the resolution of the mobile device.
Use _videoStreamSender.SetTextureSize to modify the output resolution.
Use _inputReceiver.SetInputRange and _inputReceiver.SetEnableInputPositionCorrection(true) to correct the resolution. The resolution modification on the web side is consistent with this.
    private void OnMessage(byte[] bytes)
    {


        string msg = System.Text.Encoding.Default.GetString(bytes);
        if (string.IsNullOrEmpty(msg) || !msg.Contains("MessageType"))
        {


            return;
        }

        RenderStreamingMessage messageObject = JsonUtility.FromJson<RenderStreamingMessage>(msg);
        if (messageObject == null)
        {


            return;
        }

        switch (messageObject.MessageType)
        {


            case MessageType.Screen:
                ScreenMessage screenMessage = JsonUtility.FromJson<ScreenMessage>(msg);
                ResetOutputScreen(screenMessage);
                break;
            default:
                break;
        }
    }

    private void ResetOutputScreen(ScreenMessage screenMessage)
    {


        int width = screenMessage.Width;
        int height = screenMessage.Height;
        float targetWidth, targetHeight;

        int configWidth = 1920;
        int configHeight = 1080;
        float configRate = (float) configWidth / configHeight;
        float curRate = (float) width / height;
        if (curRate > configRate)
        {


            targetWidth = configWidth;
            targetHeight = targetWidth / curRate;
        }
        else
        {


            targetHeight = configHeight;
            targetWidth = targetHeight * curRate;
        }

        _videoStreamSender.SetTextureSize(new Vector2Int((int) targetWidth, (int) targetHeight));

        // 这一步是分辨率偏移修正的关键代码
        _inputReceiver.SetInputRange(
            new Vector2Int((int) _videoStreamSender.width, (int) _videoStreamSender.height),
            new Rect(0, 0, Screen.width, Screen.height));
        _inputReceiver.SetEnableInputPositionCorrection(true);
    }
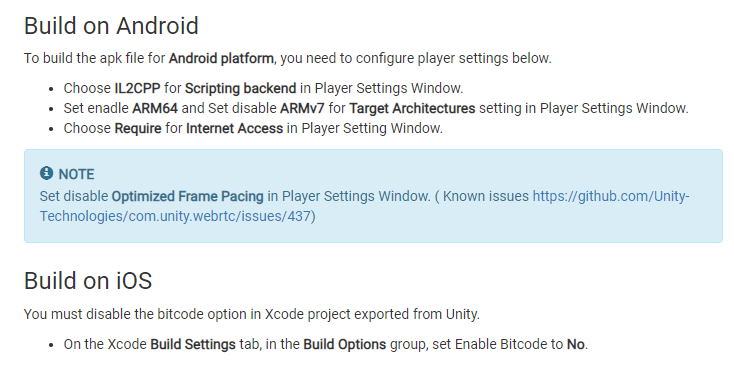
5. Project settings before publishing
Changes as requested in the WebRTC docs
6. Release test
update plan
1. Mac and iOS release bug sharing