Table of contents
1. The small program realizes sending mail
Prepare a qq mailbox and start the SMTP service
Determine the applet cloud development environment and create a new cloud function
2. The small program realizes sending SMS
Write a cloud function - send SMS
Learning record:
1. The small program realizes sending mail
-
Prepare a qq mailbox and start the SMTP service
In the account settings of QQ mailbox, open: SMTP service

Then click below to generate an authorization code.
-
Determine the applet cloud development environment and create a new cloud function
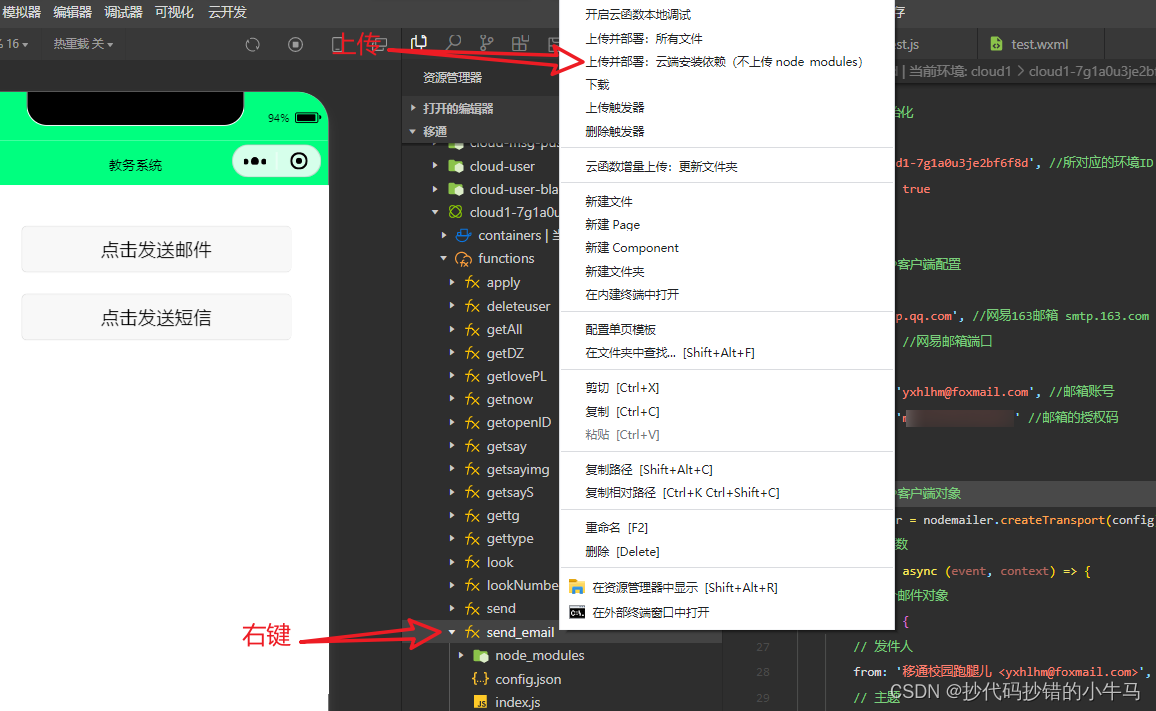
Right-click on the newly created cloud function -- open in external terminal
Enter: npm install nodemailer command to install dependencies.

- code part
// 云函数入口文件
const cloud = require('wx-server-sdk')
//引入发送邮件的类库
var nodemailer = require('nodemailer')

//云开发环境初始化
cloud.init({
    env: '你的云开发环境ID', //所对应的环境ID
    traceUser: true
})

// 创建一个SMTP客户端配置
var config = {
    host: 'smtp.qq.com', //网易163邮箱 smtp.163.com
    port: 465, //网易邮箱端口
    auth: {
        user: '你开启SMTP的邮箱', //邮箱账号
        pass: '点击生成的授权码' //邮箱的授权码
    }
};
// 创建一个SMTP客户端对象
var transporter = nodemailer.createTransport(config);
// 云函数入口函数
exports.main = async (event, context) => {
    // 创建一个邮件对象
    var mail = {
        // 发件人
        from: '移通校园跑腿儿 <[email protected]>',
        // 主题
        subject: '订单状态提醒',
        // 收件人
        to: '[email protected]',
        // 邮件内容,text或者html格式
        text: '被人接单啦,尽快回到小程序查看吧' //可以是链接,也可以是验证码
    };

    let res = await transporter.sendMail(mail);
    return res;
}
Finally, just upload and deploy the cloud function:
- call test
wxml:
<button style="margin-top: 20px; width: 70%;" type="default" bindtap="clk1">点击发送邮件</button>

<button style="margin-top: 20px; width: 70%;" type="default" bindtap="clk2">点击发送短信</button>
js:
Page({

    clk1() {
        // 调用 云函数 发送 邮件
        wx.cloud.callFunction({
            name: 'send_email',
            success(res) {
                console.log("发送成功:", res)
            },
            fail(err) {
                console.log("失败:", err)
            }
        })
    },

    clk2() {
        // 调用 云函数 发送 短信
        wx.cloud.callFunction({
            name: 'send_message',
            success(res) {
                console.log("发送成功:", res)
            },
            fail(err) {
                console.log("失败:", err)
            }
        })
    },


})
result:
Target phone:
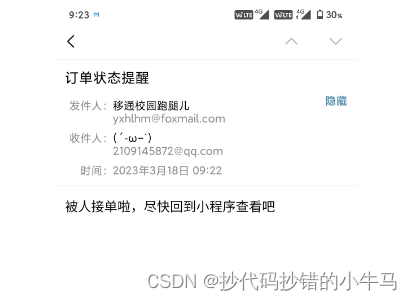
Console:

2. The small program realizes sending SMS
I applied for this at Tencent Cloud before: Login - Tencent Cloud ![]() https://console.cloud.tencent.com/smsv2
https://console.cloud.tencent.com/smsv2
As a result, because I use cloud development, I can apply for SMS service directly in the cloud development console.
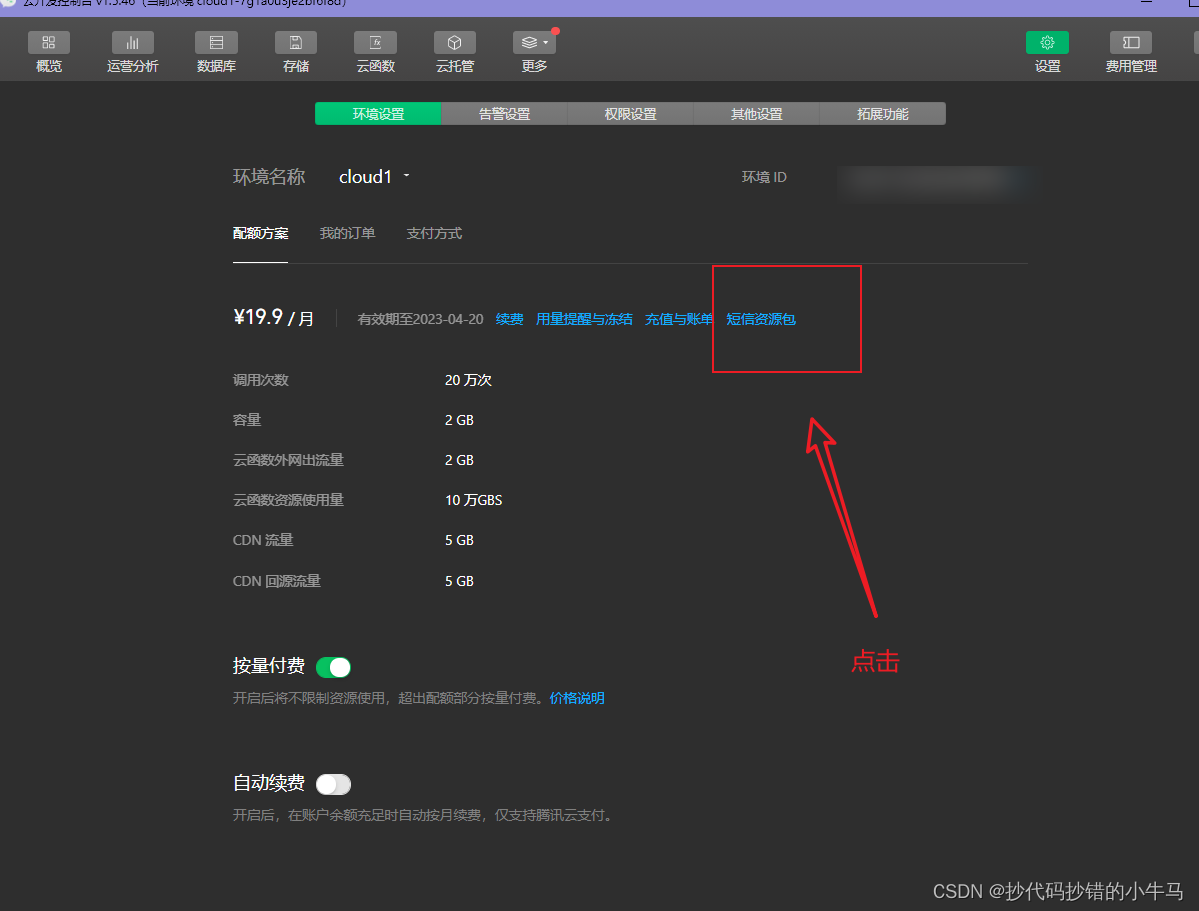
If you apply directly here, individuals will send 100, and companies will send 1,000. And it is also very convenient for cloud development to call it, but I only saw it later:
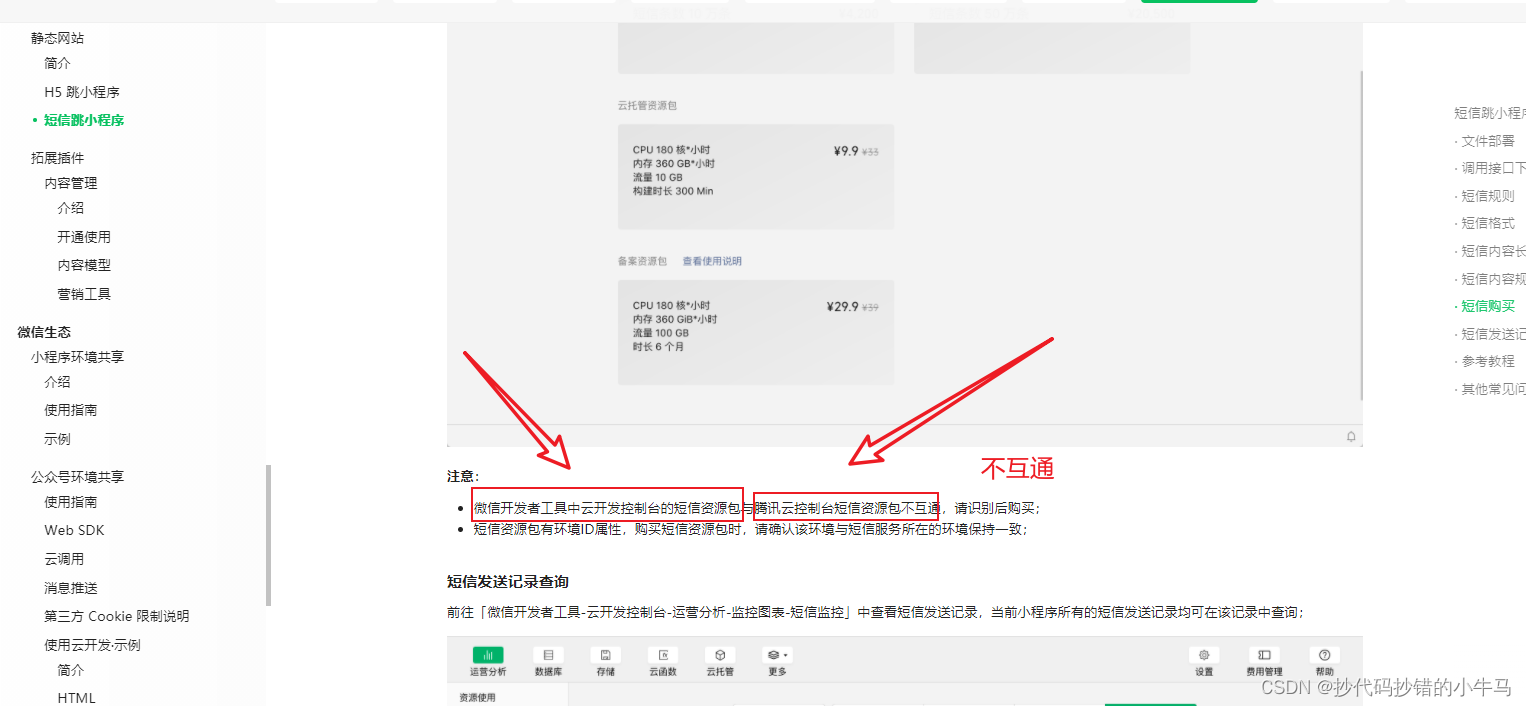
Tencent Cloud Console:
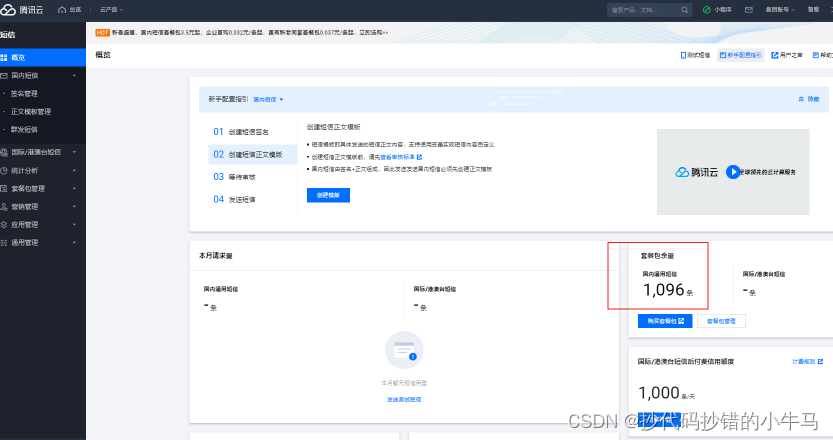
In WeChat developer tools:

Newcomers will increase their quota for free! ! ! 50 yuan can buy 1000 text messages.
It is easier to send SMS directly with cloud development + static resources. Moreover, the text message sent can carry a link, which can be directly opened and jumped to the applet.
It's better to use the free one first: first, there must be an application~
-
Confirm application
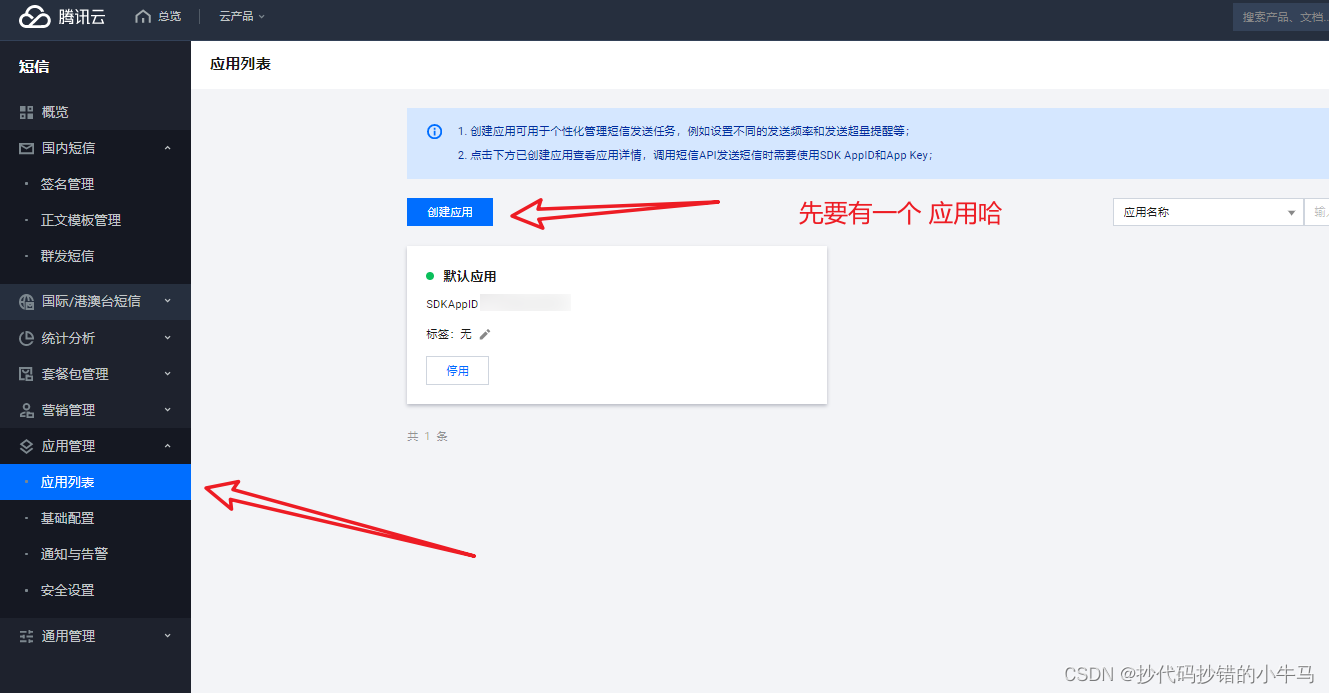
-
confirm signature
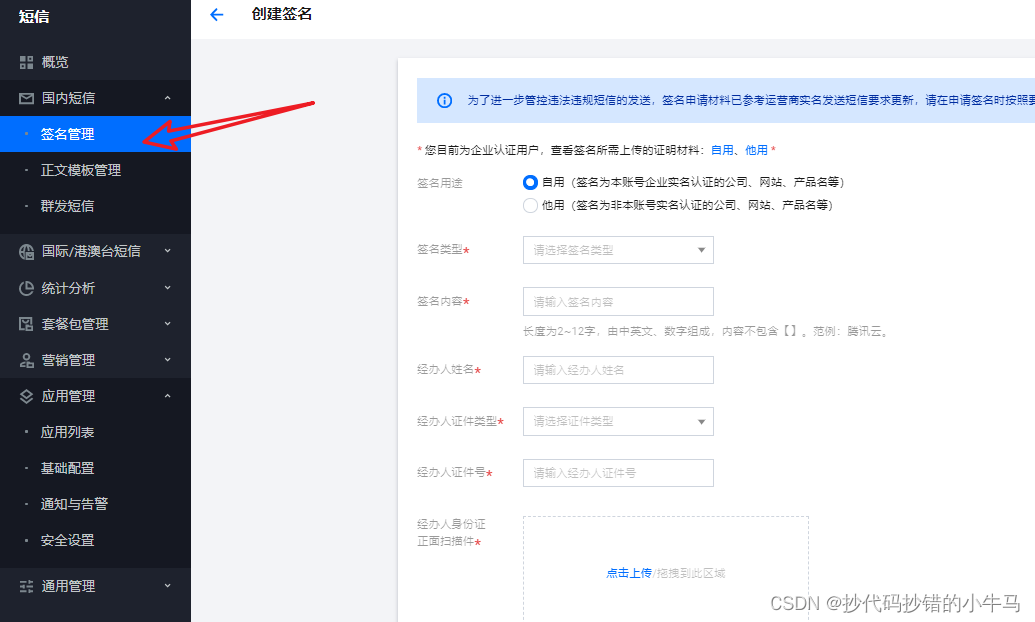
-
Determine the template

-
Write a cloud function - send SMS
My cloud function name: send_message, right-click it, click to open in an external terminal--enter the following named SDK installation dependencies:
npm install --save sms-node-sdkCode: Just replace the content marked in it
// 云函数入口文件
const cloud = require('wx-server-sdk')
const {
    SmsClient
} = require('sms-node-sdk');


const AppID = 666666; //你的SDK AppID  是1400开头
// 短信应用SDK AppKey ,替换为你本身的 AppKey
const AppKey = '666666';
// 须要发送短信的手机号码
const phoneNumber = '19115314436';
// 短信模板ID,须要在短信应用中申请
const templId = 666666;
// 签名,替换为你本身申请的签名
const smsSign = '移通校园跑腿儿';
// 实例化smsClient
//cloud.init()
//云开发环境初始化
cloud.init({
    env: 'cloud1-7g1a0u3je2bf6f8d', //你原开发所对应的环境ID
    traceUser: true
})
// 云函数入口函数
exports.main = async (event, context) => {
    let order_people = '自定义内容'; // 这个地方是 你创建模板 自定义内容的地方
    let smsClient = new SmsClient({
        AppID,
        AppKey
    });
    return await smsClient.init({
        action: 'SmsSingleSendTemplate',
        data: {
            nationCode: '86',
            phoneNumber,
            templId: templId,
            params: [order_people],
            sign: smsSign
            // 签名参数未提供或者为空时,会使用默认签名发送短信
        }
    })


}
The things you need to modify are as follows:
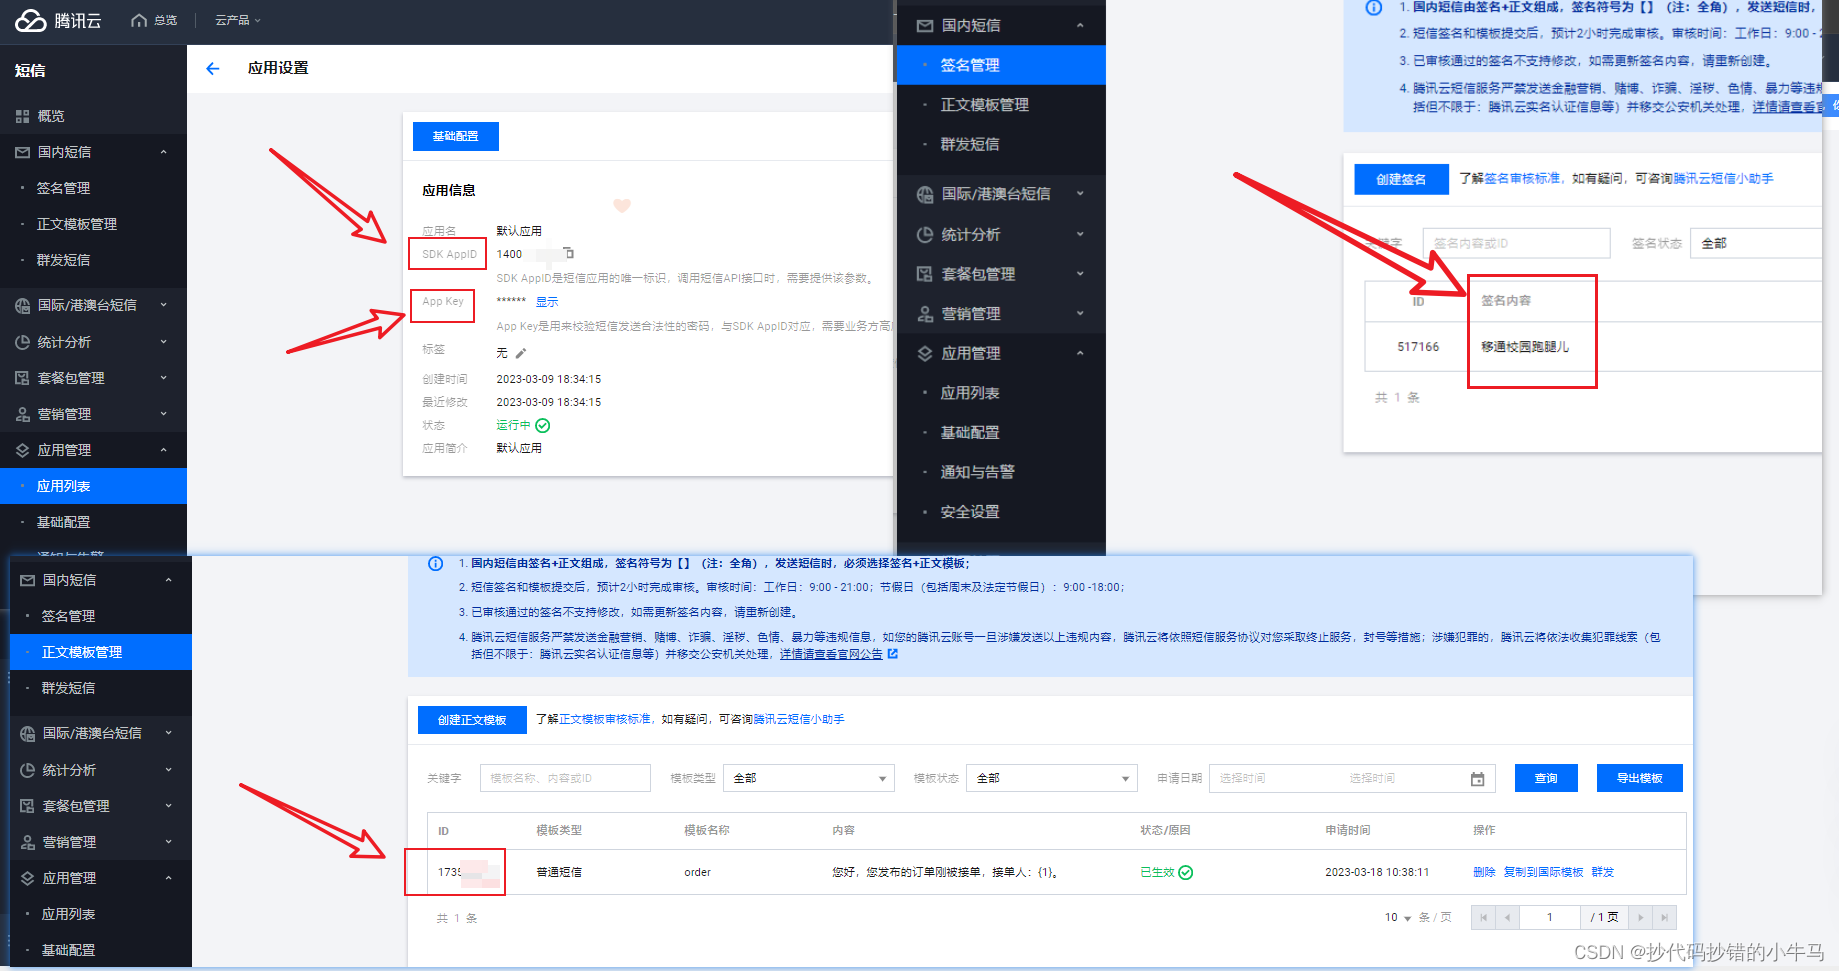
Go here, save, upload and deploy the cloud function, and it's OK.
Note : it is not allowed to send links in text messages , and the sending also carries a fixed and filed link, which is very strict.
call: in the console

In the target phone:
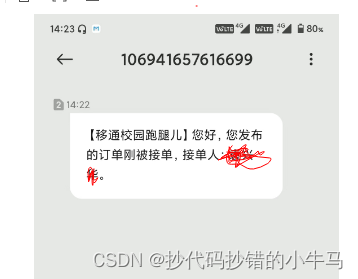
3. Link jump applet
It is very troublesome to carry the link in the Tencent cloud template, but later on, cloud development + static resources will directly jump to the applet terminal without authentication. Later, when the free quota of Tencent cloud is used up, I will choose cloud development to send SMS, so it is necessary to understand: The link jumps to the applet.
Official documentation:
May know:
- Using the cloud to develop webpages hosted by static websites, you can jump to any legal and compliant applet without authentication. That is, you can jump to the Mini Program in the H5 of the internal browser of WeChat, and you can also jump to the WeChat Mini Program in the external browser of WeChat or other Apps (such as Enterprise WeChat, QQ, etc.).
- Only URL Links of published applets can be generated.
- When opening the URL Link in WeChat or an Android phone, the official H5 intermediate page will be redirected by default. If you need to customize the H5 content, you can use the cloud to develop a static website.
-
H5 configuration
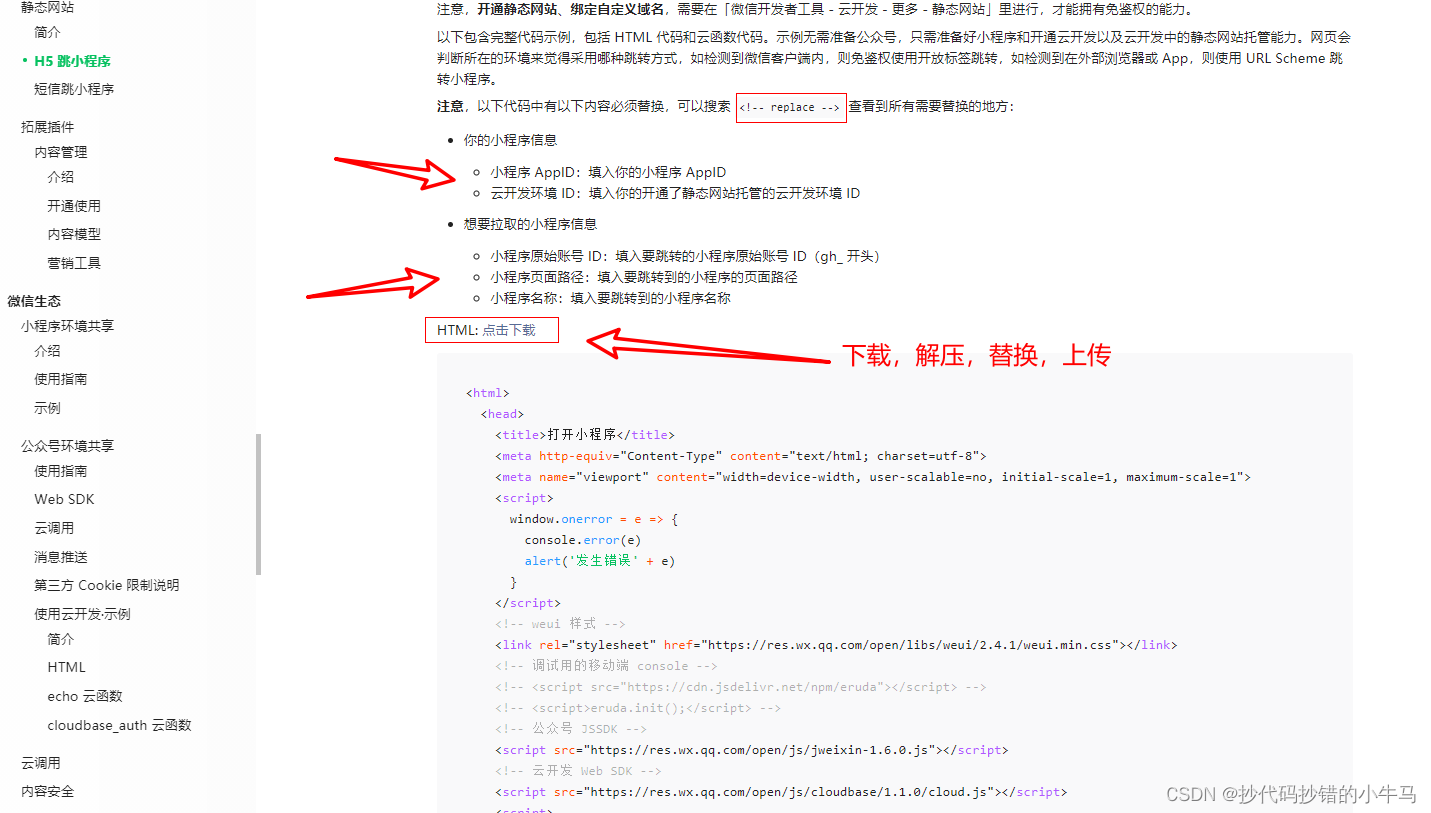
Revise:
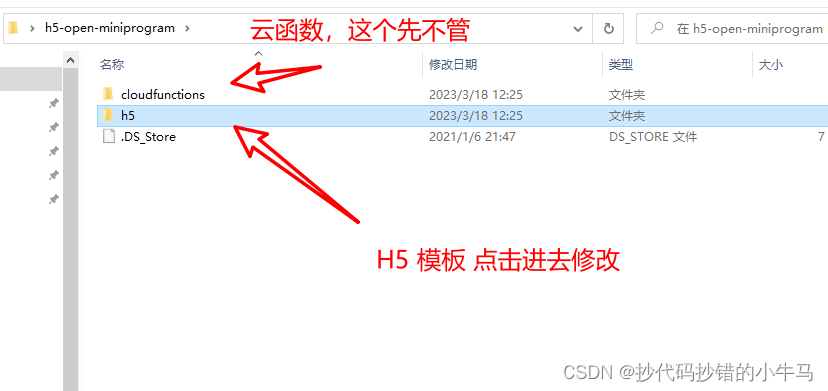
Click in--Open Notepad--Search: <!-- replace --> View all places that need to be replaced

After the modification is complete, save it. Cloud development background upload H5
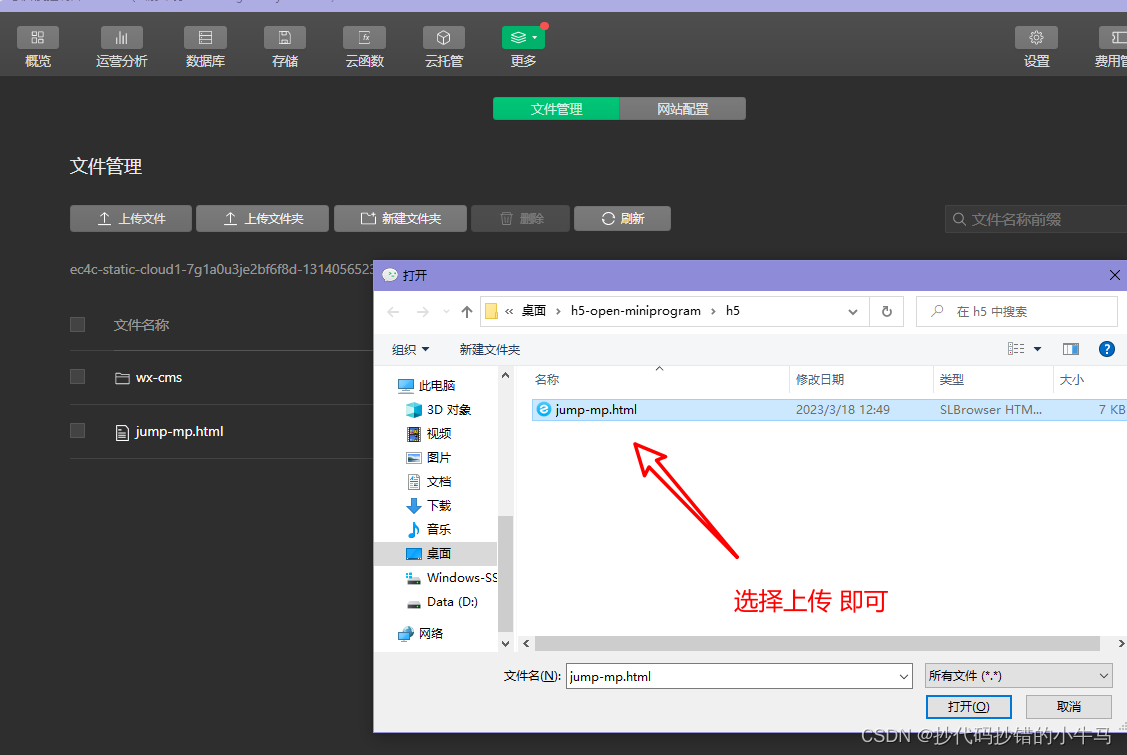
Don't worry about it here.
-
Generate URL Link
-
Obtain the Mini Program URL Link, which is applicable to the business scenarios where the Mini Program is launched in SMS, email, webpage, WeChat, etc. Through this interface, you can choose to generate expired and permanently valid Mini Program links. There is a limit on the number. Currently, it is only open to domestic non- personal Mini Programs. For details, see Get URL Link
Or you have to create a new cloud function yourself.
code:
const cloud = require('wx-server-sdk')
//云开发环境初始化
cloud.init({
    env: 'cloud1-7g1a0u3je2bf6f8d', //你的云开发所对应的环境ID
    traceUser: true
})
exports.main = async (event, context) => {
    try {
        const result = await cloud.openapi.urllink.generate({
            "path": '/pages/get/get',
            "query": '',
            "isExpire": true,
            "expireType": 1,
            "expireInterval": 1,
            "envVersion": 'release',
            // "cloudBase": {
            //   "env": 'xxx',
            //   "domain": 'xxx.xx',
            //   "path": '/jump-wxa.html',
            //   "query": 'a=1&b=2'
            // }
            // 不填就跳转 默认 H5 页面
        })
        return result
    } catch (err) {
        return err
    }
}
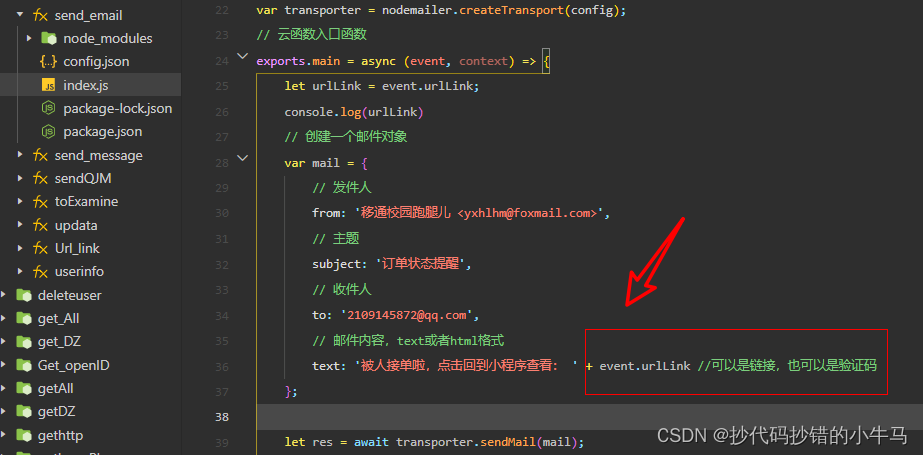
The text message cannot carry the link now, I will carry it in the email: fine-tune it, you can pass in a parameter yourself
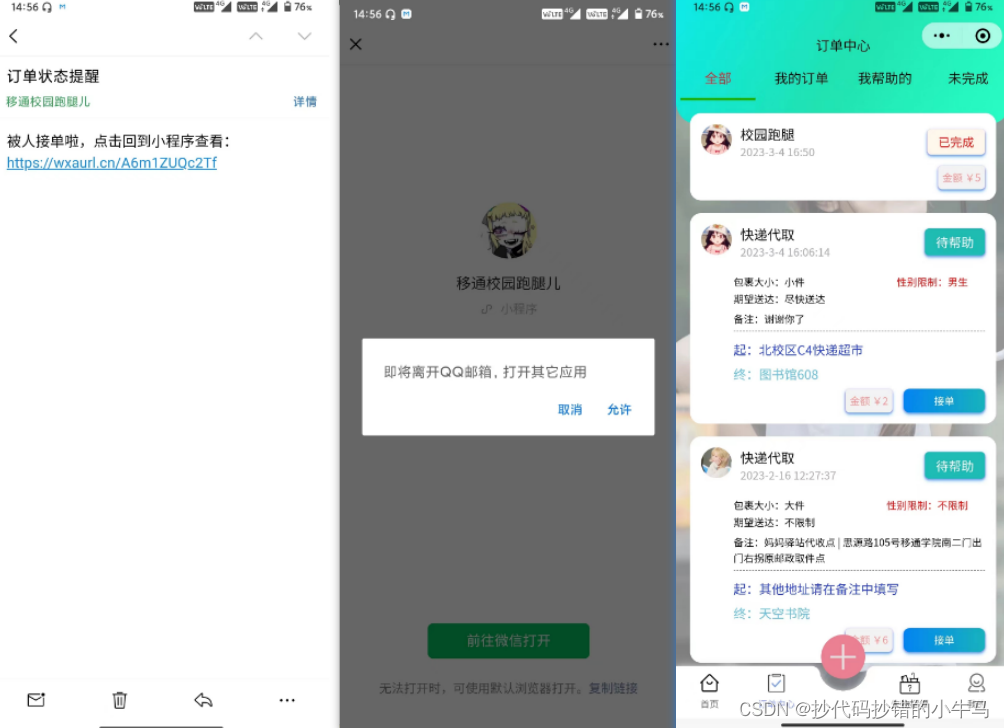
Effect:
bye~
see you next time~