DataGrip! tutorial
Getting started with DataGrip
Recently, I saw a database client tool, DataGrip, produced by the famous JetBrains company, which is the company that produced Intellij IDEA.
DataGrip is a database management client tool, which is convenient to connect to the database server, execute sql, create tables, create indexes, and export data, etc. The client tool I tried before was dbvisualizer, but after trying DataGrip, I decided to abandon dbvisualizer.
I believe that when you see DataGrip for the first time, you will have an amazing feeling, just like when you see a girl for the first time, you just glance at it, and you say to yourself, it is her! Without further ado, let's take a look at the common functions of DataGrip.
The DataGrip download link is as follows https://www.jetbrains.com/datagrip/download. The installation process is also very simple, double-click to install, the next step, you will be asked to choose a theme in the middle, I chose the classic Darcula, after the installation is complete, start, the interface is as follows
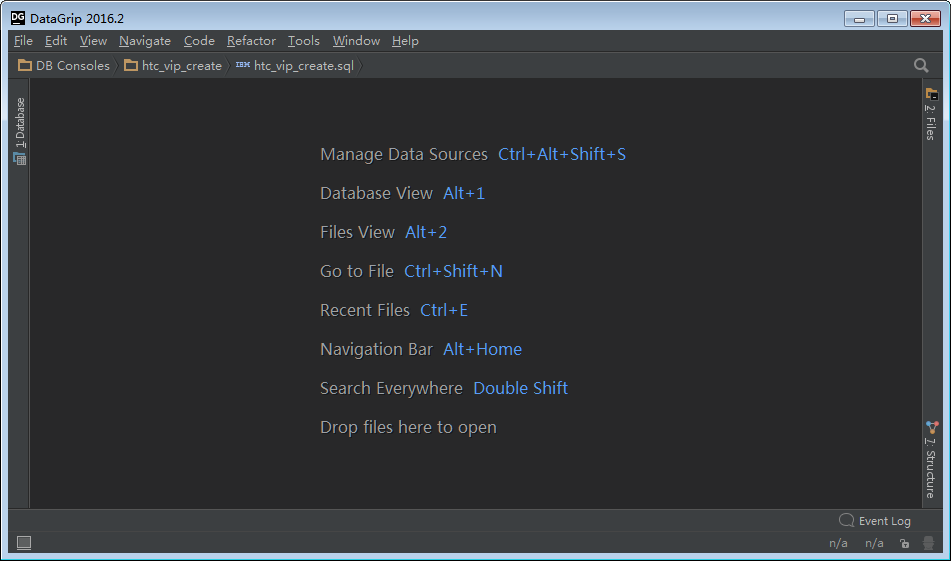
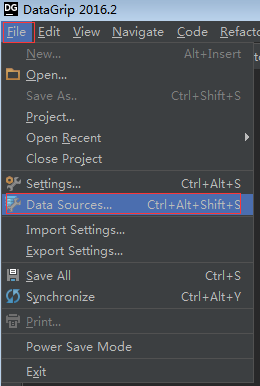
I believe that students who have used IDEA will feel very kind. Next, manage the database drivers. DataGrip supports mainstream databases, File->DataSource
You can also expand the green + sign in the Database view to add a database connection
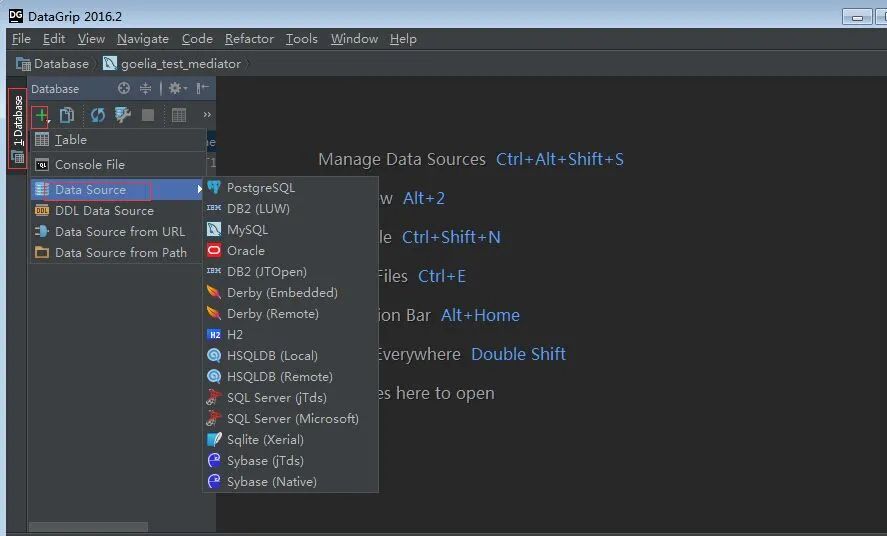
Select the type of database to connect to
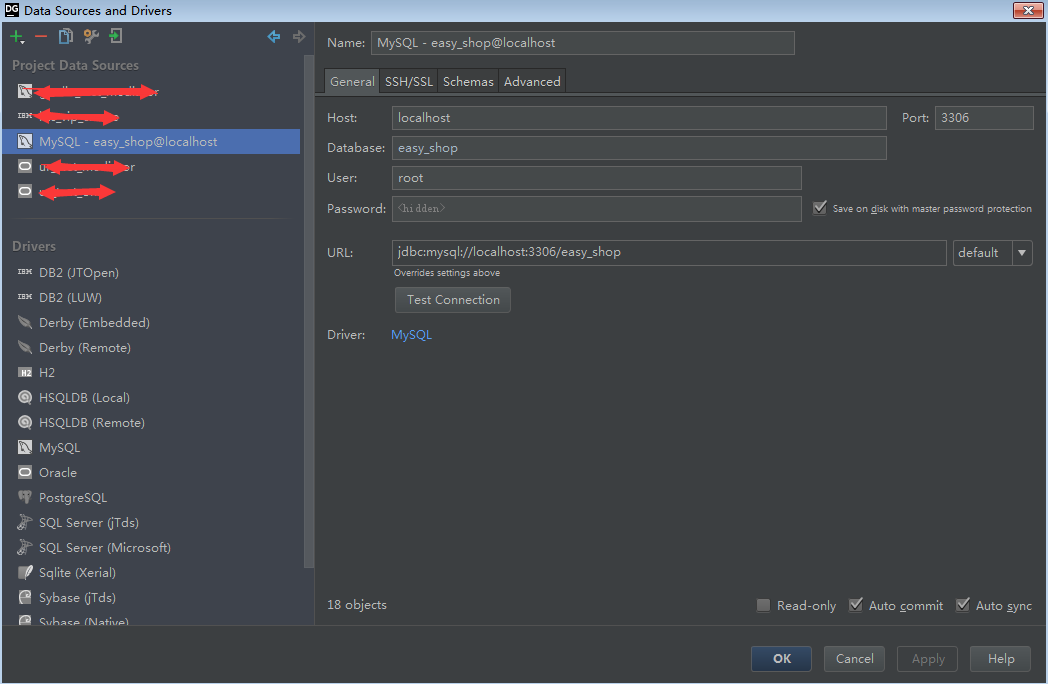
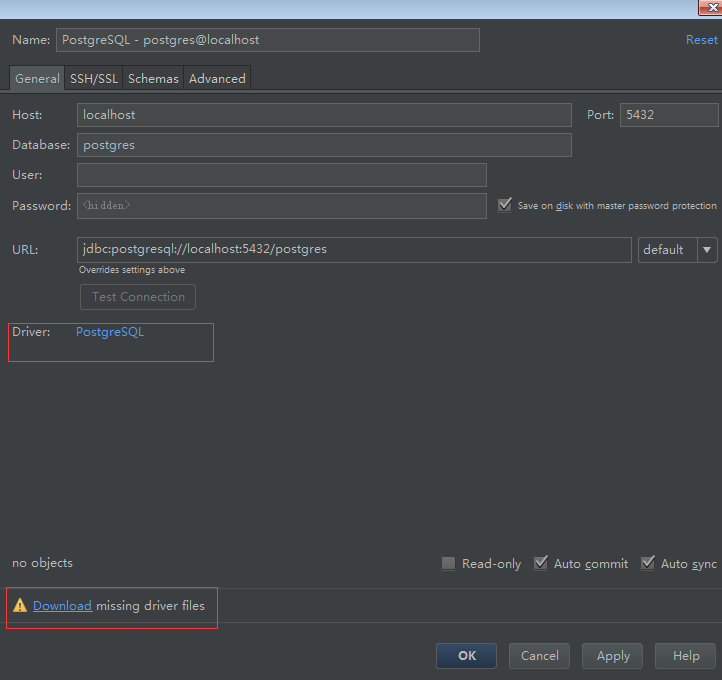
In the panel, the upper left part lists the database connections that have been established. Click each item, and the configuration information of the current connection will be displayed on the right. In the General panel, you can configure the database connection information, such as host, user name, password, etc. The database configuration information is not exactly the same, fill in the database URL, note that there is an option after the URL, you can choose to fill in the url directly, then you don’t need to fill in the host name, port and other information separately.
The Driver section displays the database driver information. If the driver has not been downloaded, there will be a warning at the bottom, indicating that the driver is missing.
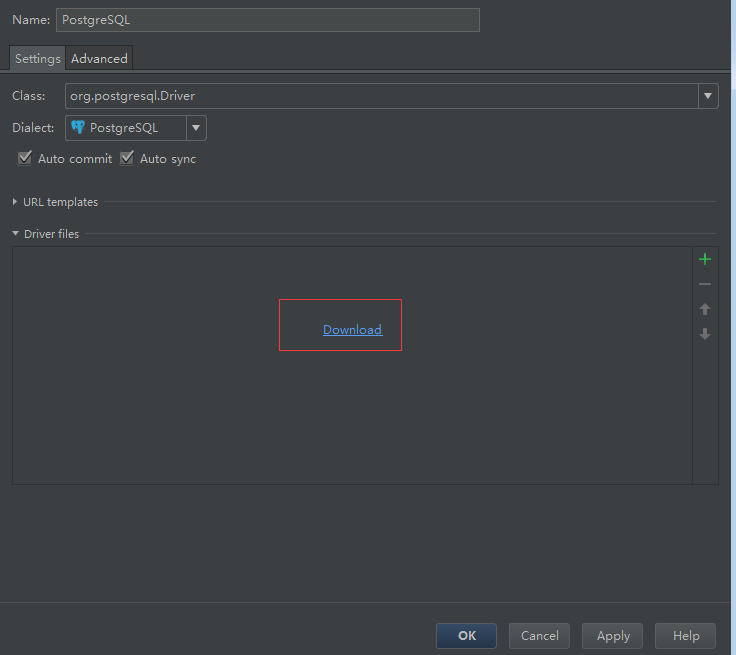
After clicking the database type of Driver, it will jump to the driver download page, click download, and the driver package will be displayed after downloading
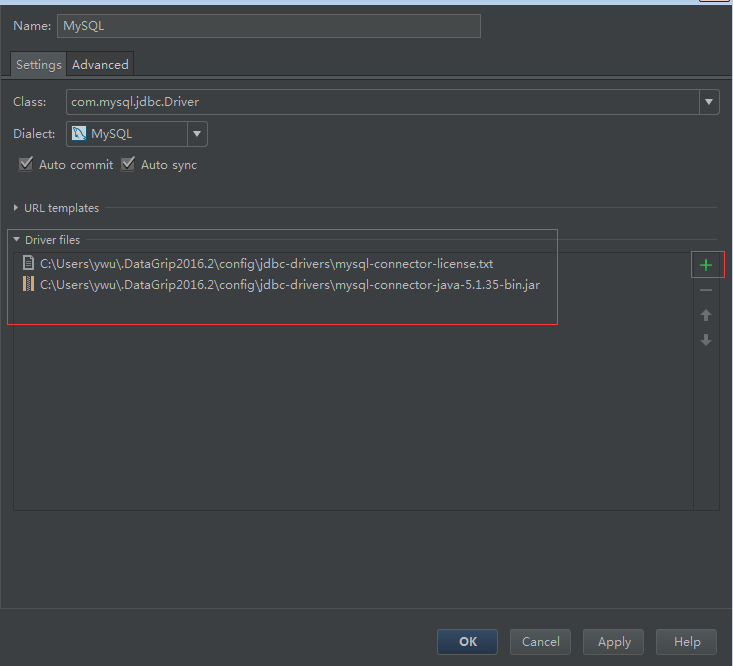
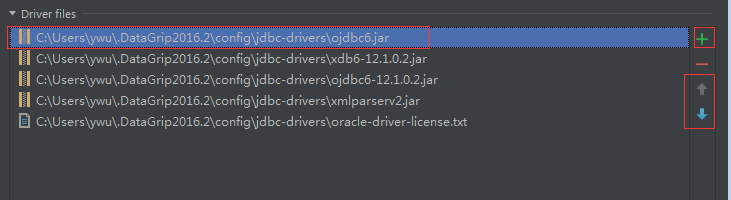
If there is a problem with the downloaded driver, you can manually add the local driver package. During the trial process, when creating an Oracle connection, the downloaded driver package has a problem, prompting that the class is missing, click the green + sign on the right, and select the locally downloaded jar package, move the imported jar package to the top position through the up and down arrows on the right
Click Test Connection to check whether the configuration is correct, and then you can use it.
Open DataGrip, select File->Settings, the current panel shows common settings

Basically, the default settings are enough. It is also very simple to change the settings. The menu on the left has been classified. The first item is database-related configuration, and the second item is configuration appearance. You can modify the theme here, and the key map modification is quick key, editor configures the relevant settings of the editor, here you can modify the font of the editor, expand the edit item, Editor->Color & Fonts->Font
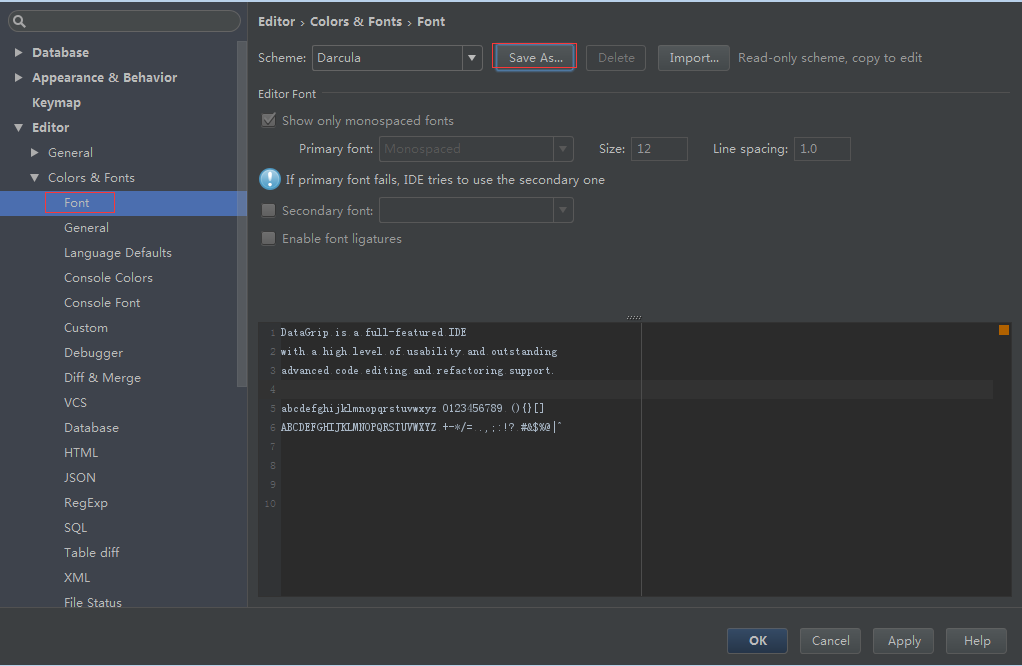
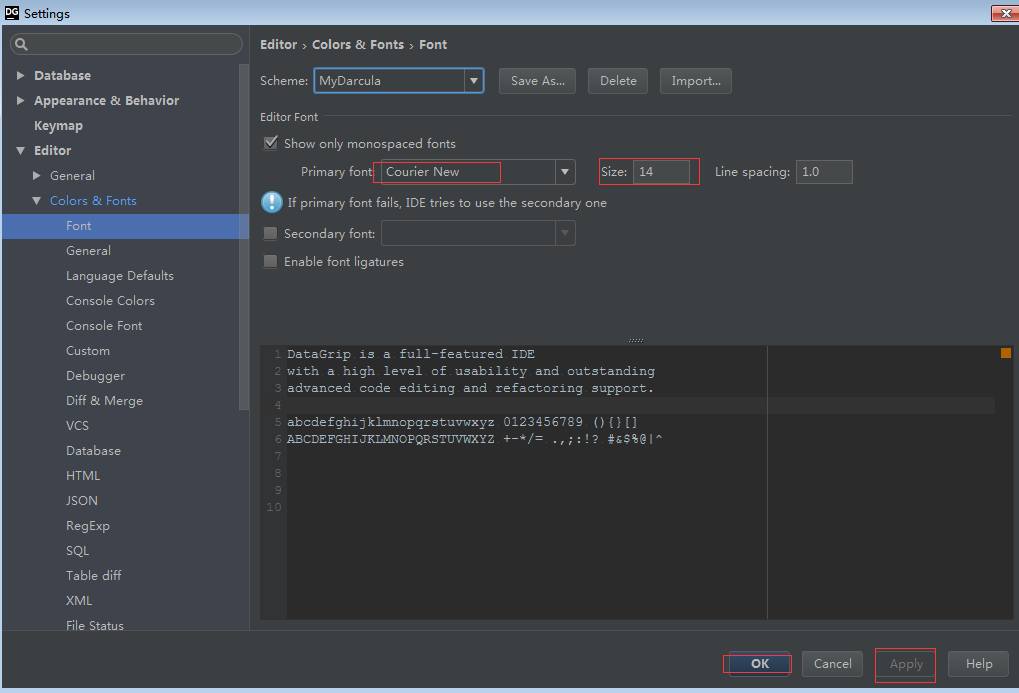
You need to save the current theme, click save as, give it a name, select the renamed theme to modify it, here I choose the customary Conurier New font, the size is 14, click apply in the lower right corner, and click OK
There is nothing else to set up.
Next, let's use DataGrip to complete the common operations of the database, including querying data, modifying data, creating databases, tables, etc.
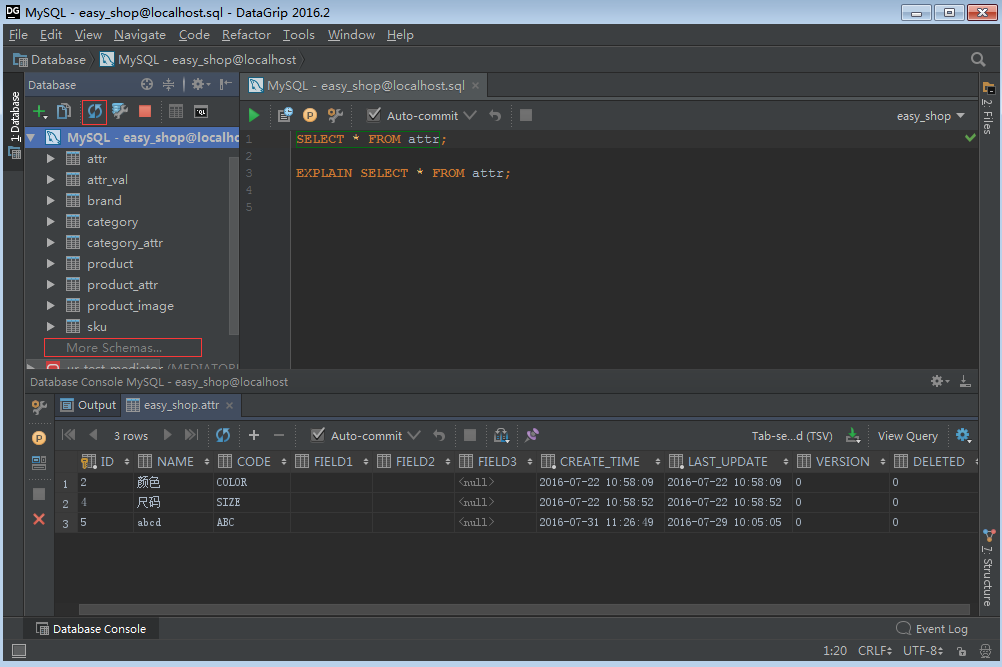
The upper left area shows the current database connection, and the database table and other information will be displayed after expansion. If there is no information after expansion, you need to select the database connection, click the rotation icon above to synchronize, and there is a More Schema option below, click to switch between different schemas .
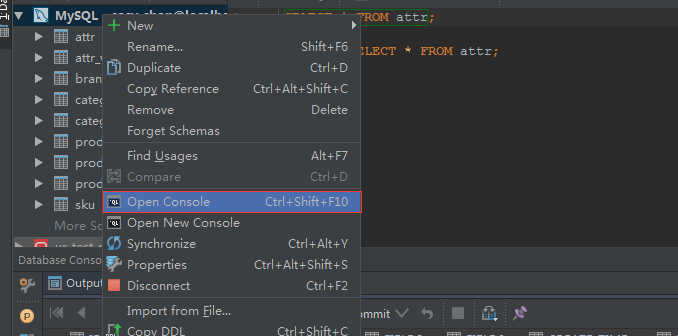
Right-click the selected database connection, select open console, and you can write sql statements in the console on the right.
DataGrip's smart prompts are very cool. Whether it is standard sql keywords, table names, field names, or even database-specific fields, they can be prompted. I have to sigh that this smart prompt is too powerful. Intellij IDEA's smart prompt is also a second-kill eclipse .
After writing the sql statement, you can select it and execute it with the green arrow on the upper left side of the electron

You can also use the shortcut key Ctrl+Enter. If it is selected, the sql will be executed directly. If it is not selected, if there are multiple sqls in the console, it will prompt you which sql to execute. I was used to the operation in dbvisualizer before, the cursor in dbvisualizer stays on the current sql (sql ends with a semicolon), press Ctrl+. The shortcut key will automatically execute the current sql, in fact, DataGrip can also be set, in setting->Database-General
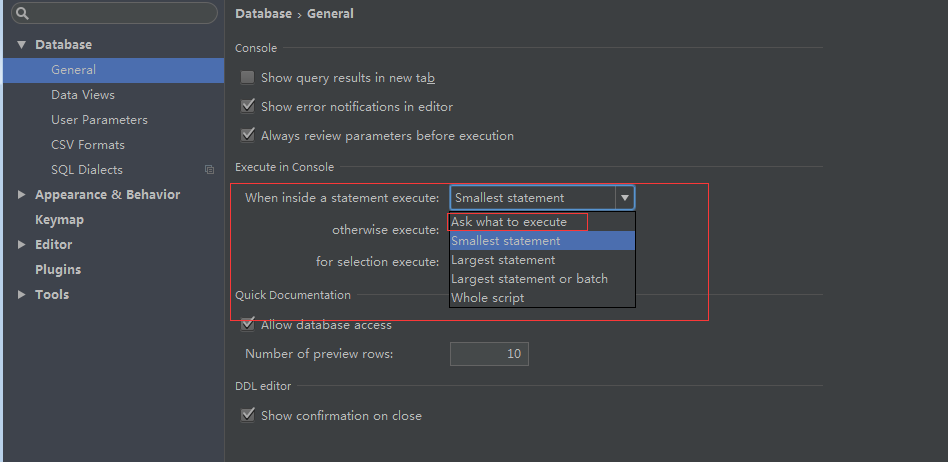
The default is a prompt when the statement is executed. After changing it to the smallest statement, when the cursor stays on the current statement, pressing Ctrl+Enter will directly execute the current statement.
The execution result of the statement is displayed at the bottom
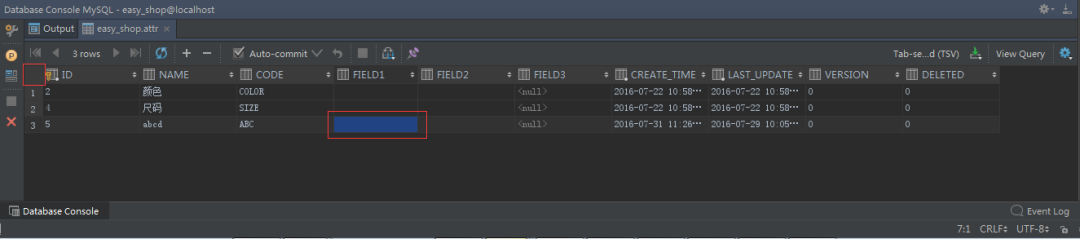
If the width of a certain column is too narrow, you can click any one of the column with the mouse, and use the shortcut key Ctrl+Shift+left and right arrows to adjust the width. If you want to adjust the width of all columns, you can click the red box in the upper left corner to select all rows, and use Shortcut keys Ctrl+Shift+left and right arrows to adjust
It is also very convenient to add and delete rows. The + and - buttons on the upper part can directly add rows or delete selected rows. Editing columns is also very convenient. Double-click the column to be modified, enter the modified value, and click the mouse on other parts. Completed the modification

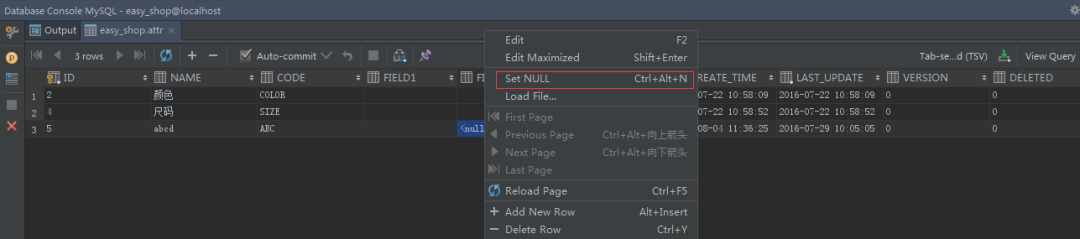
Sometimes we want to set a field to null instead of an empty string "", DataGrip also provides gradient operations, right click on the column and select set null
For those who need to view the results in multiple windows, that is, if you want the query results to be displayed in a new tab, you can click the pin tab button, then the new query will not be displayed in the current tab, but a new tab will be opened

The output console next to it shows the log information of executing sql, and you can see information such as the time of sql execution

I just asked such a hanging tool, who else! ! !
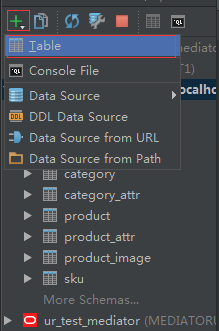
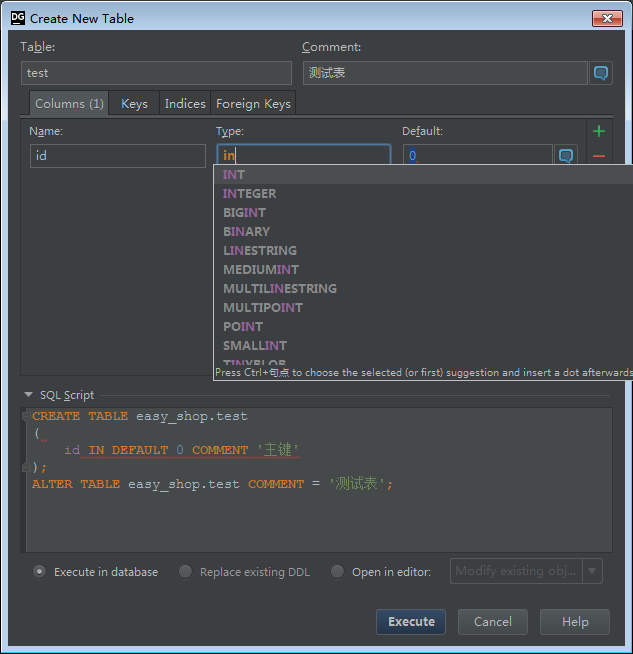
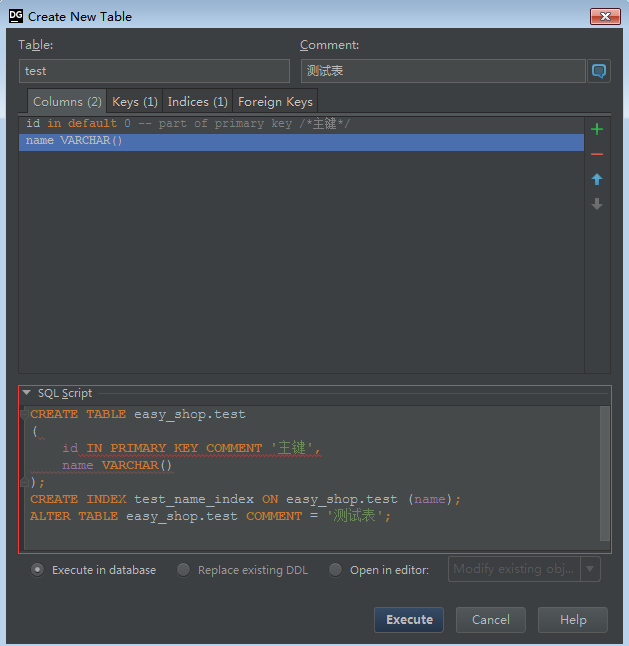
It is also quite simple and smart to create a new table. Select the database connection, click the green + sign and select table
In the newly opened window, you can fill in the form information
Let me ask you if you are excited to see this window! ! !
You can fill in the table name and table comments at the top, and you can click the green + sign on the right to add columns in the middle. The column type type can also be automatically completed. After clicking the message box icon on the right of default, you can add comments to the column, and the tabs next to it can be Set up indexes and foreign keys
The DDL for all these operations is displayed directly at the bottom
I asked you if you were afraid?
After the table is created, you can click the table icon in the figure below to open the table view view
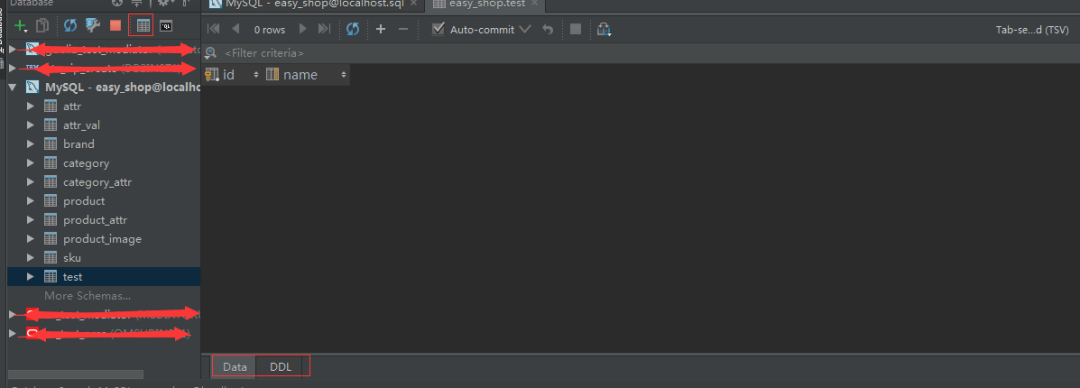
You can view the data of the table, and you can also view the DDL statement
The design and experience of these basic functions have already amazed me, and the next step is the export of data.
DataGrip's export function is also quite powerful
Select the table that needs to export data, right click, Dump Data To File
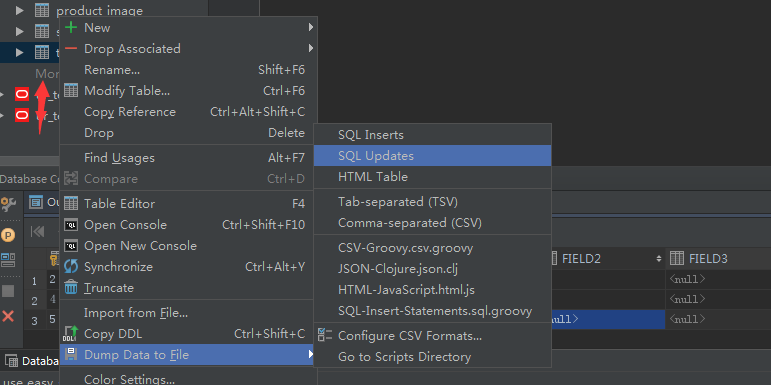
That is, it can export sql statements in the form of insert and update, and can also export data in html, csv, and json formats
can also be exported in the query results view
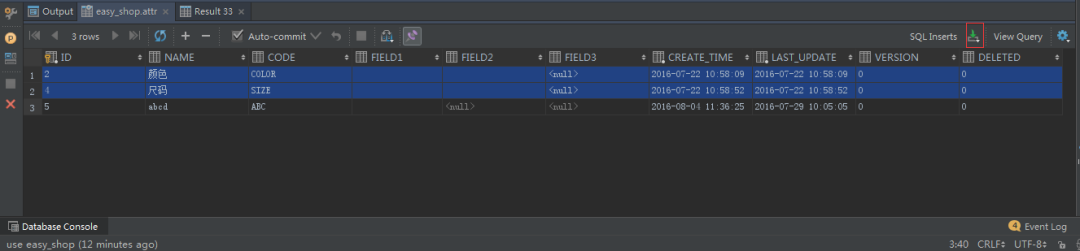
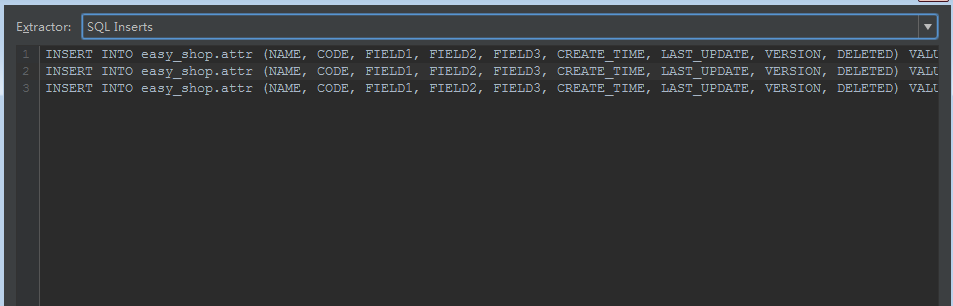
Click the download icon in the upper right corner, and you can choose different export methods in the pop-up window, such as sql insert, sql update, csv format, etc.
If it is exported to csv format, you can also control the exported format
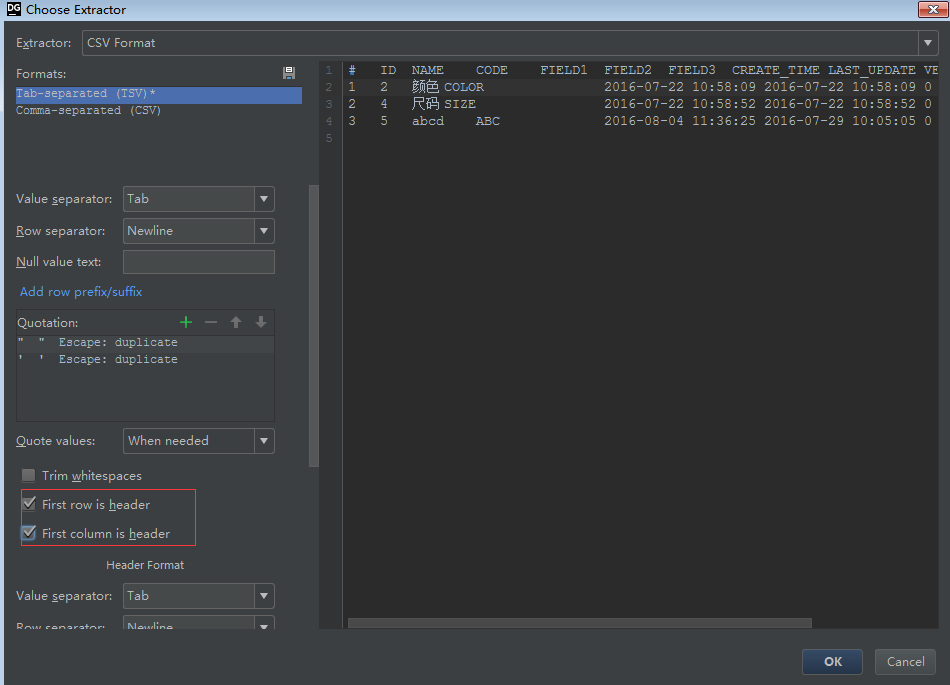
Opening with excel after exporting is the result

In addition to exporting data, it is also possible to import data
Select the table, right click -> Import from File, select the file to import
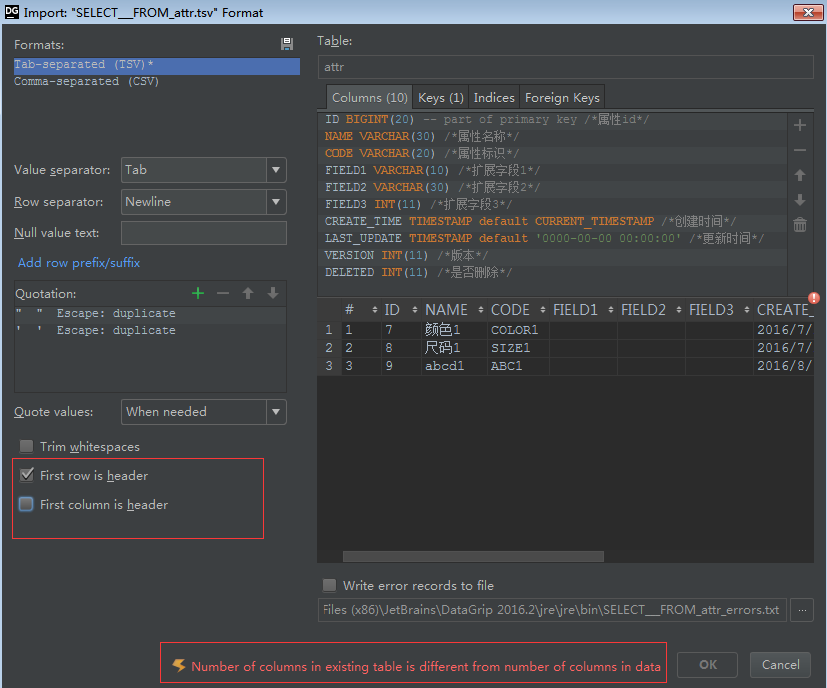
Note that if the two header options on the left are checked when exporting, if there are headers when importing, they must also be checked, otherwise it will prompt that the number of columns does not match
1. Keyword navigation:
When writing sql in the text editing area of datagrip, press and hold the Ctrl key on the keyboard, and at the same time move the mouse to the sql keyword, such as the table name, field name, or function name, the mouse will become a hand shape, the keyword It will turn blue and underlined, click it, it will automatically locate the object tree on the left, and select the clicked object
2. Quickly navigate to the specified table, view, function, etc.:
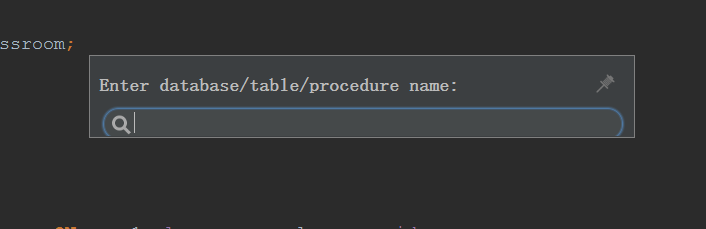
In datagrip, use the shortcut key of Ctrl+N to pop up a search box, enter the name to be navigated, and press Enter
3. Global search
Press the shift key twice in a row, or click the search icon in the upper right corner, a search box will pop up, search for anything you want
4. Result set search
Click the mouse in the query result set view area, press the shortcut key Ctrl+F, a search box will pop up, enter the search content, support regular expressions, and filter results.

5. Navigate to Linked Data
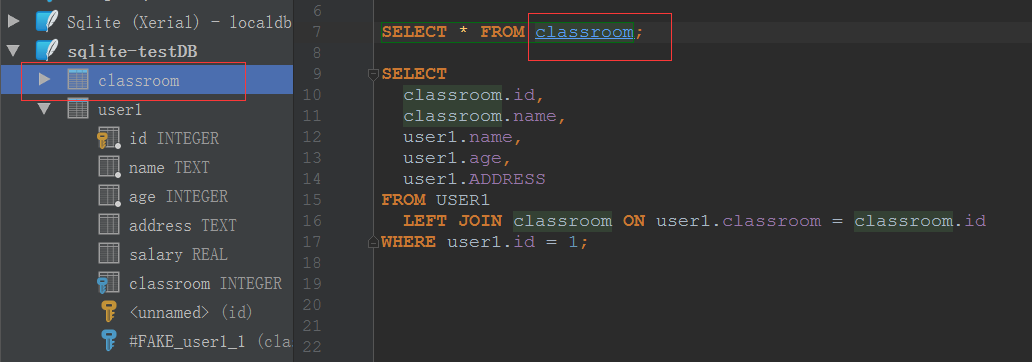
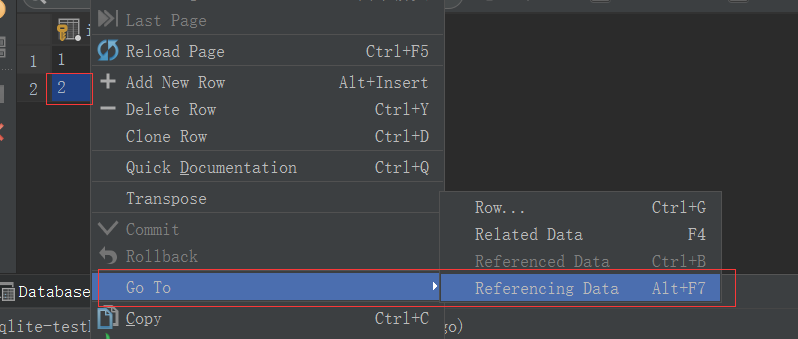
There will be an external inspection association between the tables. When querying, you can directly locate the associated data or the associated data. For example, the user1 table has an external inspection field classroom pointing to the primary key id of the classroom table. When querying the data in the classroom table, you can Right click on the id field, go to, referencing data
Choose whether to display the first data or all data
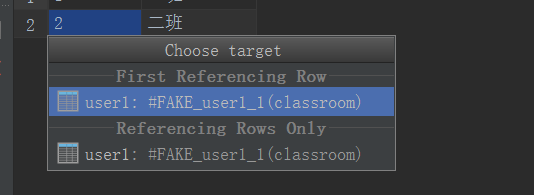
The data of the associated table will be automatically opened
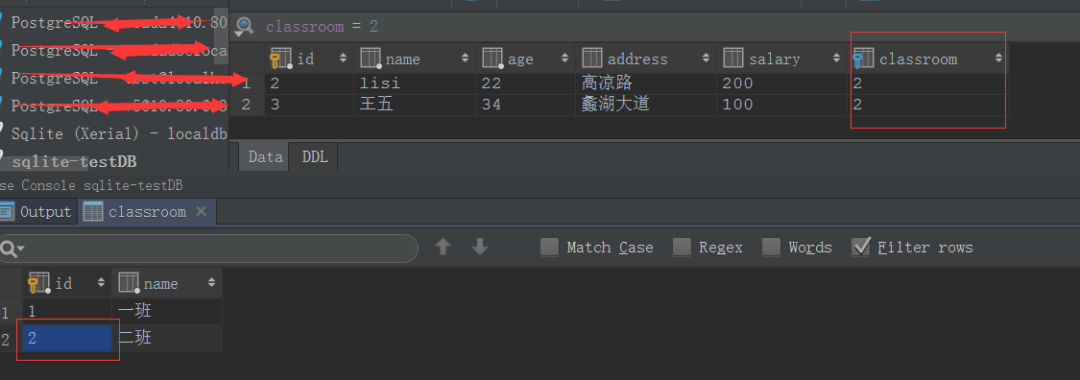
On the contrary, when querying the data of the sub table, it can also automatically locate the parent table
6. Result set data filtering
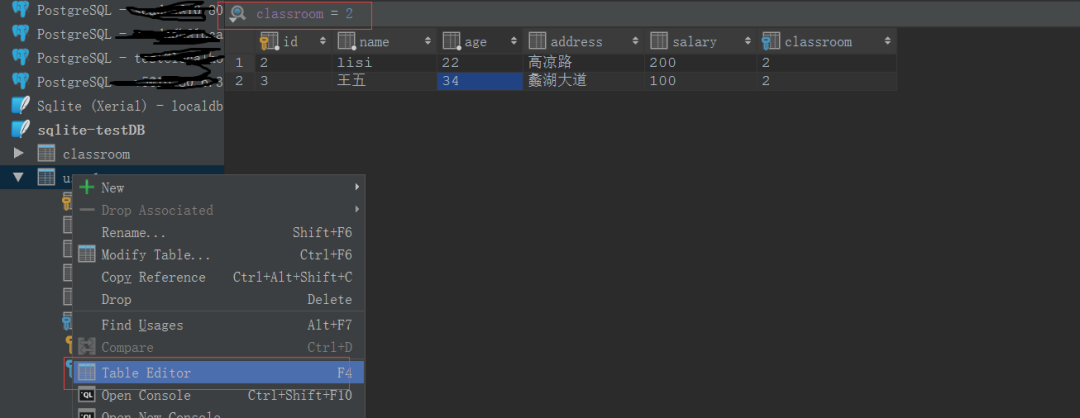
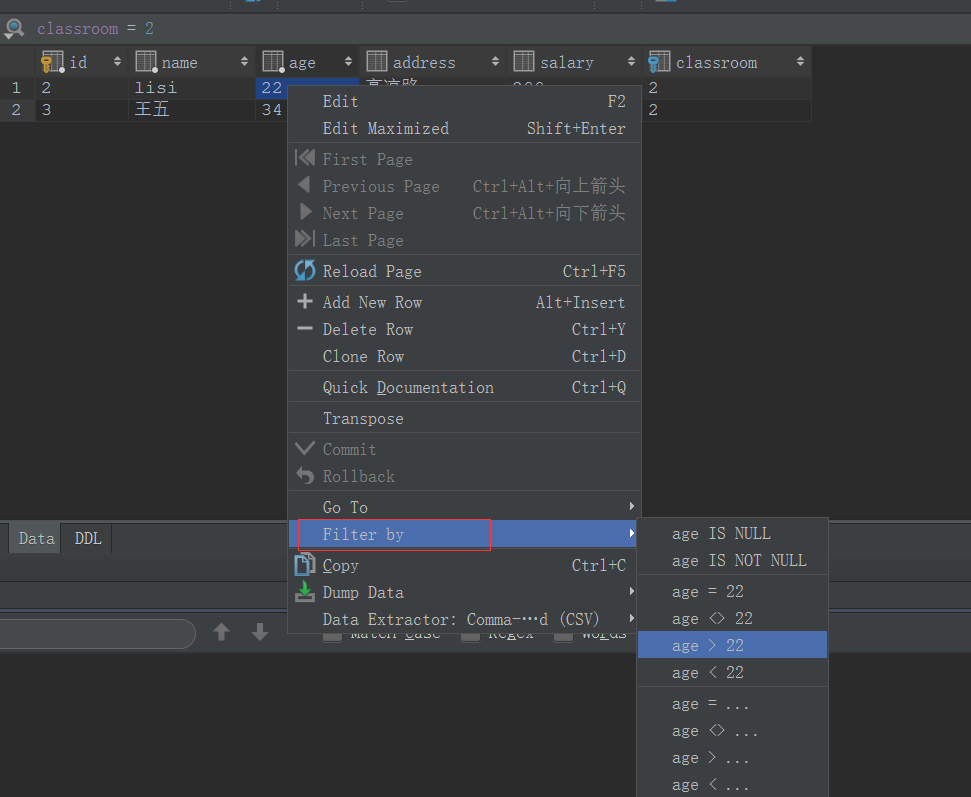
For the result set opened with table edit (select the table in the object tree, right-click -> table editor), you can use the condition to continue filtering the result set, as shown in the figure below, you can enter the where condition filter in the input item in the upper left corner of the result set
You can also right click on the column that needs to filter the data, filter by filter
7. Row to column
For tables with many fields, you need to push left and right to view the data, you can switch to column display, and use the shortcut key Ctrl+Q in the result set view area

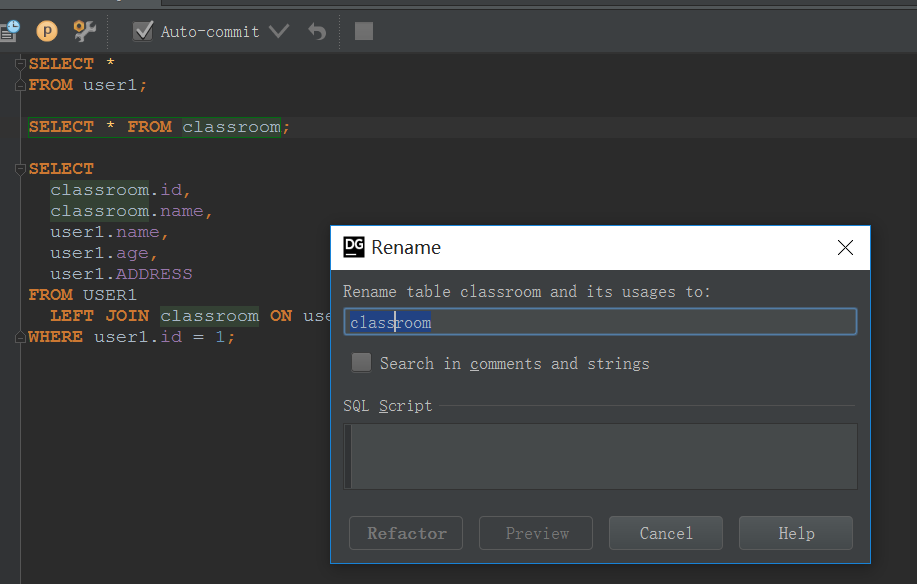
8. Variable renaming
Click the variable to be renamed with the mouse, press the shortcut key Shift+F6, and the rename dialog box will pop up, enter a new name
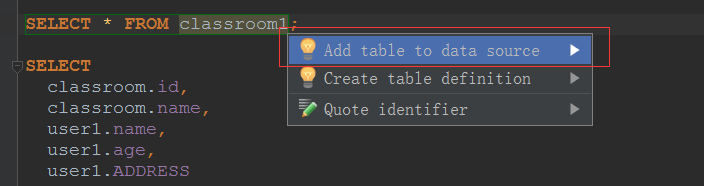
9. Automatic detection of unparseable objects
If the table name or field name does not exist, datagrip will automatically prompt. At this time, facing the problematic table name or field name, press Alt+Enter, and it will automatically prompt whether to create a table or add a field.
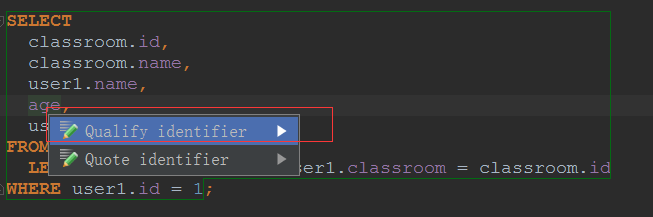
10. Authorization Qualified Field Name
For queries that use table aliases, but do not use alias prefixes in the fields, datagrip can automatically add prefixes, hover the mouse on the fields that need to add alias prefixes, and use the shortcut key of Alt+Enter
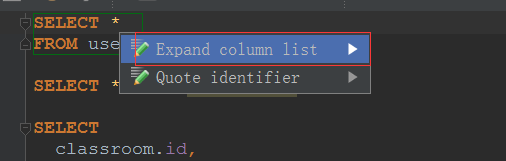
11. The * wildcard is automatically expanded
When querying, we will use select to query all columns. This is a bad habit. datagrip can quickly expand columns, position the cursor to the back, and press Alt+Enter shortcut key
12. Automatic uppercase conversion
It is a good habit to use uppercase in sql. If you use lowercase, you can place the cursor on the field or table name that needs to be converted, and use the shortcut keys Ctrl+shift+U to convert automatically
13. SQL formatting
Select the sql code that needs to be formatted, use the shortcut key of Ctrl+Alt+L, 4 MySQL tuning tools, all the masters of the company are using it!
datagrip provides a powerful editor that implements the column editing mode of notpad++
14. Multi-cursor mode
When editing sql, you may need to input or delete some characters at the same time, press alt+shift, and click the mouse at different positions at the same time, multiple cursors will appear
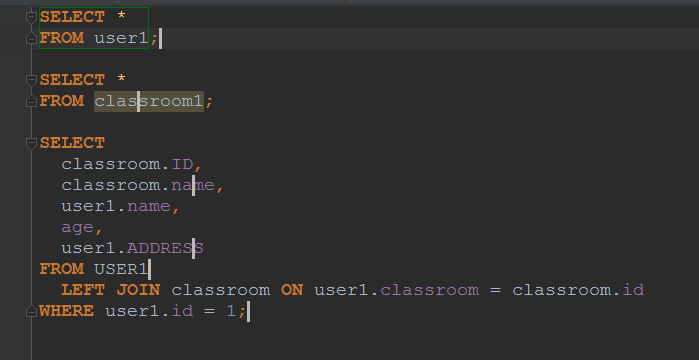
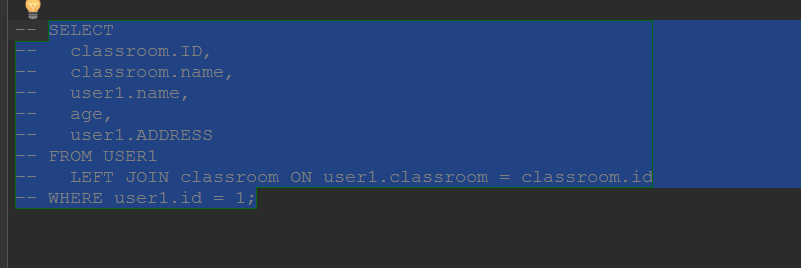
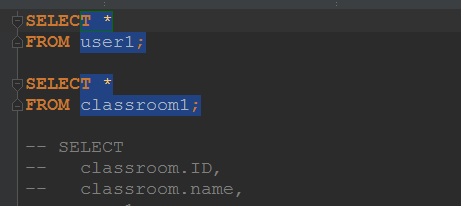
15. Code comments
Select the code to be commented, and press Ctrl+/ or Ctrl+shift+/ shortcut key to comment the code or uncomment it
16. Column editing
Hold down the Alt key on the keyboard and drag with the left mouse button at the same time to select multiple columns, copy and paste, etc.
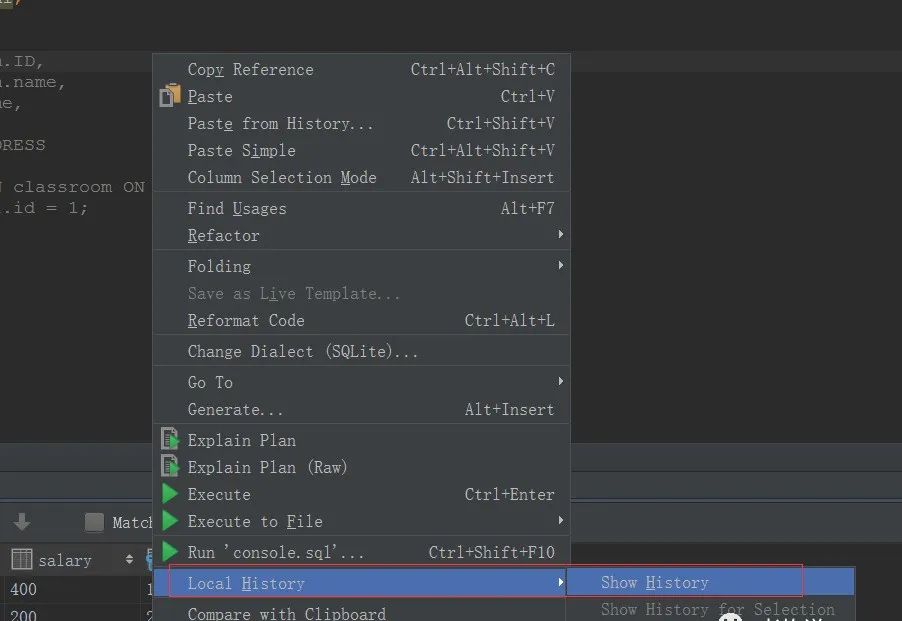
17. Code History
In the text editor, mail, local history, show history, you can view the used sql history
18. Command History
