influxdb github homepage: https://github.com/influxdata/influxdb
chronograf github homepage: https://github.com/influxdata/chronograf
Docker install InfluxDB
docker run -p 8086:8086 --name influxdb-dev influxdb:latest
Here the blogger installed version 2.2.1
Then visit the website: http://127.0.0.1:8086/, get the following interface:
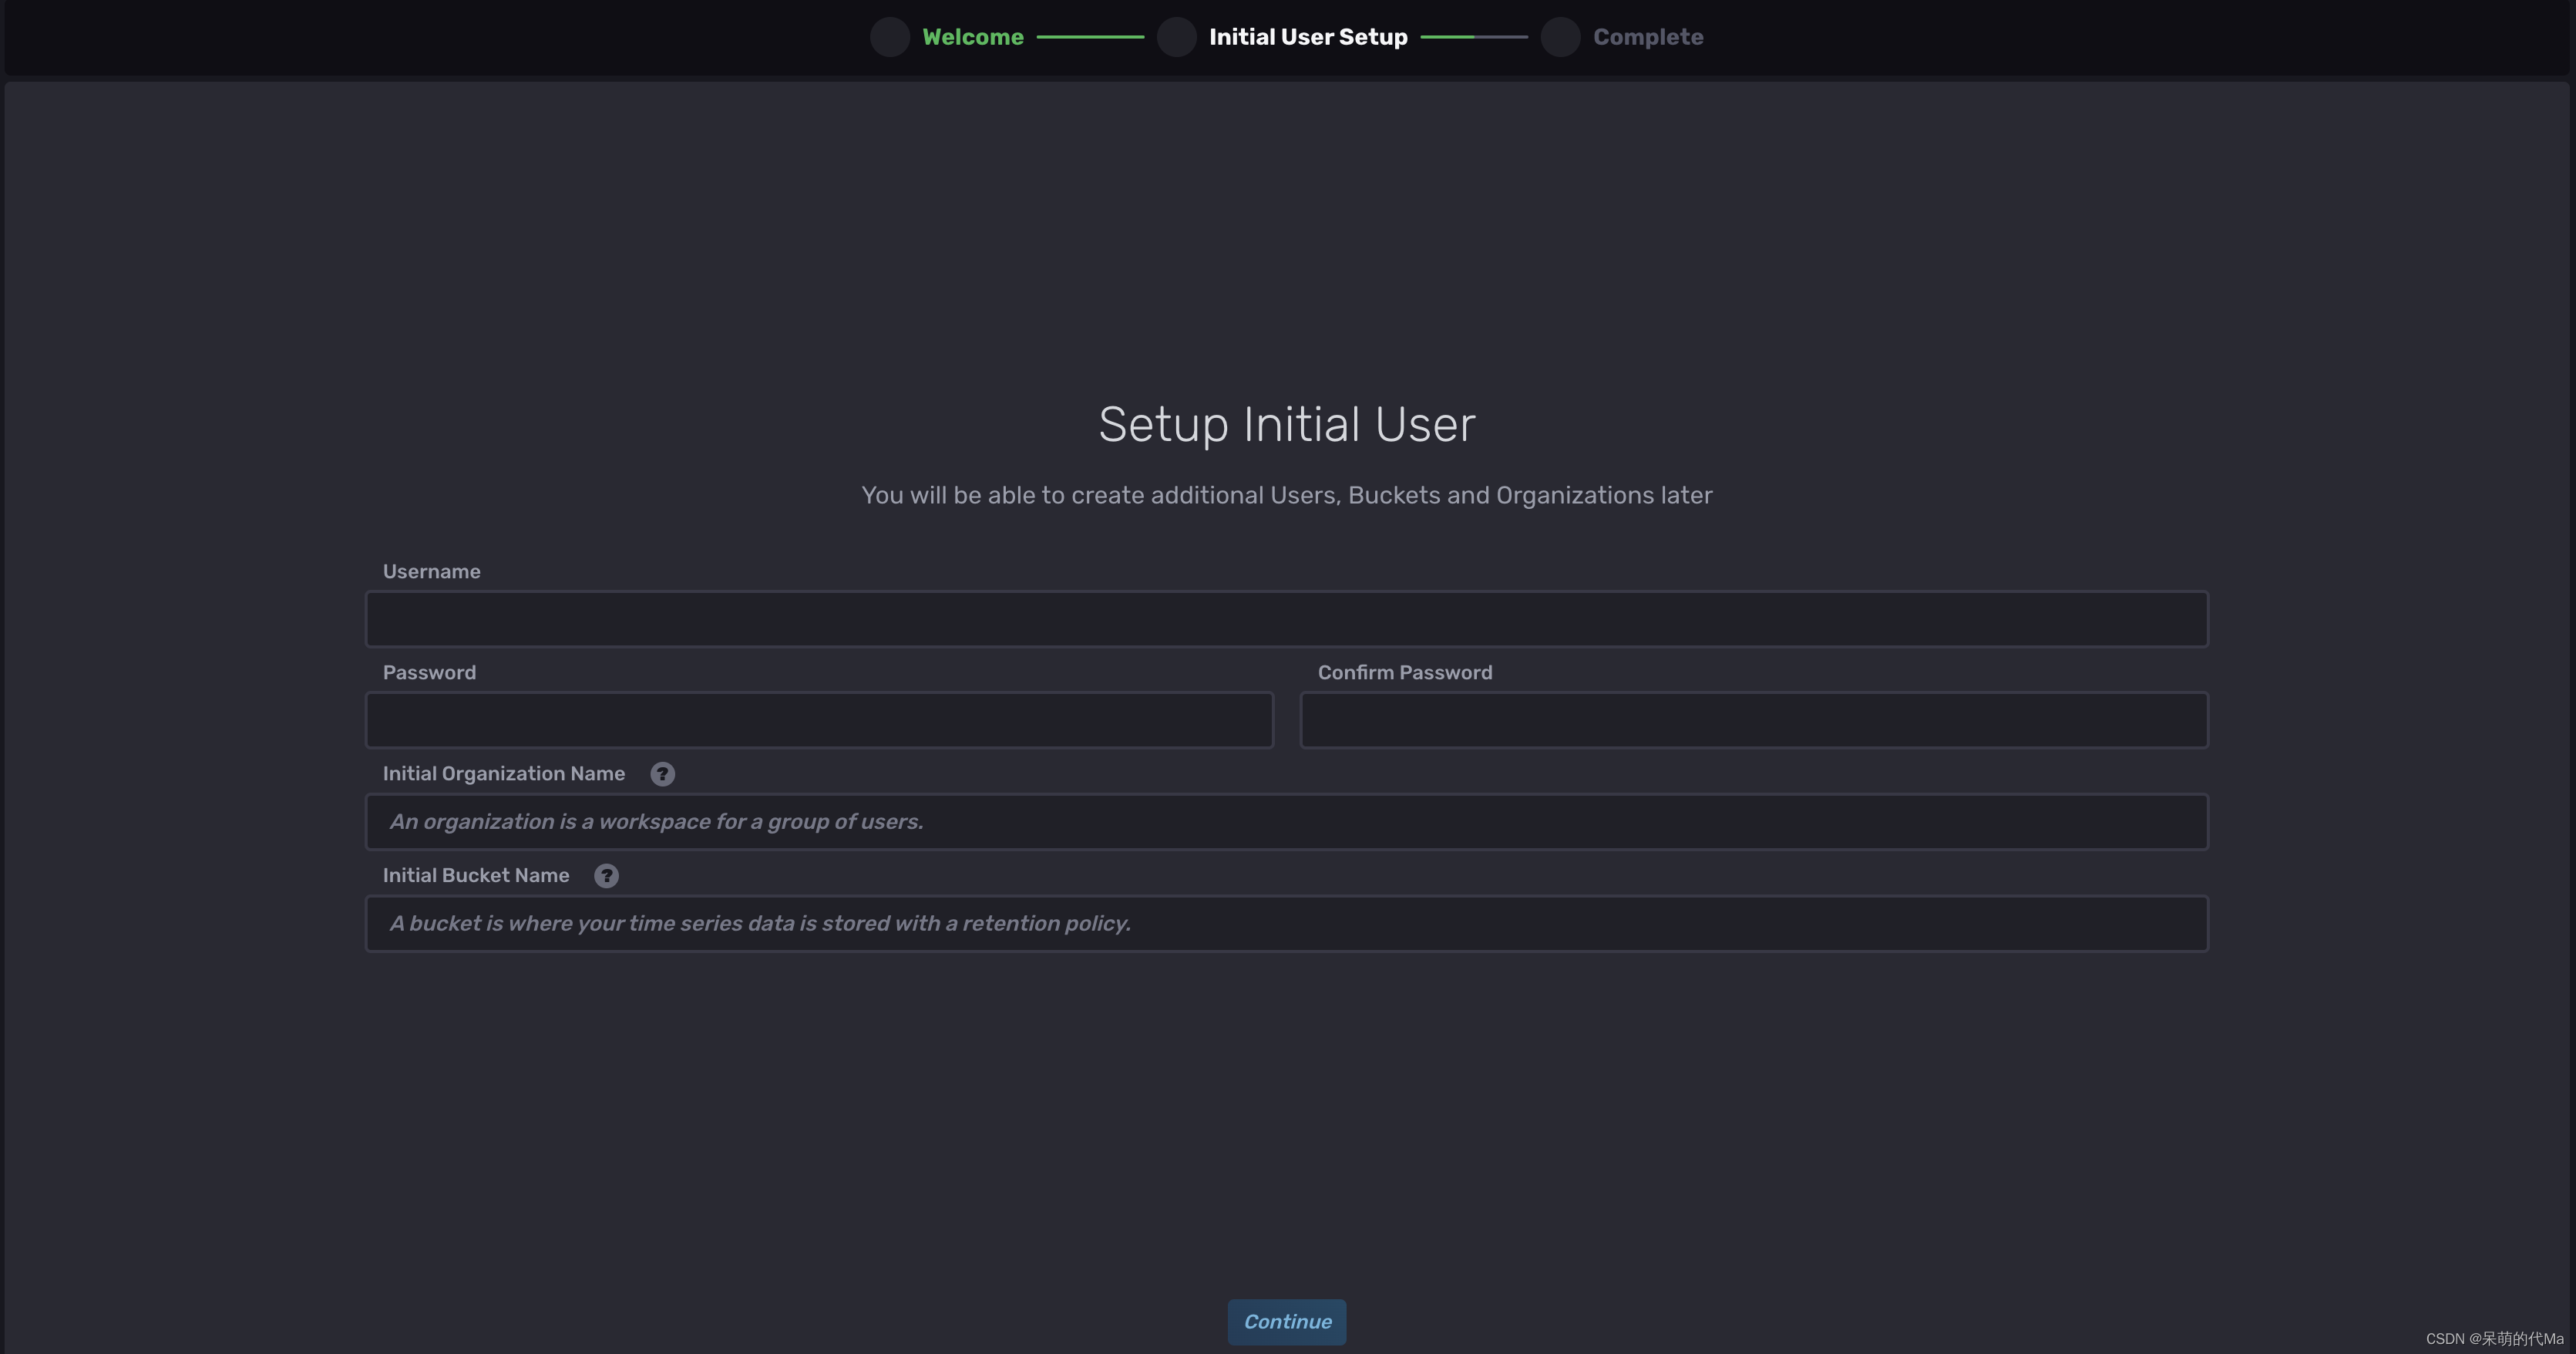
For example, enter:
- Username: root
- Password: influx_pass
- Initial organization (organization name): manager
- Initial bucket name: manager_test_bucket
in:
- organization: A workspace for a group of users. An organization can create many users, buckets, dashboards, tasks. Organizations are the largest environment, and data under different organizations are isolated.
- bucket: storage bucket, similar to the concept of a database. At the same time, each data in the bucket will have a storage period, and it will be deleted after a long time, or stored permanently.
Click [submit] to submit and enter the main interface:
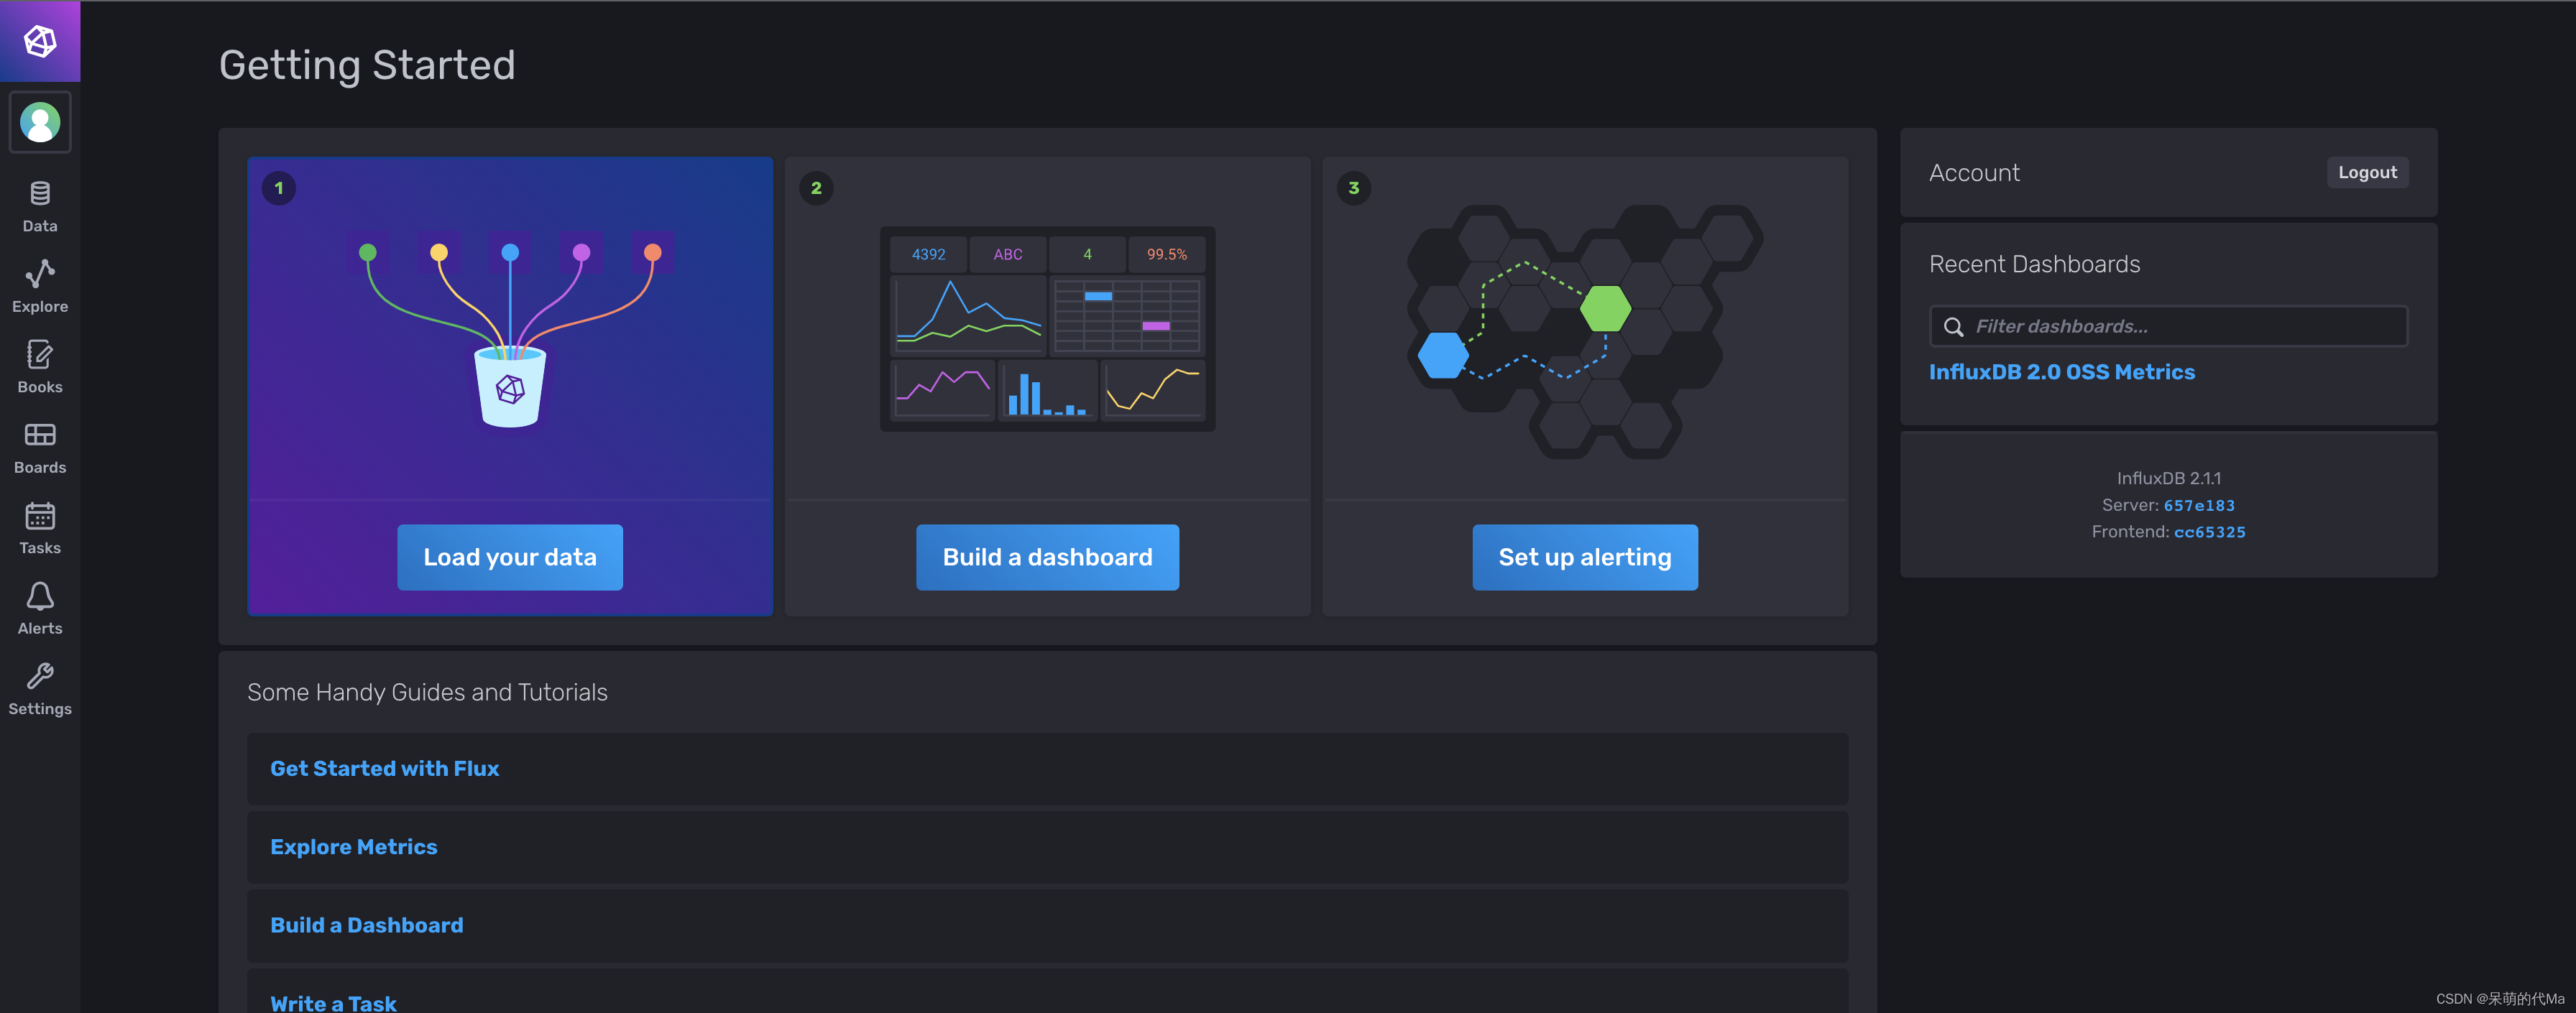
Use the front-end interface
- Click [Explore] on the left, this interface is where data is queried when there is data in the database
- Click [Script Editor] in the middle to switch to the command line mode, which is convenient for adding, deleting, modifying and checking data

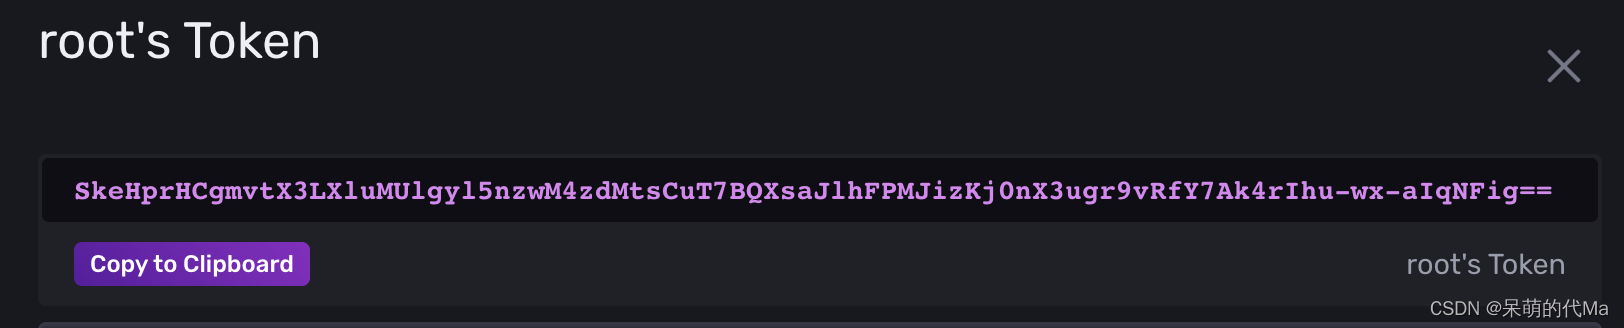
When connecting through an external tool, token verification is required, and the location of the token is:
- Click [Data] on the left
- Click [API Tokens] on the right

and then click [root's Token] to get the token of the current user, which isSkeHprHCgmvtX3LXluMUlg......the following string