Easy setting of breadcrumbs: proLayout can directly set breadcrumbs
<PageContainer
    header={

   {
      title: '请假管理',
      ghost: true,
      breadcrumb: {
        routes: [
          {
            path: '',
            breadcrumbName: '考前报道管理',
          },
          {
            path: '',
            breadcrumbName: '请假管理',
          },
        ],
      }}}
    >
1. Project scenario:
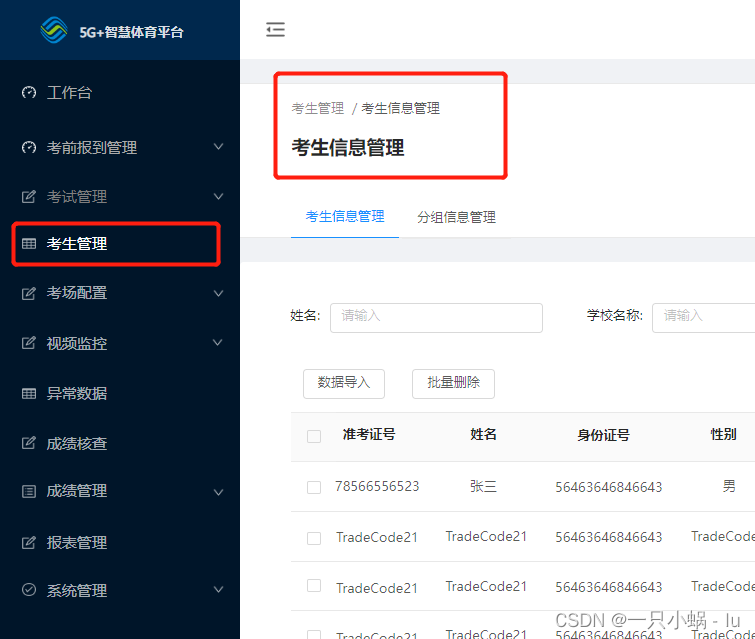
Umi uses ptoLayout together to generate menus through routing. The prototype picture shows that some secondary and tertiary routes are displayed on the title of the page, but they cannot be displayed on the menu. As shown in the figure, the candidate information management of the secondary route is on the title, but not on the menu.
prototype:
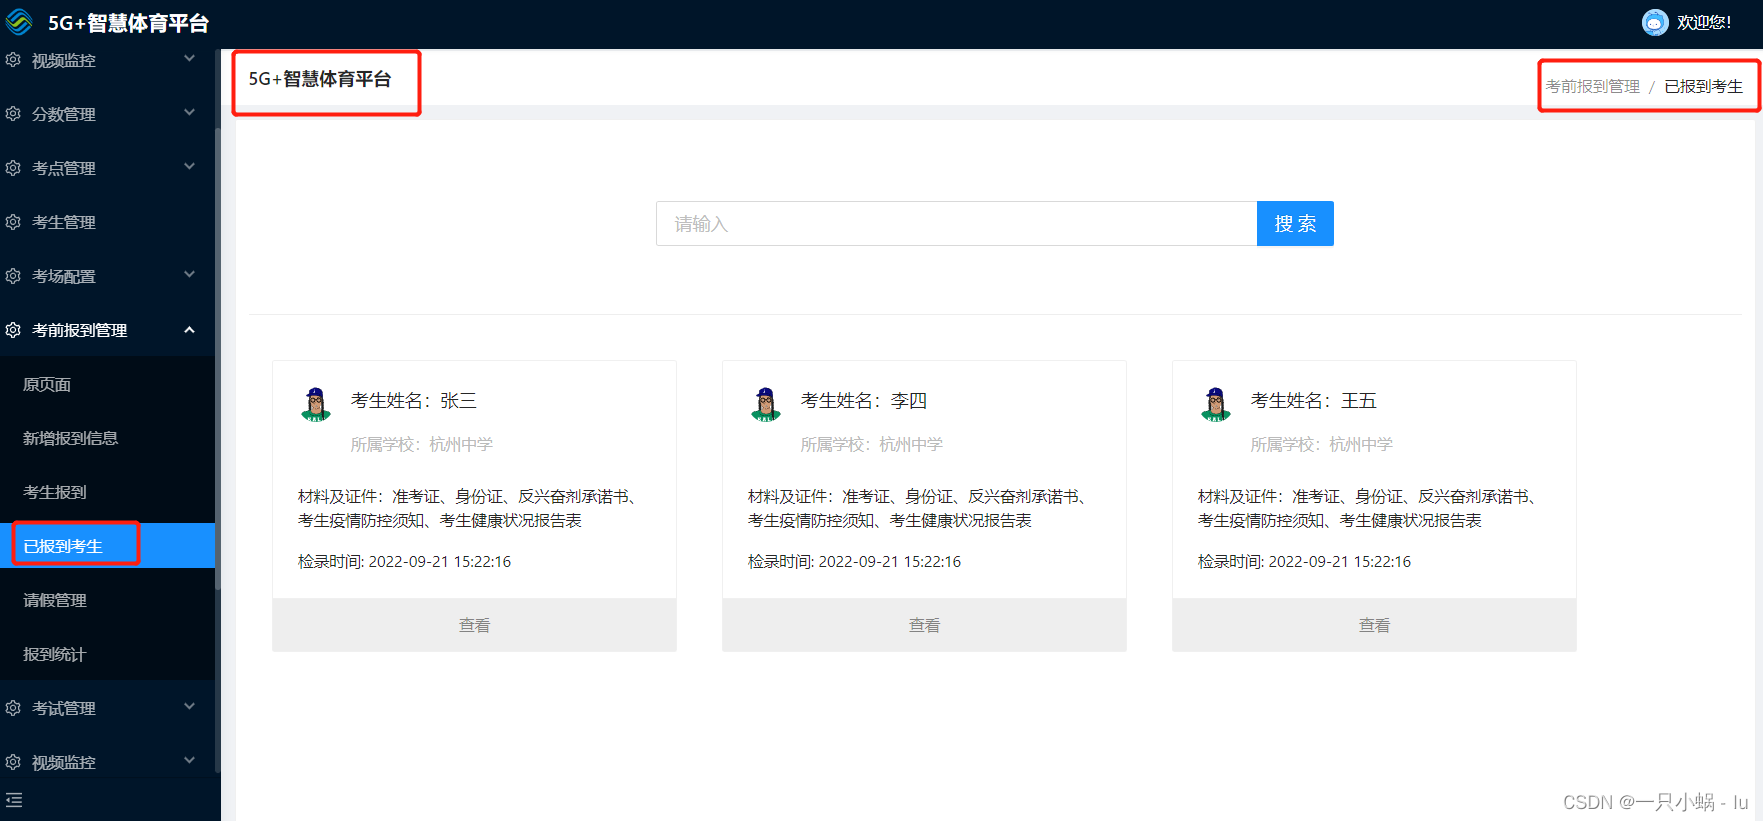
Actual effect: The title is displayed incorrectly. When it is not displayed on the menu, that is, when the route does not set a name, the title will not be displayed either (5G+ shows that candidates have been reported, which is the desired effect)
2. Analysis:
The combination of ProLayout and umi will have the best effect. umi will help us automatically inject the routes in config.ts into the configured layout, which can save you from the trouble of handwriting menus.
1. ant-design-pro layout
① Install @ant-design/pro-layout
② Configure layout:{}
see (quick start - modify configuration) --> https://v3.umijs.org/zh-CN/docs/getting-started
③ By default, Pro will read the routes configuration in config/config.tsx as the menu data of ProLayout to generate the menu. If the name attribute is configured in routes, a menu will be generated, and the ordinary route without name attribute
2. umi routing configuration
Umi configures projects and plugins in .umirc.ts or config/config.ts, supports es6
Advanced usage of the menu: By default, Pro will read the routes configuration in config/config.tsx as the menu data of ProLayout to generate the menu, and cooperate with plugin-access to easily manage the menu permissions.
1. 路由
   ① 直接写在.umirc.ts或config/config.ts
   ② 路由配置可以拆分成单独的 routes.ts:
  / config/routes.ts

   export default [
      { exact: true, path: '/', component: 'index' },
];

// config/config.ts

import { defineConfig } from 'umi';
import routes from './routes';

export default defineConfig({
  routes: routes,
});
3. Solution:
Look at the API of proLayout, and find that you can set whether to display the secondary route through the api, that is, the secondary route, write the name, but the property is not displayed in the menu bar, but the route is displayed.
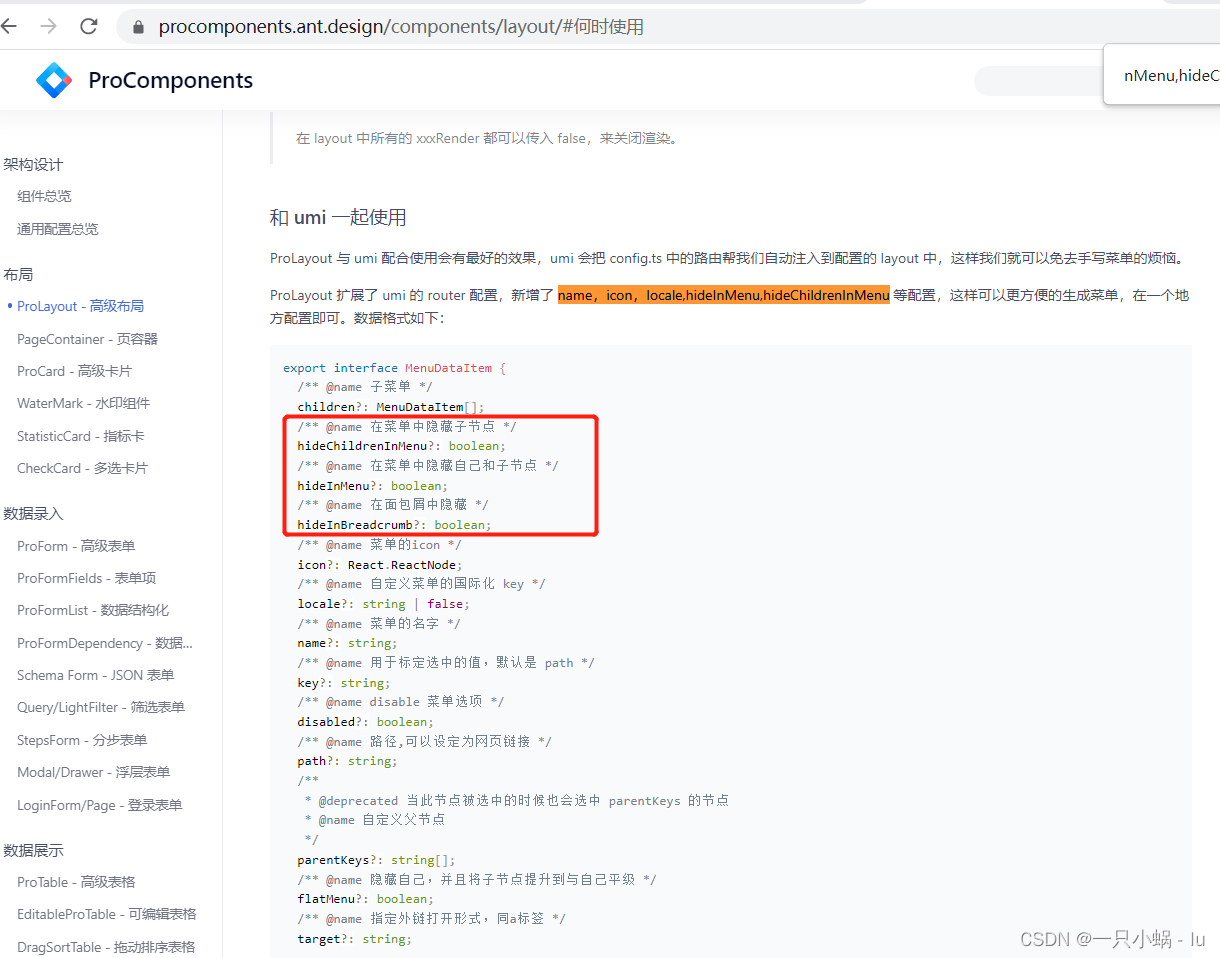
ProLayout expands the router configuration of umi, and adds configurations such as name, icon, locale, hideInMenu, hideChildrenInMenu, etc., so that the menu can be generated more conveniently and configured in one place
Routing code:
 {
      path: '/gradeManagement',
      name: '成绩管理',
      icon: 'setting',
      access: 'isGradeManagement',
      hideChildrenInMenu:true,
      routes: [
        {
          path: '/gradeManagement',
          redirect: './gradeMan',
        },
        {
          path: '/gradeManagement/gradeMan',
          icon: 'setting',
          component: './gradeManagement/gradeMan',
          name: '成绩管理',
        },
        {
          path: '/gradeManagement/gradeDetail',
          icon: 'setting',
          component: './gradeManagement/gradeDetail',
          name: '详情查看',
        },
      ]
    }