
Abstract: The intelligent flame and smoke detection system is used for intelligent daily fire detection and alarm. It uses the camera screen to identify flames and smoke in real time. It also supports picture and video flame detection and visualizes the results. This paper introduces the intelligent flame and smoke detection system in detail. While introducing the algorithm principle, it also gives the implementation code of Python and the UI interface of PyQt . In the interface, various pictures and videos can be selected for detection and recognition; multiple targets in the image can be recognized and classified, with fast detection speed and high recognition accuracy. The blog post provides a complete Python code and usage tutorial, which is suitable for beginners to refer to. For the complete code resource file, please go to the download link at the end of the article. The catalog of this blog post is as follows:
Article Directory
Demonstration and introduction of intelligent flame and smoke detection system
foreword
The occurrence of fire accidents has always been one of the disasters that are difficult to avoid in people's daily life. People have been trying to find the right way to reduce the economic and property losses caused by fire accidents. Although it is impractical to completely eliminate the occurrence of fire accidents, it is possible to monitor the occurrence of fire accidents with data, quickly find open flames according to sound and light alarms, and extinguish them in the fastest time, so as to reduce the losses caused by fire accidents, so flames and The identification of smoke is always the most important direction of people's research.
Flame and smoke discrimination, together with surveillance cameras, real-time discrimination of open flames in different areas of the supervised logistics warehouse. If a fire safety hazard is detected, an early warning will be issued immediately and the monitoring center will be notified for resolution. The flame and smoke discrimination early warning platform automatically recognizes the smoke and fire monitoring system to make full use of the existing ordinary video surveillance, no need to install a thermal imaging camera, no need for a controller. Flame and smoke discrimination and early warning platform automatically recognizes firework monitoring system based on intelligent video analysis and deep learning neural network technology, completes real-time analysis, identification and warning of flames in the supervision area, while retaining flame screenshots and firework videos, and fire data Push it to the relevant personnel for timely processing.
This system is based on YoloV5 and uses login and registration for user management. For pictures, videos and real-time images captured by cameras, it can detect flames and smoke. The system supports result recording, display and storage, and the results of each detection are recorded in the table. In this regard, here is the interface designed by the blogger. The simple style of the same style, the function can also meet the recognition and detection of pictures, videos and cameras. I hope you can like it. The initial interface is as follows:

The screenshot of the interface when detecting categories (click on the picture to enlarge) is as shown below, which can identify multiple categories in the screen, and can also enable camera or video detection:

For the detailed function demonstration effect, please refer to the blogger’s B station video or the animation demonstration in the next section. Friends who think it is good, please like, follow and bookmark! The design workload of the system UI interface is relatively large, and the interface beautification needs to be carefully crafted. If you have any suggestions or opinions, you can comment and exchange them below.
1. Effect demonstration
Whether the software is easy to use or not, appearance is very important. First of all, let’s take a look at the recognition effect through the animation. The main function of the system is to recognize the flames and smoke in pictures, videos and camera images, and the recognition results are visually displayed on the interface. And in the image, it also provides the display selection function of multiple targets, and the demonstration effect is as follows.
(1) System introduction
The intelligent flame and smoke detection system is mainly used for fire detection in daily scenes, identifying flames and smoke and marking the number, location, prediction confidence, etc. Flame and smoke conditions can also be tested and detected; the login system provides user registration, login, and management functions; the trained and tuned model can effectively detect fire conditions, and the model can be switched; a single target can be selected for separate display and labeling, and the results are consistent key to save.
(2) Technical features
(1) The detection algorithm adopts the YoloV5 deep learning model, which is convenient for training and switching;
(2) Choose pictures, videos or cameras to detect flames and smoke;
(3) The interface is implemented based on PyQt5, with results display, switching and saving functions;
( 4) Support user login, registration, management, interface scaling, visualization and other functions;
(3) User registration and login interface
A login interface is designed here, where you can register an account and password, and then log in. The interface still refers to the current popular UI design. The left side is a moving picture, and the right side enters the account number, password, verification code, etc.

(4) Select image recognition
The system allows you to select a picture file for recognition. After clicking the picture selection button icon to select a picture, all the recognition results will be displayed. You can check a single result through the drop-down box to judge a specific target. The interface display of this function is shown in the figure below:

(5) Video recognition effect display
Many times we need to identify multiple flames and smoke in a video, here is a video selection function. Click the video button to select the video to be detected. The system will automatically analyze the video frame by frame to identify multiple flames and smoke, and record the classification and counting results of the flames and smoke in the table at the lower right corner. The effect is shown in the figure below:

(6) The camera detection effect is displayed
in real scenes. We often use the camera to obtain real-time images, and at the same time need to identify flames and smoke, so this article takes this function into consideration. As shown in the figure below, after clicking the camera button, the system enters the ready state, the system displays the real-time picture and starts to detect the flame and smoke in the picture, and the recognition result is shown in the figure below:

2. Intelligent flame and smoke data set and training
Introduction to YOLO
The origin of YOLO's name is quite interesting. Its original meaning is the abbreviation of the buzzword You Only Live Once, and the author of the model, Joseph Redmon, changed a word and used You Only Look One as the name of the model. This is because, compared to the R-CNN series algorithm, which decomposes the detection problem into two steps of demarcating the position and determining the category, the YOLO series algorithm does not have an explicit process of finding the area, and can achieve end-to-end fast prediction, that is, input an image image, giving the location, class and confidence of several objects in the output.
Compared with the SSD algorithm, which is also in place in one step, the characteristic of the YOLO series is that once the algorithm is issued, various people and teams will update and iterate it. By continuously updating the iterative model version, YOLO has also received continuous improvement in effect and wider attention. But it is worth noting that Joseph Redmon, the original author of the YOLO model, withdrew from the relevant research after updating to the v3 version, and the subsequent versions are the work of other researchers, including the YoloV5 we introduced today.
Let's first introduce the most original YOLO model, and then briefly introduce the YoloV5 version, mainly through specific examples to see how to use the YOLOv5 model well.
The network structure of YOLOv1 is nothing special. It is a convolutional neural network like the image classification we are familiar with, but its output vector is not the same. If the neural network is regarded as a regression analysis problem we are familiar with, then what YOLO does is to change the structure of the model response, and this also lays the foundation for YOLO target detection. The output vector of YOLO includes not only the category of the target, but also the coordinates of the bounding box and the confidence of the prediction. Its core idea is to divide the image into several small blocks of S*S, pre-place two bounding boxes in each grid, predict the coordinates, category and confidence of each bounding box through the convolutional neural network, and then Locally unique prediction boxes are obtained by non-maximum suppression.

After several years of version iterations, the network structure of YoloV5 has learned from others and has become extremely complex, mainly including extracting features through convolution and pooling network structures in Backbone, and continuously merging with previously extracted features in the Neck part, and in the Head part. It is used for final detection and output, as shown in the figure below.
We chose YoloV5 as the introduction today. On the one hand, it is because YoloV5 is already quite good in terms of the final effect. It is a relatively well-developed and widely used version; and more importantly, YoloV5 is very convenient to call, train and predict. Provides good practice tools for beginners. Another feature of YoloV5 is that it provides networks with different sizes and parameters for different device requirements and different application scenarios.

As shown in the figure, larger models such as YOLOv5l and YOLOv5x have more parameters and have higher prediction accuracy on large-scale COCO datasets; while small models such as YOLOv5n or YOLOv5s take up less space and are suitable for deployment on mobile devices , and the inference speed is faster, which is suitable for real-time detection of high frame rate video.
Dataset introduction
Here we use the flame and smoke recognition data set, which contains 3850 pictures in the training set, 405 pictures in the verification set, and 218 pictures in the test set, with a total of 4473 pictures. Some of the images and annotations are shown in the figure below.

Each image provides image class tag information, bounding box in the image, key part information, and attribute information. After the data set is decompressed, the following picture is obtained.

Configure the parameters of the model to train, set the address of the model, the input size of the graph is 480×480, the confidence threshold is set to 0.25, the NMS threshold is set to 0.45, and the GPU is used for training.
parser = argparse.ArgumentParser()
parser.add_argument('--weights', nargs='+', type=str, default='./weights/fireSmoke-best.pt',
                    help='model.pt path(s)')  # 模型路径仅支持.pt文件
parser.add_argument('--img-size', type=int, default=480, help='inference size (pixels)')  # 检测图像大小,仅支持480
parser.add_argument('--conf-thres', type=float, default=0.25, help='object confidence threshold')  # 置信度阈值
parser.add_argument('--iou-thres', type=float, default=0.45, help='IOU threshold for NMS')  # NMS阈值
# 选中运行机器的GPU或者cpu,有GPU则GPU,没有则cpu,若想仅使用cpu,可以填cpu即可
parser.add_argument('--device', default='',
                    help='cuda device, i.e. 0 or 0,1,2,3 or cpu')
parser.add_argument('--save-dir', type=str, default='inference', help='directory to save results')  # 文件保存路径
parser.add_argument('--classes', nargs='+', type=int,
                    help='filter by class: --class 0, or --class 0 2 3')  # 分开类别
parser.add_argument('--agnostic-nms', action='store_true', help='class-agnostic NMS')  # 使用NMS
opt = parser.parse_args()  # opt局部变量,重要
out, weight, imgsz = opt.save_dir, opt.weights, opt.img_size  # 得到文件保存路径,文件权重路径,图像尺寸
device = select_device(opt.device)  # 检验计算单元,gpu还是cpu
half = device.type != 'cpu'  # 如果使用gpu则进行半精度推理

model = attempt_load(weight, map_location=device)  # 读取模型
imgsz = check_img_size(imgsz, s=model.stride.max())  # 检查图像尺寸
if half:  # 如果是半精度推理
    model.half()  # 转换模型的格式
names = model.module.names if hasattr(model, 'module') else model.names  # 得到模型训练的类别名

colors = [[random.randint(0, 255) for _ in range(3)] for _ in range(len(names))]  # 给每个类别一个颜色
img = torch.zeros((1, 3, imgsz, imgsz), device=device)  # 创建一个图像进行预推理
_ = model(img.half() if half else img) if device.type != 'cpu' else None  # 预推理
Run train.py in the cmd terminal for training, the following is a screenshot of the results during the training process. After 8 hours, the training was completed with a model size of 14.1Mb.

In deep learning, we usually observe the model training situation through the curve of the loss function decline. The YOLOv5 training mainly includes three aspects of loss: rectangular box loss (box_loss), confidence loss (obj_loss) and classification loss (cls_loss). After the training is over, we can also find some training processes in the logs directory. summary graph. The figure below shows the model training curve for bloggers training flame and smoke recognition.

Generally, we will come into contact with two indicators, namely recall rate recall and precision precision. The two indicators p and r simply judge the quality of the model from one angle, and both are values between 0 and 1. Where closer to 1, the performance of the model is better, and closer to 0, the performance of the model is worse. In order to comprehensively evaluate the performance of target detection, the average average density map is generally used to further evaluate the quality of the model. By setting different confidence thresholds, we can get the p-value and r-value calculated by the model under different thresholds. In general, the p-value and r-value are negatively correlated. After drawing, we can get the following figure In the curve shown, the area of the curve is called AP, and an AP value can be calculated for each target in the target detection model, and the mAP value of the model can be obtained by averaging all the AP values.

Taking PR-curve as an example, we can see that the mean average accuracy of our model on the validation set is 0.676.
3. Intelligent flame and smoke detection
After the training is completed, the best model is obtained. Next, we input the frame image to the network for prediction, so as to obtain the prediction result. The code of the prediction method (predict.py) part is as follows:
def predict(img):
    img = torch.from_numpy(img).to(device)
    img = img.half() if half else img.float()
    img /= 255.0
    if img.ndimension() == 3:
        img = img.unsqueeze(0)

    t1 = time_synchronized()
    pred = model(img, augment=False)[0]
    pred = non_max_suppression(pred, opt.conf_thres, opt.iou_thres, classes=opt.classes,
                               agnostic=opt.agnostic_nms)
    t2 = time_synchronized()
    InferNms = round((t2 - t1), 2)

    return pred, InferNms
After getting the prediction result, we can frame the flame and smoke in the frame image, and then use opencv drawing operation on the picture to output the category of flame and smoke and the prediction score of flame and smoke. The following is a script for reading and detecting a flame and smoke picture. First, the picture data is preprocessed and sent to predict for detection, and then the position of the marked frame is calculated and marked in the picture.
if __name__ == '__main__':
    img_path = "./UI_rec/test_/Burning-Couches_-The-Sequel-_mp4-96_jpg.rf.28706d695c18b0daccc1711efdebab0a.jpg"
    image = cv_imread(img_path)
    image = cv2.resize(image, (850, 500))
    img0 = image.copy()
    img = letterbox(img0, new_shape=imgsz)[0]
    img = np.stack(img, 0)
    img = img[:, :, ::-1].transpose(2, 0, 1)  # BGR to RGB, to 3x416x416
    img = np.ascontiguousarray(img)

    pred, useTime = predict(img)

    det = pred[0]
    p, s, im0 = None, '', img0
    if det is not None and len(det):  # 如果有检测信息则进入
        det[:, :4] = scale_coords(img.shape[1:], det[:, :4], im0.shape).round()  # 把图像缩放至im0的尺寸
        number_i = 0  # 类别预编号
        detInfo = []
        for *xyxy, conf, cls in reversed(det):  # 遍历检测信息
            c1, c2 = (int(xyxy[0]), int(xyxy[1])), (int(xyxy[2]), int(xyxy[3]))
            # 将检测信息添加到字典中
            detInfo.append([names[int(cls)], [c1[0], c1[1], c2[0], c2[1]], '%.2f' % conf])
            number_i += 1  # 编号数+1

            label = '%s %.2f' % (names[int(cls)], conf)

            # 画出检测到的目标物
            plot_one_box(image, xyxy, label=label, color=colors[int(cls)])
    # 实时显示检测画面
    cv2.imshow('Stream', image)
    # if cv2.waitKey(1) & 0xFF == ord('q'):
    #     break
    c = cv2.waitKey(0) & 0xff
The result of the execution is shown in the figure below. The types and confidence values of the flame and smoke are marked in the figure, and the prediction speed is fast. Based on this model, we can design it as a system with an interface, select a picture, video or camera on the interface and then call the model for detection.

The blogger conducted a detailed test on the entire system, and finally developed a version with a smooth and refreshing interface, which is the display of the demo part of the blog post, complete UI interface, test picture video, code files, and Python offline dependency package (easy to install and run, but also You can configure the environment by yourself), all of which have been packaged and uploaded, and interested friends can obtain them through the download link.

download link
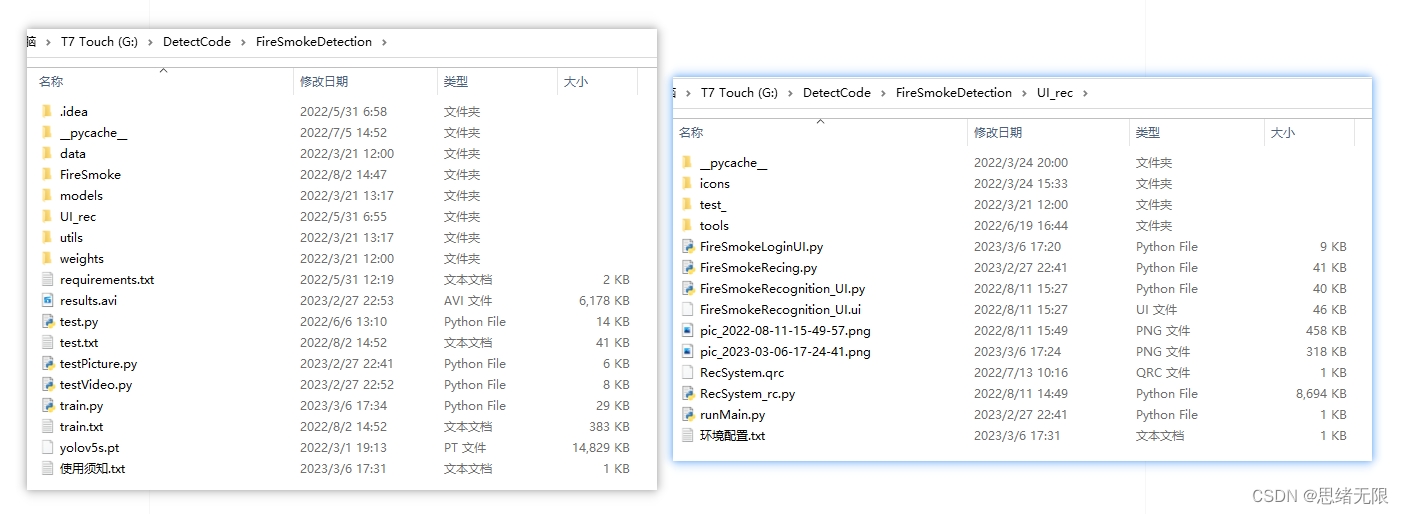
If you want to obtain the complete and complete program files involved in the blog post (including test pictures, videos, py, UI files, etc., as shown in the figure below), they have been packaged and uploaded to the blogger’s Bread Multi-platform. See blogs and videos for reference. Package all the involved files into it at the same time, and click to run. The screenshot of the complete file is as follows:

The resources under the folder are displayed as follows, and the offline dependency package of Python is also given in the link below. Readers can copy the offline dependency package to the project directory for installation after the correct installation of Anaconda and Pycharm software. The use of offline dependencies is detailed The demonstration can also be seen in my B station video: Win11 installs software from scratch and configures the environment to run deep learning projects , and uses pycharm and anaconda in Win10 for python environment configuration tutorials .
Note : This code is developed with Pycharm+Python3.8, and it can run successfully after testing. The main programs of the running interface are runMain.py and LoginUI.py. The test picture script can run testPicture.py, and the test video script can run testVideo.py. To ensure that the program runs smoothly, please configure the version of the Python dependency package according to requirements.txt. Python version: 3.8 , do not use other versions, see requirements.txt file for details;
The complete resource includes data sets and training codes. For environment configuration and how to modify text, pictures, logos, etc. in the interface, please refer to the video. To download the complete file of the project, please refer to the reference blog post, or refer to the introduction of the video : ➷➷ ➷
Reference blog article: https://www.cnblogs.com/sixuwuxian/p/17238083.html
Reference video demonstration: https://www.bilibili.com/video/BV1WY411z7eG/
Offline dependency library download link : https://pan.baidu.com/s/1hW9z9ofV1FRSezTSj59JSg?pwd=oy4n (extraction code: oy4n)
Methods for modifying text, icons and background images in the interface:
In Qt Designer, you can completely modify the various controls and settings of the interface, and then convert the ui file into a py file to call and display the interface. If you only need to modify the text, icons and background images in the interface, you can modify them directly in the ConfigUI.config file. The steps are as follows:
(1) Open the UI_rec/tools/ConfigUI.config file. If there are garbled characters, please select GBK code to open.
(2) If you need to modify the interface text, just select the character you want to change and replace it with your own.
(3) If you need to modify the background, icons, etc., you only need to modify the path of the picture. For example, the background image in the original file is set as follows:
mainWindow = :/images/icons/back-image.png
It can be modified to your own image named background2.png (located in the UI_rec/icons/ folder), and the background image can be modified by setting this item as follows:
mainWindow = ./icons/background2.png
conclusion
Due to the limited ability of the blogger, even if the method mentioned in the blog post has been tested, it is inevitable that there will be omissions. I hope you can enthusiastically point out the mistakes, so that the next revision can be presented to everyone in a more perfect and rigorous manner. At the same time, if there is a better way to achieve it, please let me know.