Umi framework, prolayout layout, access setting menu permissions, initialState global initialization data, used together, according to the permission information returned by the backend, completes the different display of different permissions of the menu.
1. umi cooperates with patlayout layout to realize the display of menu bar according to the configured route
2. Umi's access plug-in, set the menu display of different permissions
3. There is no redux warehouse, and the data is initialized globally through initialState to complete the preservation and acquisition of permission information after login
4. Overall process:
① In the app.tsx file, set and export the initialState data, which includes the method of obtaining permissions and the obtained permission field
② When logging in, call the initialState data, call the interface method, and modify the permission value in the global initialization
② access plug-in, cooperate with pro-layout, set routing menu, configure access value according to the permission value in initialState data, and set menu permission
③ Every time it is refreshed, re-call the access permission method in initialState
1. umi plug-in access, with pro-layout, routing completes menu and permission configuration
1. Configure pro-layout
① Install @ant-design/pro-layout
② Configure layout: {}
see (quick start-modify configuration) --> https://v3.umijs.org/zh-CN/docs/getting-started
③ Default in Pro It will read the routes configuration in config/config.tsx as the menu data of ProLayout to generate the menu. If the name attribute is configured in routes, a menu will be generated, and the ordinary route without name attribute
2. access plugin --umijs/plugin-access
The cooperation of routing and plugin-access can also facilitate the management of menu permissions. Configure the access attribute in the menu. When the field result is true, the menu is visible; if it is false, the menu is not visible.
{
path: '/dashboardHouse',
name: '工作台',
icon: 'dashboard',
access: 'isDashboardHouse',
component: './dashboardHouse/dashboard',
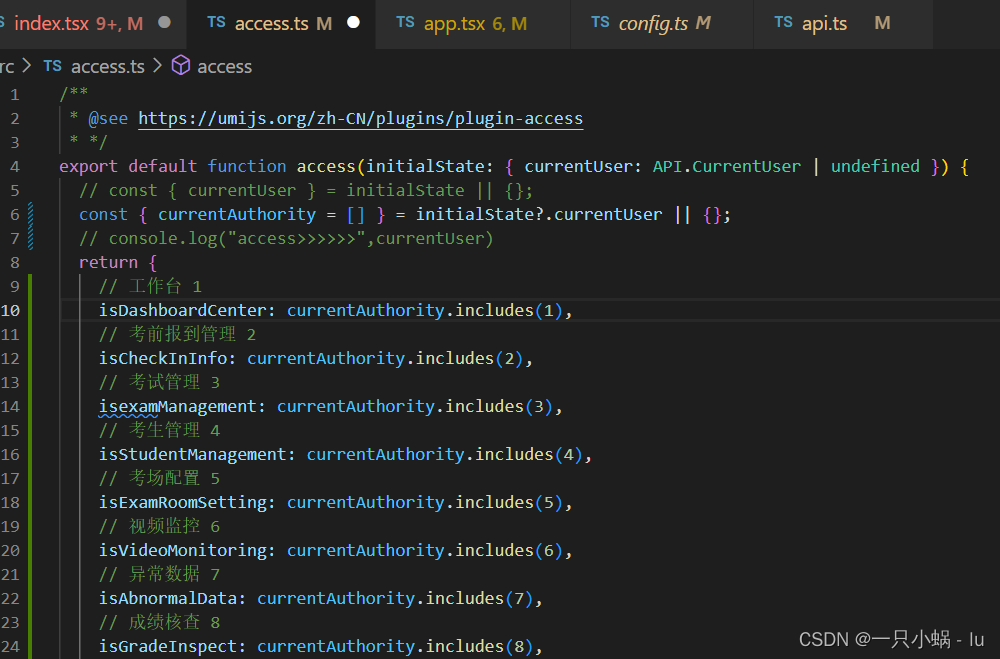
}, Access introduction: It is agreed to src/access.ts define a file for our permissions. This file needs to export a method by default, and the exported method will be executed when the project is initialized . This method needs to return an object, and each value of the object corresponds to a defined permission. As shown in the figure, in access, take the permission information in the global initialization data umijs/plugin-initial-state for matching.
2. Use umijs/plugin-initial-state to store permission information
1. Introduction of umi plugin --umijs/plugin-initial-state
① Agree on a place to produce and consume initialization data.
②Enabled when there is and the method src/app.ts is exported getInitialState .
③This plug-in cannot be used directly and must be @umijs/plugin-model used together.
④Configuration:

⑤ Get the value in the component

2. use
① When src/app.ts setting up and exporting getInitialState a method (enabled)
getInitialState 中的 fetchUserInfo 中的方法,是调用权限的方法/接口
登陆时,本地存储name ,后面每次刷新时,从本地获取name ,调用getInitialState的权限方法
/**将/api/currentUser接口返回的信息存入全局初始数据initialState */
export async function getInitialState(): Promise<{
  settings?: Partial<LayoutSettings>;
  currentUser?: API.CurrentUser;
  menus?: [];
  //请求用户信息
  fetchUserInfo?: () => Promise<API.CurrentUser | undefined>;
}> {
  const fetchUserInfo = async () => {
    const name = window.sessionStorage.getItem('name')
    try {
      const res = await getCurrentUser({ name });
      if (res?.success) {
        const { data:{ids,code} } = res
        const currentUser = {currentAuthority:ids,code}
        return currentUser;
      }
    } catch (error) {
      // history.push(loginPath);
    }
    return undefined;
  };
  // // 如果是登录页面,不执行
  if (history.location.pathname !== loginPath) {
    const currentUser = await fetchUserInfo();
    return {
      currentUser,
      fetchUserInfo,
      settings: {},
    };
  }
  return {
    settings: {},
    fetchUserInfo
  };
② Login, call initialState data, call fetchUserInfo to obtain permissions (modify permission information)
 const { initialState, setInitialState } = useModel('@@initialState');

  /**登陆后--获取权限--调权限接口 */
  const fetchUserInfo = async () => {
    const userInfo = await initialState?.fetchUserInfo?.();
    if (userInfo) {
      setInitialState({
        ...initialState,
        currentUser: userInfo,
      });
    }
  }

  // 点击登录
  const handleSubmit = async (values: API.LoginParams) => {
    var storage = window.sessionStorage;
    const { name, password } = values
    // 登录接口
    const res = await logIn({ name, password })
    if (res?.success) {
      setSubmitting(true);
      storage.setItem('name', name)
      await fetchUserInfo();
    }
3. Used in conjunction with initial-state umijs/plugin-model 插件
①A hooks paradigm-based simple data management solution (some scenarios can be replaced dva), which is usually used for global shared data of middle-end projects.
②Enabled src/models when there is a hooks model in the directory.
4. Assignment of page authority
The permission setting of access is introduced above. The access plug-in can also use the hook -- useAccess to obtain permission-related information in the component, and complete the allocation of page permissions with the component Access. (At this time, other information can also be stored in access, and can be referenced elsewhere, such as code)
<Access> The component has accessible and fallback two properties, when accessible it is true the child component will be rendered, when accessible it is the corresponding property false will be rendered .fallbackReactNode
import {  useAccess, Access } from 'umi';

    const access = useAccess()
    const code = access.code

     <Access
        accessible={access.isDashboardCenterQuick}
        fallback ={null}
      >

         <Button type="dashed" icon={<PlusOutlined />} onClick={showModal}>
             添加
         </Button>
      </Access>
5. Routing authentication
Set the high-level component, you can get the access of the current route through the parameter route, and use useAccess to obtain the current route authority and realize route authentication

 {
      path: '/system',
      name: '系统管理',
      icon: 'setting',
      access: 'isSystem',
      wrappers: ['@/wrappers/auth'],
}
   // config,里的 路由设置