Camunda8 is designed and developed based on the standard cloud-native architecture, so the official recommendation is to install and deploy Camunda8 based on Kubernetes and docker. Considering that most developers do not necessarily have knowledge about the Kubernetes environment and cloud-native, this article introduces how to install and deploy Camunda8 on a Windows The way of manually installing and running Camunda8 on the machine is convenient for developers to quickly understand the components and new features of Camunda8, and have a perceptual understanding of the functions of Camunda8.

Camunda8 architecture diagram
The entire operation steps are: Download Camunda8 related components—"Install JDK—"Install elasticsearch—"Install zeebe—"Install operate—"Install tasklist—"Install process designer—"Design process—"Publish process—"Process pending tasks .
1. Deployment environment description
1. Introduction to the deployment environment
Operating system: Officially recommended to use Linux, I use Window11 64-bit, memory 16G;
Jdk version: OpenJDK 8+ or above is required, and I installed jdk20 version;
Camunda version: Camunda Platform 8.1.10;
The steps to deploy Camunda8 are: first install OpenJDK 8+, then install Elasticsearch, and then deploy zeebe, operate, tasklist and other services in sequence. Installing JDK is a prerequisite for starting deployment and starting other service components.
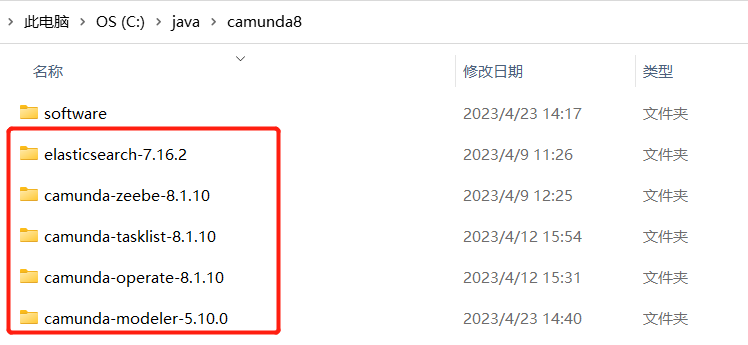
After the installation is complete, Camunda8 has 5 components in total, and the windows directory structure is as follows:
2. OpenJDK installation
If you have installed OpenJDK 8+, this step can be skipped.
Jdk20 download address: https://www.oracle.com/java/technologies/downloads/#jdk20-windows

After the download is complete, install Jdk and check whether the installation is successful

Two, elasticsearch installation and deployment
1. Download elasticsearch
https://www.elastic.co/cn/downloads/past-releases/elasticsearch-7-16-2
2. Start the elasticsearch service
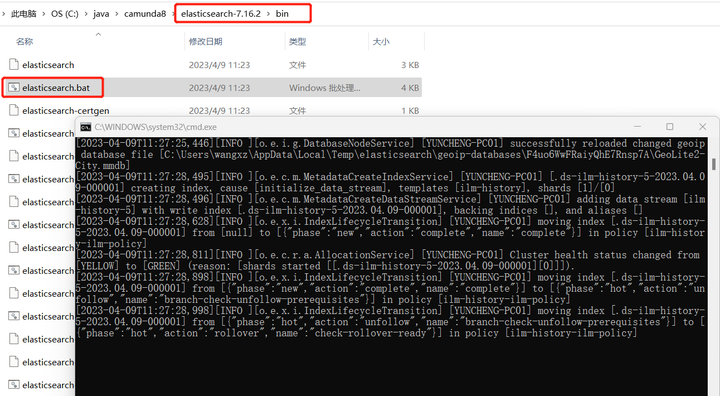
Unzip the downloaded Elasticsearch to C:\java\camunda8\elasticsearch-7.16.2, enter the bin directory, click elasticsearch.bat to start the es service, the effect is as follows:
3. Check the elasticsearch service
Check whether elasticsearch starts successfully, and enter in the browser: http://localhost:9200/?pretty

3. Zeebe installation and deployment
1. Download the zeebe deployment package
Download zeebe, https://github.com/camunda/camunda-platform/releases
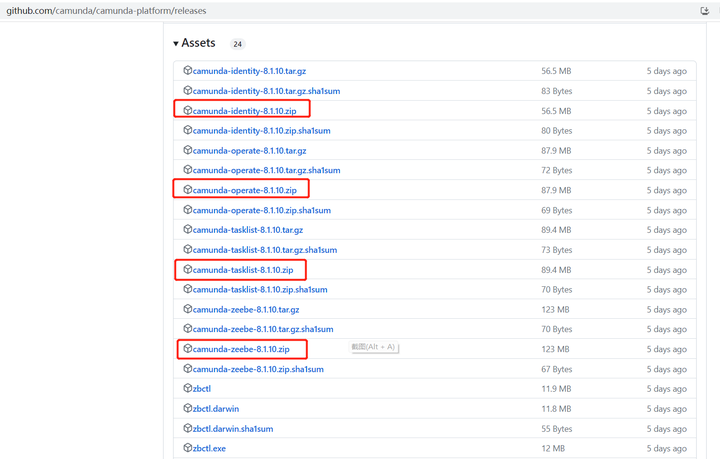
Privatized deployment of camunda8 requires camunda-zeebe-8.1.10.zip , camunda-operate-8.1.10.zip , camunda-tasklist-8.1.10.zip , camunda-identity-8.1.10.zip , which can be found here and download these components.
2, deploy zeebe-elasticsearch-exporter
Unzip the downloaded zeebe to C:\java\camunda8\camunda-zeebe-8.1.10, enter the config directory
Open the application.yaml configuration file and add the following configuration to the file
zeebe:
  broker:
    exporters:
       elasticsearch:
         className: io.camunda.zeebe.exporter.ElasticsearchExporter
Why do you need to configure the elasticsearch exporter to the exporter?
Zeebe itself does not store historical data related to your workflow instances. If you want to keep this data for audit or analysis, you need to export to another storage system. Zeebe provides a ready-made ElasticSearch exporter, lib\zeebe-elasticsearch-exporter-8.1.10.jar in the installation directory. ElasticSearch is also the data storage tool for Camunda Operate and Camunda Tasklist, so to run Operate and Tasklist, you need to enable the ElasticSearch exporter in Zeebe and run an instance of ElasticSearch.
Configuring the exporter in Zeebe is particularly critical. It is not clearly stated in the official documentation of camunda8. It is easy for everyone to fail the local deployment test. If the elasticsearch exporter is not configured, then the process instance data will not be visible in the subsequent operate and tasklist interfaces.
3. Start the zeebe service
Enter the bin directory, click broker.bat, and start the zeebe service. The effect is as follows:

4. Test zeebe
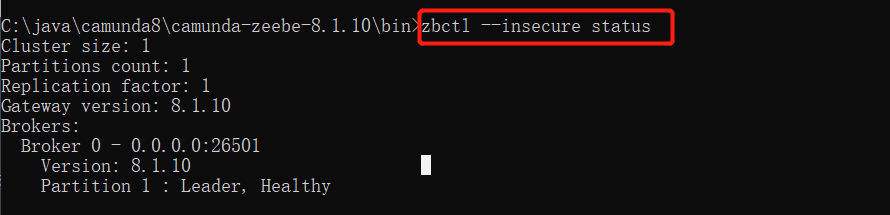
You can test the Zeebe gateway by asking zbtcl for the cluster topology, zbctl status should produce output like this:
4. Operate installation and deployment
1. Start the operate service
Unzip the downloaded operate to C:\java\camunda8\camunda-operate-8.1.10, enter the bin directory, click operate.bat, start the operate service, the effect is as follows:

2. Enter the operate console
After the startup is complete, visit: http://localhost:8080/ , enter the user name demo, password demo, and enter the operate management console. Currently, no process has been released, and the effect is as follows:
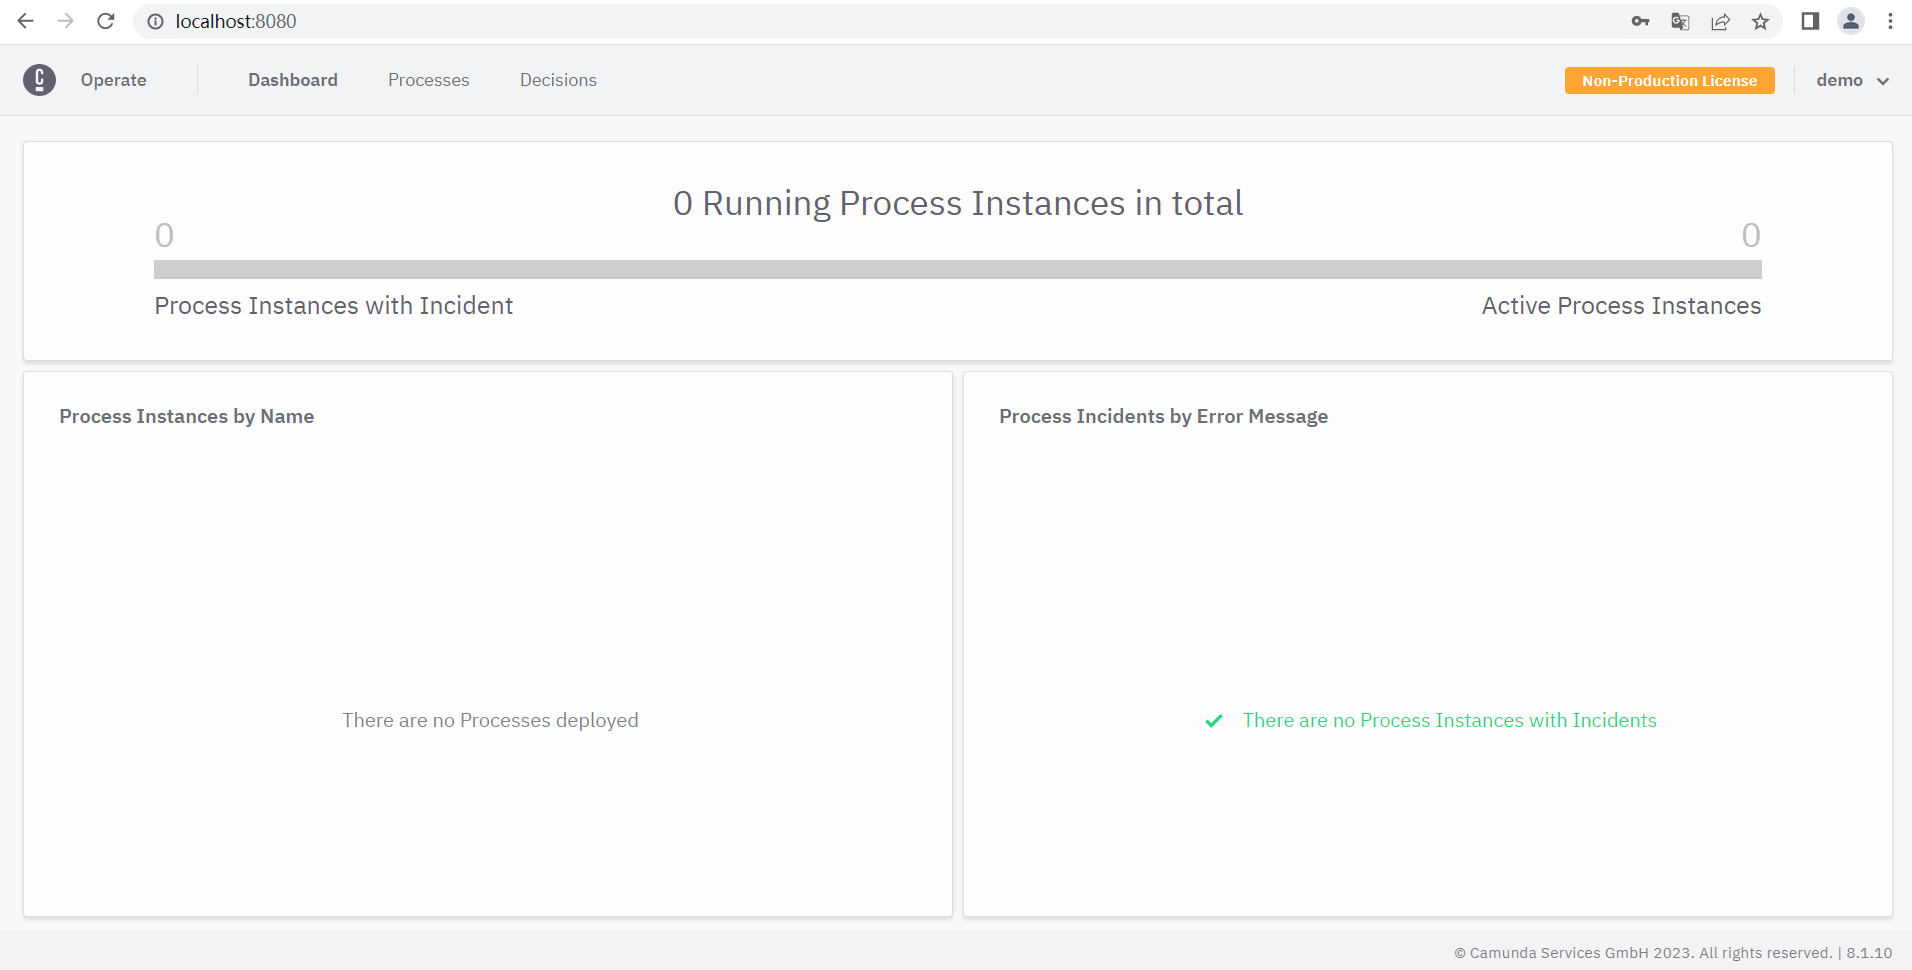
Note: camunda8 is a microservice architecture. We simulate distributed deployment. The operate component needs to connect to the elasticsearch database and zeebe gateway. The specific configuration is in the config/application.yml file. The default configuration is as follows:
# Operate configuration file
camunda.operate:
  # Set operate username and password.
  # If user with <username> does not exists it will be created.
  # Default: demo/demo
  #username:
  #password:
  # ELS instance to store Operate data
  elasticsearch:
    # Cluster name
    clusterName: elasticsearch
    # URL
    url: http://localhost:9200
  # Zeebe instance
  zeebe:
    # Gateway address
    gatewayAddress: localhost:26500
  # ELS instance to export Zeebe data to
  zeebeElasticsearch:
    # Cluster name
    clusterName: elasticsearch
    # URL
    url: http://localhost:9200
    # Index prefix, configured in Zeebe Elasticsearch exporter
prefix: zeebe-record
For more configuration parameters, see the official documentation: https://docs.camunda.io/docs/self-managed/operate-deployment/operate-configuration/
5. Tasklist installation and deployment
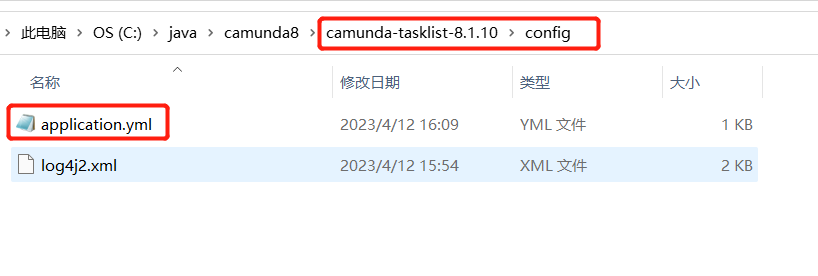
1. Modify the tasklist configuration file
The default port of Tasklist is 8080, and the direct start conflicts with the operate service port. Here, the port of the service needs to be modified first, so that it can be started on a machine.
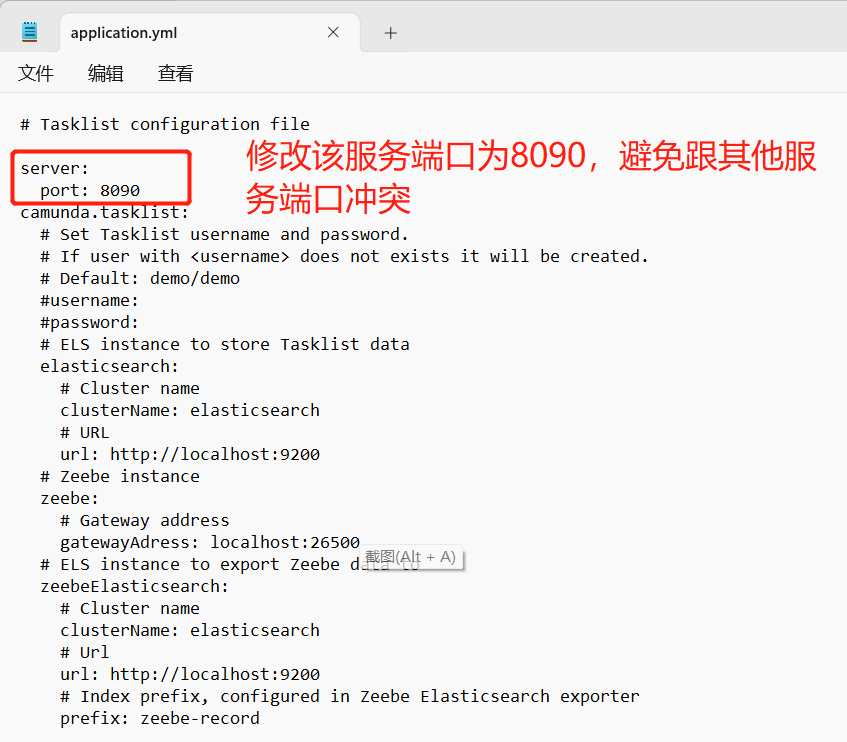
In the config/application.yml file, add the server.port port configuration as follows:
For more configuration parameters, see the official documentation: https://docs.camunda.io/docs/self-managed/tasklist-deployment/tasklist-configuration/
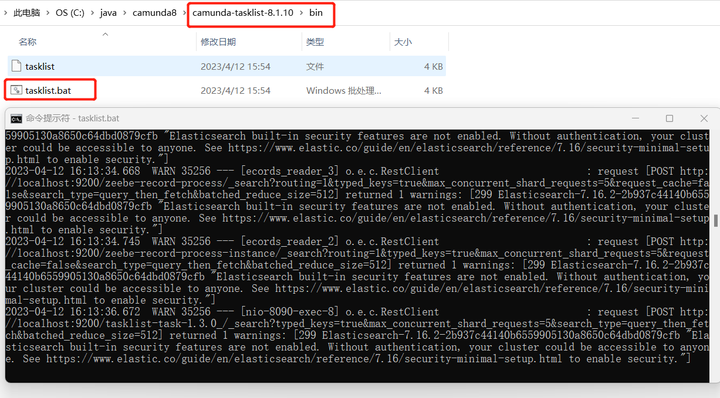
2. Start the tasklist service
Unzip the downloaded tasklist to C:\java\camunda8\camunda-tasklist-8.1.10, enter the bin directory, click tasklist.bat, and start the tasklist service. The effect is as follows:
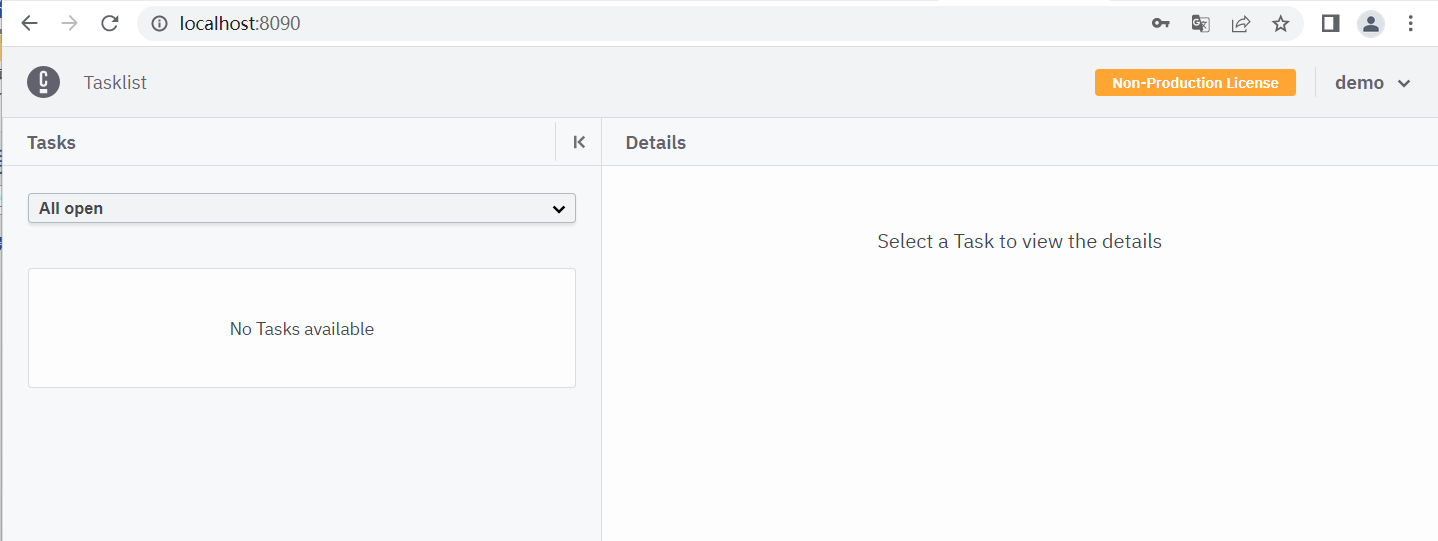
3. Enter the tasklist console
After the startup is complete, visit: http://localhost:8090/ , enter the user name demo, password demo, and enter the tasklist management console. Currently, the process task information has not been released, and the effect is as follows:
6. Process designer installation and deployment
1. Download Desktop Modeler
The Camunda8 version provides two versions of the process designer, Desktop Modeler and Web Modeler. Among them, Desktop Modeler is an open source version, and Web Modeler is a commercial version. Currently, only the docker installation package is officially provided. We use the open source version of the process designer Desktop Modeler.
Download Camunda Desktop Process Designer Desktop Modeler, https://camunda.com/download/modeler/

2. Start Desktop Modeler
Unzip the downloaded Desktop Modeler to C:\java\camunda8\camunda-modeler-5.10.0, enter this directory, click Camunda Modeler.exe to start the process designer, the effect is as follows:

The interface after starting the process designer. This version of the process modeling tool supports two versions of Camunda7 and Camunda8, and supports BPMN, DMN, Form and other model modeling. We choose the BPMN model of Camunda Platform8.

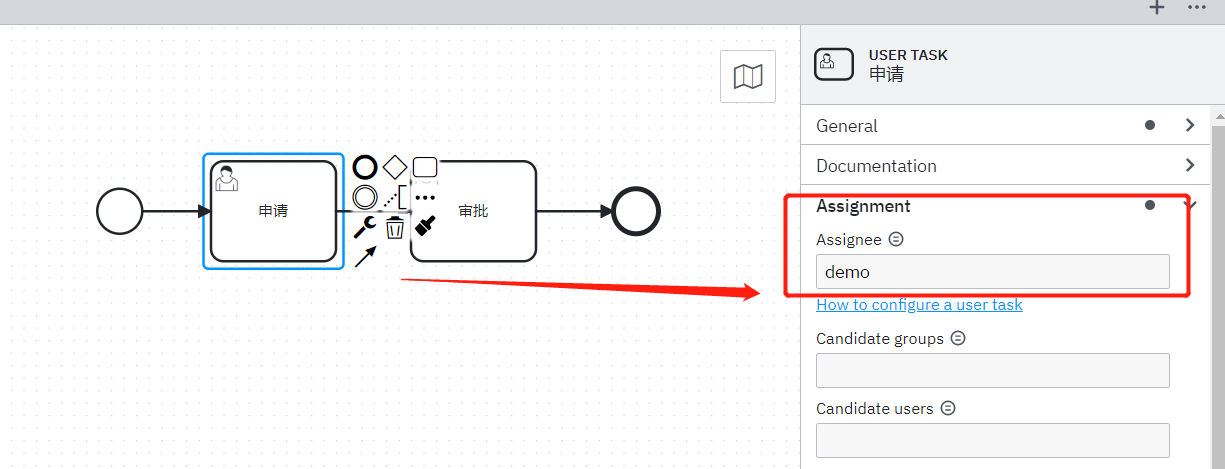
3. Design a process and publish it
In order to test the process release, process start and process approval functions, a user task activity approval process is simply designed, and the process processing person is configured as a demo. This user is the default user after camunda is installed, so that it is convenient to enter the approval process through the interface later.
After the process design is completed, click the publish button in the lower left corner of the designer, and the following interface will pop up:
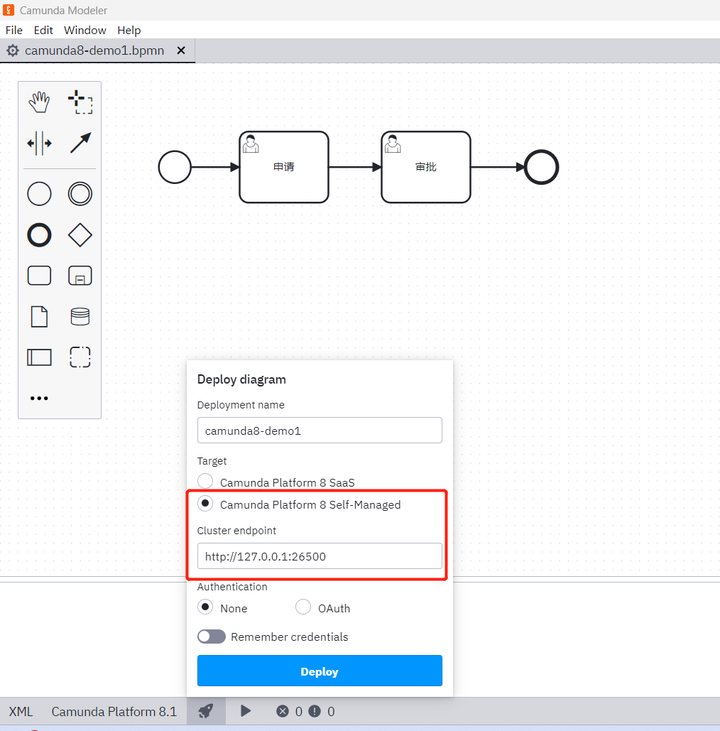
Note that when publishing, select the Self-Managed target, that is, the process engine cluster that is privatized and deployed by yourself, enter the default zeebe gateway address, and click deploy to complete the process release.
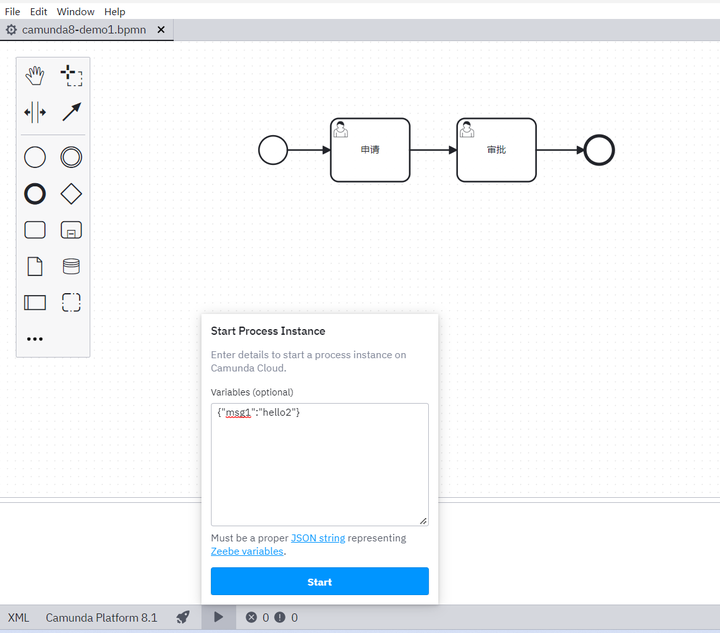
It is also possible to start the process directly on the designer:
At this point, log in to the operate console again, and you can see the process instance just started:

Click on the instance title to enter the process instance:
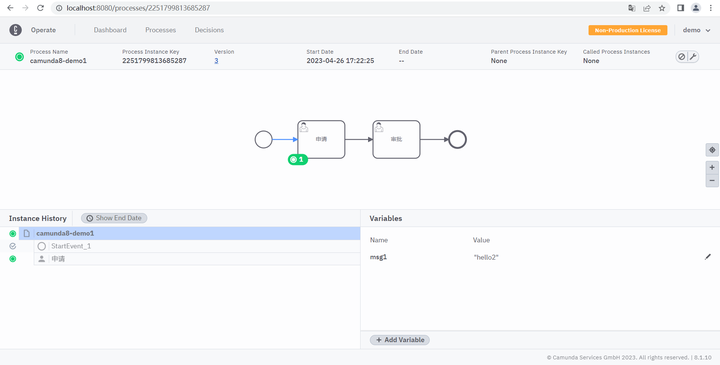
You can see that the process is in the startup state, and it is currently applying for the user task node. At this time, we log in to the Tasklist workbench to see if there are any pending tasks.
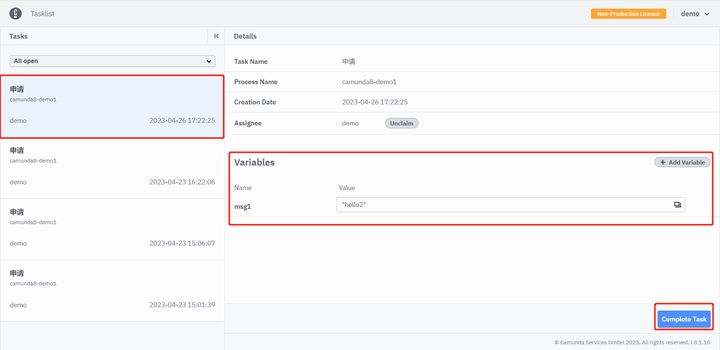
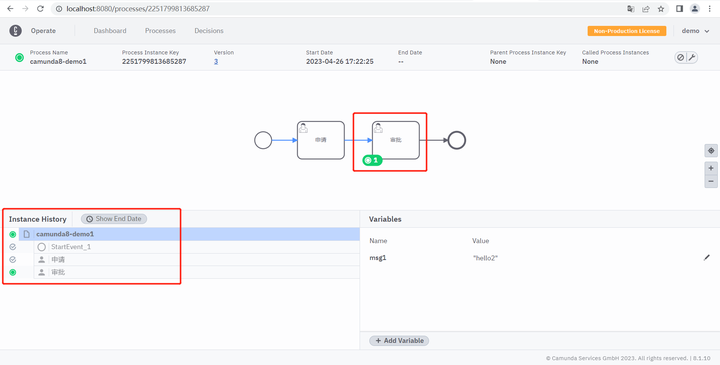
Click the Complete Task button to complete the pending task processing, and then return to the operate interface to see that the process status has reached the next active node.
7. Summary
The camunda7 process engine core is developed based on activiti5, which is essentially a process virtual machine pvm. The core of the Camunda8 process engine is Zeebe, which is the process automation engine that powers the Camunda platform 8. The process engines of camunda7 and camunda8 are completely different, so camunda7 and camunda8 are two completely different process platforms. Although camunda8 also provides a privatized installation and deployment model, its official positioning is a SaaS process engine, with a focus on supporting online lease services. In addition, compared to camunda7, camunda8 has fewer open source components, and most components need to be purchased separately.

For the comparative analysis of camunda7 and camunda8, please refer to: https://lowcode.blog.csdn.net/article/details/129764438
8. Extended knowledge: camunda8 deployment method
The official recommendation is to use several ways to deploy and run camunda8 in a self-managed manner:
1. Run Camunda8 based on Helm/Kubernetes deployment
It is highly recommended to run Camunda Platform 8 with Kubernetes in production. In addition to stock Kubernetes, various providers such as Red Hat OpenShift and Amazon EKS are officially supported. Additionally, use Kubernetes with Minikube or KIND to run Camunda Platform 8 locally on a developer machine.
2. Run Camunda8 based on Docker deployment
It is possible to run Docker images of the provided components, as well as in production. For your convenience, we provide a Docker Compose configuration for running Camunda Platform 8 on a developer machine. Note that Docker Compose configurations are not optimized for production use, but for local development.
3. Manually deploy and run Camunda8
If the local or virtual machine provides a supported Java Virtual Machine (JVM), you can run Java applications on it. This allows you to run Camunda on a virtual machine or on bare metal and provides a lot of flexibility. However, you need to configure the details of the components in order to interact correctly yourself. We consider this a last resort. Note that Zeebe does not support Windows/Mac for production use.
9. References
https://docs.camunda.io/docs/self-managed/platform-deployment/manual/
https://docs.camunda.io/docs/self-managed/platform-deployment/overview/