Table of contents
3. JDK environment variable configuration
4. Check whether the configuration is successful
1. JDK download
Download address: Java Downloads | Oracle
After clicking on the above URL to enter:
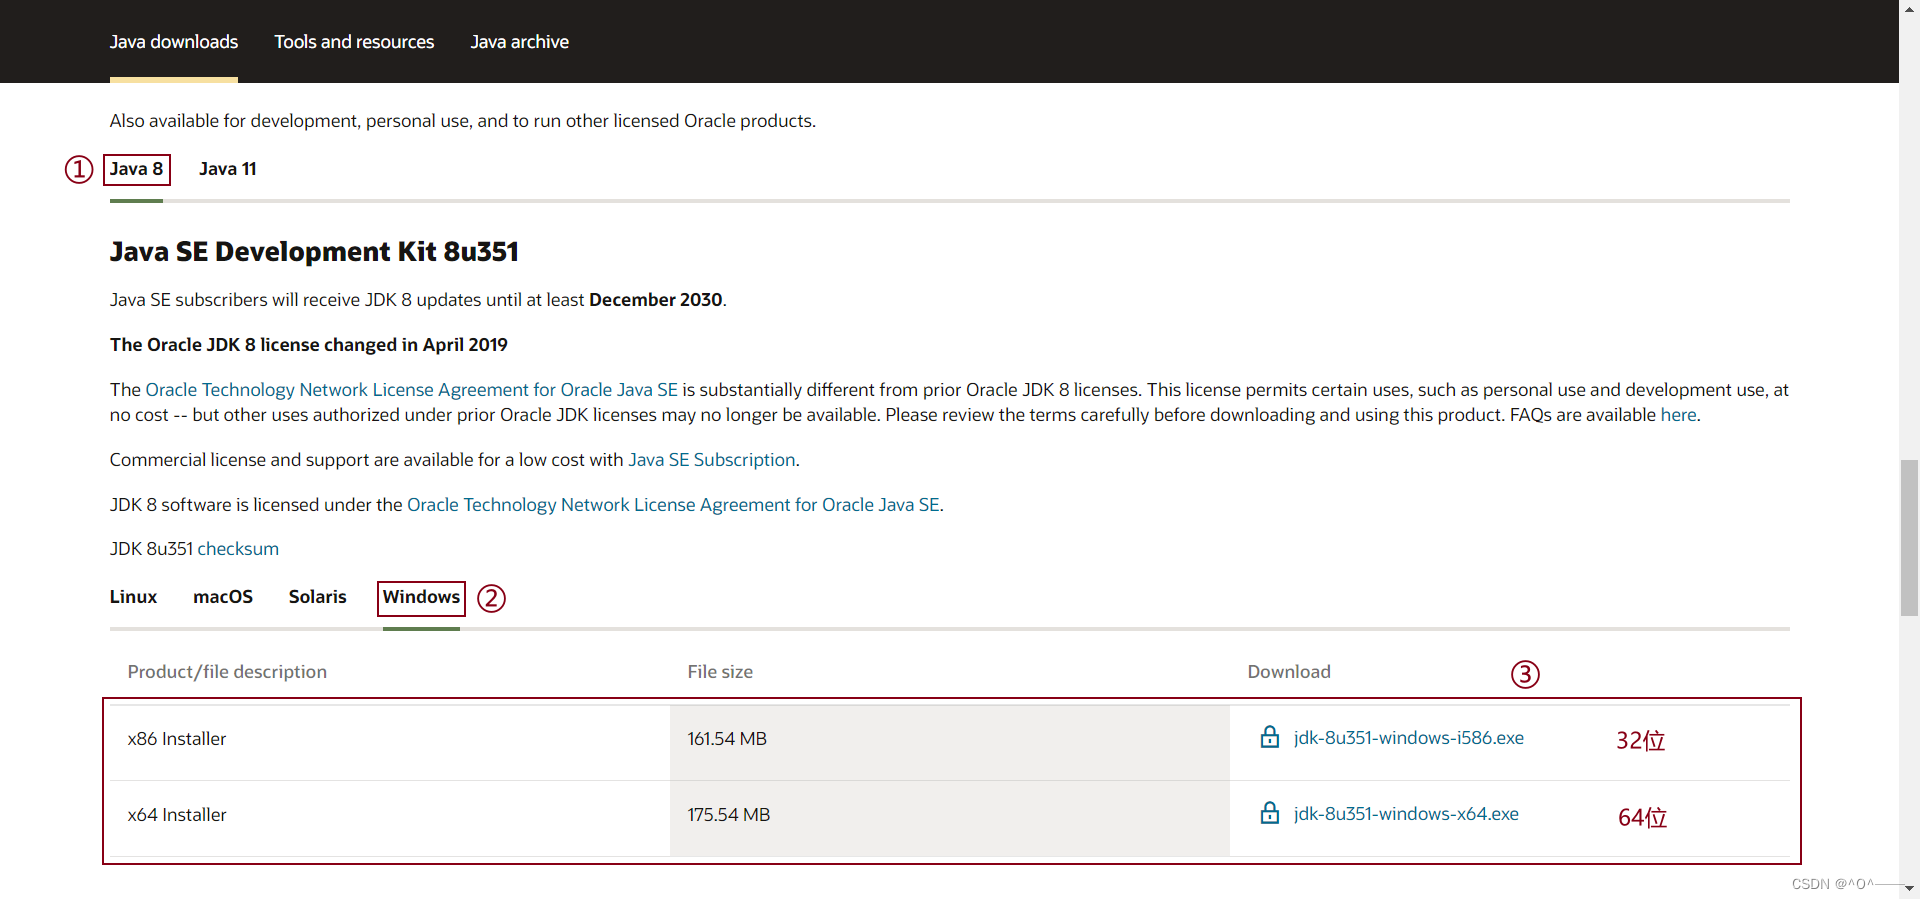
1. Swipe down, slide, slide... Find ① Java 8 , click ② Windows , and select ③ the corresponding 32-bit or 64-bit version according to your computer system to download;
2. After selecting the download, a pop-up will appear (I chose to download 64-bit):
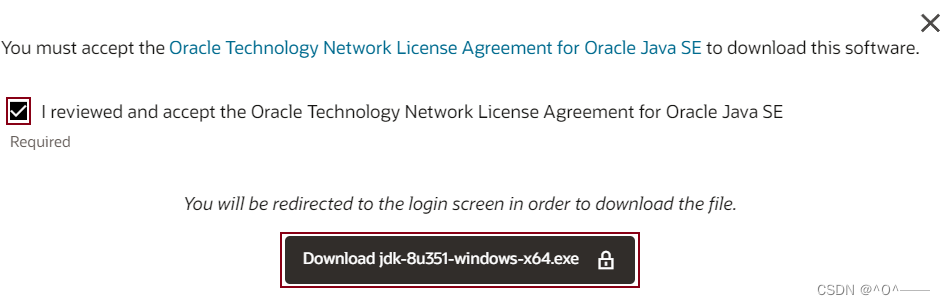
You need to agree to the agreement before downloading, so check I reviewed and accept the Oracle Technology Network License Agreement for Oracle Java SE , and then click Download jdk-8u351-windows-x64.exe to download;
3. The more troublesome thing is that downloading requires an Oracle account to log in . If you don’t have one, you need to create an account ;
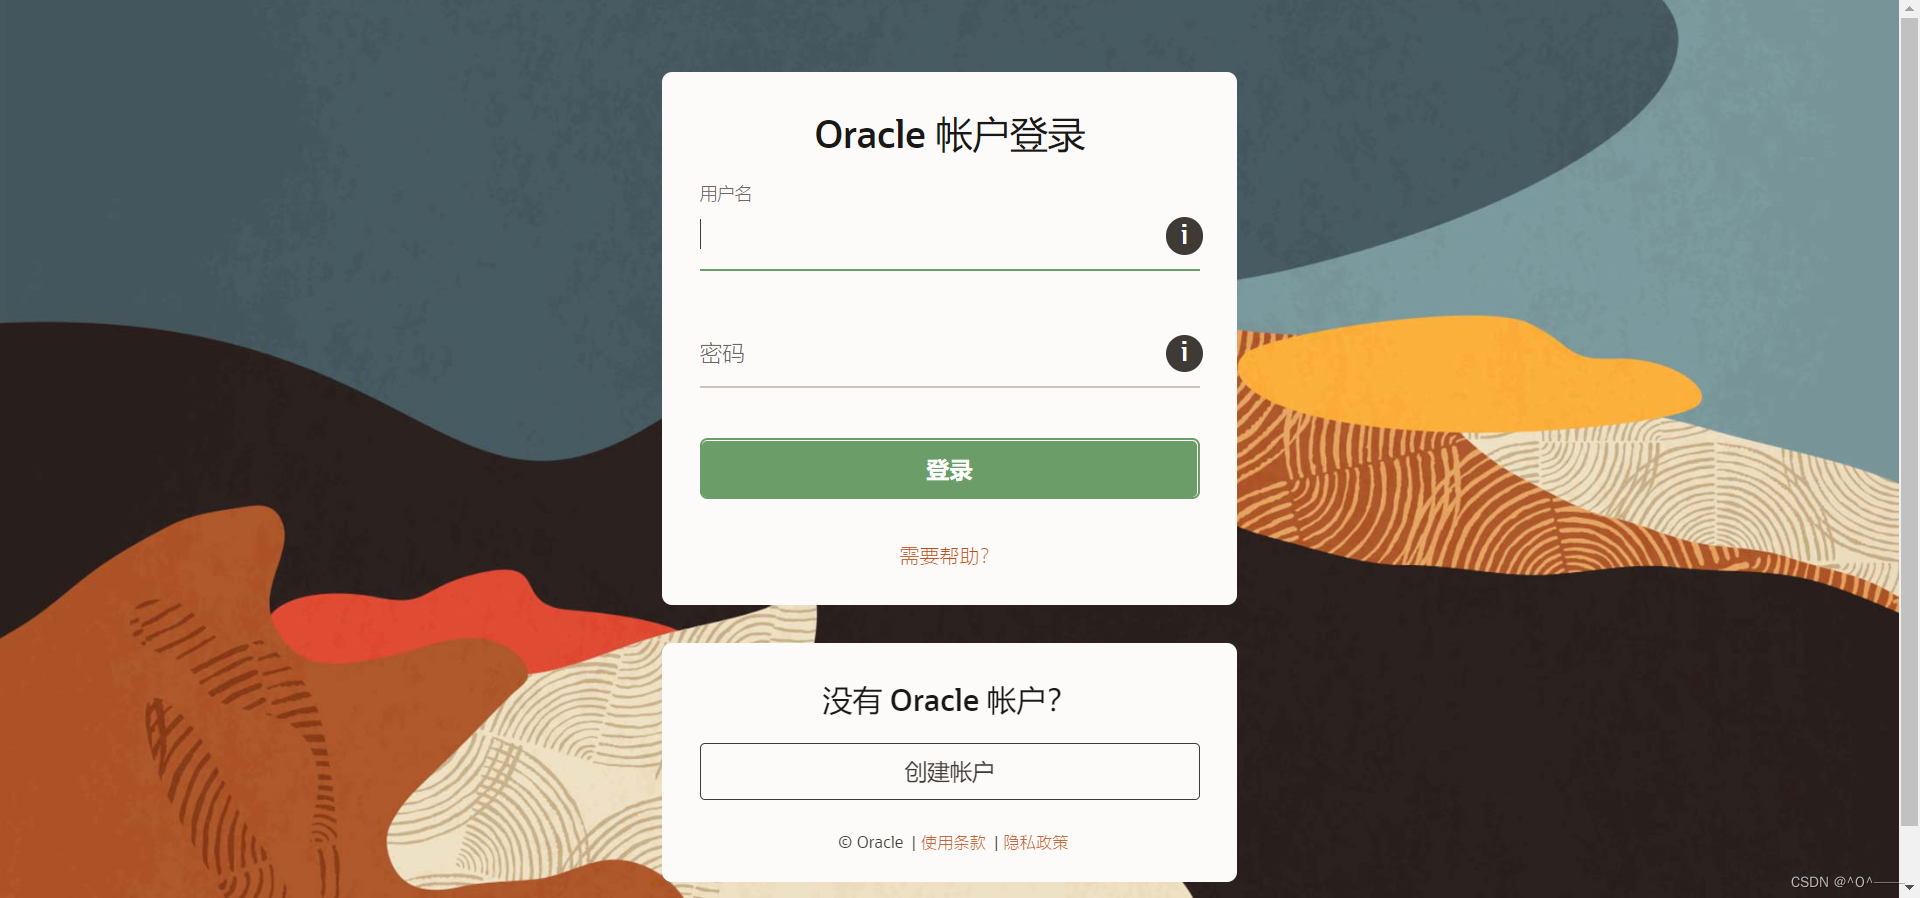
4. After creating an account, log in with Oracle account and it will automatically download jdk for you~**✲❈❉✿❀❃❁☸
What? You said you don’t want to download from the official website? If you think it’s too troublesome,![]() then I’ve prepared one for you (jdk is a 64-bit system):
then I’ve prepared one for you (jdk is a 64-bit system):
jdk-8u201-windows-x64.zip-Java document resources-CSDN download
- After entering the link above, click Download Now ;

- After downloading , unzip it and you can use it. After unzipping, you will get the jdk-8u201-windows-x64.exe file .
2. JDK installation
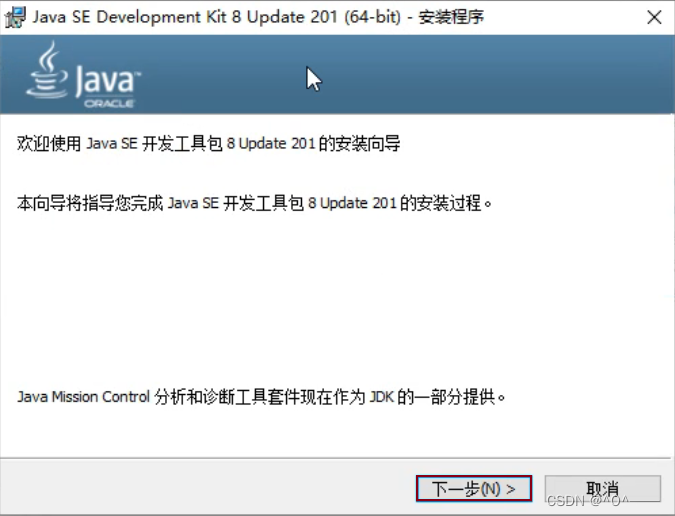
1. Double-click jdk-8u201-windows-x64.exe
![]()
2. Click Next(N) > ;
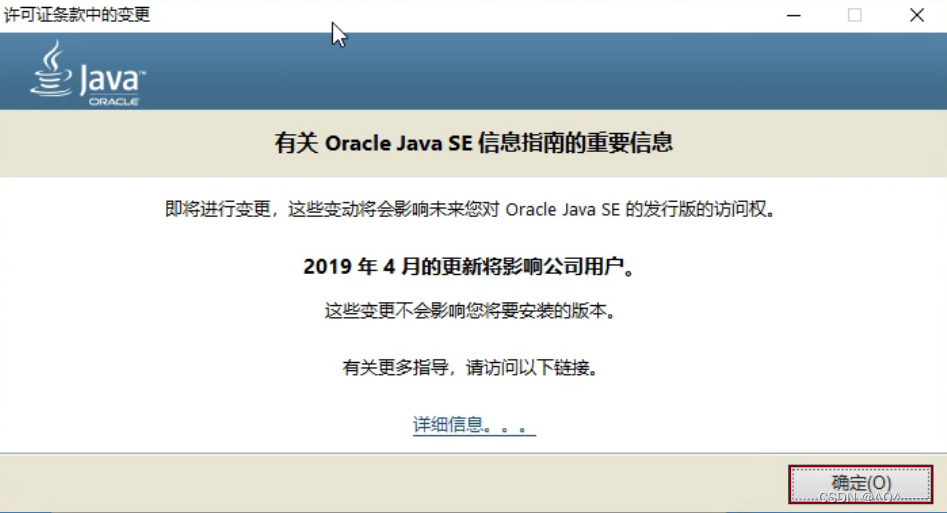
3.Install jdk
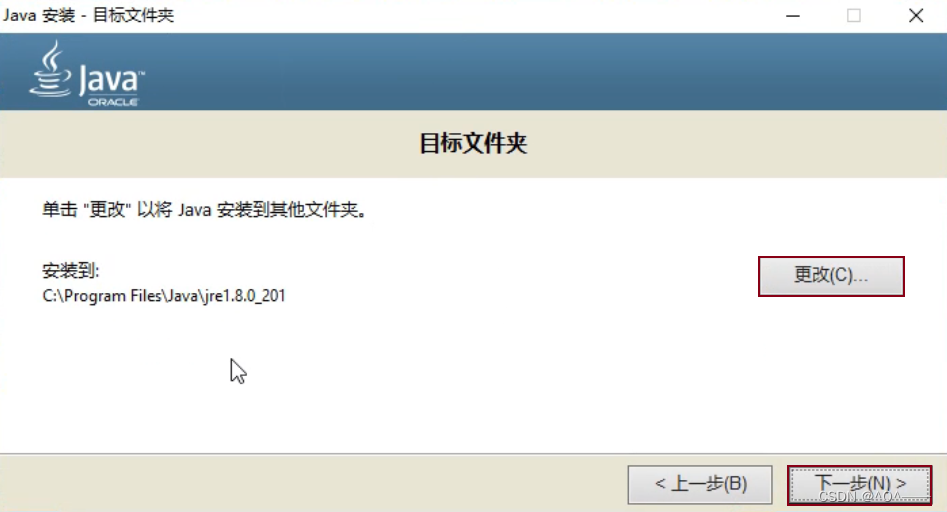
3.1. Just click Next (N) > and it will be installed to the C drive by default (it is recommended not to choose to change..., jdk will not affect or burden your computer, and it will not occupy memory when you are not using it) );
or
3.2. Click Change (C)... to change the installation path, and then click Next (N) >;

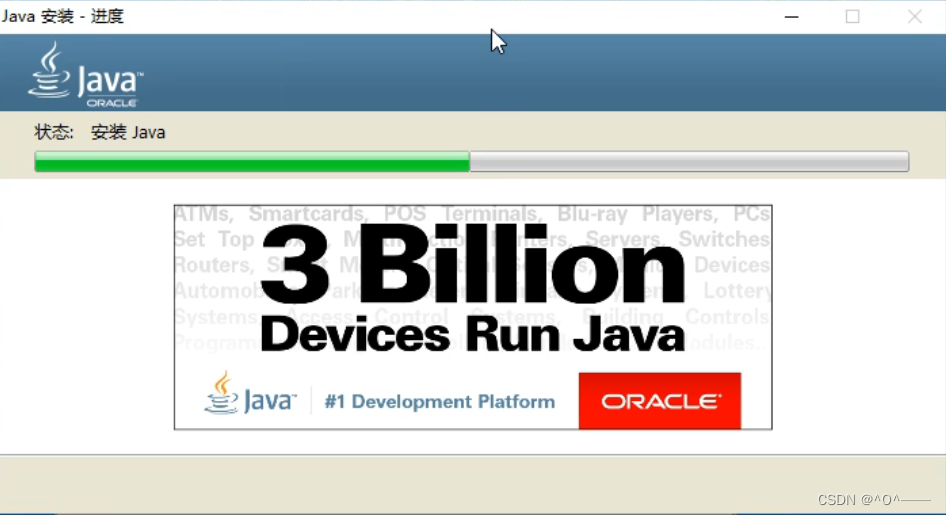
installing...

4. After the installation is completed, click OK (O) ;
5.Install jre
If you did not change the installation path when installing jdk (that is, the setting in step 3 ), click Next (N) > directly ;
If you change the installation path, click Change (C)... to change it to be consistent with the jdk installation path, and then click Next (N) > ;
installing...
6. After the installation is complete, click Close (C).

Install jdk summary:
The download will be divided into two times. The first time is to install jdk (development version) , and the second time is to install jre (production version) . The default installation path is the computer's C drive ( if it has not been changed ), and the directory is: C:\Program Files\Java .

3. JDK environment variable configuration
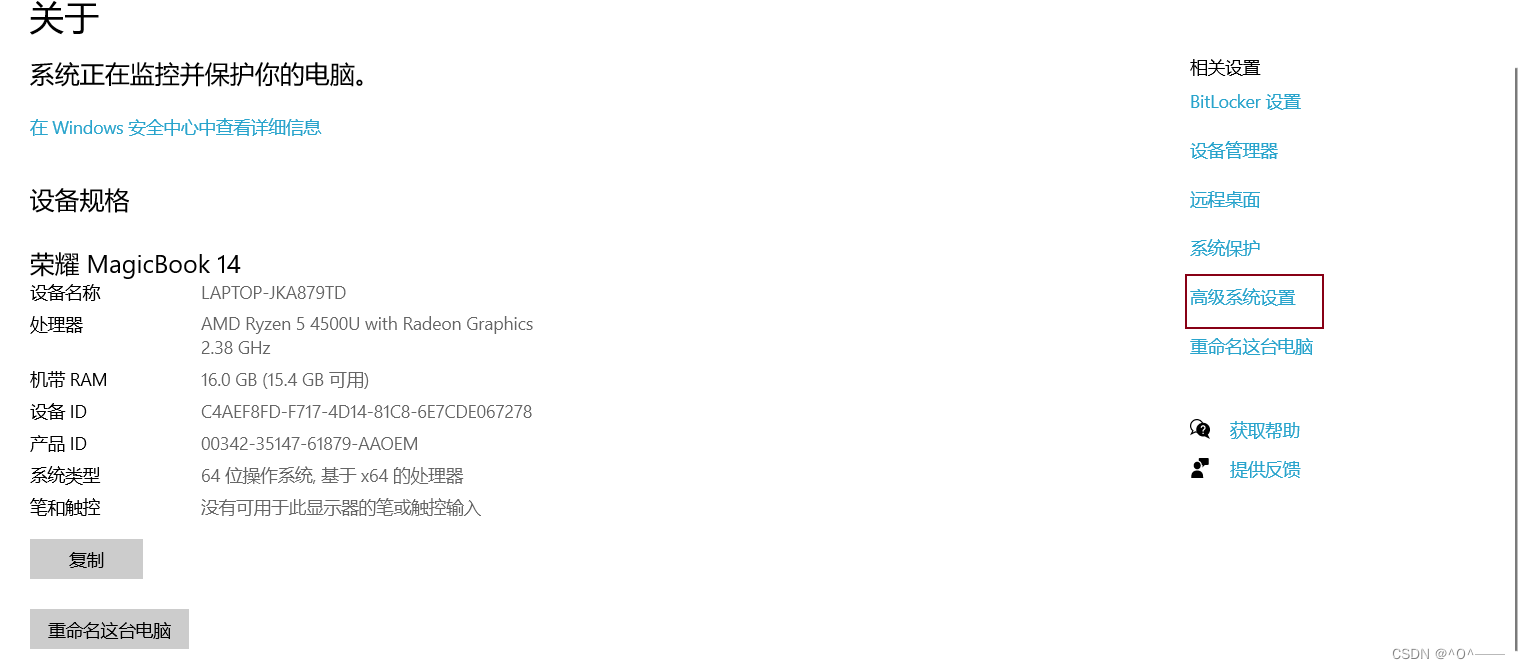
1. Find this computer , right-click Properties (R) and find advanced system settings ;
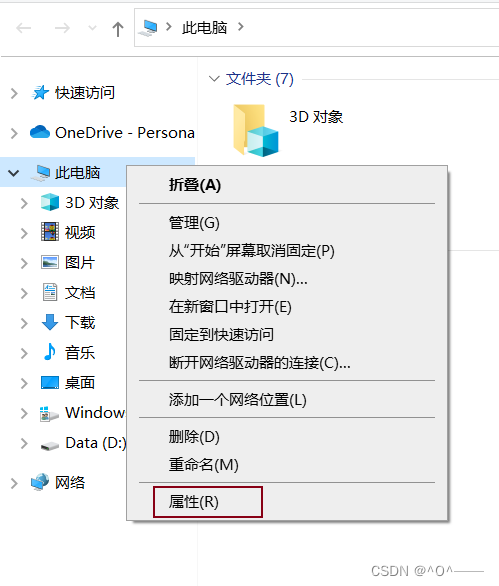
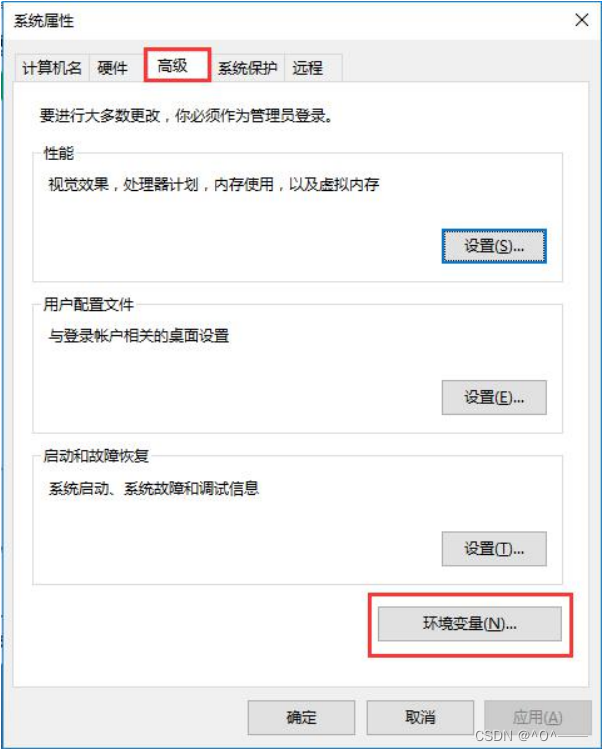
2. Click Advanced and select Environment Variables ( N )... ;
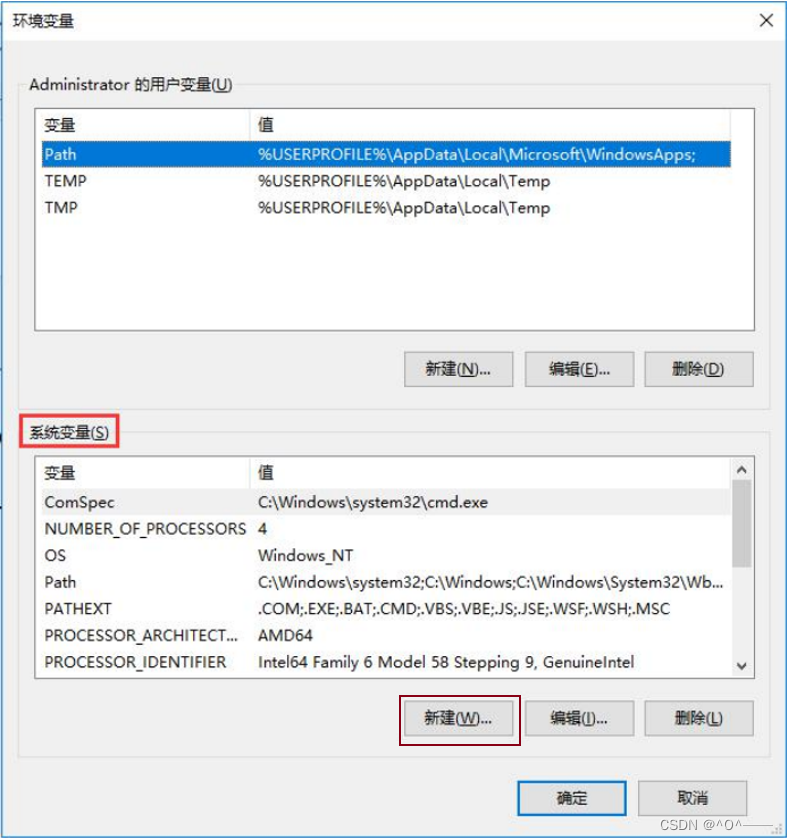
3. Configure system variables
3.1. System variables (S) -> New (W)... ;
pop up:
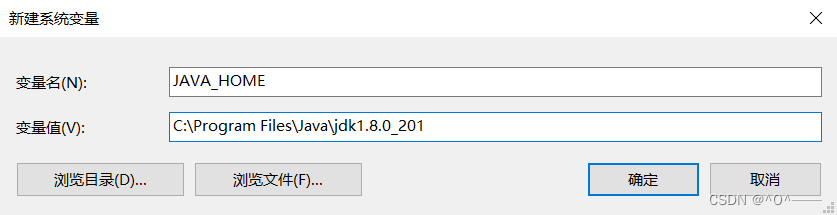
Then fill in:
Variable name (N): JAVA_HOME
Variable value (V): Downloaded jdk installation directory, mine is the default installation path on the C drive
 Variable value (V):
① Search in the search bar to enter the default installation directory of the C drive (or enter your customized installation directory);
②Find the jdk version you downloaded and click in ( note, don’t select jre ).
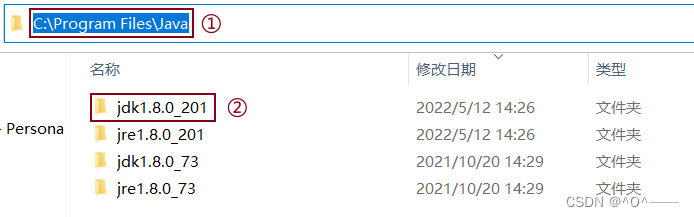
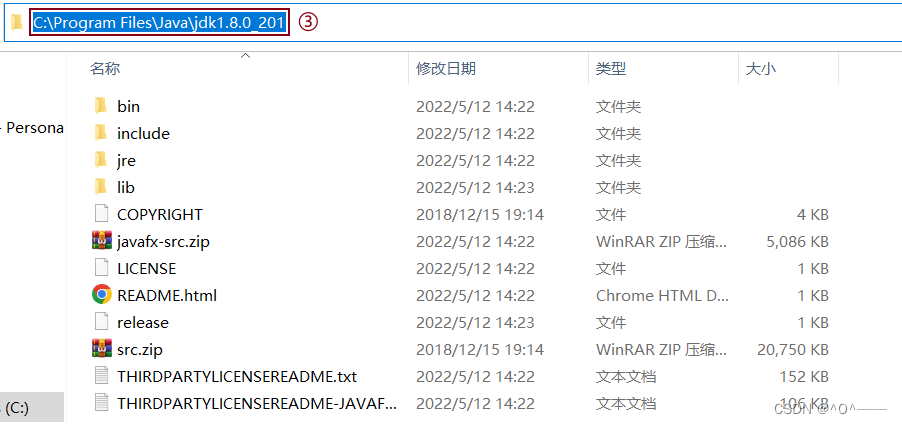
Then ③ inside is the jdk installation directory, just copy this path up.
hint:
If you want to change to another version of jdk later, you only need to find JAVA_HOME in the system variable (S) , double-click it, and replace the jdk in the variable value (V): with the jdk version directory you want to change.
3.2. Find the variable Path in the system variables (S) , (double-click the variable Path ) or (click Edit (I)... ) to enter;

How to configure the variable Path:
☝️The first type

Create new (N) respectively :
%JAVA_HOME%\bin;
%JAVA_HOME%\jre\bin;
✌️Second type
Click directly to edit text (T)... ;
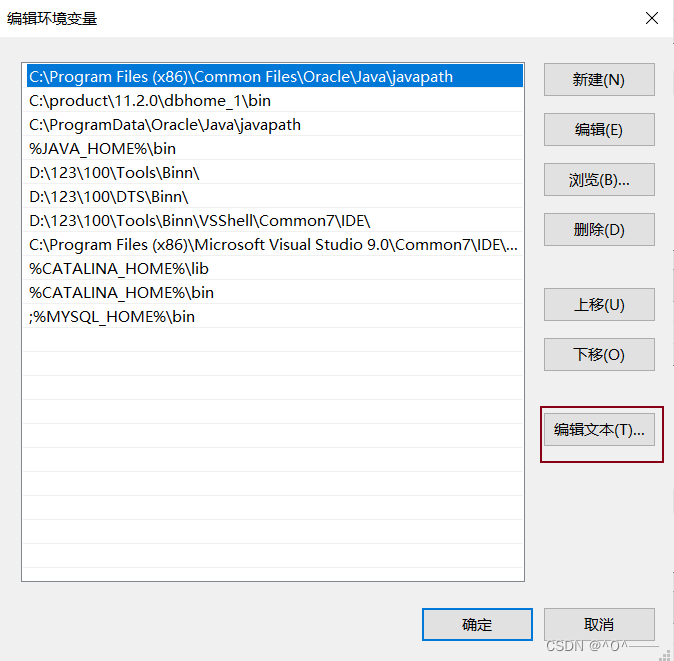
pop up:
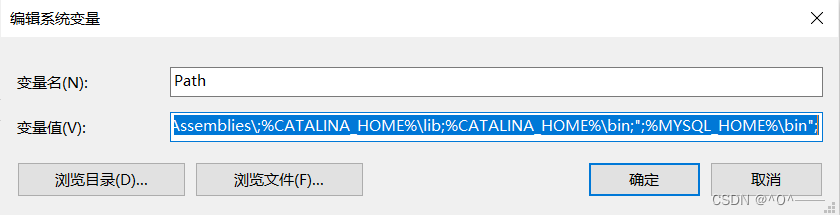
At the end of variable value (V): add:
%JAVA_HOME%\bin;%JAVA_HOME%\jre\bin;
Note: Each variable ends with a semicolon. If the previous variable does not end with a semicolon, a semicolon must be added before adding.
3.3. In System Variables (S) again , click New (W)... ;
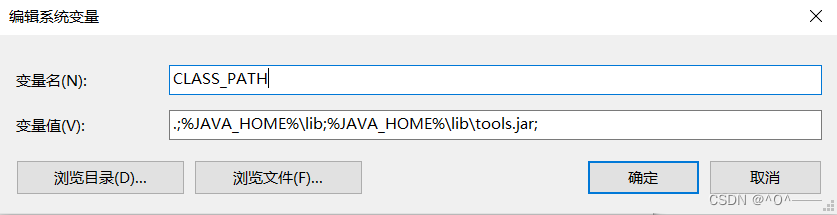
Then fill in:
Variable name (N): CLASS_PATH
Variable value (V): .;%JAVA_HOME%\lib;%JAVA_HOME%\lib\tools.jar;
4. Check whether the configuration is successful
1. Search for ①cmd (command prompt) in the search bar in the lower left corner of the desktop , and click ②Run as administrator ;

2. Enter the command to view the jdk version: java -version

If the jdk version appears, congratulations on your successful configuration! ! ! ❀❀❀
Note: When inputting, you need to put a space after java, and then write -version . If you don’t write it in the correct format, it will not be output. This is my painful lesson.

over. . .