Recently, the company's design students put forward a request for a tool that can facilitate them to inspect the client's UI. Because DoKit is integrated in our project , I told him that he can use the "control inspection" function in this. But after using it, she raised some questions:
- The width, height, and font size of the controls you see are all specific pixel values, and they are different on different devices, which is not intuitive. Hope you can see the dp value.
- Can't see the specific font. Because the texts in the project are all custom fonts, for example, I can't see the difference between bold and black fonts. In fact, this is okay, because the design can be seen, but it would be more convenient if it were available.
- The selection is not accurate. Sometimes the slider is placed on the text, but it needs to be switched several times to select it.
For example, in the picture below, my slider selects "12", but the default information is the outer view. You need to click the arrow button on the right again to select it normally.

In addition, I also found that it cannot be used on Dialog, and the page under the Dialog is still selected by the slider. So based on these problems, I started to customize it according to our needs (this article is based on version 3.7.11 optimization).
1. Width and height issues
First, copy the relevant source code ViewCheckerKit, ViewCheckDoKitView, ViewCheckDrawDoKitView, ViewCheckInfoDoKitViewclass, and add the custom module through the method DoKit.Builderin .customKits
The problem of width, height, and font size is actually very simple. You only need to convert the px value in the code to dp.
2. Font problem
Fonts cannot be TextVewobtained directly through methods such as font size and font color. TextVewFortunately, our custom fonts are all implemented with customization . So you can set the font type value in setTagand then getTagtake it out when displaying information.
3. Select the question
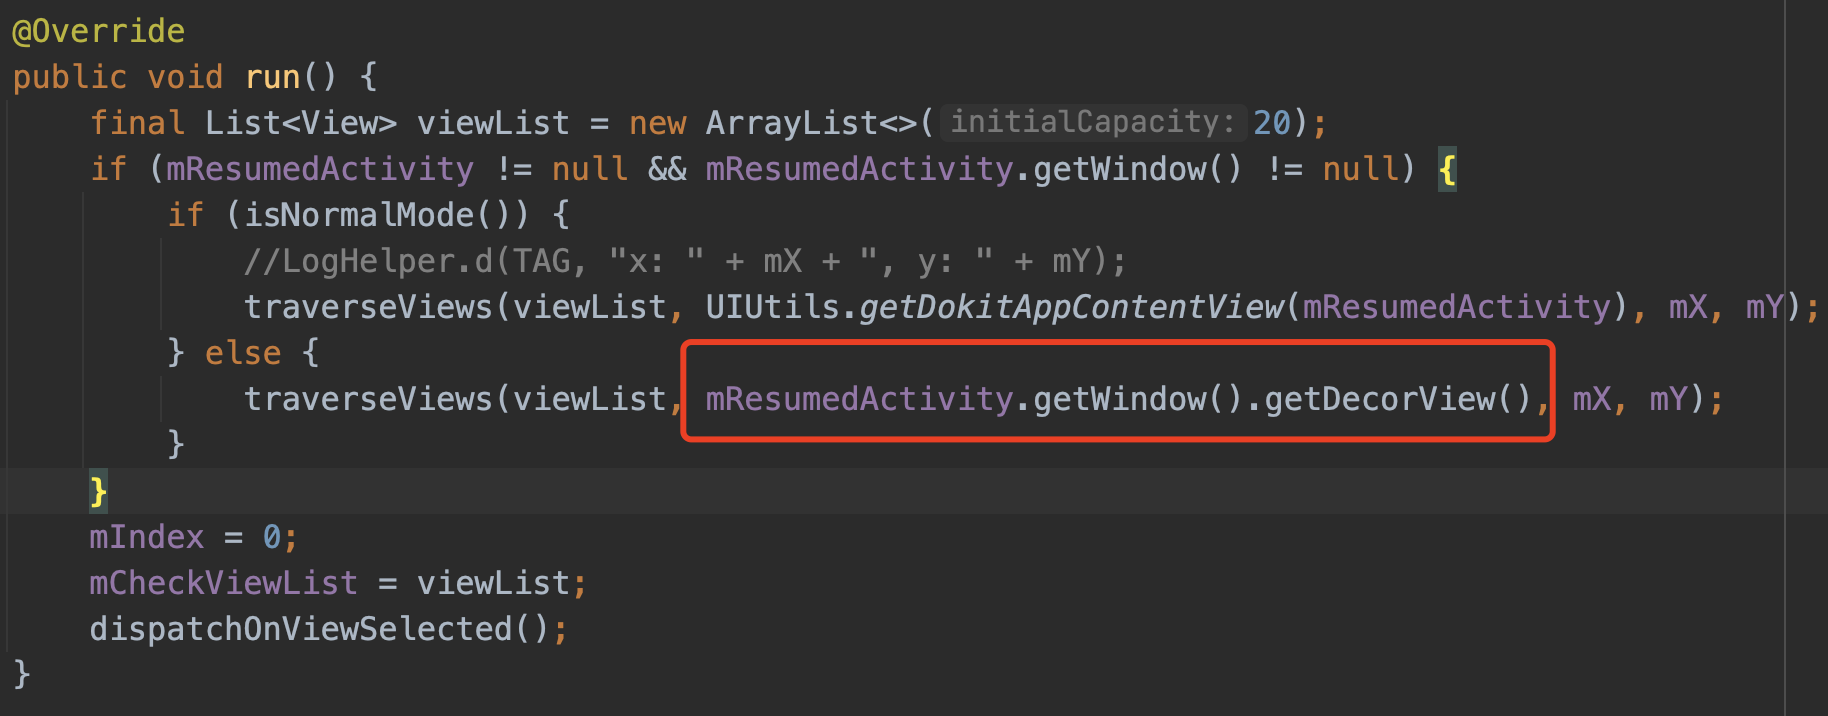
First, take a look at the traversal source code of the selected view:
	private void traverseViews(List<View> viewList, View view, int x, int y) {


        if (view == null) {


            return;
        }

        int[] location = new int[2];
        //相对window的x y
        view.getLocationInWindow(location);
        int left = location[0];
        int top = location[1];
        int right = left + view.getWidth();
        int bottom = top + view.getHeight();

        // 深度优先遍历
        if (view instanceof ViewGroup) {


            int childCount = ((ViewGroup) view).getChildCount();
            if (childCount != 0) {


                for (int index = childCount - 1; index >= 0; index--) {


                    traverseViews(viewList, ((ViewGroup) view).getChildAt(index), x, y);
                }
            }
            //noinspection DuplicateExpressions
            if (left < x && x < right && top < y && y < bottom) {


                viewList.add(view);
            }
        } else {


            //noinspection DuplicateExpressions
            if (left < x && x < right && top < y && y < bottom) {


                viewList.add(view);
            }
        }
    }
In fact, there is no problem with the idea of traversal. Depth first, ViewGroupthe last view is processed first (generally speaking, it is the top view). But for example FrameLayout, sometimes I will add a loading view to cover it and hide it after the loading is completed. No matter how you choose at this time, the first one will be the loading view. Therefore, you can determine whether the view is currently hidden before traversing, and you can skip it when it is hidden.
In addition, for ConstraintLayoutthis type of layout, the order of subviews does not completely represent the view hierarchy. So after traversing, I also looped through the list to find the view with the smallest area and prioritize it first.
// 取出最小的view放到最前面,便于查看
int size = Integer.MAX_VALUE;
View minSizeView = null;
for (View view : viewList) {


	if (size > view.getHeight() * view.getWidth()) {


    	size = view.getHeight() * view.getWidth();
    	minSizeView = view;
	}
}
if (minSizeView != null) {


   viewList.remove(minSizeView);
   viewList.add(0, minSizeView);
}
Take a look at the results of optimization so far:

4.Dialog problem
The reason why it cannot be used on Dialog is because the obtained Window belongs to the current Activity.
Dialog or PopupWindow have their own Window. It cannot be obtained through Activity, so the views in Dialog cannot be traversed.
So the question here becomes how to get the Dialog's Window. In other words, it is a pop-up window on the Activity. Here I directly use the getFloatWindowViewByToken method in FloatingWindow :
object FloatingWindowManager {


    fun getFloatWindowViewByToken(activity: Activity): List<View> {


        val floatView = arrayListOf<View>()
        try {


            // 获取目标 Activity 的 decorView
            val targetDecorView = activity.window.decorView
            // 获取目标 Activity 的 子窗口的 token
            val targetSubToken = targetDecorView.windowToken

            //  拿到 mView 集合,找到目标 Activity 所在的 index 位置
            val mView = Window.getViews().map {

     it }.toList()
            val targetIndex = mView.indexOfFirst {

     it == targetDecorView }

            // 获取 mParams 集合
            val mParams = Window.getParams()
            // 根据目标 index 从 mParams 集合中找到目标 token
            val targetToken = mParams[targetIndex].token

            mParams.forEachIndexed {

     index, params ->
                val token = params.token
                // Activity 自身不参与
                if (index != targetIndex) {


                    if (token == targetSubToken || token == null || token == targetToken) {


                        // 根据 index 拿到 mView 中的 View
                        floatView.add(mView[index])
                    }
                }
            }
        } catch (e: Exception) {


            e.printStackTrace()
        }

        return floatView
    }
}
The reference link at the end of the article has the author's detailed explanation of this method and ideas. If you are interested, you can read it.
Through this method, we obtain all the windows on the upper layer of the current Activity, including our sliders and information display boxes. So it needs to filter itself out. This can be handled simply by the package name.
List<View> views = FloatingWindowManager.INSTANCE.getFloatWindowViewByToken(mResumedActivity);
for (View view : views) {


	if (!view.getClass().getName().contains("didichuxing")) {


    	traverseViews(viewList, view, mX, mY);
    }
}
This is basically completed, but a new problem was discovered at this time, and the selected Y coordinate was biased.

Move the slider to the upper position to select the middle button. Let’s look at the code for coordinate calculation:
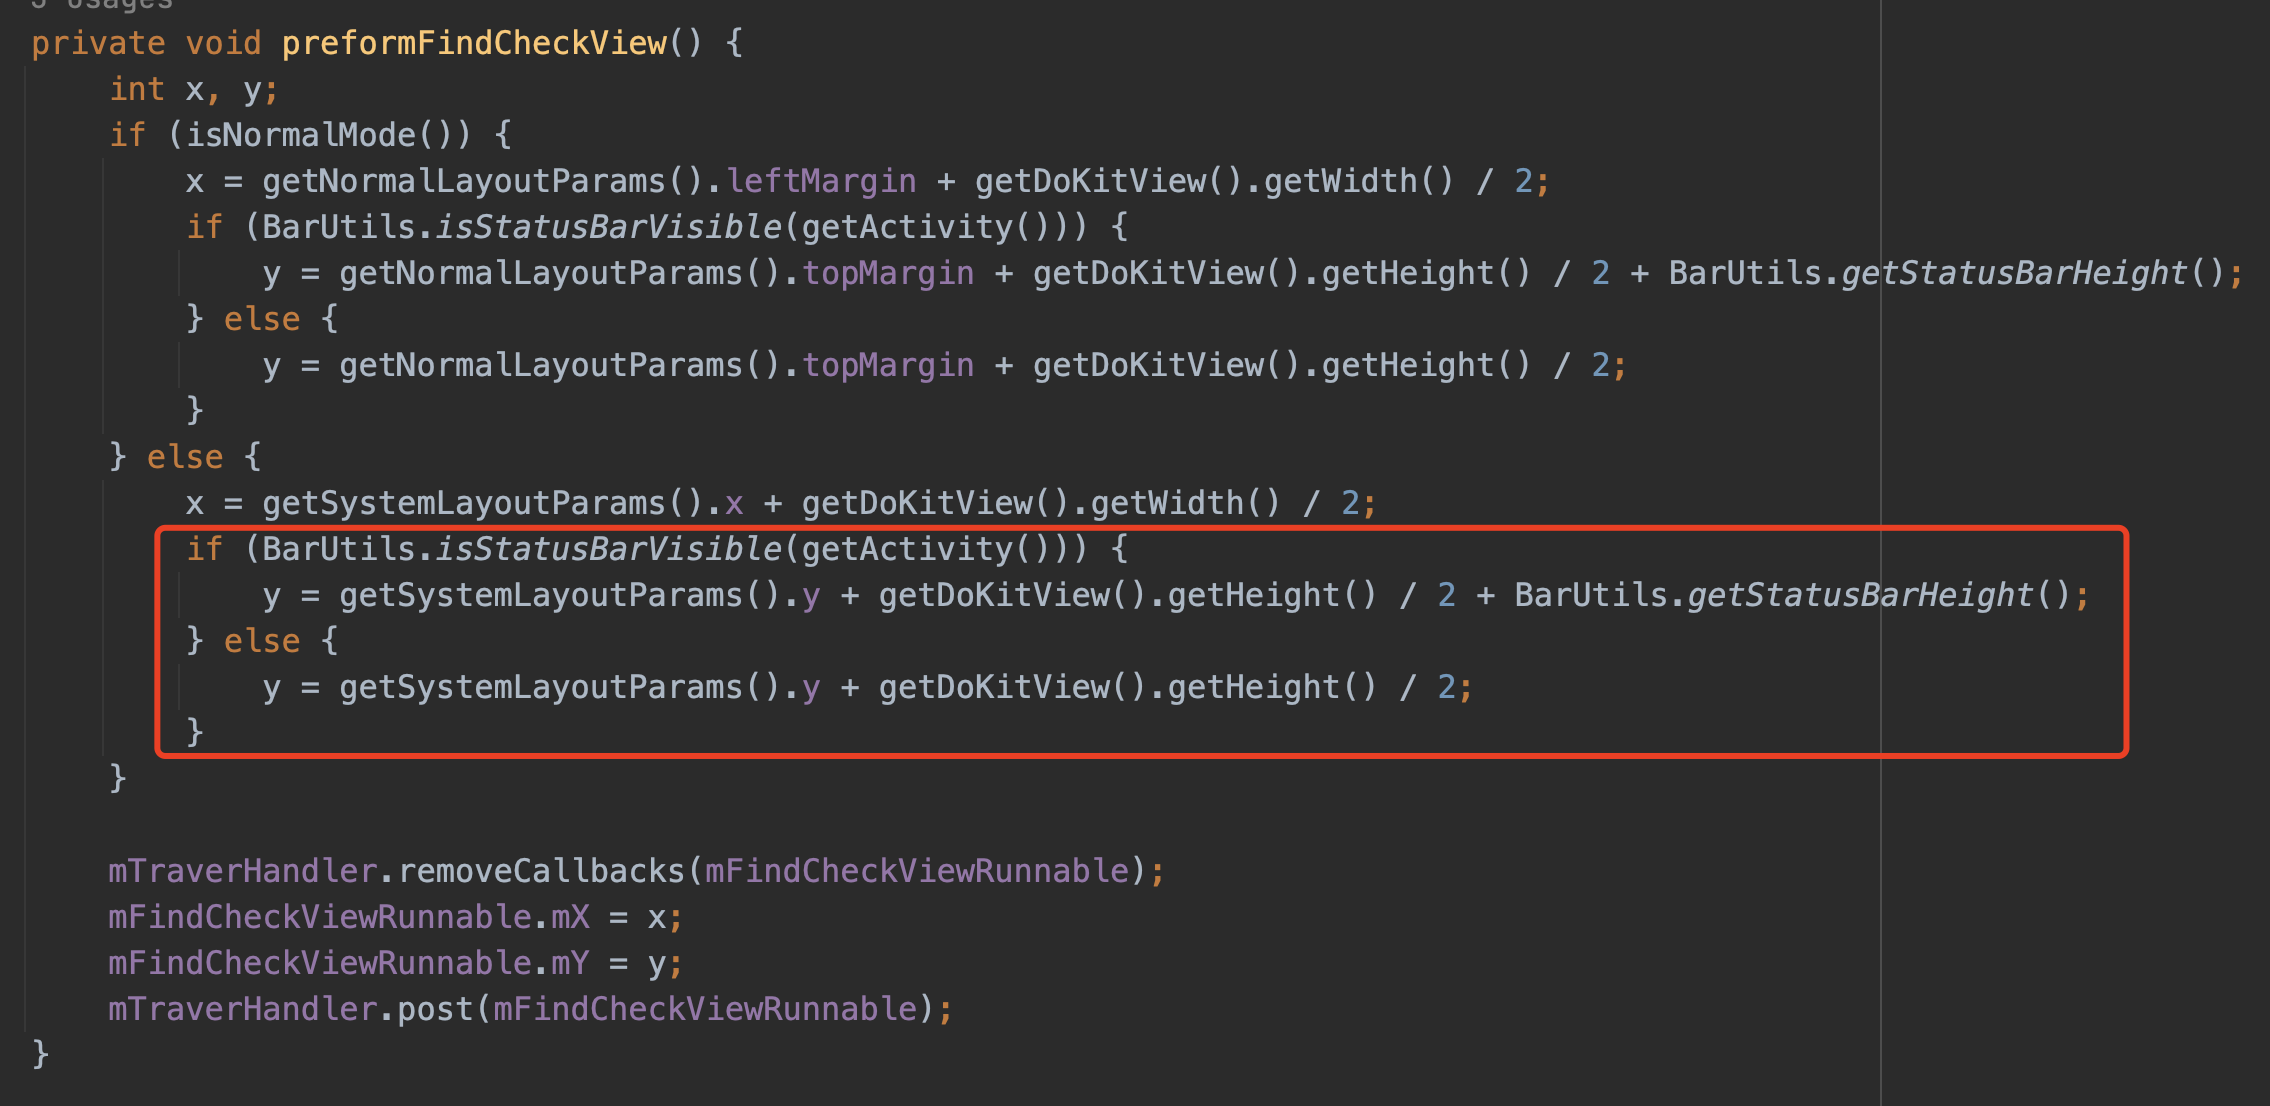
There is actually no problem with the processing here. getSystemLayoutParams().yGet the position of the slider and add half of its own height to get the center point position. Then check whether the status bar position has been corrected.
The problem with Dialog is that the pop-up position does not start from the upper left corner of the page. The traversal method traverseViewsuses x, y relative to the Activity window.
int[] location = new int[2];
//相对window的x y
view.getLocationInWindow(location);
I found a Dialog window diagram:

the two windows are not in the same range, and the obtained coordinates cannot be used directly, so for Dialog, use the getLocationOnScreencoordinate position relative to the entire screen.
int[] location = new int[2];
view.getLocationOnScreen(location);
The final result is normal.

5.Others
1. Optimize inner margin and outer margin conditions. Currently, the source code requires that the margins on all four sides are not 0 before it will be displayed:

Such strict conditions will cause a lot of control information that only has space on one or two sides to be unable to be displayed normally, so here I will &&change it to ||.
2. Later, we plan to display the view’s rounded corners, selected color, gradient and other information. The implementation idea is the same as the font processing above.