♥ ♡ ♥ ♡ ♥ ♡ ♥ ♡ ♥ ♡ ♥ ♡ ♥ ♡ ♥ ♡ ♥ ♡ ♥ ♡ ♥ ♡ ♥ ♡ ♥ ♡ ♥ ♡ ♥ ♡ ♥ ♡ ♥ ♡ ♥ ♡ ♥ ♡ ♥ ♡ ♥ ♡ ♥ ♡ ♥ ♡ ♥
write in front
╔══════════════════════════════════════════════════════════════════════════╗
Hello everyone! I am Myon. While my cloud server has not expired, I will give you a very detailed tutorial on setting up the shooting range for the CTF competition as well as the production of Web competition questions and the deployment of the docker environment. Due to my limited ability, I can only I can tell you some basic and simple things. You are welcome to communicate and learn from each other in the comment area. I hope you can learn something new through this blog. I also look forward to your attention and support!
╚══════════════════════════════════════════════════════════════════════════╝
♥ ♡ ♥ ♡ ♥ ♡ ♥ ♡ ♥ ♡ ♥ ♡ ♥ ♡ ♥ ♡ ♥ ♡ ♥ ♡ ♥ ♡ ♥ ♡ ♥ ♡ ♥ ♡ ♥ ♡ ♥ ♡ ♥ ♡ ♥ ♡ ♥ ♡ ♥ ♡ ♥ ♡ ♥ ♡ ♥ ♡ ♥
Because I have built this kind of CTF shooting range before. If you have read the blog I wrote before, you will know that the previous one was purely based on CTFd, but this time it is based on H1ve (this one looks better). I was responsible for the construction, operation and maintenance of the last CTF competition in our school, as well as the environment deployment of Pwn and Web competition questions. I will introduce them later.
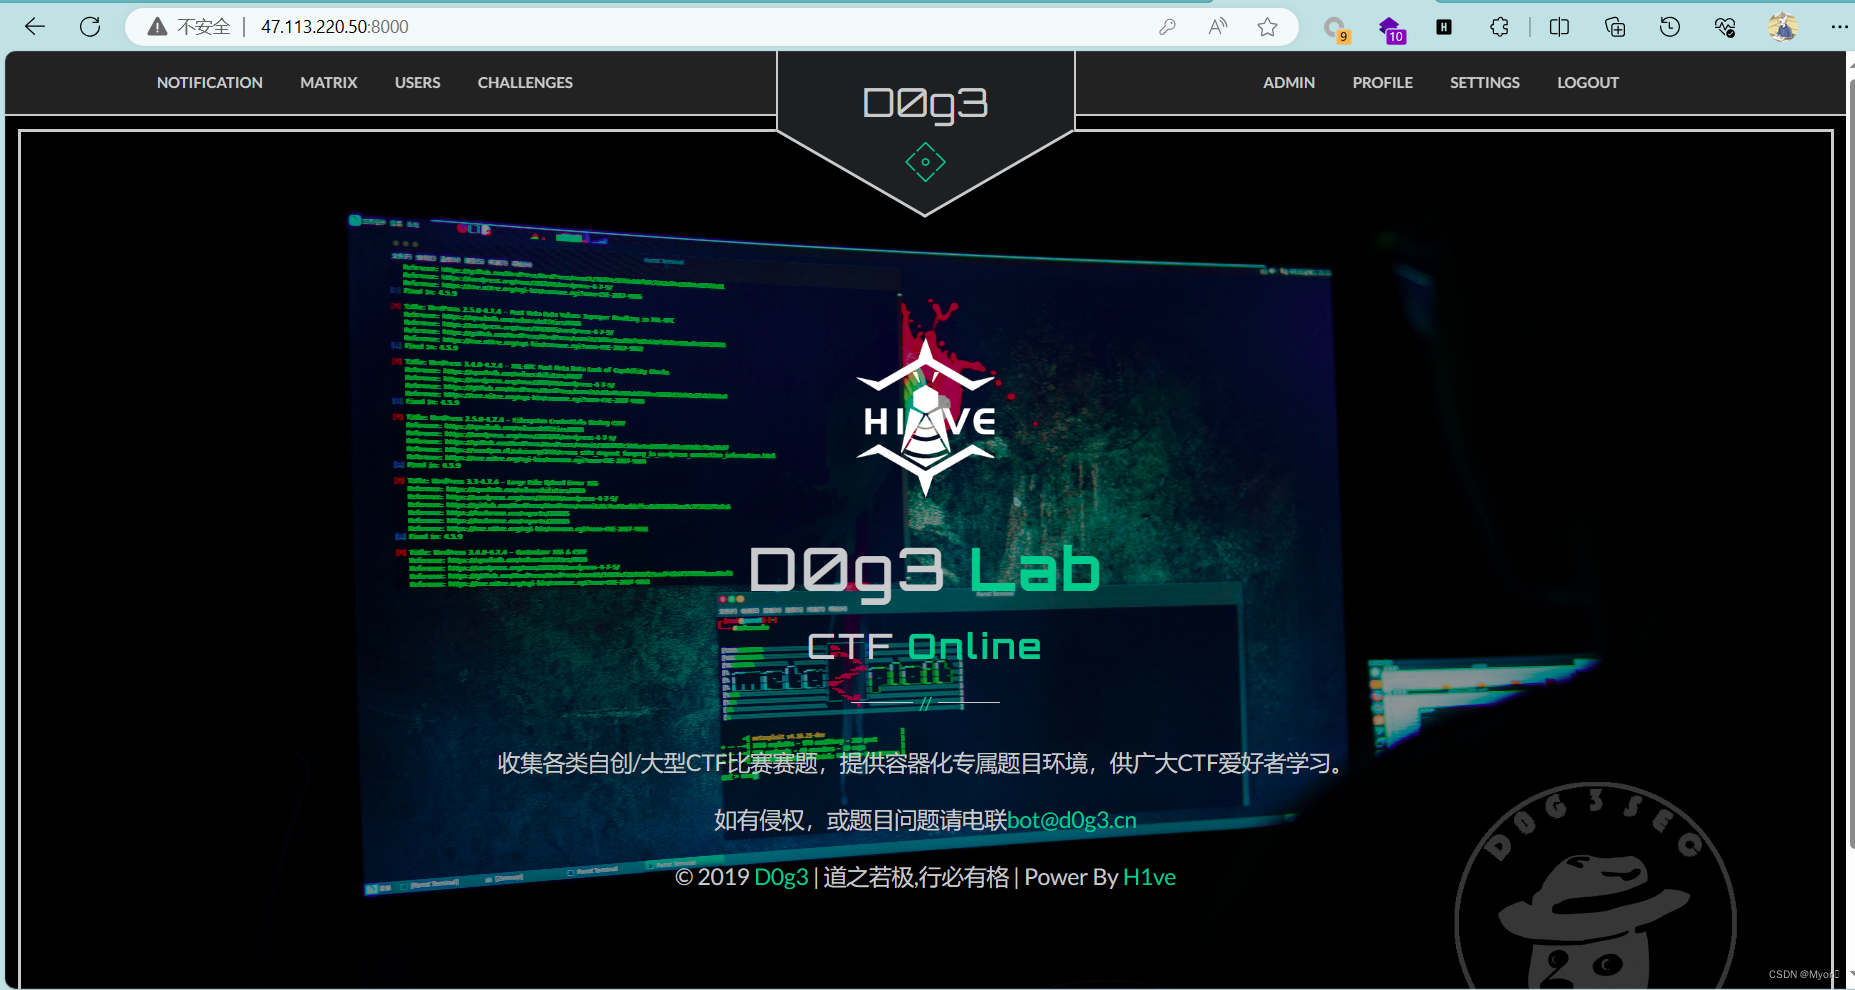
Let me show you the finished product renderings first.
front page:

ranking:

challenges:

announcement:

I write this blog mainly to supplement and summarize some of the previous content. If you don’t understand anything during the reading process, you are welcome to refer to my previous articles. In the "Website Construction" column, thank you again for your support and attention!

Before the article begins, let me share with you a website for learning artificial intelligence. It is easy to understand and humorous.
Artificial Intelligence ![]() https://www.captainbed.cn/myon/
https://www.captainbed.cn/myon/
~~~~~~~~~~~~~~~~~~~~~~~~~~~~~~~~~~~~~~~~~~~~~~~~~~~~~~~~~~~~~~~~~~~~~~~~~~~~~~~~~~~~~~~~~~
Use server: centos8 OK text begins ◉ ‿ ◉
~~~~~~~~~~~~~~~~~~~~~~~~~~~~~~~~~~~~~~~~~~~~~~~~~~~~~~~~~~~~~~~~~~~~~~~~~~~~~~~~~~~~~~~~~~
Table of contents
Part1, CTF shooting range construction
5. Pull the image and start Single Mode
6. Set all containers in the entire H1ve directory to self-start
Part2, Web competition question production and terminal docker environment deployment
1. Preparation of question documents
2. Docker environment deployment
3. Front-end deployment of competition questions
4. Terminal competition question operation and maintenance
Part1, CTF shooting range construction
If it is a new server and there is no git command, we install it first.
yum install git1. Clone H1ve from github
You can place it wherever you like. I created a Myon folder in the root directory and cloned it into it.
git clone https://github.com/D0g3-Lab/H1ve.git
After cloning, we still need to install some things first
Set up yum source
yum-config-manager --add-repo https://download.docker.com/linux/centos/docker-ce.repo2. Install docker
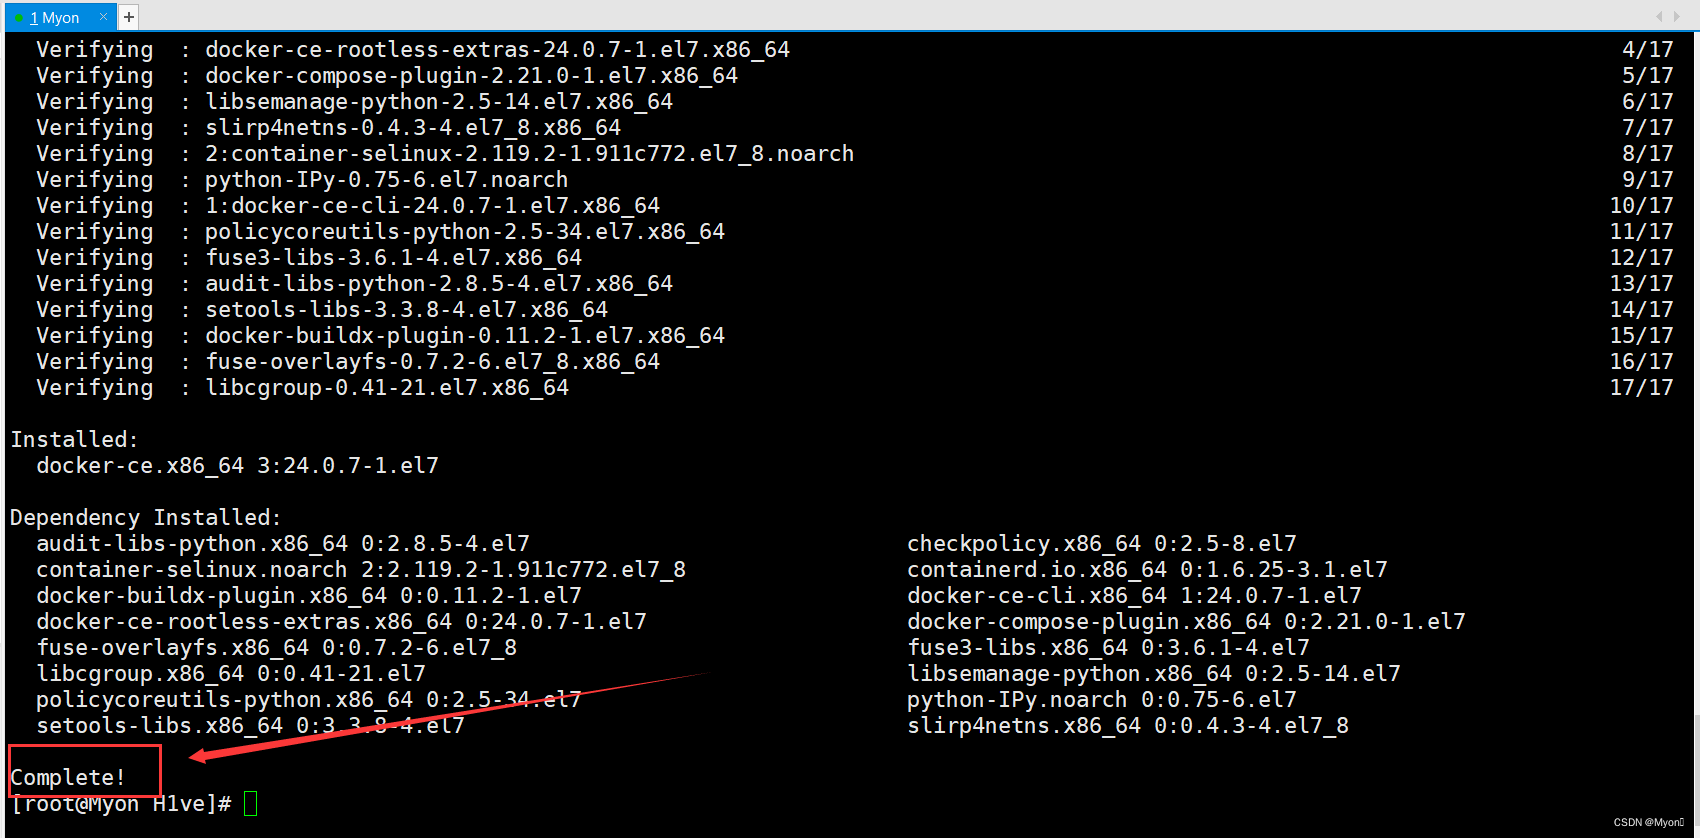
yum install -y docker-ce
 Seeing complete means the installation is complete.
Let’s check the version of docker and set it to start automatically at boot
docker version

systemctl start docker

systemctl enable docker
Then we install docker-compose
(This docker-compose command will be frequently used later when pulling images and competition environment)
3. Install python-pip
✦ ✧ ✦ ✧ ✦ ✧ ✦ ✧ ✦ ✧ ✦ ✧ ✦ ✧ ✦ ✧ ✦ ✧ ✦ ✧ ✦ ✧ ✦ ✧ ✦ ✧ ✦ ✧ ✦ ✧ ✦ ✧ ✦ ✧ ✦ ✧ ✦ ✧
Note that the default installation of pip here will cause an error. Do not execute the following command first, first read the error explanation later.
The default installation is the Python2.7 version, and here we need the Python3 version of pip
✦ ✧ ✦ ✧ ✦ ✧ ✦ ✧ ✦ ✧ ✦ ✧ ✦ ✧ ✦ ✧ ✦ ✧ ✦ ✧ ✦ ✧ ✦ ✧ ✦ ✧ ✦ ✧ ✦ ✧ ✦ ✧ ✦ ✧ ✦ ✧ ✦ ✧
yum -y install epel-release

yum -y install python-pip

If you see complete, it means the installation is successful. We can also check it using the command
pip -V
But when we try to install docker-compose, we will encounter an error
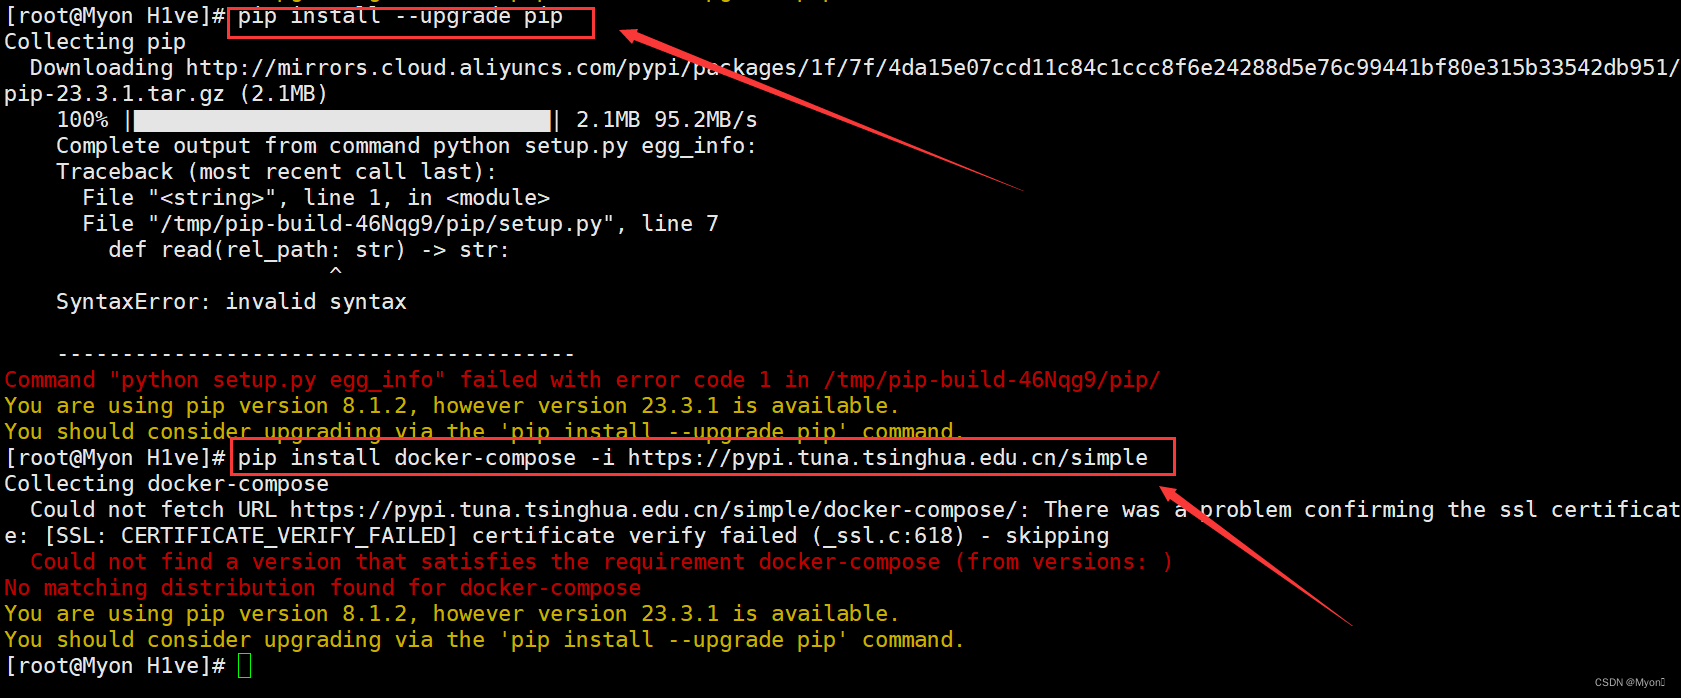
pip install docker-compose -i https://pypi.tuna.tsinghua.edu.cn/simple The general meaning is that our pip version is too old and we cannot find a suitable docker-compose version to satisfy

Try to upgrade pip version
pip install --upgrade pip -i https://pypi.tuna.tsinghua.edu.cn/simplepip install --upgrade pipBut there is a high probability that you will encounter the following error report:
Could not find a version that satisfies the requirement docker-compose (from versions: )
No matching distribution found for docker-compose
You are using pip version 8.1.2, however version 23.3.1 is available.
You should consider upgrading via the 'pip install --upgrade pip' command.

Solution: Install pip of python3
From the above pip -v we know that the default version of Python2.7 is installed
So here we install pip of Python3 and upgrade it
yum install python3-pip

pip3 install --upgrade pip
You can see that pip was successfully upgraded to 21.3.1

All subsequent pip operations will be replaced by pip3.
4. Install docker-compose
pip3 install docker-compose -i https://pypi.tuna.tsinghua.edu.cn/simple

You can see that the installation was successful. As for the warning, don’t worry about it.

Next we enter the H1ve directory that we cloned before.
Modify configuration file
(It is best not to do this step first, because I am not sure whether the subsequent error is related to this step. It is recommended to try the subsequent image pull operation directly. If there is any problem, you can try to delete H1ve and clone again)
sed -i 's/mariadb:10.4/mariadb:10.4.12/g' single.yml

sed -i 's/mariadb:10.4/mariadb:10.4.12/g' single-nginx.yml
5. Pull the image and start Single Mode
docker-compose -f single.yml upEncountered the following error:
ERROR: manifest for mariadb:10.4.12.12.12.12 not found: manifest unknown: manifest unknown

This situation means that docker needs us to specify the version number of the downloaded image.
But I didn't find a solution, so I replaced its single.yml file
Then you can pull it (I suspect it is caused by modifying the configuration file earlier)

Then access port 8000

After filling in the basic information, the page shown below can be loaded.
So I deleted H1ve and cloned it again for testing.
Determine whether there is a problem with single.yml due to modification of the configuration file
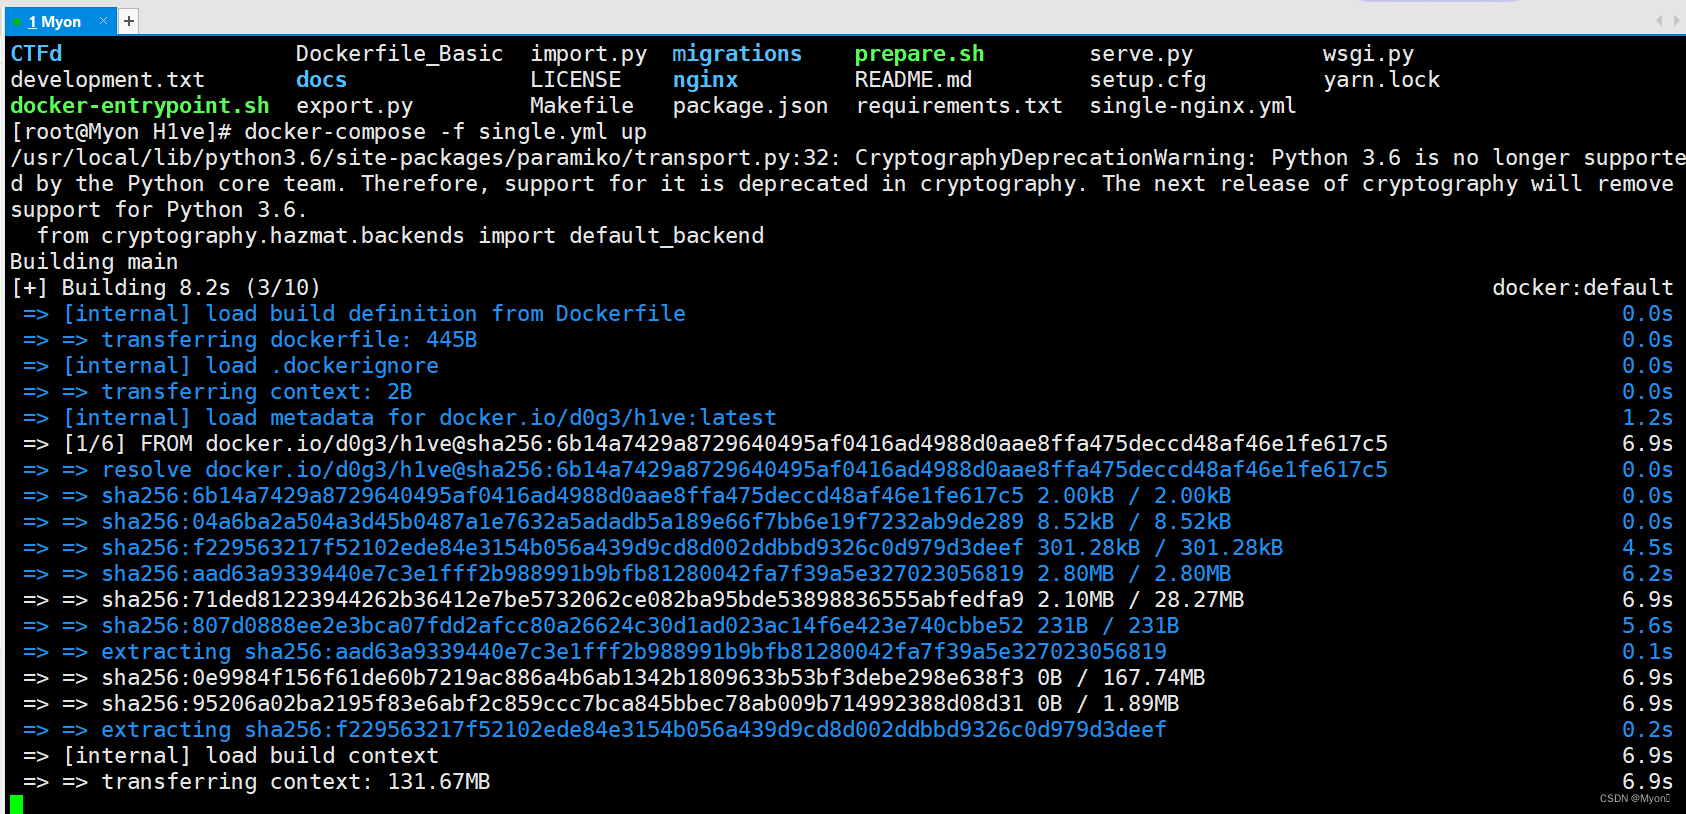
After cloning, you don’t need to do anything, just go into the directory and pull it directly, and it actually becomes

Then try to pull Single-Nginx Mode
docker-compose -f single-nginx.yml up It can be pulled successfully but cannot be accessed here

Modify the configuration file for verification and find that it can be pulled successfully.
It's very strange. Of course, I can't rule out that when I pulled the previous version, it had an impact on the environment of the version I just cloned from github.

In general, my suggestion to you is to try to pull the image directly after cloning it (for later testing, you can pull it successfully without setting up a configuration file. The details still depend on the environment configuration of your own server). Misoperations are also possible. Try deleting H1ve and re-cloning it.
By the way, you also need to make sure that the ports used are allowed and set in the server's security group rules.

Of course, if you want to directly access the IP address and go to the shooting range, you may need to set up a proxy forwarding to forward port 80 to 8000.
(It is not necessary in the one I talked about before that was built entirely based on CTFd. Direct access to the IP is the home page of the shooting range)
For specific content, please refer to my previous blog: "Cloud Server-Based Blog and Shooting Range Construction - Experience and Lessons"
We need to open all containers related to H1ve and set them to self-start
View container
docker ps -a
Start container
docker start 容器名
6. Set all containers in the entire H1ve directory to self-start
docker update --restart=always $(docker ps -aq)
View open containers
docker ps
Now we no longer need to pull the image, we can directly access the shooting range address + port number, and the shooting range will always be open.

~~~~~~~~~~~~~~~~~~~~~~~~~~~~~~~~~~~~~~~~~~~~~~~~~~~~~~~~~~~~~~~~~~~~~~~~~
Next comes the second part ◉ ‿ ◉
~~~~~~~~~~~~~~~~~~~~~~~~~~~~~~~~~~~~~~~~~~~~~~~~~~~~~~~~~~~~~~~~~~~~~~~~~
Part2, Web competition question production and terminal docker environment deployment
In order to facilitate testing, I have opened all the ports of the server here. You can add your own according to the port where the question is located.

1. Preparation of question documents
Each web page should contain at least one index.php or index.html (homepage file)
Let’s do the simplest web question first, such as hiding the flag in the source code of a web page
The file is named index.php and its content is as shown below

The content may look complicated, but in fact it is just a page.
(1) files folder
So we have the question file, create a new folder files, and put this file index.php in the files directory.
(Why is the folder called files? Because I will give you two template files later, just follow what I said)
Of course, if you can write Dockerfile and docker-compose.yml yourself, then you can do it however you want.
I asked ChatGPT to write it, and it is feasible, but here I am mainly talking about basic routines, so I will give you a template. Follow what I said, and you can deploy simple web competition questions.
In addition to files, we also need two other files:
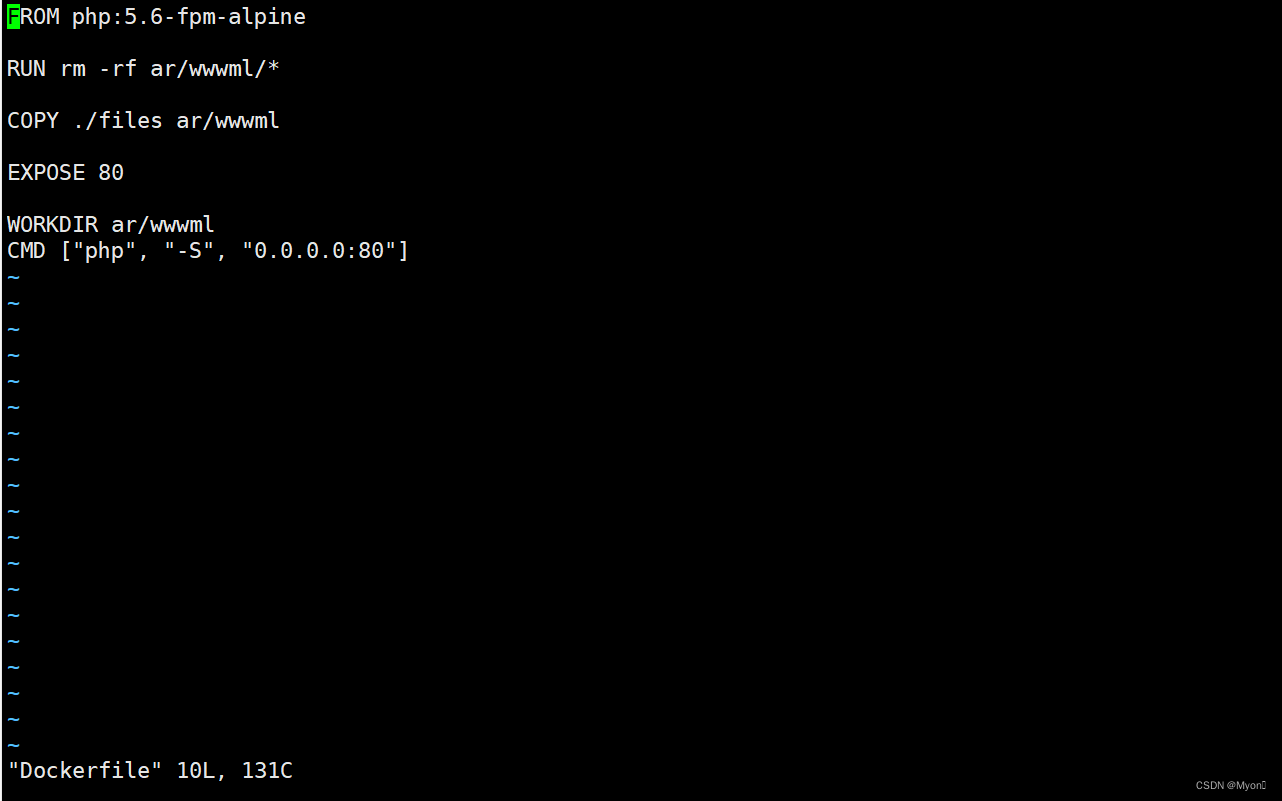
(2)Dockerfile
(You can use this file directly without modification)
The content is as follows:
FROM php:5.6-fpm-alpine

RUN rm -rf ar/wwwml/*

COPY ./files ar/wwwml

EXPOSE 80

WORKDIR ar/wwwml
CMD ["php", "-S", "0.0.0.0:80"]
(3)docker-compose.yml
(This file needs to change the port to the port where your own question is deployed)
The content is as follows:
version: "2"

services:

  web:
    build: .
    restart: always
    ports:
      - "0.0.0.0:8001:80"
    environment:
      - FLAG=Myon{s0_eaSyest_wEb_fl2}

Explanation of the contents of the second file:
0.0.0.0:8001:80 # The question is deployed on port 8001. Players can access the question environment by accessing port 8001.
80 is the port where ngnix is located. It depends on your environment. It is usually at 80. Of course, I have encountered other problems when deploying Pwn competition questions before. I need to modify the configuration file. For details, you can refer to my previous blog:
"Deploying Web Questions in CTFd Based on CTFTraining" and
"Deploy pwn question based on xinetd (100% successful and can nc the shooting range address)"
FLAG=Myon{s0_eaSyest_wEb_fl2} # In fact, I found out later that it seems to have no impact, because the correct flag is placed in the file yourself, unless the question is related to environment variables that may affect it, so to be on the safe side, you You can change the FLAG value here to the flag value of your own question, just to further ensure consistency.
Everything else remains unchanged.
Put the above files: files, Dockerfile, docker-compose.yml into a new folder
In order to facilitate memory and operation and maintenance, I like to name the question after the name, for example, it is called f12 (view the source code of the question)
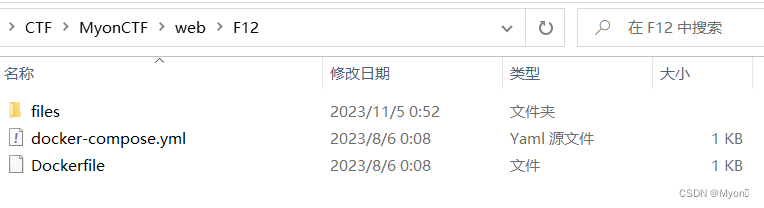
In this way, all the files for our web competition are ready. Put the f12 folder into the terminal.
I first created a testctf folder here to store CTF competition questions.
Command to create a new folder
mkdir 文件夹名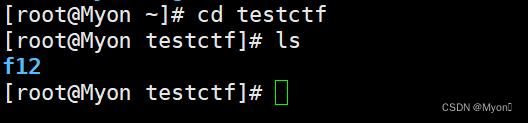
When transferring files, I prefer to use xftp, directly pull or paste and copy.

2. Docker environment deployment
Enter the f12 directory and use the command to pull the image
docker-compose up -d

After the pull is successful, use the command to view the container
docker ps
Access the port where the question is located, here is 8001

Use F12 to find the flag in the web page source code

3. Front-end deployment of competition questions
So how to put the competition questions, add them to the front end of our shooting range, set the flag, and score, etc., have been discussed in detail in my blog "Deploying Web Questions in CTFd Based on CTFTraining", so I won't go into details here.
The link should expire. You can directly search for the name of my blog to find it, or in the column of "Website Construction"
In addition, I also have the source code of some other types of Web questions here. It is very easy to build these questions such as mini games, basic parameter passing, PHP deserialization, command execution, file upload, PHP bypass, and information leakage. Welcome everyone. Come to me for discussion.
For SQL injection, it needs to be combined with the database. The source code of some questions can also be written by ChatGPT.


4. Terminal competition question operation and maintenance
If we encounter problems when deploying the docker environment, such as inaccessibility, or some file information has not been modified, but the image environment of the topic has been pulled, then we need to delete the container first and then pull it again:
View question container name
docker psDelete the problematic container using the command
docker rm -f 容器名
The question page is no longer accessible at this time

But here comes the point, can we still use docker-compose up -d to pull directly?
This operation will not work. After pulling, you will get the same container as before you deleted it, even though you have modified the file content.
For this question, you can still read my previous blog "Deploy pwn question based on xinetd (100% successful and can nc the shooting range address)"
Because docker builds a container, you can understand it as an independent environment, and the paths of the files inside are different. Why do we dare to deploy vulnerabilities directly on our own servers? It is because the security of docker is still very strong. Of course, there may be docker containers escaping to the local, but generally things built with docker are still very safe, even if the If something is broken, it will not affect the local things on your server. It is a separate environment.
To truly replace the question environment, there are two correct operations:
Method 1: Rename the question folder (for example, change F12 to F12) and use the mv command
Of course, you need to make sure that the name you rename is the name of the image that has not been pulled, that is, a brand new name.
mv f12 F12At this time, we enter F12 to pull the image, also using
docker-compose up -dMethod 2: Delete all unused networks. Unused networks are networks that are not referenced by any container.
docker network prune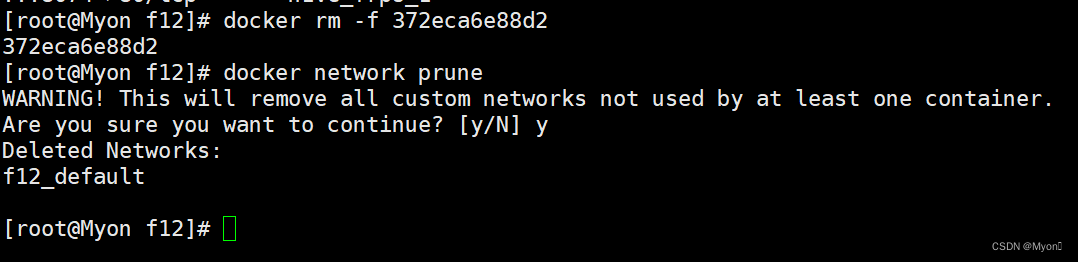
Because the original container of this network has been deleted by us, but its network still exists, but it is not referenced by the container, so it needs to be cleared first, and then the image pull can be used to pull the content of your modified file.
It is recommended to use method 2, but you can also use the rename method and wait for the unused networks to accumulate for a period of time before clearing them out.
♥ ♡ ♥ ♡ ♥ ♡ ♥ ♡ ♥ ♡ ♥ ♡ ♥ ♡ ♥ ♡ ♥ ♡ ♥ ♡ ♥ ♡ ♥ ♡ ♥ ♡ ♥ ♡ ♥ ♡ ♥ ♡ ♥ ♡ ♥ ♡ ♥ ♡ ♥ ♡ ♥ ♡ ♥ ♡ ♥ ♡ ♥
~~~~~~~~~~~~~~~~~~~~~~~~~~~~~~~~~~~~~~~~~~~~~~~~~~~~~~~~~~~~~~~~~~~~~~~~~
The article ends here. I hope you will gain something from reading it. I look forward to your attention and support◉ ‿ ◉
~~~~~~~~~~~~~~~~~~~~~~~~~~~~~~~~~~~~~~~~~~~~~~~~~~~~~~~~~~~~~~~~~~~~~~~~~
♥ ♡ ♥ ♡ ♥ ♡ ♥ ♡ ♥ ♡ ♥ ♡ ♥ ♡ ♥ ♡ ♥ ♡ ♥ ♡ ♥ ♡ ♥ ♡ ♥ ♡ ♥ ♡ ♥ ♡ ♥ ♡ ♥ ♡ ♥ ♡ ♥ ♡ ♥ ♡ ♥ ♡ ♥ ♡ ♥ ♡ ♥