HeyForm is an excellent open source online form tool that can quickly build beautiful and practical forms through an intuitive drag-and-drop editor.
HeyForm is very feature-rich:
- It supports a variety of input types, from basic text and numbers to advanced image selection, date selection, file upload, etc.
- Implement dynamic, adaptable forms with conditional logic and URL redirections.
- It provides powerful theme customization functions, allowing you to set fonts, colors, backgrounds, etc. In addition, it also supports custom CSS.
- With built-in detailed analysis functions, you can grasp key indicators such as form filling progress and bounce rate in real time, and gain in-depth insights into user behavior.
- Supports one-click export of form data to CSV format to facilitate secondary analysis and application.
- Open source, supports privatized deployment!
Private deployment of HeyForm
HeyForm's privatized deployment relies on MongoDB and Redis databases, which is relatively complex to deploy. Sealos' app store provides one-click deployment of application templates, which can be deployed with just one click of the mouse, which is very smooth.
Open this link directly:
Then click "Go to Sealos Deployment" in the upper right corner.
If this is your first time using Sealos , you need to register and log in to a Sealos public cloud account. After logging in, you will immediately jump to the template deployment page.
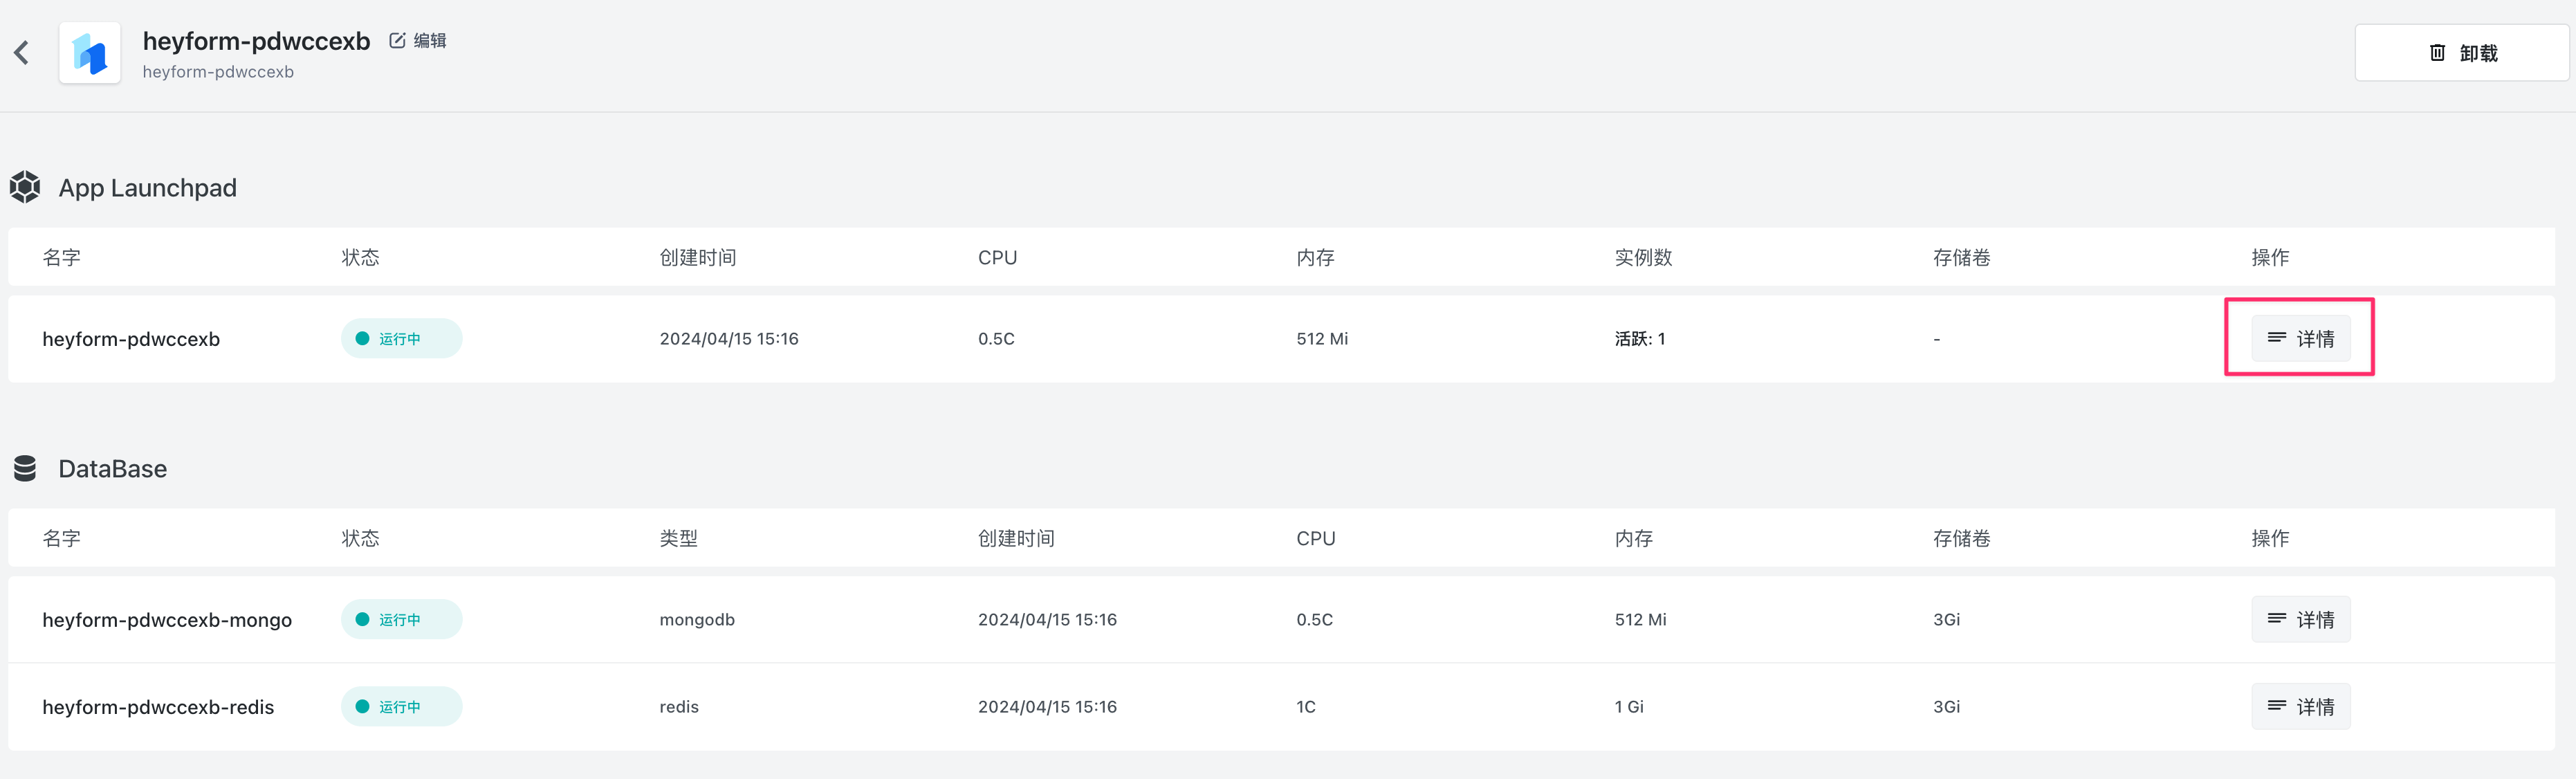
After jumping in, click "Deploy Application" in the upper right corner to start deployment. After the deployment is completed, directly click "Details" of the application to enter the application details page.
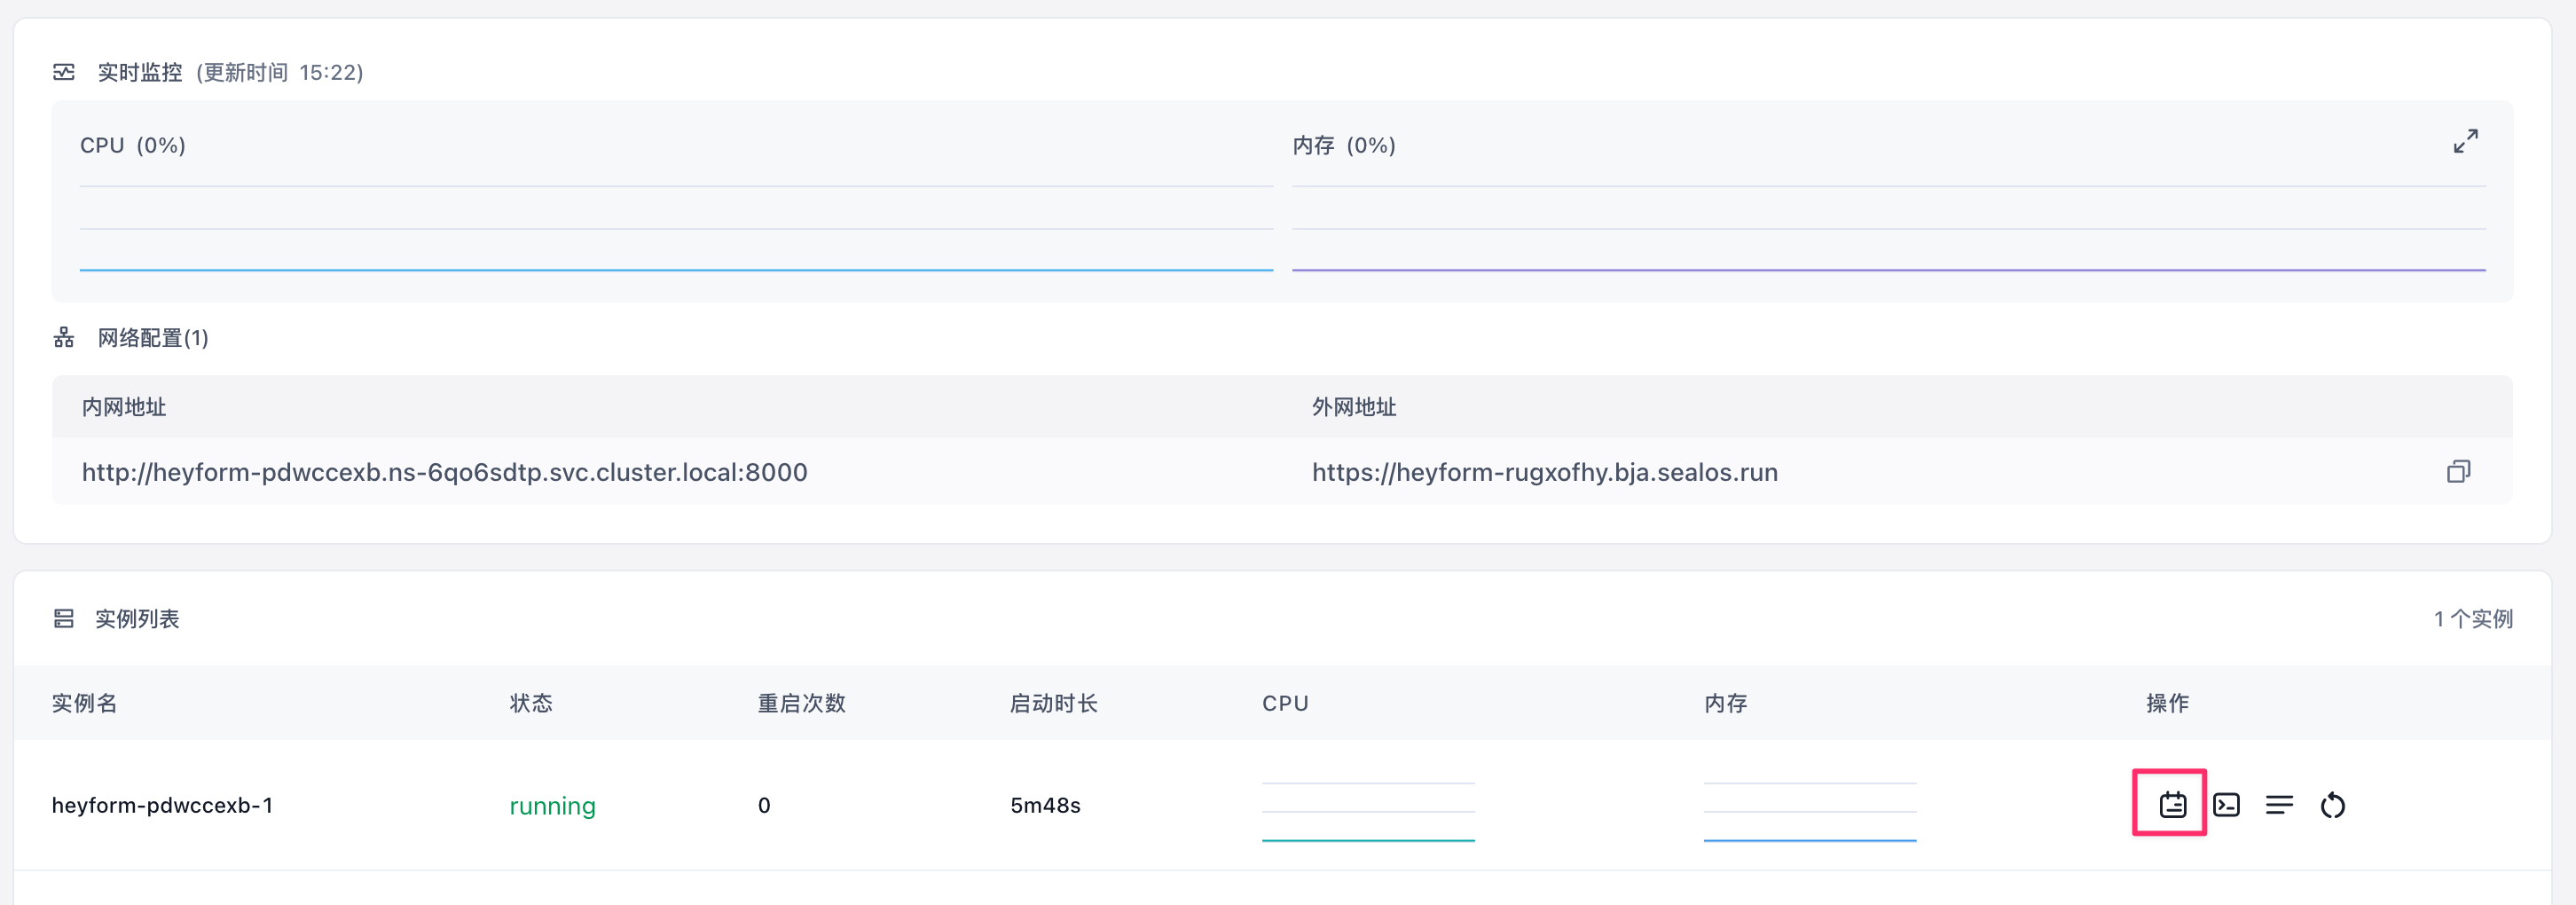
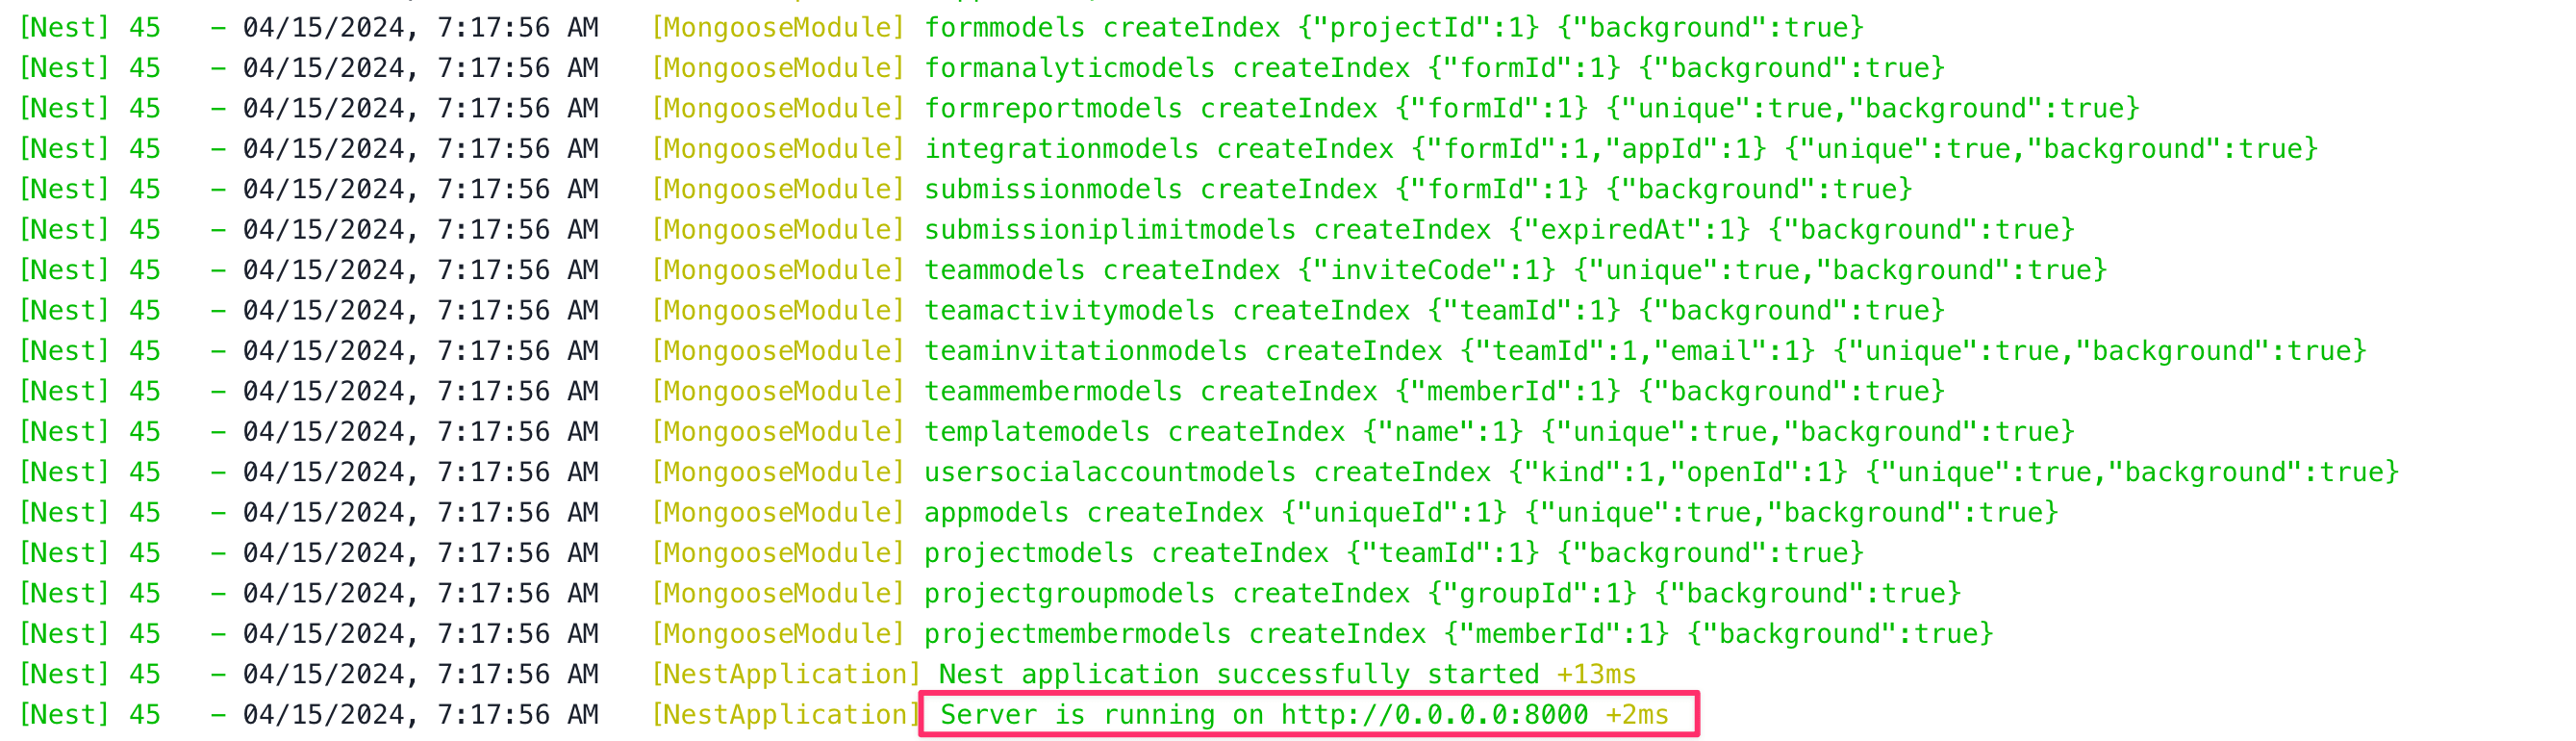
After waiting for the instance status to change to running, click the log icon to view the log:
If the following log appears, it means the startup was successful:
At this time, click on the external network address to open the visual interface of HeyForm:

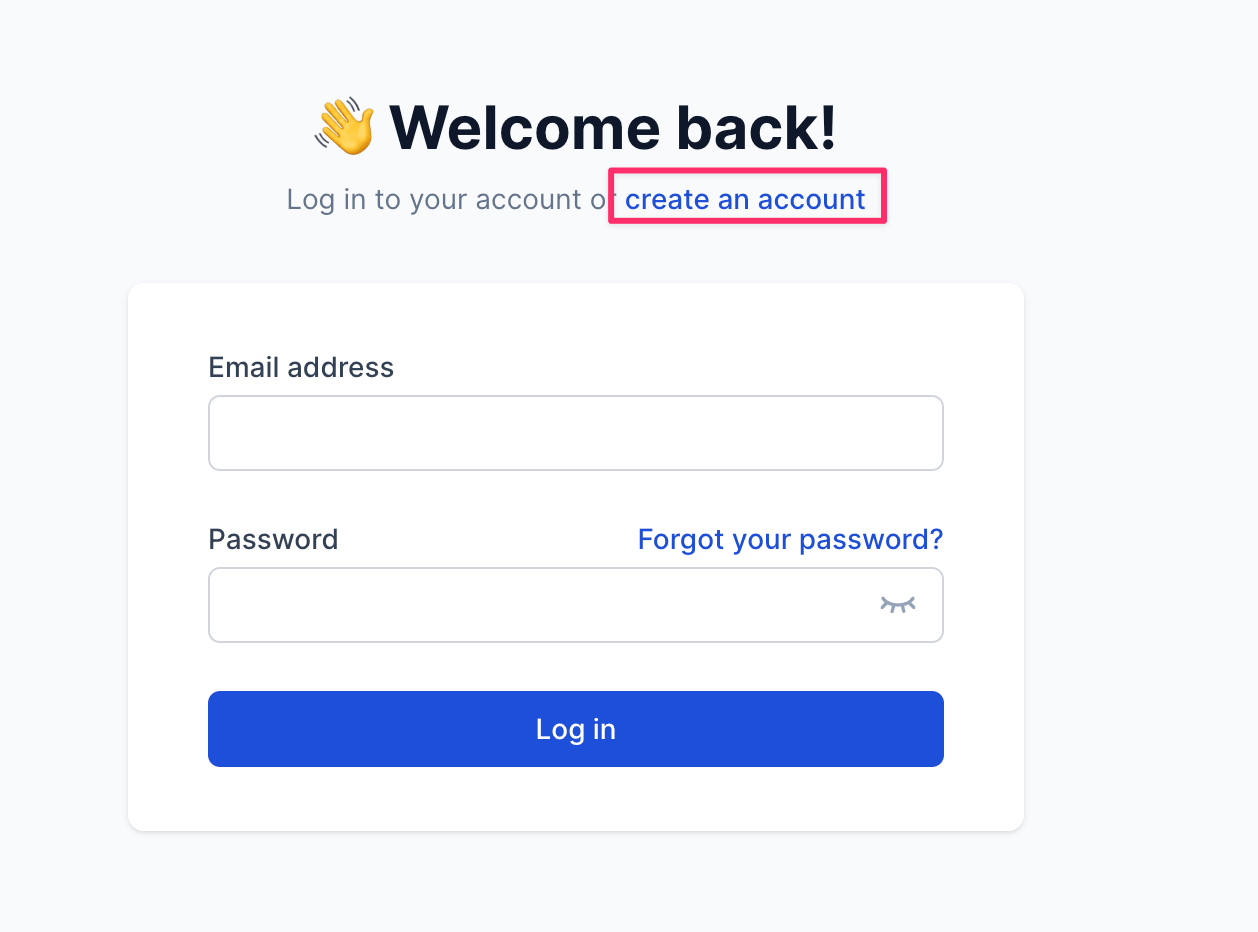
register log in
After opening the HeyForm visual interface, first create a user:
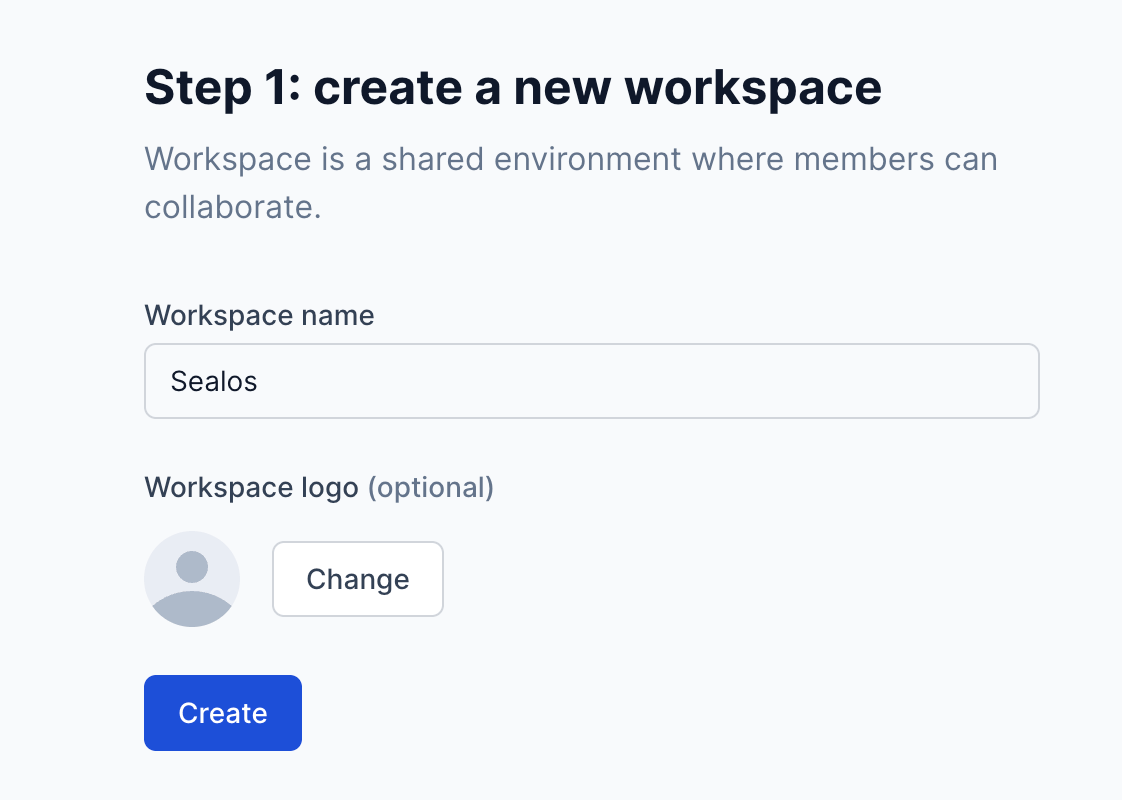
After creating the user, you will be asked to create a workspace:
After creating the workspace, you will enter the workspace interface. There is a default project under the workspace. You can use the default project or create a new project.
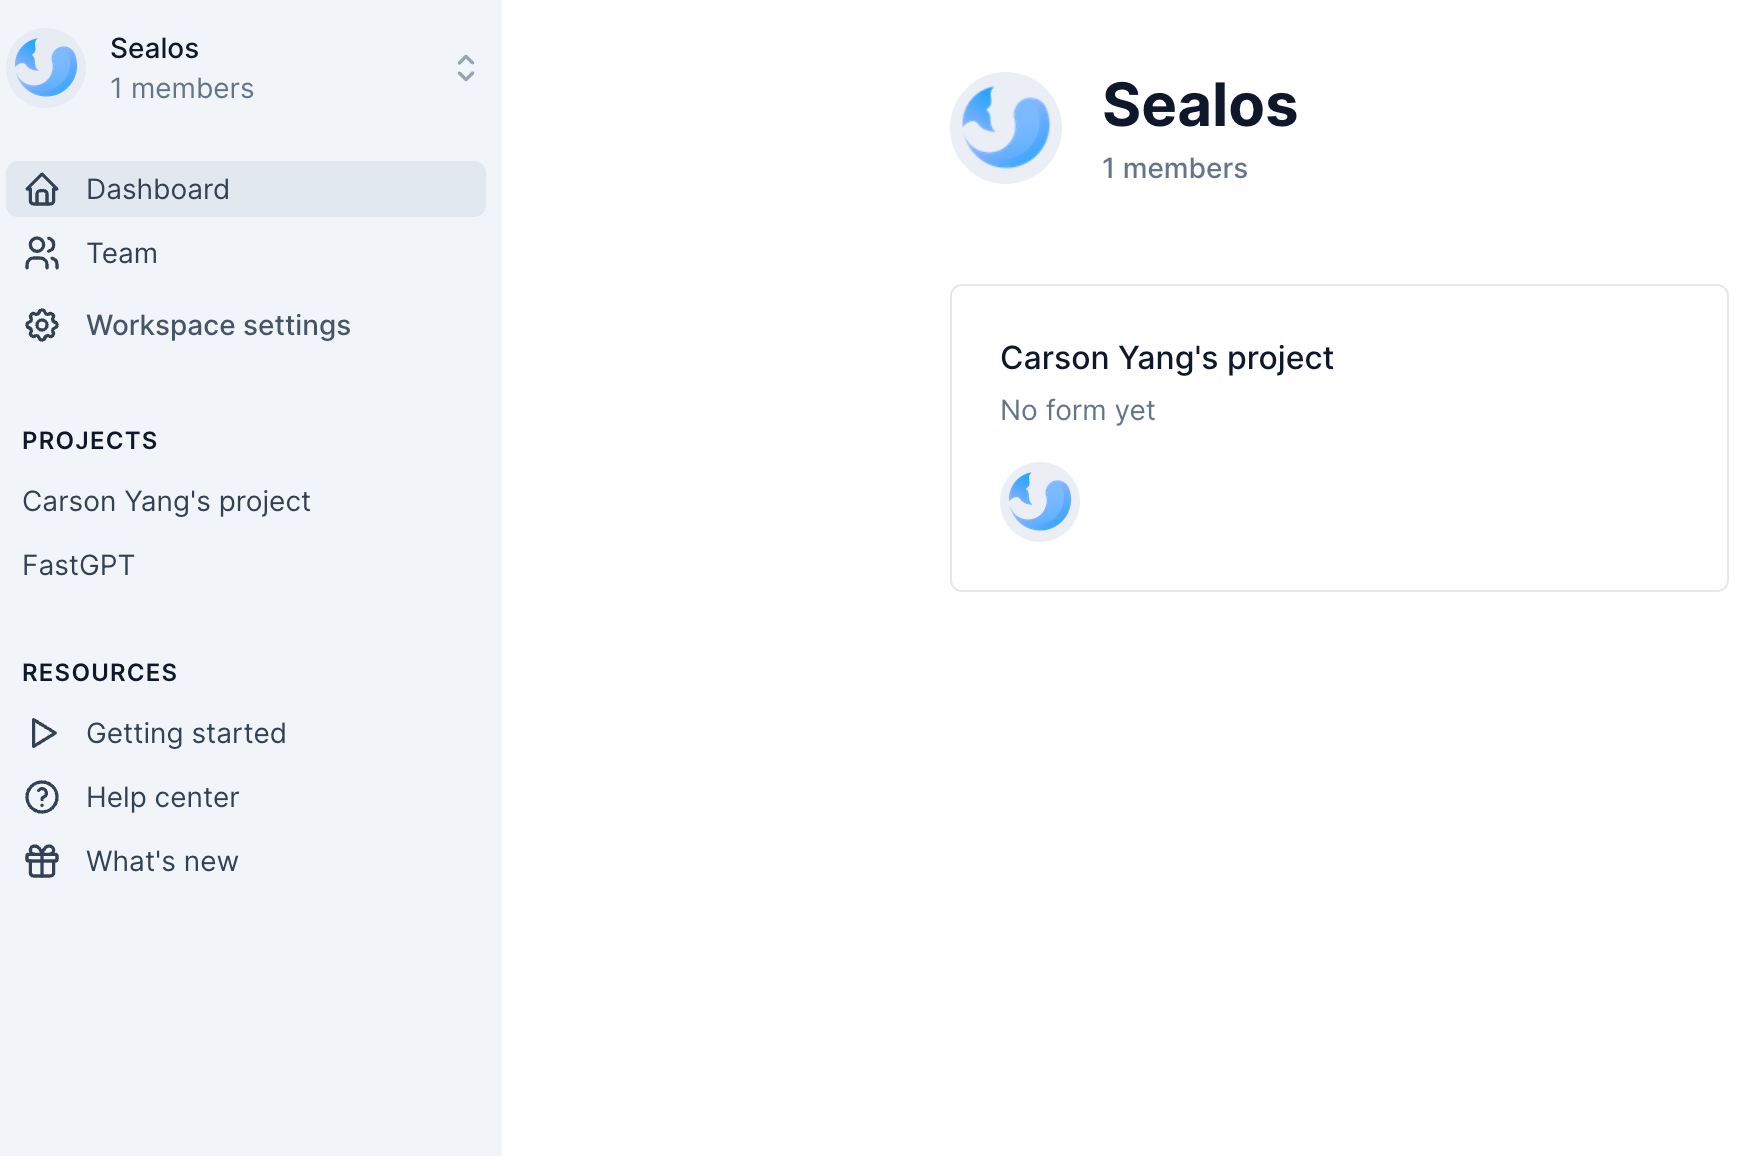
If you want to delete the default project, you need to perform email verification, and the template does not configure the SMTP information of the email sender by default. I will tell you how to configure it later.
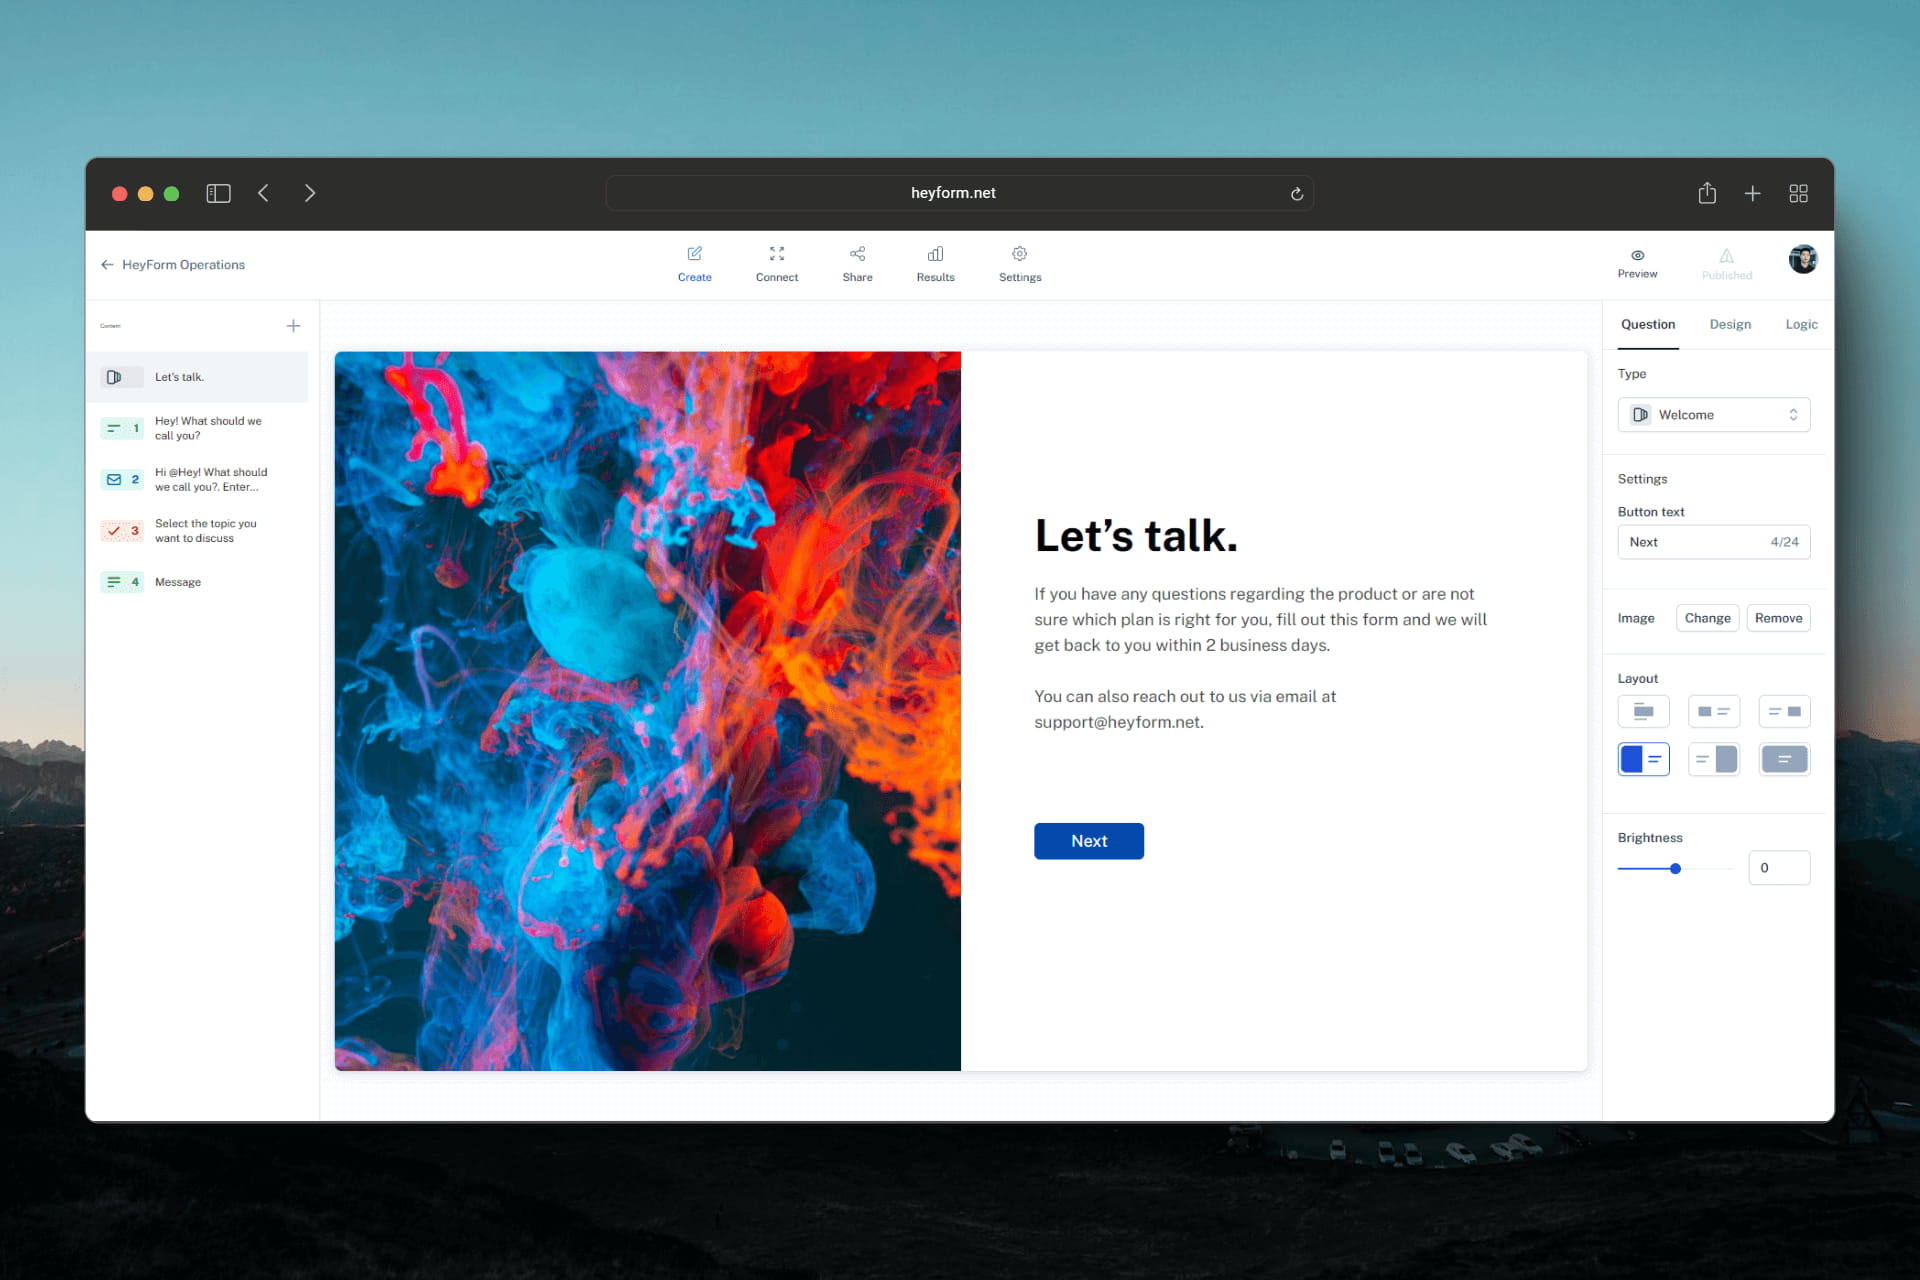
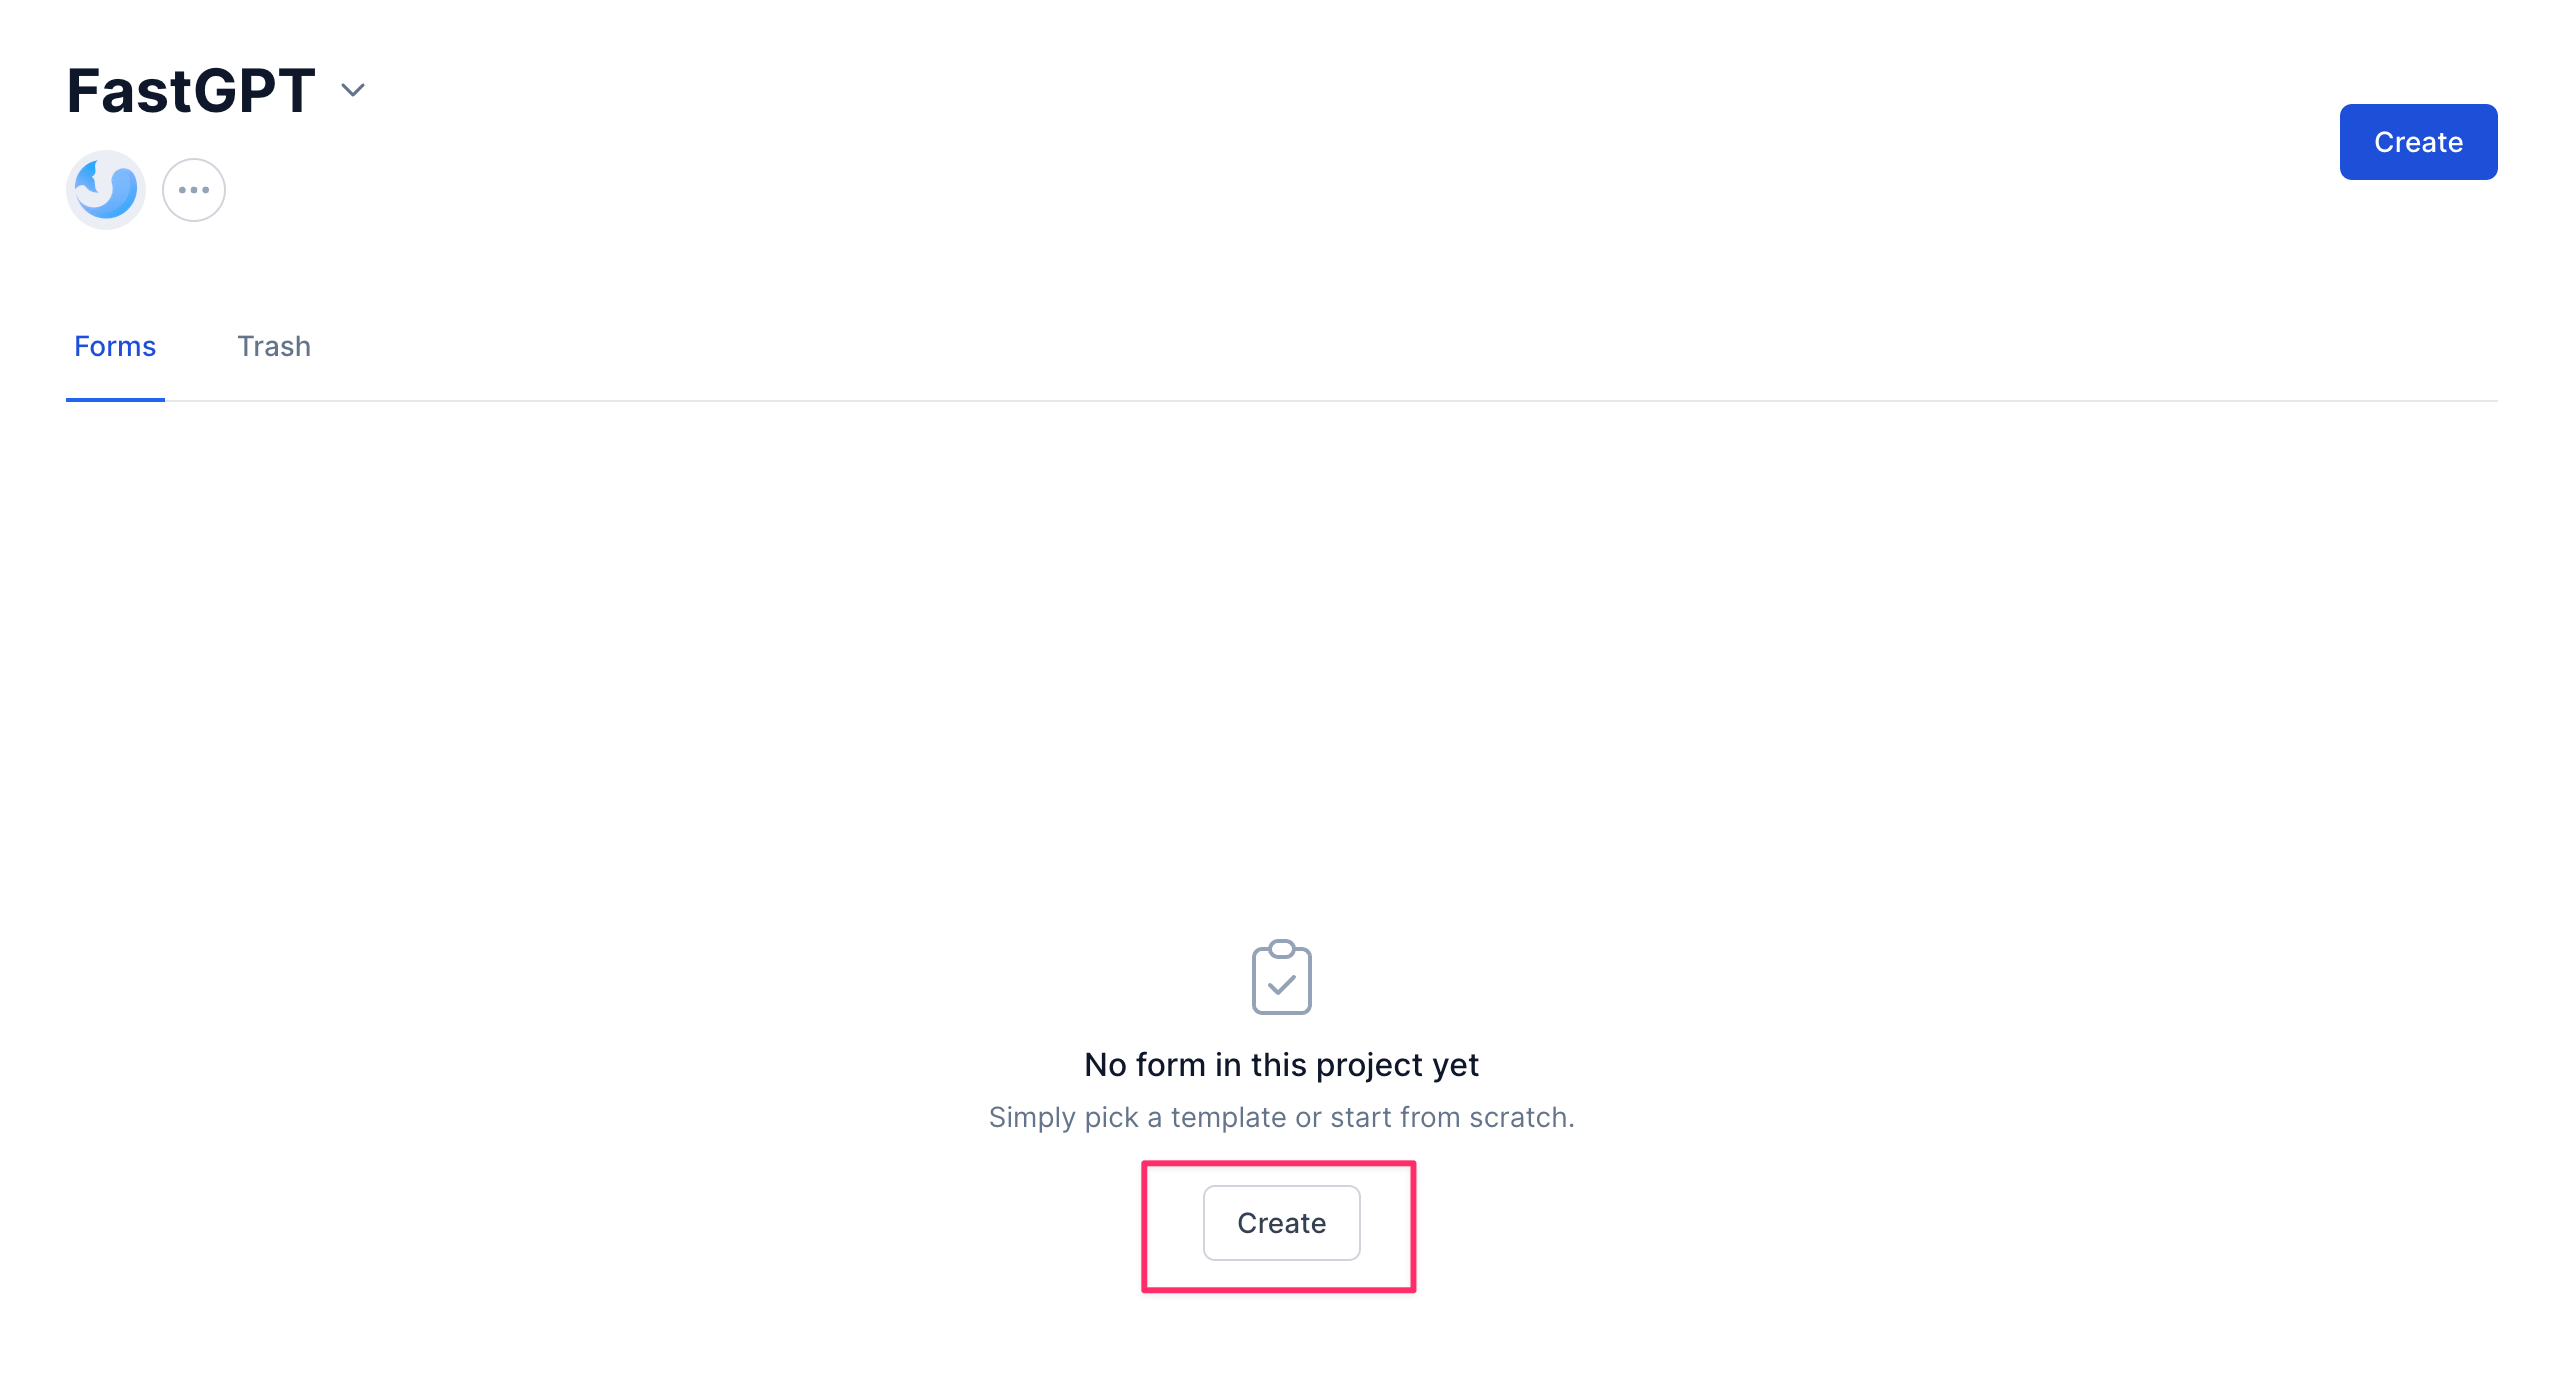
Create form
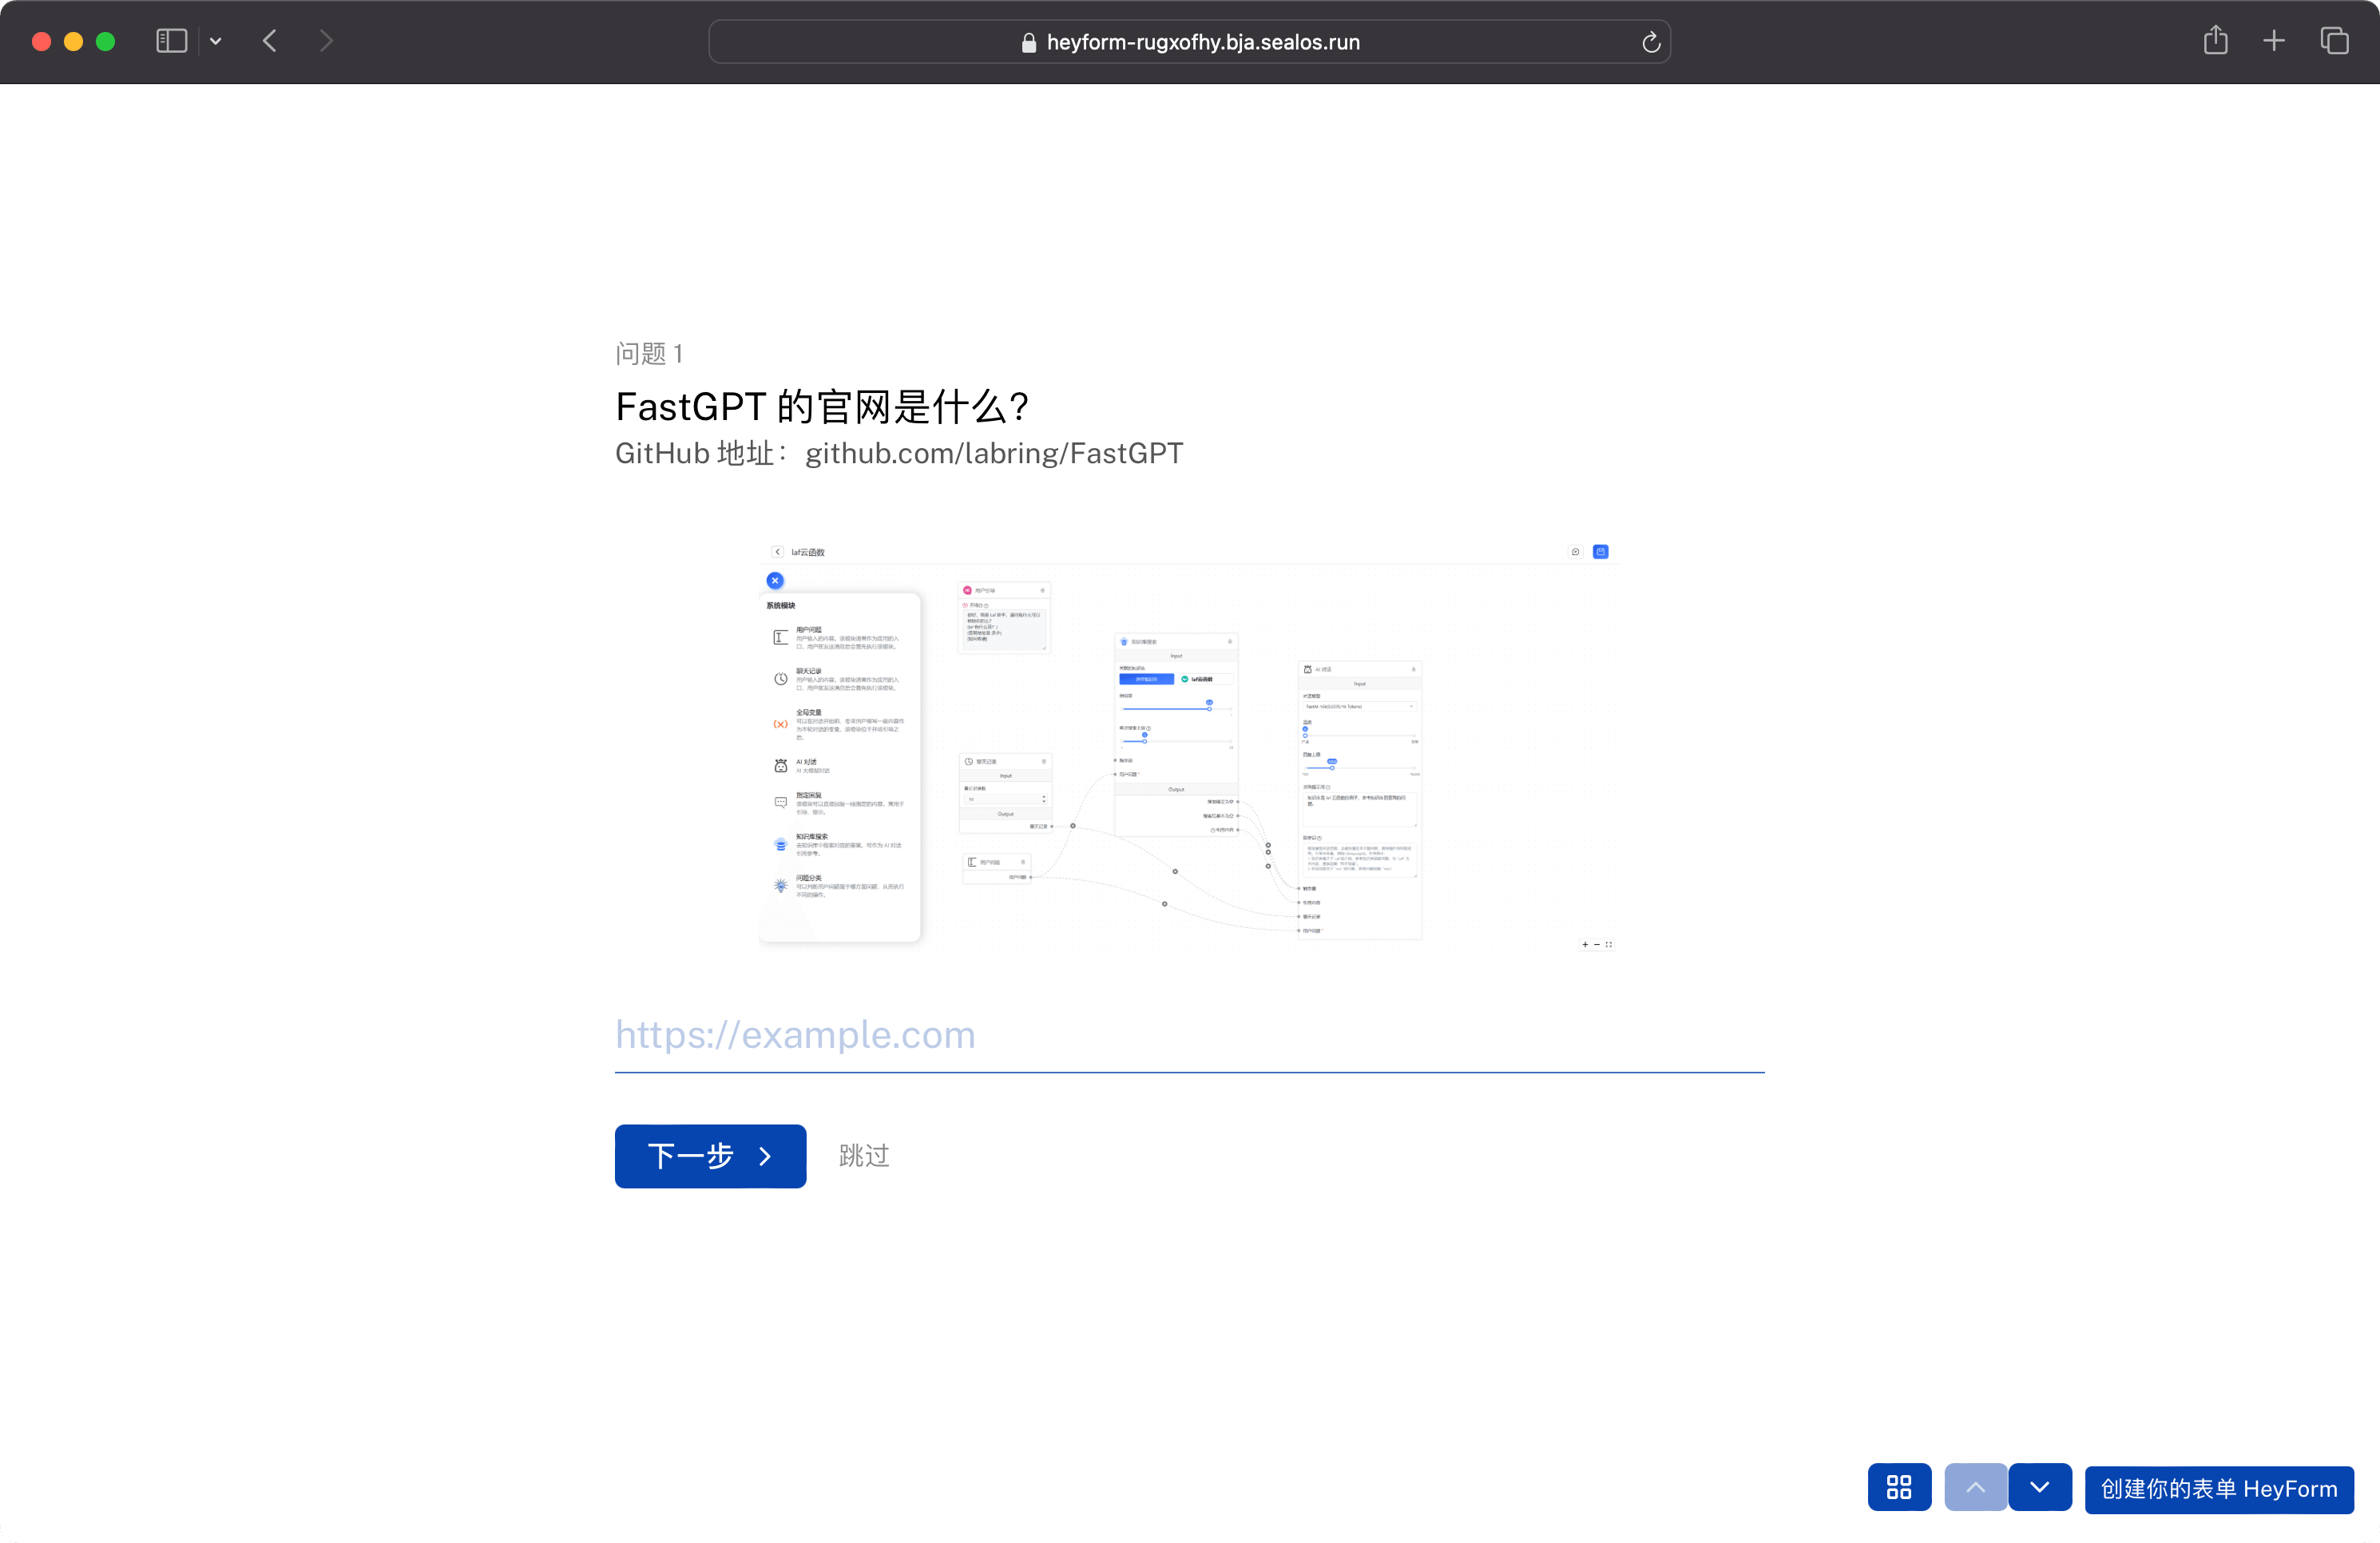
First enter the default project or the project we created ourselves, and then start creating the first form!
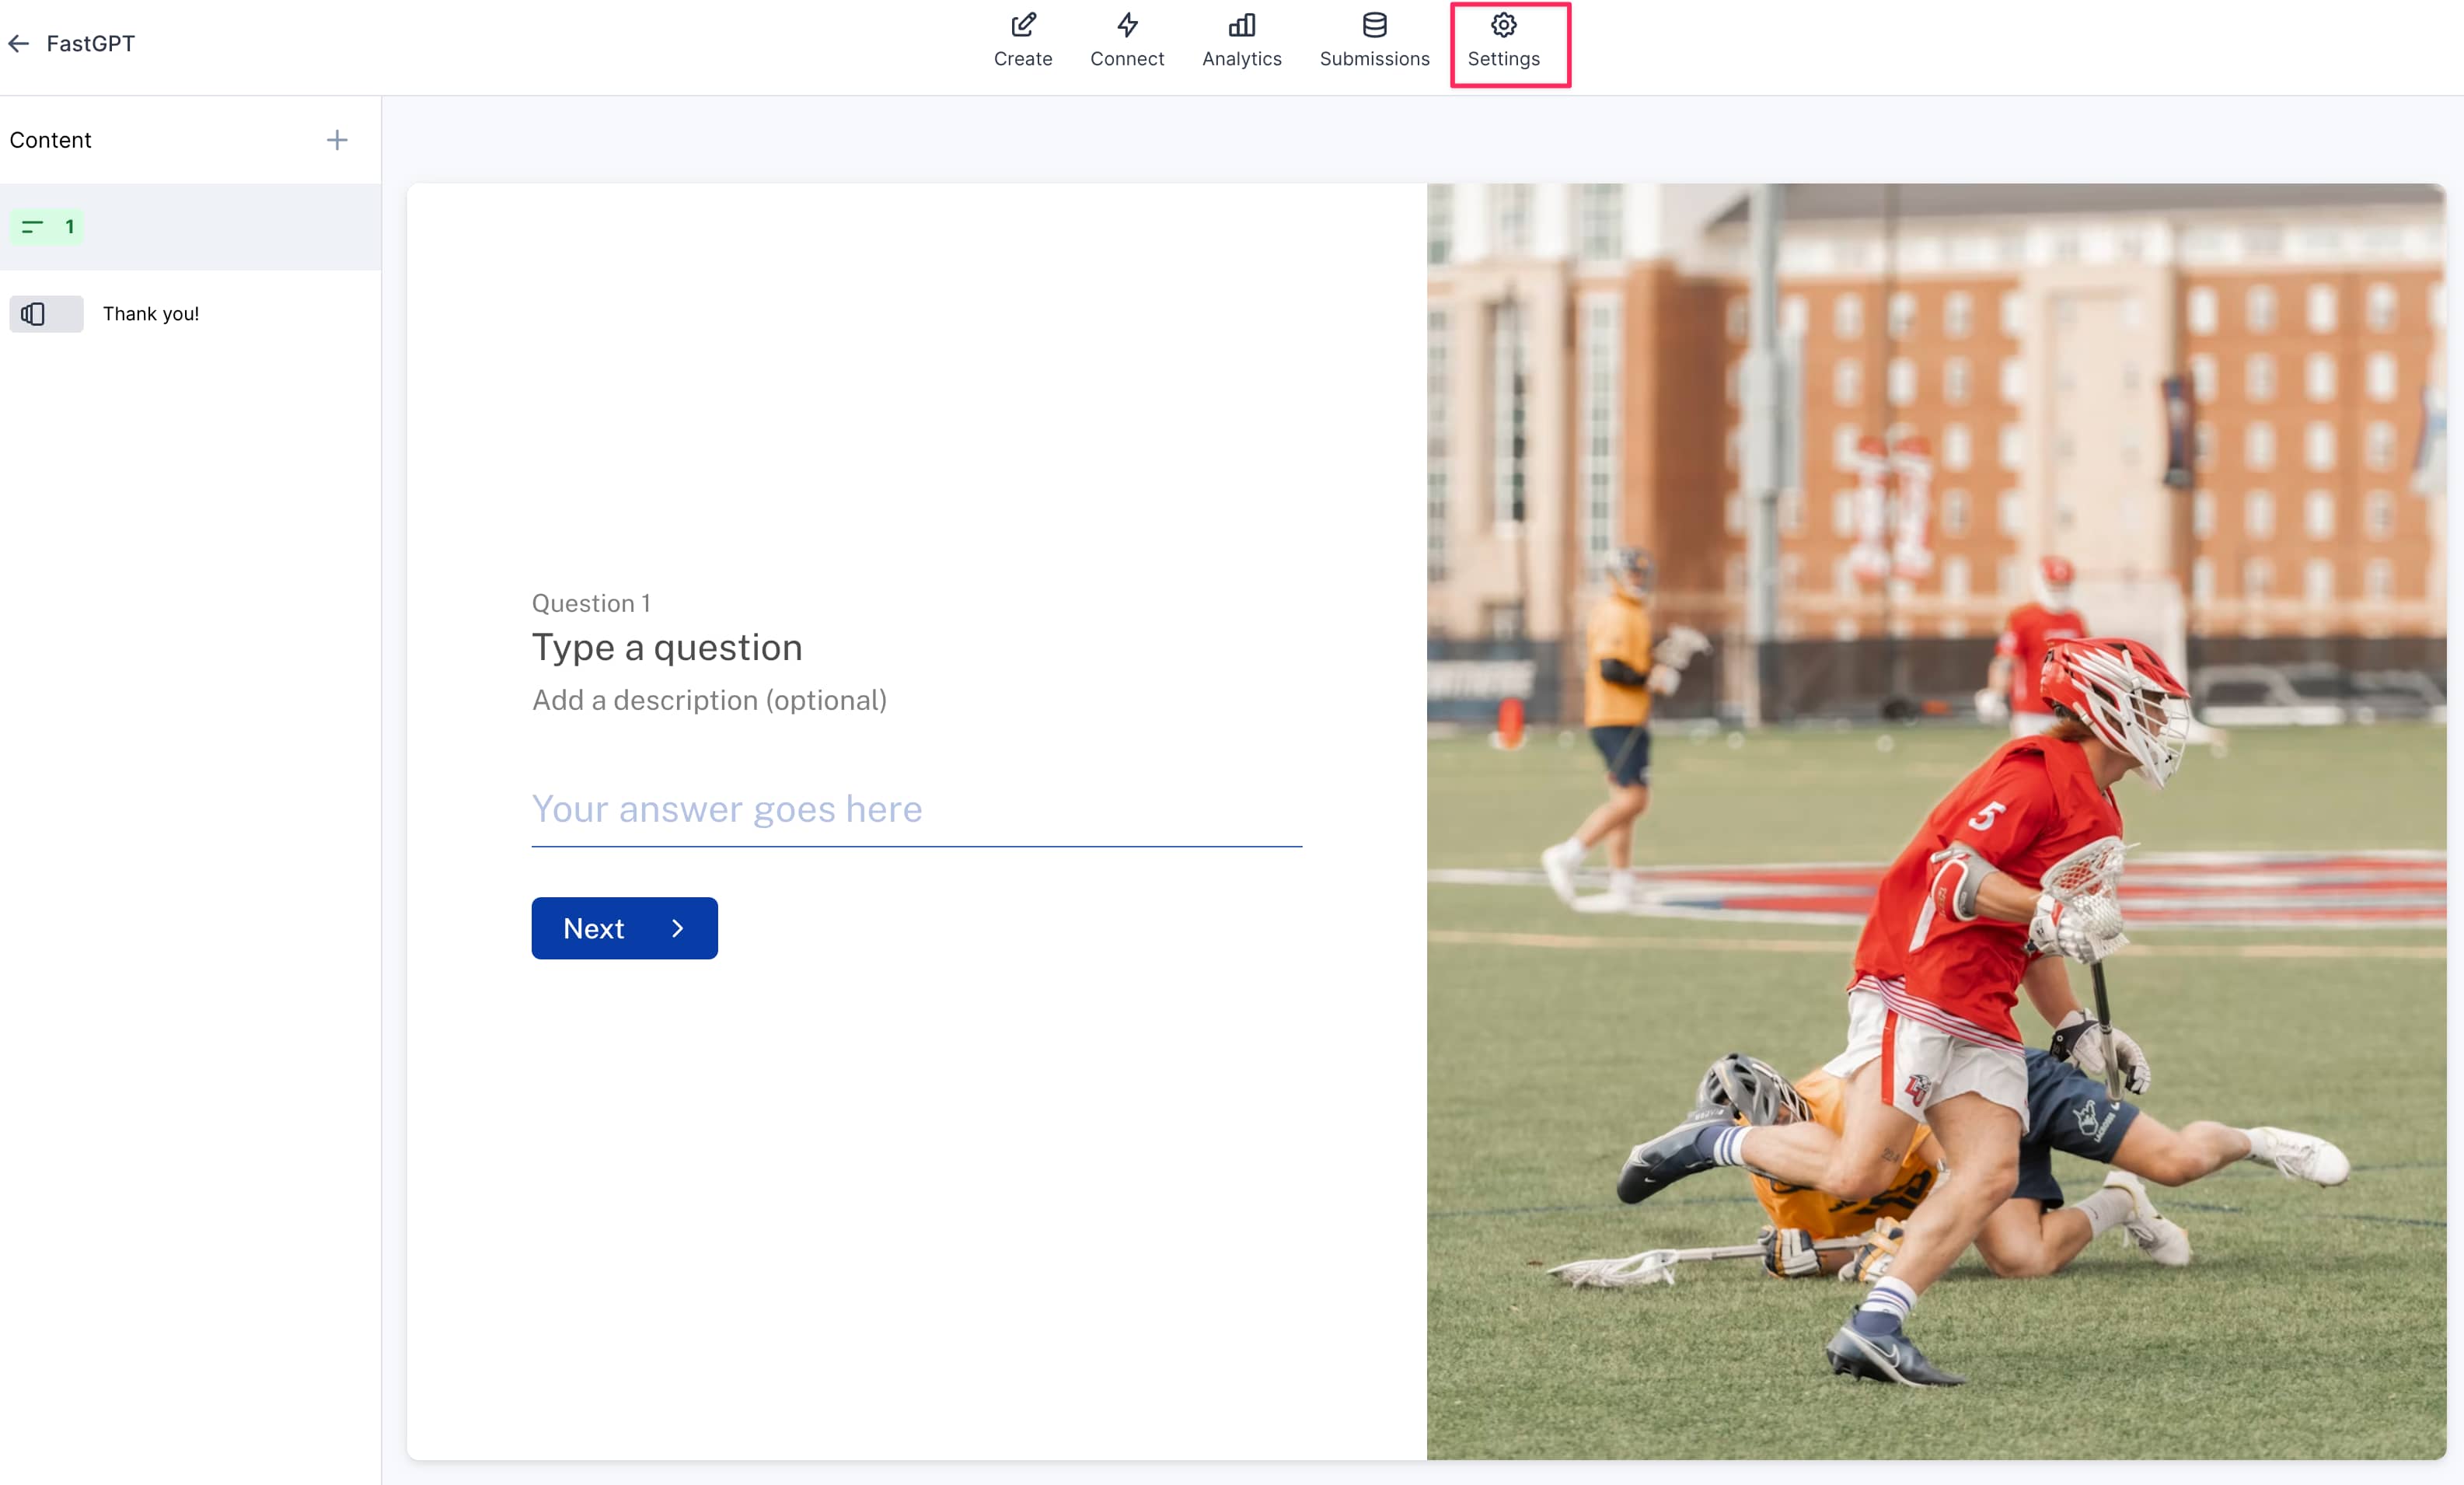
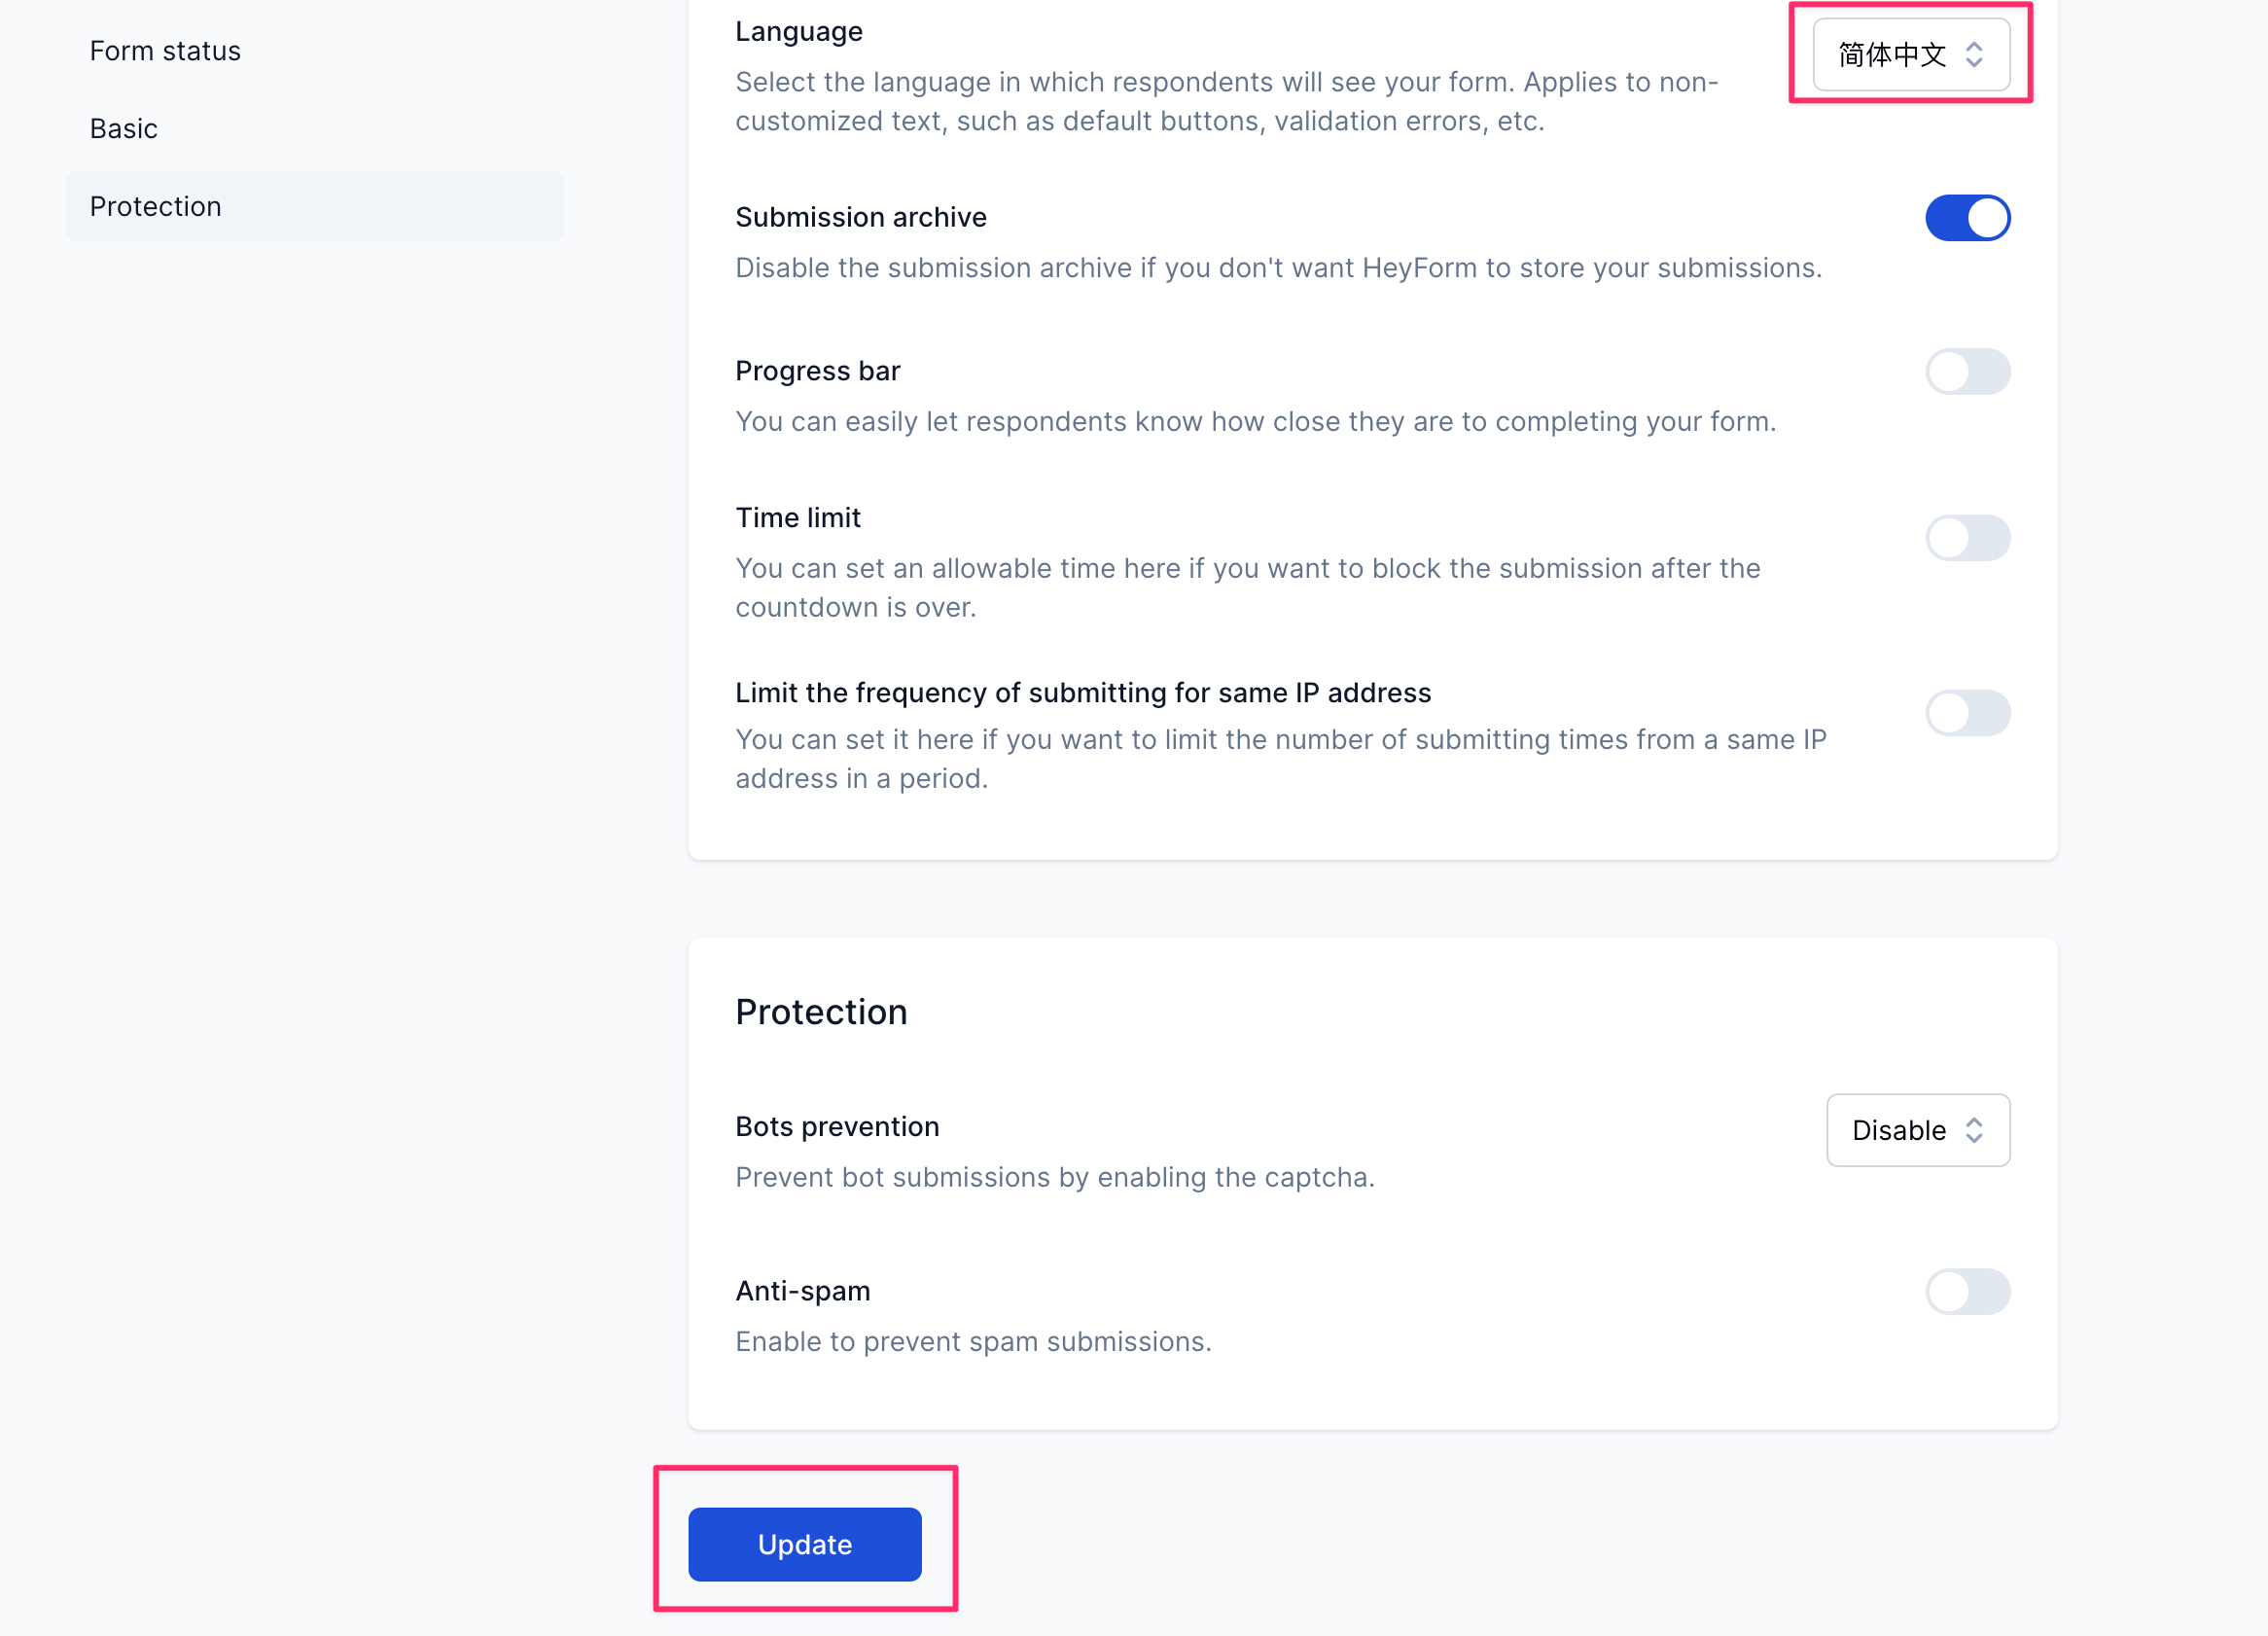
After creating the form, the first thing is to go to the settings and change the language of the form to Chinese.
After making changes, click "Update".
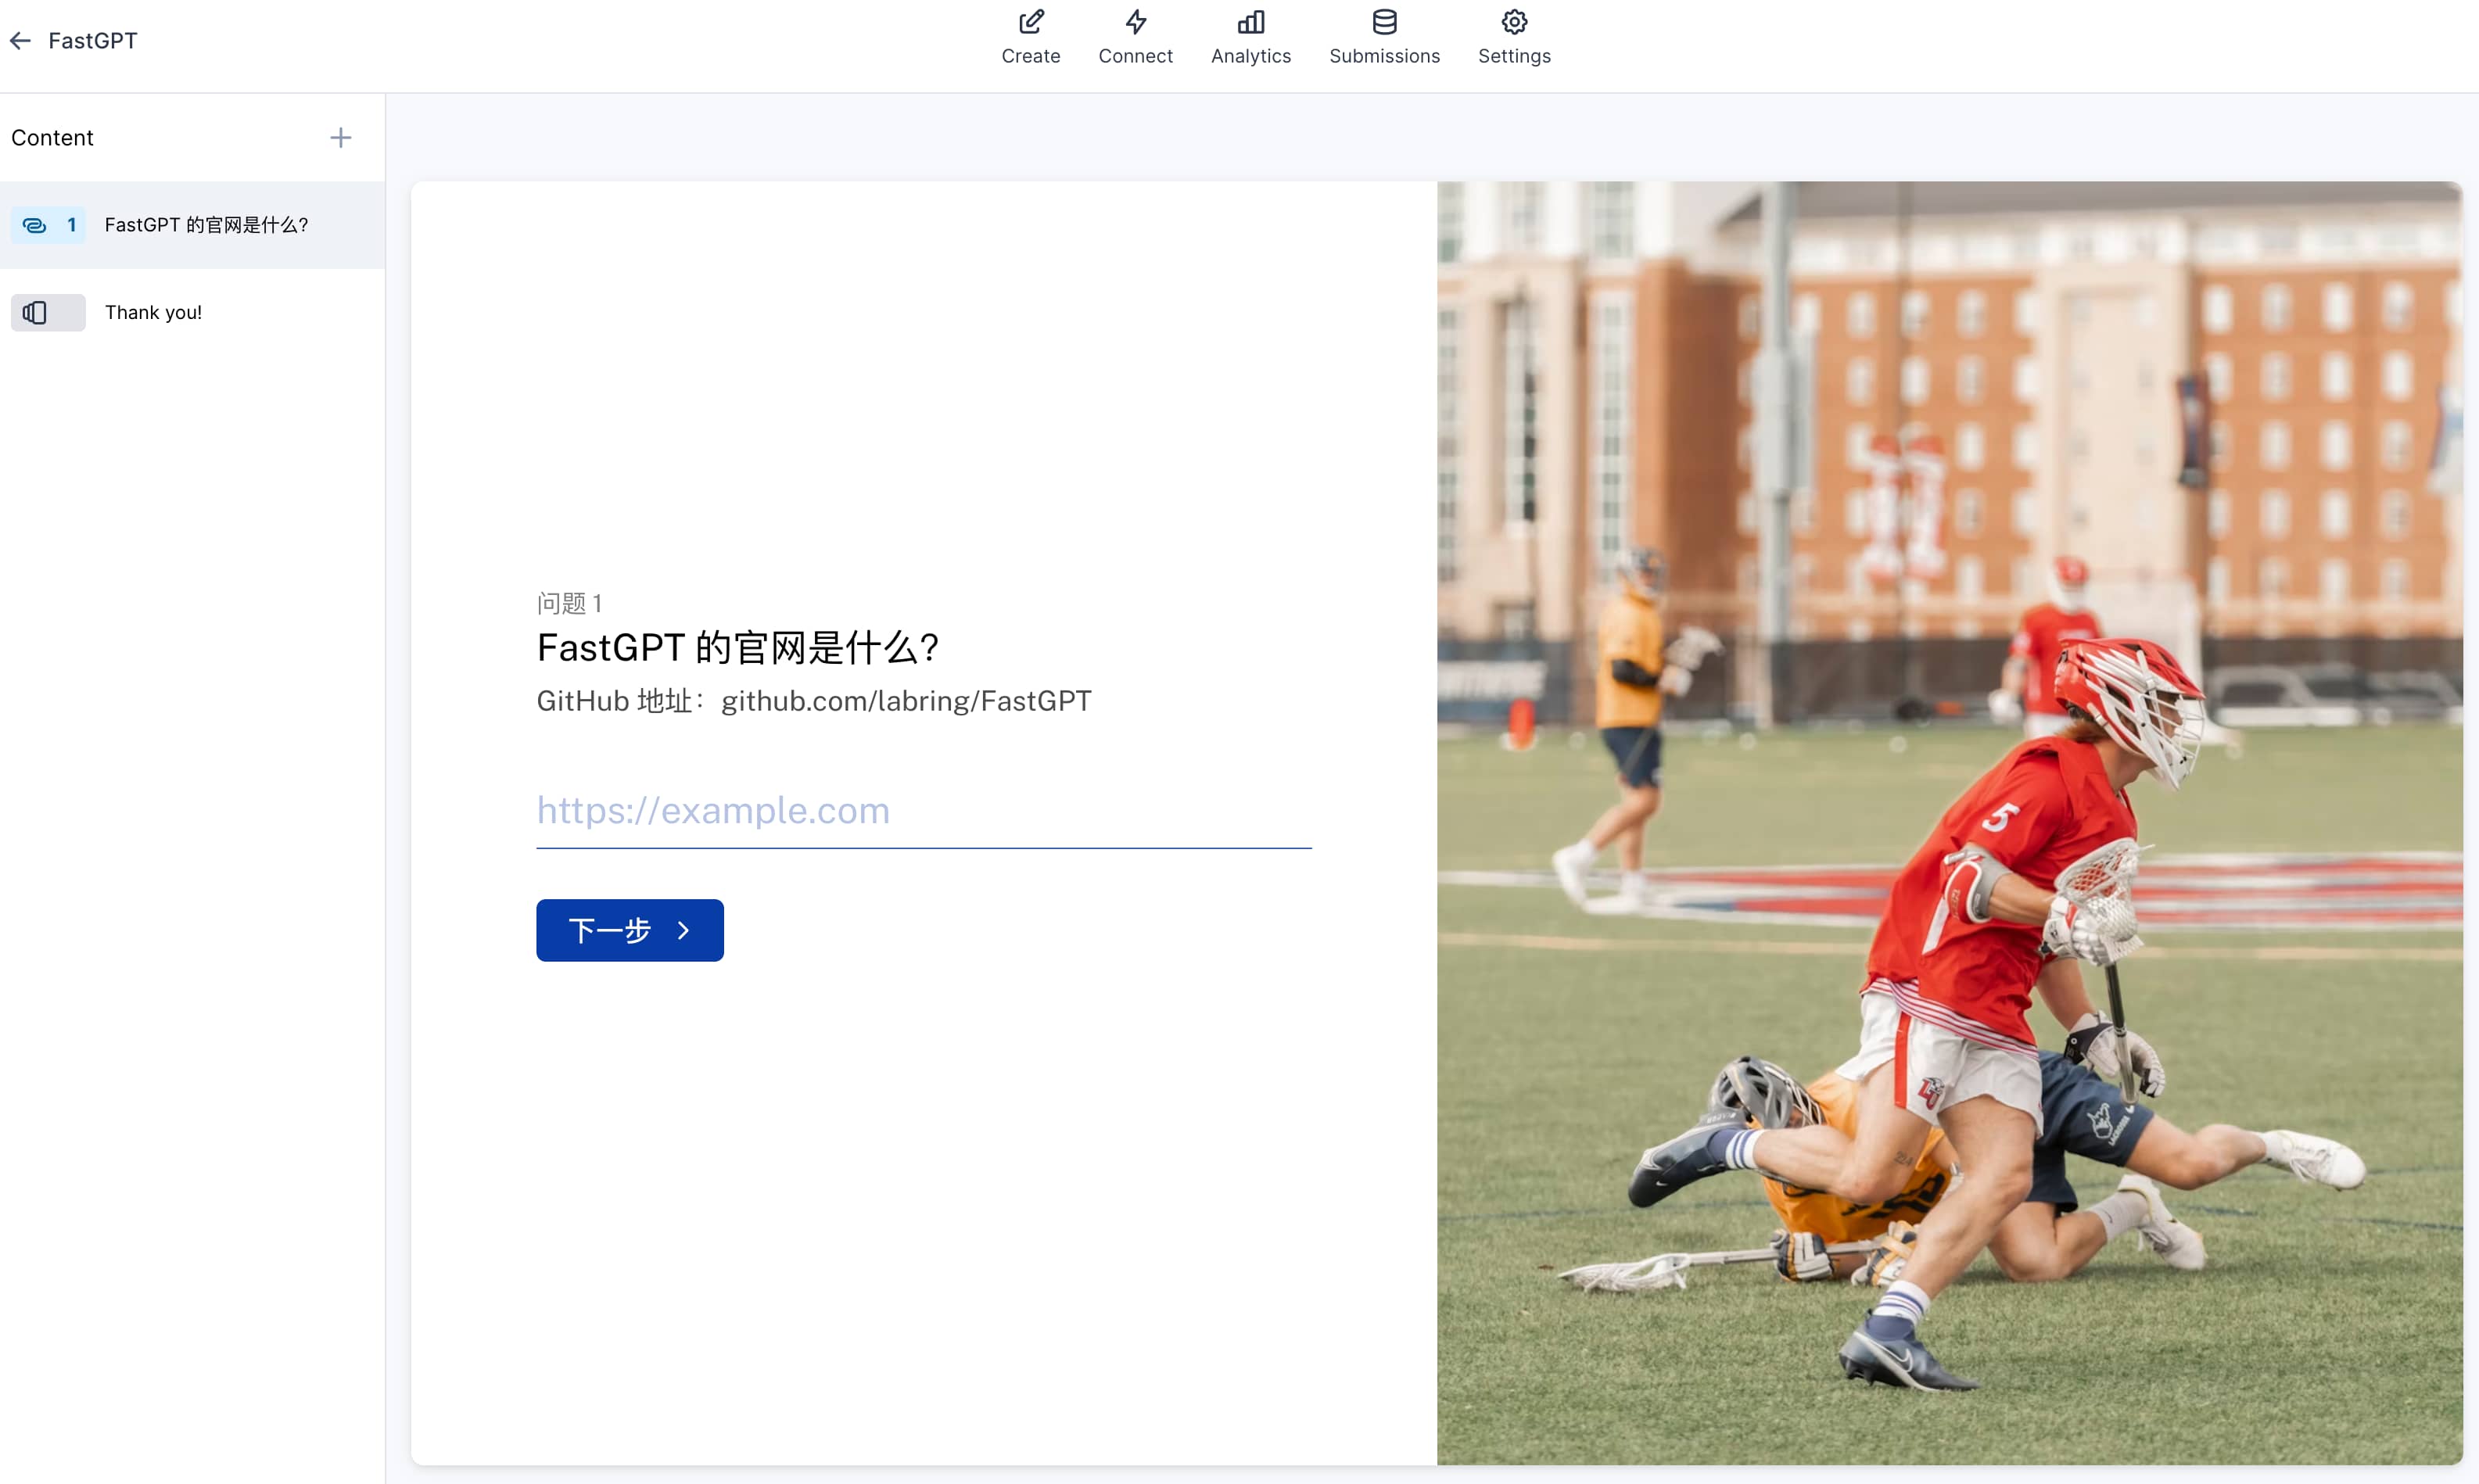
Now the language of the form becomes Chinese:
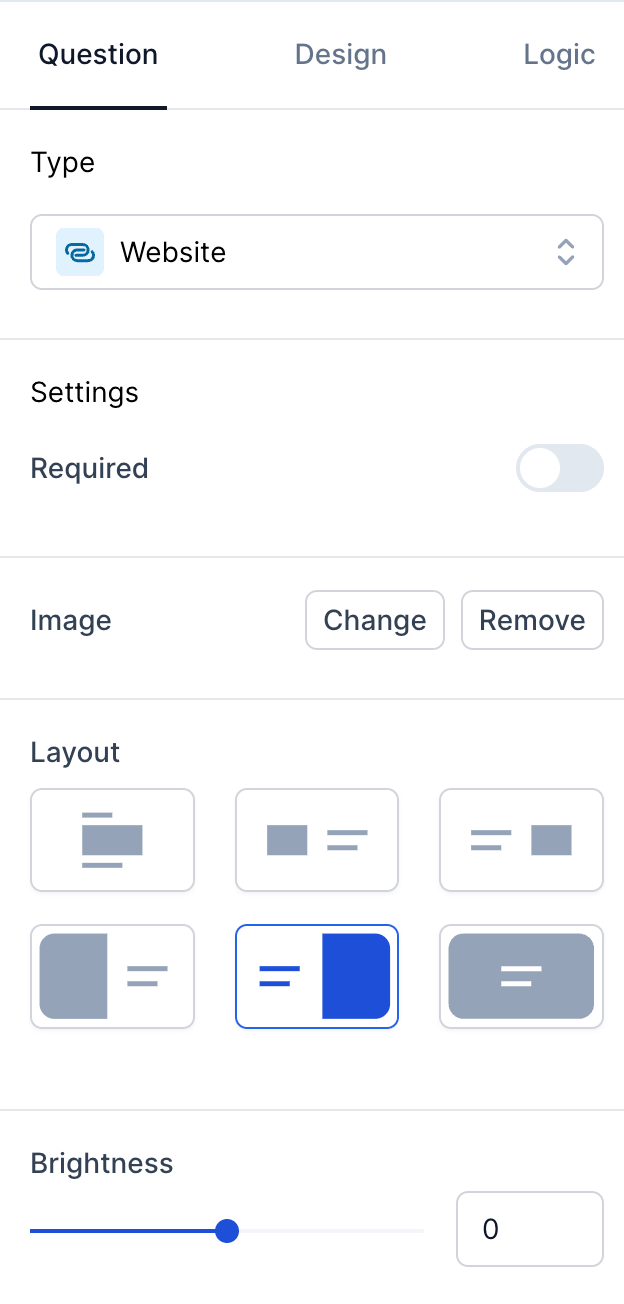
You can set the type, font, color, background, etc. of each form page on the right side of the form.
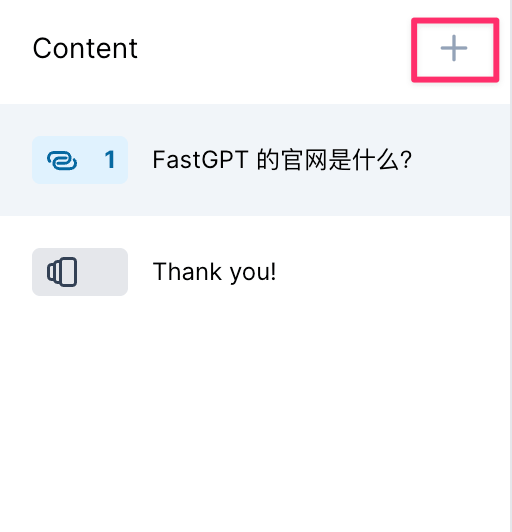
Click the "+" in the upper left corner to add more pages to the form:
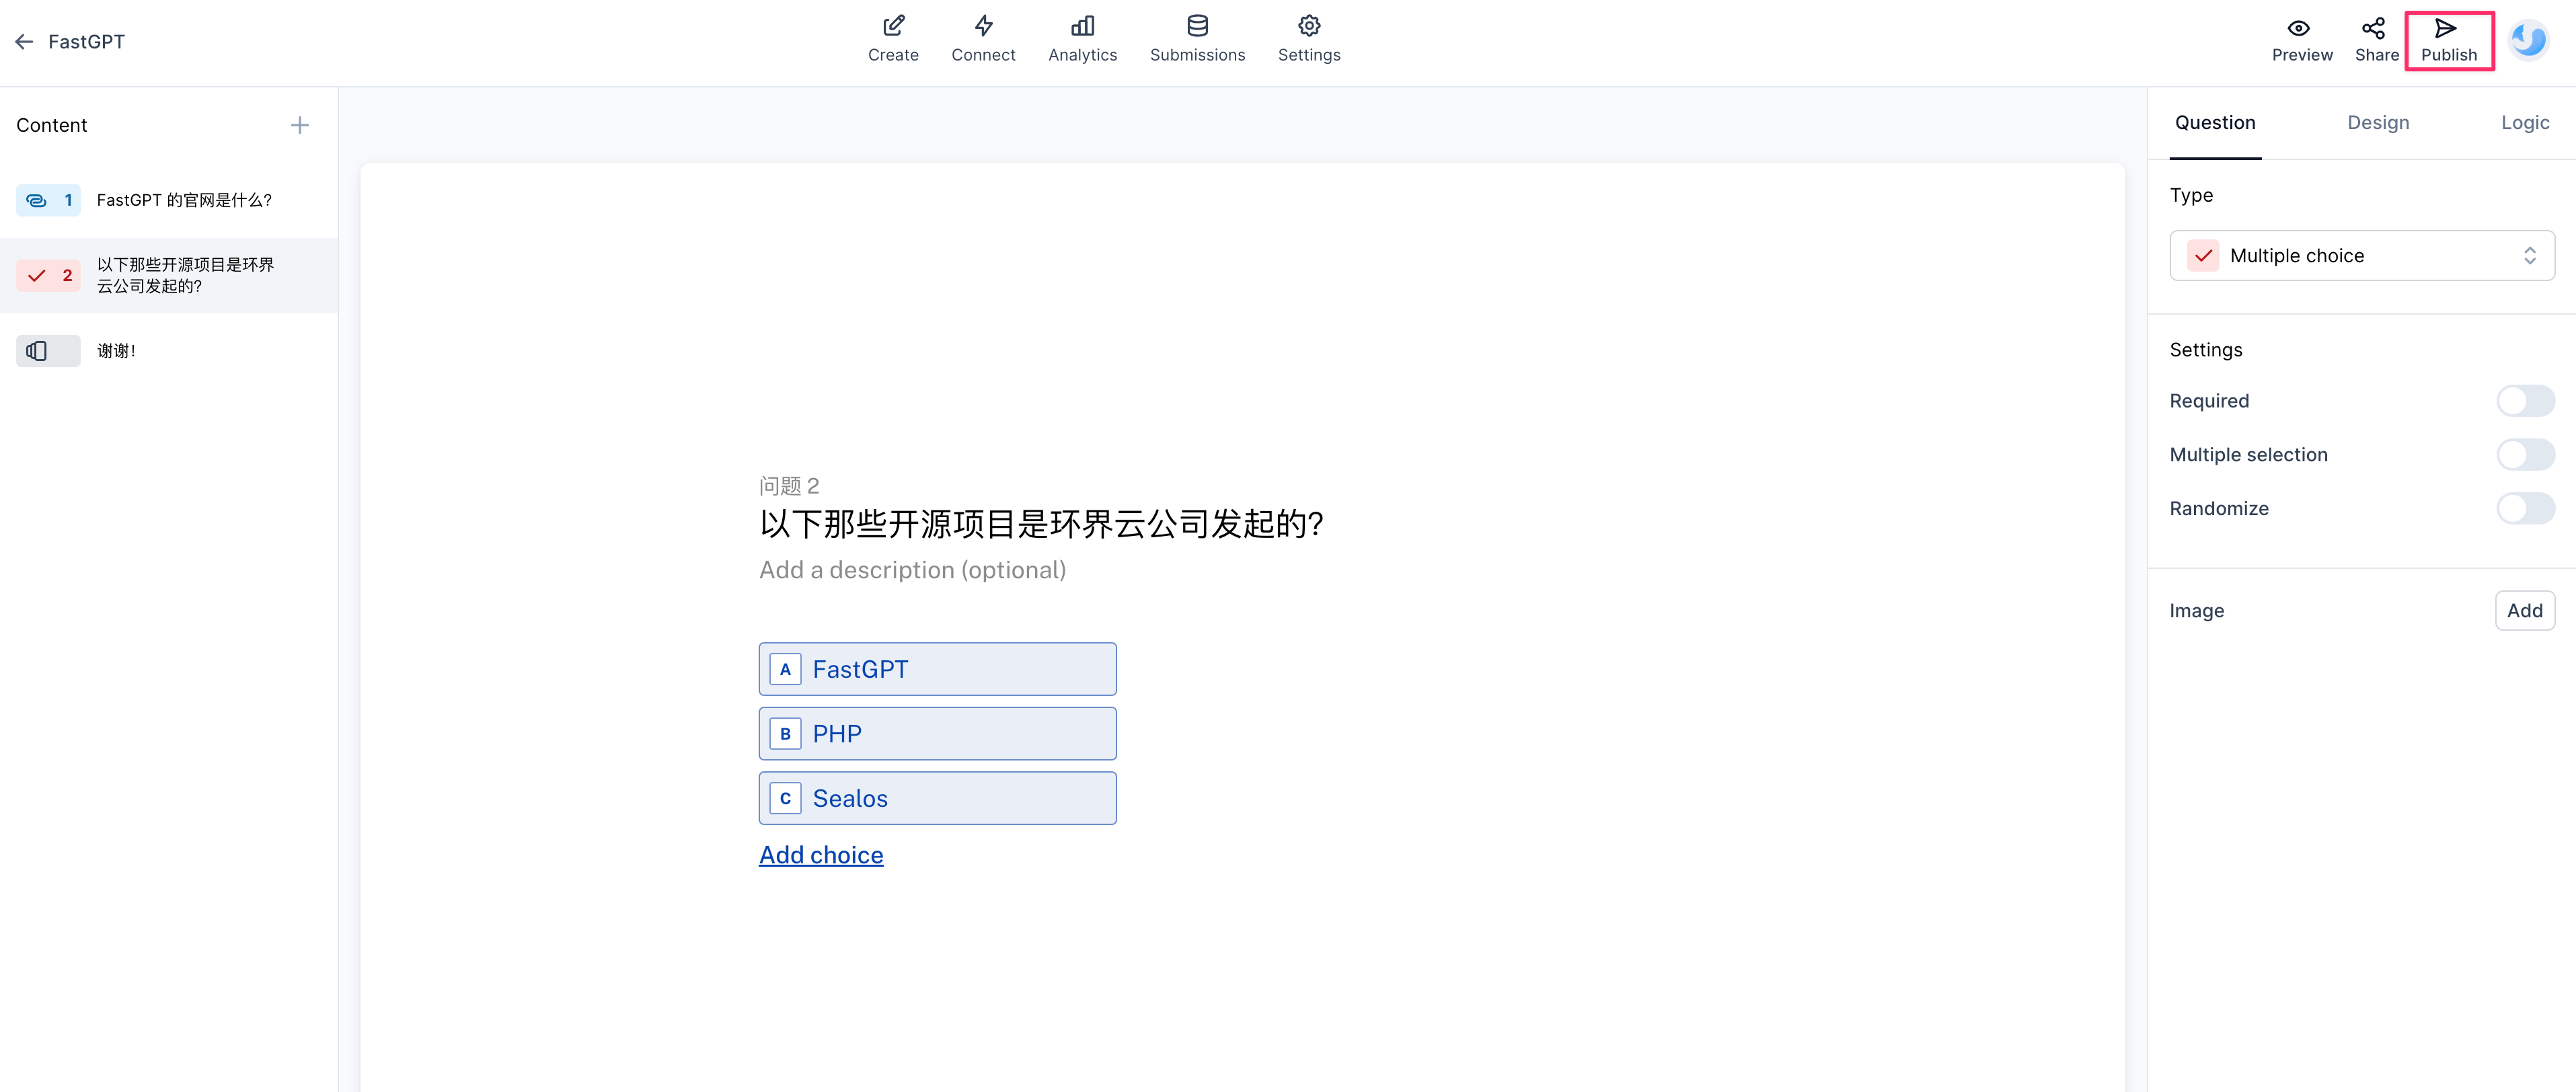
After creating the form, click "Publish" in the upper right corner to publish:
Then click "Share" and copy the link to share the form.
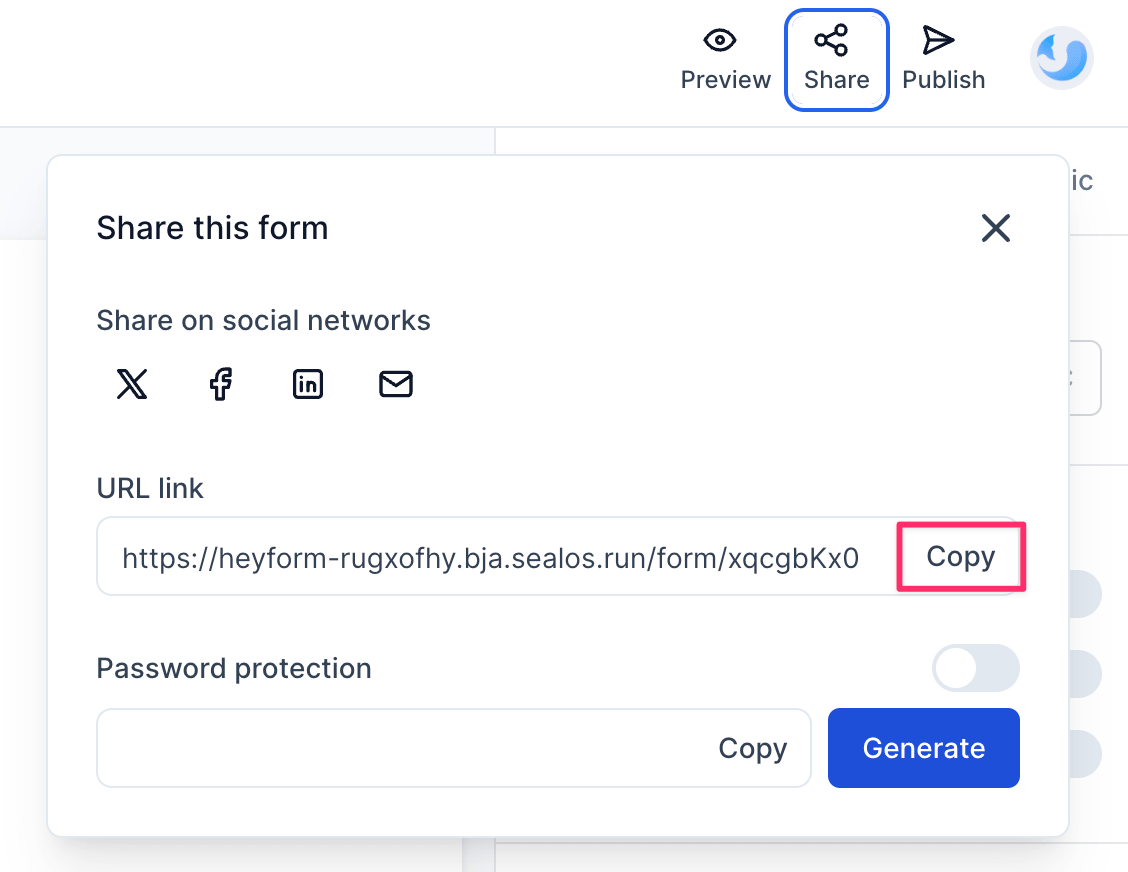
Others can open the link and start filling out the form.