Backing up and restoring a database using SQL Server Management Studio (SSMS)
1. Database backup
Step 1
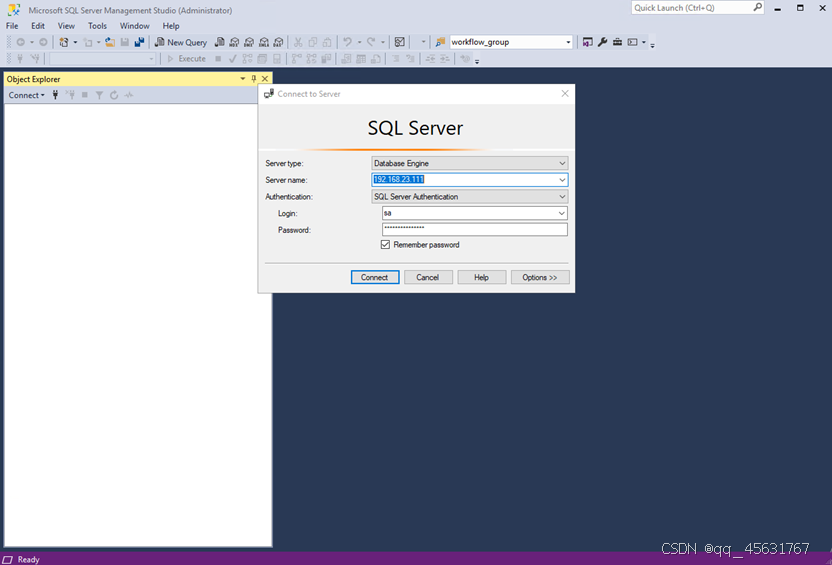
Open SSMS and enter the server name, username and password to connect to your SQL Server instance.
Step 2
Expand Database and select the database you want to back up.


Step 3
Right-click the selected database and click Tasks --> Back Up

Step 4
Click Remove to delete the default backup address

Step
5Click Add

Step 6
Click ... to browse the local directory.

Step 7
Select a directory to save the backup file and fill in the backup file name, which should end with .bak, and click OK

Step 8
Keep clicking OK


Step 9
If the following prompt appears, it means that the database backup is successful.

Step 10
The backup database file can be found under the directory selected in Step 7.

2. Database restoration
Step 1
Open SSMS and enter the server name, username and password to connect to your SQL Server instance.

Step 2Right
-click Database and click New Database

Step 3
Enter the database name you want and click OK

Step 4
Select the newly created database in Step 3, right-click and click Tasks --> Restore --> Database

Step 5
Select Device and click ... to select the database backup file.

Step
6Click Add

Step 7
Select the database backup file and click OK

Step 8
Click OK

Step 9
Click Options, check Overwrite the existing database (WITH REPLACE), and click OK

Step 10
If the following prompt appears, the restoration is successful.

Step 11
Select the newly created database and expand Tbles to see the restored table.
