Now, it was generally want their computer to run more smoothly, so the solid-state equipment has become a good choice. Lenovo G50-80 following example to introduce how to install memory.
First, the hardware ready
Lenovo G50-80
Toshiba SSDs: TOSHIBA TR2000 480G (Reference Price: 379 yuan)
launch of U disk (for installed systems, we need to make well in advance)
Second, detailed steps
1, off, off. Unplug shutdown. Must ensure that the computer off, shut down, Never operate the power on.
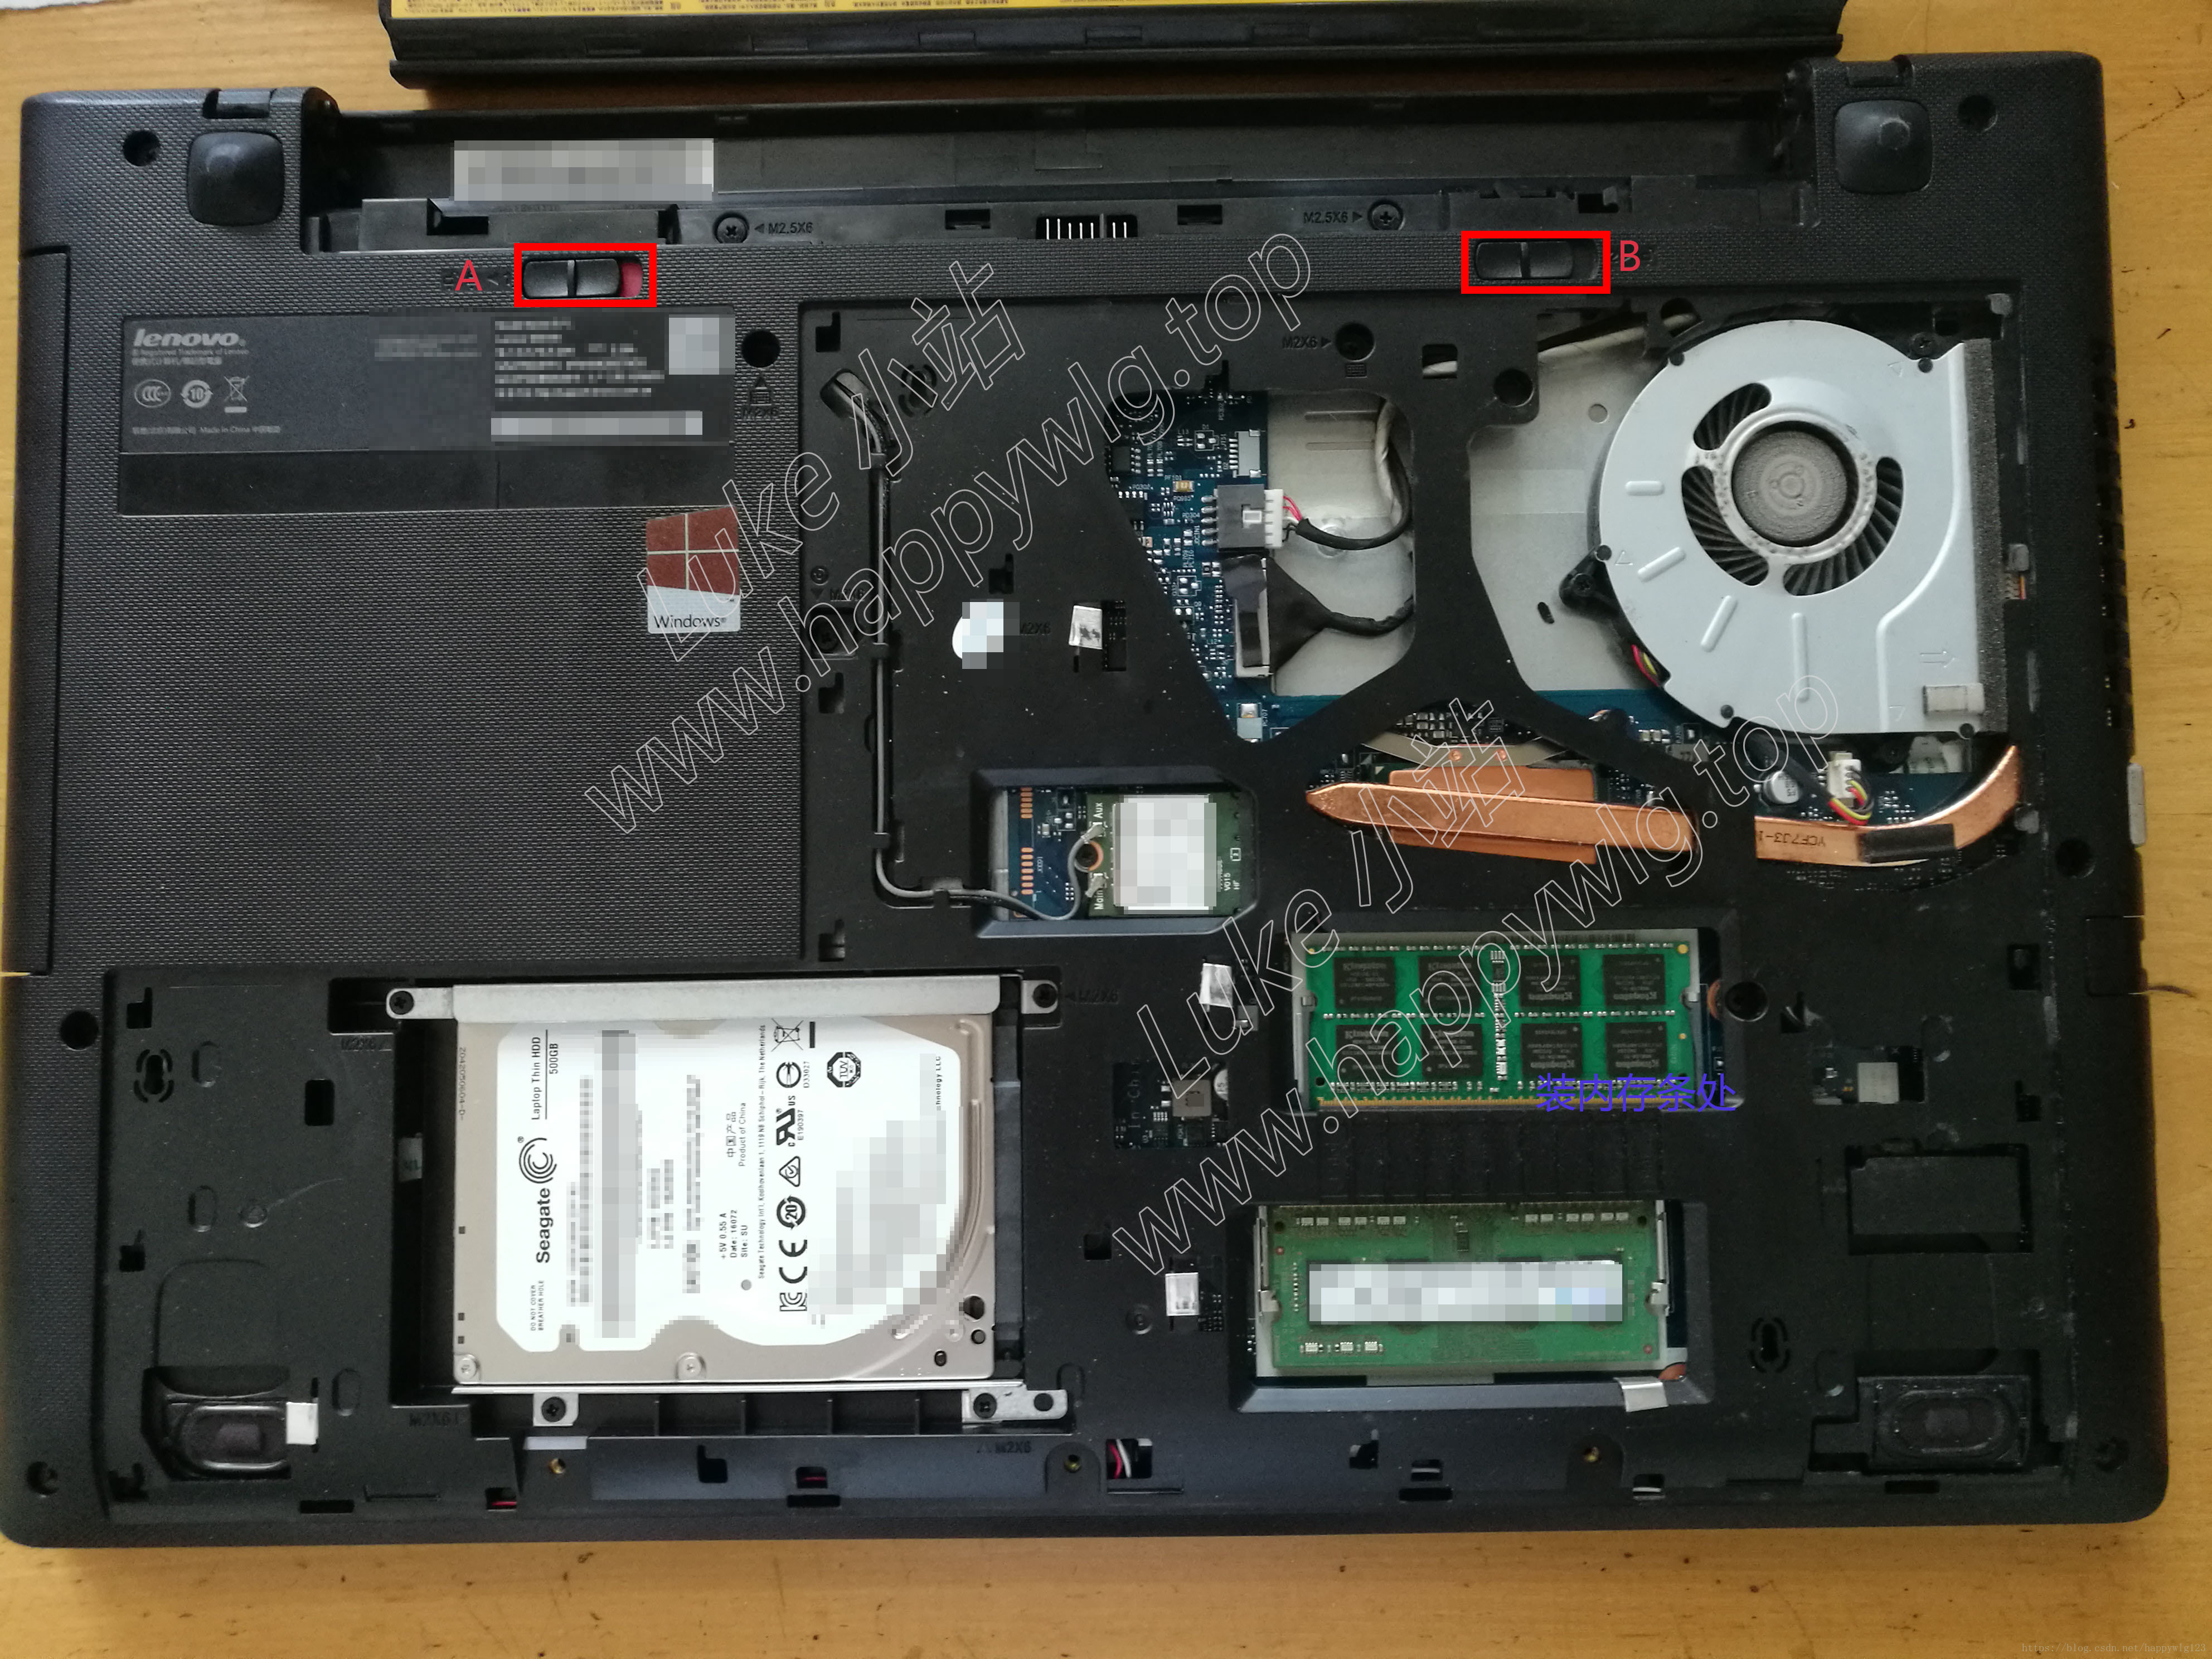
2, remove the battery. To ensure that the replacement process is not accidentally turned on the computer, be sure to remove the battery! After determining the power-down the computer shown in FIG., A first slider moves to the left, the right button has been opened red rendering. After breaking cases slightly movable with slide button B, the battery will bounce outwardly. After determining that the battery can be removed to open gently.
3, open the back cover. There are three screws lowermost horizontal side by side, a little harder to push down the cover open sequentially, i.e. dislocation cover, the back cover can be removed at this time.
4, removal of the old mechanical hard drive. The red circle Remove the four screws, left out of the hard disk (the direction indicated by the red arrow, you may need a little harder, please pay attention not to ruin scale equipment). 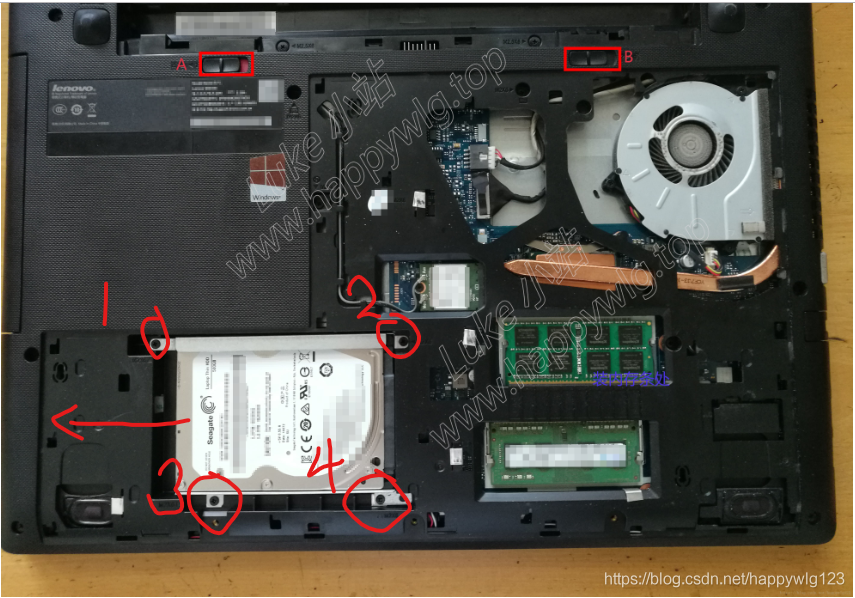
5, is removed (a left and right brackets, each bracket two screws each) stents on the original hard disk. Observe the shaft direction, the position, so as to install the SSD.
6, as the bracket is mounted to the SSD.