Étapes pour réaliser l'écran squelette dans Vue:
1. Installez le plug-in d'écran squelette:
npm install vue-skeleton-webpack-plugin
2. Le plug-in d'écran squelette reposant sur le rendu côté serveur, installez vue-server-renderer
npm install vue-server-renderer
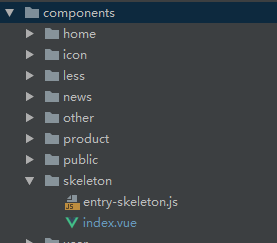
3. Créez un nouveau répertoire squelette dans src> components, et créez-y index.vue et entry.skeleton.js, comme indiqué ci-dessous:
4. Écrivez le style de l'écran squelette dans index, vue, qui est généralement cohérent avec le mise en page de la page d'accueil, par exemple:
<template>
    <div class="skeleton">
        <section></section>
        <div class="center">
          <ul class="dec">
              <li v-for="n in 2" :key="n">
                  <span></span>
                  <span></span>
              </li>
              <li>
                  <span></span>
              </li>
          </ul>
            <ul class="features">
                <li v-for="n in 3" :key="n">
                    <i></i>
                    <span></span>
                </li>
            </ul>
        </div>
        <div class="detail">
            <ul>
                <li v-for="n in 3" :key="n">
                    <span></span>
                    <span></span>
                </li>
            </ul>
            <p></p>
        </div>
    </div>
</template>
<style lang="less">
    @import "../less/public";
    @skeleton:#eee;
    .skeleton{
        width: 100%;
        height: 100vh;
        overflow: hidden;
        background: #fff;
        section{
            width: 100%;
            height: 205px;
            background:@skeleton;
            animation: sport .2s;
        }
        .center{
            .dec{
                li{
                    width: 100%;
                    height: 34px;
                    margin: 30px 0;
                    padding: 0 @padding20px;
                    box-sizing: border-box;
                    display: flex;
                    justify-content: space-between;
                    span{
                        width: 100px;
                        background: @skeleton;
                    }
                }
                li:first-of-type{
                    height: 44px;
                }
            }
            .features{
                display: flex;
                align-content: center;
                li{
                    flex: 1;
                    text-align: center;
                    i{
                        display: inline-block;
                        width: 60px;
                        height: 60px;
                        background: @skeleton;
                        border-radius: 50%;
                        vertical-align: middle;
                    }
                    span{
                        position: relative;
                        left:-20px;
                        top:-6px;
                        display: inline-block;
                        width: 120px;
                        height: 40px;
                        background: @skeleton;
                    }
                }
            }
        }
        .detail{
            margin-top: @padding20px;
            ul{
                li{
                    width: 100%;
                    display: flex;
                    height: 44px;
                    padding: 0 @padding20px;
                    box-sizing: border-box;
                    justify-content: space-between;
                    margin-bottom: 10px;
                    span{
                        width: 300px;
                        background: @skeleton;
                    }
                    span:first-of-type{
                        width: 150px;
                    }
                }
                li:first-of-type{
                    height: 54px;
                }
            }
            p{
                width: 60%;
                height: 54px ;
                background: @skeleton;
                margin-left: @padding20px;
                margin-top: @padding20px;
            }
        }
    }
    @keyframes sport {
        0%{background: #fff}
        100%{background: @skeleton}
    }
</style>
5. Configurez le fichier d'entrée de entry.skeleton.js:
import Vue from 'vue'
import Skeleton from './index'
export default new Vue({
  components: {
    Skeleton
  },
  template: '<Skeleton/>'
})
6. Créez un webpack.skeleton.conf.js dans le dossier de construction:
'use strict';
const path = require('path')
const merge = require('webpack-merge')
const baseWebpackConfig = require('./webpack.base.conf')
const nodeExternals = require('webpack-node-externals')

const config = require('../config')
const utils = require('./utils')
const isProduction = process.env.NODE_ENV === 'production'
const sourceMapEnabled = isProduction
  ? config.build.productionSourceMap
  : config.dev.cssSourceMap

function resolve(dir) {
  return path.join(__dirname, dir)
}

let skeletonWebpackConfig = merge(baseWebpackConfig, {
  target: 'node',
  devtool: false,
  entry: {
    app: resolve('../src/components/skeleton/entry-skeleton.js')
  },
  output: Object.assign({}, baseWebpackConfig.output, {
    libraryTarget: 'commonjs2'
  }),
  externals: nodeExternals({
    whitelist: /\.css$/
  }),
  plugins: []
})

//important: enable extract-text-webpack-plugin,让颜色生效
// 重点配置
skeletonWebpackConfig.module.rules[0].options.loaders = utils.cssLoaders({
  sourceMap: sourceMapEnabled,
  extract: true
})
module.exports = skeletonWebpackConfig
7. Inclure dans webpack.dev.conf.js et webpack.pro.conf.js ou unifié dans webpack.base.conf.js séparément:
const SkeletonWebpackPlugin=require('vue-skeleton-webpack-plugin');
Puis importez-les séparément dans les plugins:
    new SkeletonWebpackPlugin({
      webpackConfig: require('./webpack.skeleton.conf'),
      quiet: true,
    }),
Ce qui précède est l'ensemble du processus de configuration de l'écran squelette du projet Vue! ! !