목차 :
1. 스택 소개
1. 스택의 정의
스택 : 고정 된 한쪽 끝에서만 요소를 삽입하고 삭제할 수있는 특수 선형 테이블입니다. 데이터 삽입 및 삭제 작업의 한 쪽 끝을 스택 의 맨 위 라고 하고 다른 끝을 스택 의 맨 아래 라고합니다 . 스택의 데이터 요소 는 LIFO (Last In First Out) 원칙을 준수합니다.
• 푸시 : 스택의 삽입 작업을 푸시 / 푸시 라고하며 데이터가 스택의 맨 위에 놓입니다.
• 팝 : 스택의 삭제 작업을 팝이라고합니다. 출력 데이터도 스택 맨 위에 있습니다.
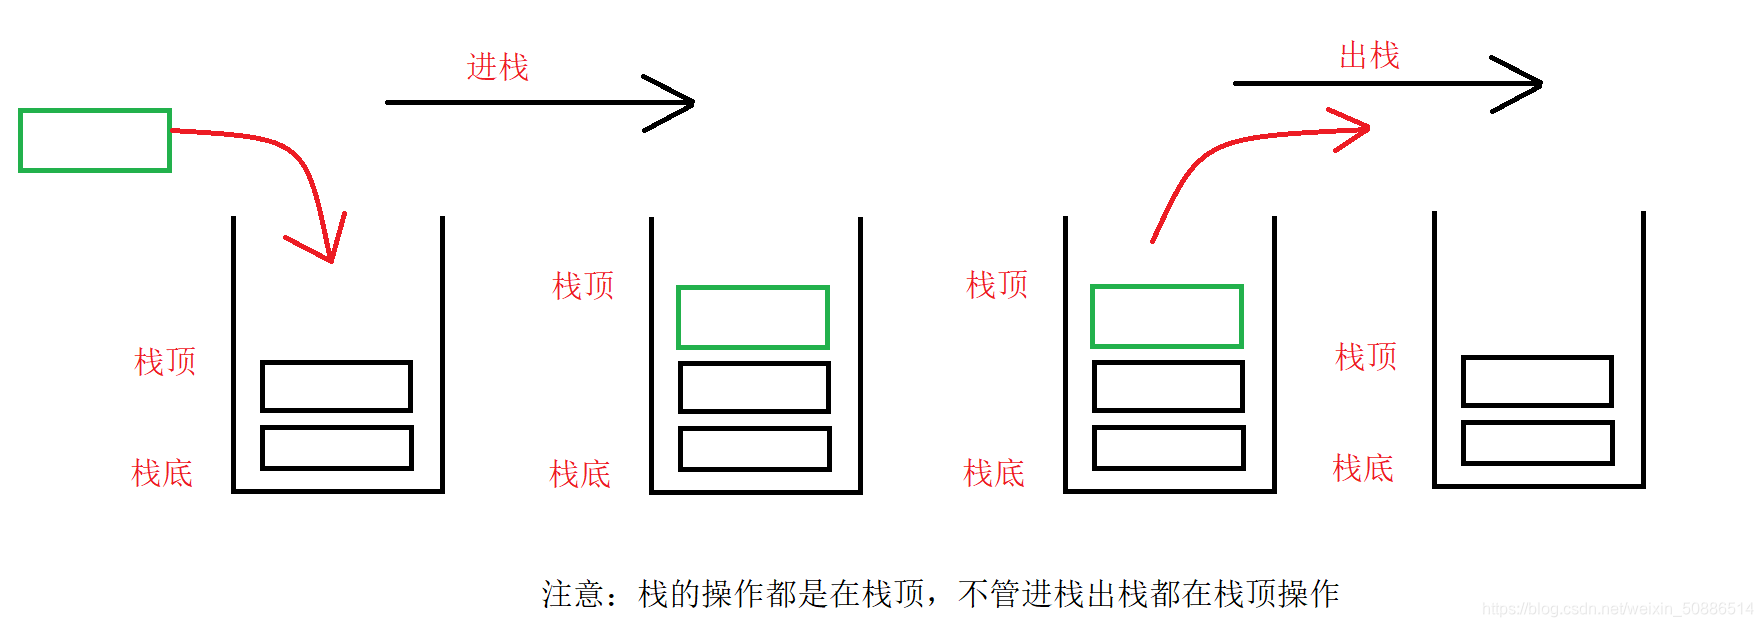
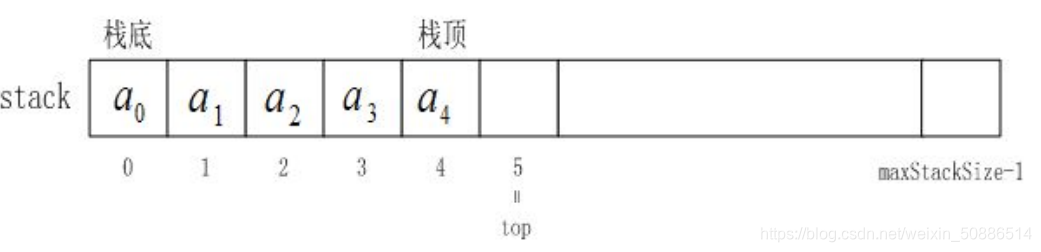
2. 스택 및 팝 구조의 개략도
배열 형태 :
사슬 구조 :
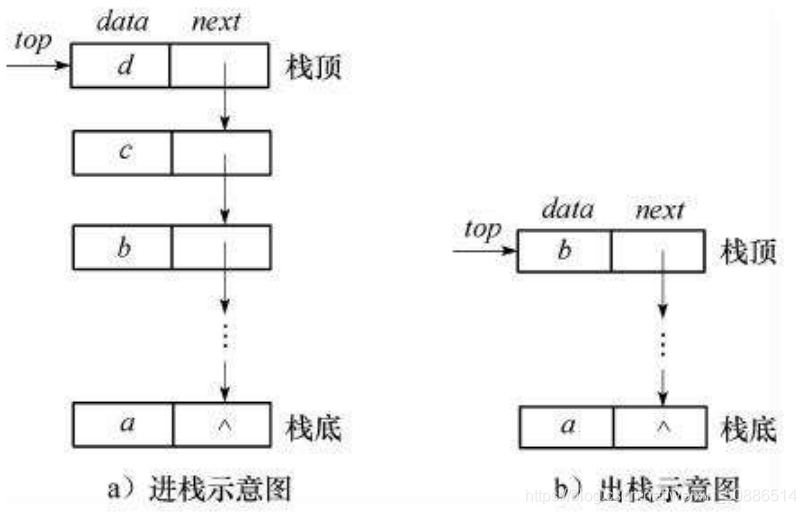
그림에 따르면 두 작업 모두 상단에서 수행됩니다.
3. 스택 구현 (배열 권장)
(1) Stack.h 스택 관리 및 인터페이스
#pragma once
#include<stdio.h>
#include<stdlib.h>
#include<assert.h>
typedef int STDataType;
typedef struct Stack
{


	STDataType* a;//动态数组
	int top;  //栈顶
	int capacity;  //容量
}Stack;
//初始化栈
void StackInit(Stack* pst);
//销毁栈
void StackDestroy(Stack* pst);
//入栈
void StackPush(Stack* pst, STDataType data);
//出栈
void StackPop(Stack* pst);
//获取栈中有效元素的个数
int StackSize(Stack* pst);
//获取栈顶元素
STDataType StackTop(Stack* pst);
//检测栈是否为空,为空返回1,非空返回0
int StackEmpty(Stack* pst);
(2) Stack.c 스택의 각 인터페이스 기능 구현
#include"Stack.h"
//初始化栈
void StackInit(Stack* pst)
{


	assert(pst);
	pst->a = (STDataType*)malloc(sizeof(STDataType)* 4);
	if (pst->a == NULL)
	{


		printf("malloc fail");
	}
	pst->top = 0;
	pst->capacity = 4;
}
//销毁栈
void StackDestroy(Stack* pst)
{


	assert(pst);
	free(pst->a);
	pst->a = NULL;
	pst->top = 0;
	pst->capacity = 0;
}
//入栈
void StackPush(Stack* pst, STDataType data)
{


	assert(pst);
	//空间不够需要增容
	if (pst->top == pst->capacity)
	{


		//增容为原来的2倍
		int* tem = (STDataType*)realloc(pst->a, sizeof(STDataType)* pst->capacity * 2);
		if (tem == NULL)
		{


			printf("realloc fail");
			exit(-1);
		}
		pst->a = tem;
		pst->capacity = pst->capacity * 2;
	}
	pst->a[pst->top] = data;
	pst->top++;
}
//出栈
void StackPop(Stack* pst)
{


	assert(pst);
	//判断栈是否为空
	//相当于assert(pst->top != 0);
	assert(!StackEmpty(pst));
	pst->top--;
}
//获取栈中有效元素的个数
int StackSize(Stack* pst)
{


	assert(pst);
	//因为初始化top是0,如果初始化top是-1则返回top+1;
	return pst->top;
}
//获取栈顶元素
STDataType StackTop(Stack* pst)
{


	assert(pst);
	assert(!StackEmpty(pst));
	return pst->a[pst->top - 1];
}
//检测栈是否为空,为空返回1,非空返回0
int StackEmpty(Stack* pst)
{


	assert(pst);
	return pst->top == 0 ? 1 : 0;
}
(3) test.c 테스트
#include"Stack.h"
void test()
{
//定义一个栈
Stack st;
StackInit(&st);
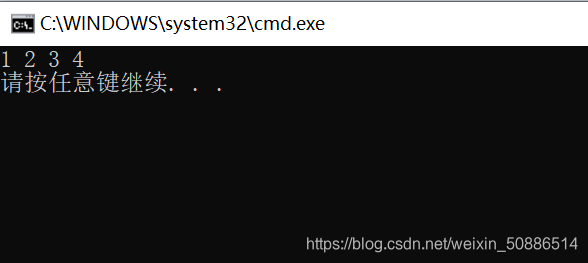
StackPush(&st, 1);
StackPush(&st, 2);
StackPush(&st, 3);
StackPush(&st, 4);
while (!StackEmpty(&st))
{
//取一个删一个
printf("%d ", StackTop(&st));
StackPop(&st);
}
StackDestroy(&st);
printf("\n");
}
int main()
{
test();
return 0;
}
2. 대기열 소개
1. 대기열 정의
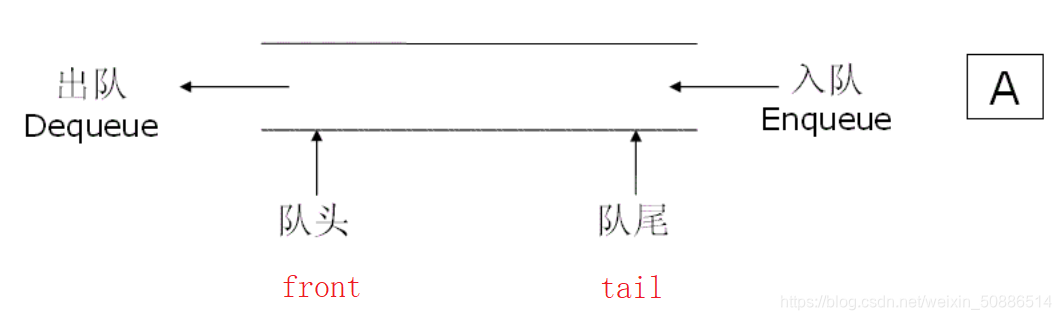
Queue : 한쪽 끝 에서는 데이터 를 삽입 하고 다른 쪽 끝 에서는 데이터 를 삭제할 수 있는 특수 선형 테이블. 대기열 은 FIFO (선입 선출) 원칙을 따릅니다.
• In the queue : 삽입 작업의 끝
을 대기열 의 끝이라고합니다. • Out of the queue : 삭제 작업의 끝을 대기열 의 헤드라고합니다.
2. 대기열 구현 (연결 목록 사용 권장)
(1) Queue.h 대기열 관리 및 인터페이스
#pragma once
#include<stdio.h>
#include<assert.h>
#include<stdlib.h>

typedef int QDatatype;
//链式结构:表示队列
typedef struct QueueNode
{


	QDatatype data;
	//指向下一个节点的指针
	struct QueueNode* next;
}QueueNode;

//队列的结构
typedef struct Queue
{


	QueueNode* front;//头指针
	QueueNode* tail;//尾指针
}Queue;
//初始化队列
void QueueInit(Queue* pq);
//销毁队列
void QueueDestroy(Queue* pq);
//队尾入队列
void QueuePush(Queue* pq, QDatatype x);
//队头出队列
void QueuePop(Queue* pq);
//检测队列是否为空,为空返回1,非空返回0
int QueueEmpty(Queue* pq);
//获取队列中有效元素的个数
int QueueSize(Queue* pq);
//获取队列头部元素
QDatatype QueueFront(Queue* pq);
//获取队列队尾元素
QDatatype QueueBack(Queue* pq);
(2) 큐의 다양한 인터페이스 기능의 Queue.c 구현
#include"Queue.h"
//初始化队列
void QueueInit(Queue* pq)
{


	assert(pq);
	pq->front = pq->tail = NULL;
}
//销毁队列
void QueueDestroy(Queue* pq)
{


	assert(pq);
	QueueNode* cur = pq->front;
	while (cur)
	{


		QueueNode* Next = cur->next;
		free(cur);
		cur = Next;
	}
	pq->front = pq->tail = NULL;
}
//队尾入队列
void QueuePush(Queue* pq, QDatatype x)
{


	assert(pq);
	QueueNode* newnode = (QueueNode*)malloc(sizeof(QueueNode));
	newnode->data = x;
	newnode->next = NULL;
	if (pq->tail == NULL)
	{


		pq->front = pq->tail = newnode;
	}
	else
	{


		pq->tail->next = newnode;
		pq->tail = newnode;
	}
}
//队头出队列
void QueuePop(Queue* pq)
{


	assert(pq);
	//队列不能为空
	assert(!QueueEmpty(pq));
	//如果只有一个节点,防止tail野指针
	if (pq->front == pq->tail)
	{


		free(pq->front);
		pq->front = pq->tail = NULL;
	}
	//多个节点
	else
	{


		QueueNode* Next = pq->front->next;
		free(pq->front);
		pq->front = Next;
	}
}
//检测队列是否为空,为空返回1,非空返回0
int QueueEmpty(Queue* pq)
{


	assert(pq);
	return pq->front == NULL ? 1 : 0;
}
//获取队列中有效元素的个数
int QueueSize(Queue* pq)
{


	assert(pq);
	int count = 0;
	QueueNode* cur = pq->front;
	while (cur)
	{


		++count;
		cur = cur->next;
	}
	return count;
}
//获取队列头部元素
QDatatype QueueFront(Queue* pq)
{


	assert(pq);
	assert(!QueueEmpty(pq));
	return pq->front->data;
}
//获取队列队尾元素
QDatatype QueueBack(Queue* pq)
{


	assert(pq);
	assert(!QueueEmpty(pq));
	return pq->tail->data;
}
(3) test.c 테스트
#include"Queue.h"

void TestQueue()
{


	Queue q;
	QueueInit(&q);
	QueuePush(&q, 1);
	QueuePush(&q, 2);
	QueuePush(&q, 3);
	QueuePush(&q, 4);
	while (!QueueEmpty(&q))
	{


		printf("%d ", QueueFront(&q));
		QueuePop(&q);
	}
	printf("\n");
	QueueDestroy(&q);
}
int main()
{


	TestQueue();
	return 0;
}