一、概述:
Spring Boot的强大之处就在于能够抽取场景作为启动器
只要加载了启动器 即可快速配置好相应的场景
那么 自定义starter(场景启动器)的步骤是:
1、首先要确定该场景需要的依赖是什么
2、然后编写自动配置
使用@Configuration注解来指定一个类为配置类
使用@ConditionalOnXXX注解 在指定条件成立的情况下该自动配置类才生效
例:
@ConditionalOnWebApplication(
    type = Type.SERVLET
)
使用@AutoConfigurationAfter注解来指定自动配置类的顺序
例:
@AutoConfigureAfter({DispatcherServletAutoConfiguration.class, TaskExecutionAutoConfiguration.class, ValidationAutoConfiguration.class})
使用@Bean注解来给容器中添加组件
使用@ConfigurationProperties注解结合相关的xxxProperties类来绑定相应的配置
例:
@ConfigurationProperties(
    prefix = "spring.mvc"
)
使用@EnableConfigurationProperties注解让xxxProperties类生效并加入到容器中
例:
@EnableConfigurationProperties({WebMvcProperties.class, ResourceProperties.class})
还须在classpath下的META-INF下的spring.factories文件中指定自动配置类的路径
让SpringBoot知道在启动时要加载的自动配置类有哪些
例:
# Initializers
org.springframework.context.ApplicationContextInitializer=\
net.zjitc.springboot.listener.HelloApplicationContextInitializer

# Listener
org.springframework.boot.SpringApplicationRunListener=\
net.zjitc.springboot.listener.HelloSpringApplicationRunListener
注意点:启动器应为一个空的jar文件 只提供辅助性的依赖管理 这些依赖可用于自动装配或其它类库
然后专门写一个自动配置模块 启动器是依赖于自动配置模块的
因此 只须引入启动器 即视为引入了自动配置模块
即:xxx-starter(启动器) → xxx-starter-autoconfigurer(自动配置模块)
命名规范:
- SpringBoot官方的命名空间:
前缀:“spring-boot-starter-”
模式:spring-boot-starter-模块名
例:spring-boot-starter-web - 自定义的命名空间:
后缀:“-spring-boot-starter”
模式:模块名-spring-boot-starter
例:mybatis-spring-boot-starter
二、项目创建
由于需要有启动器和自动配置模块这两样 因此为方便起见 在IDEA中 创建一个空的工程
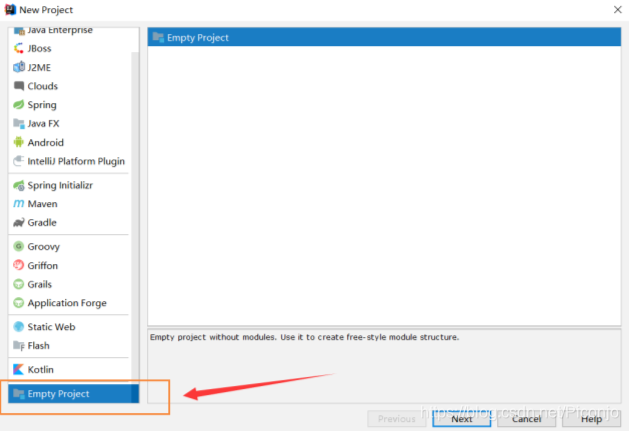
点击加号 添加模块
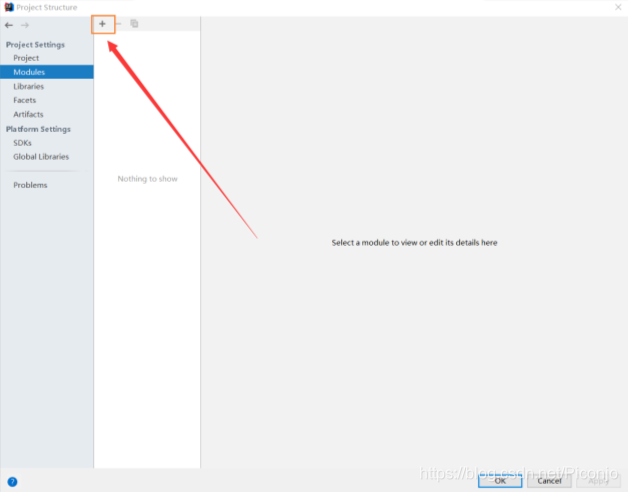
选择new module
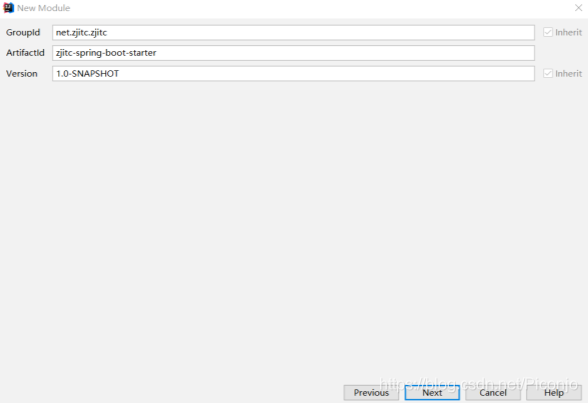
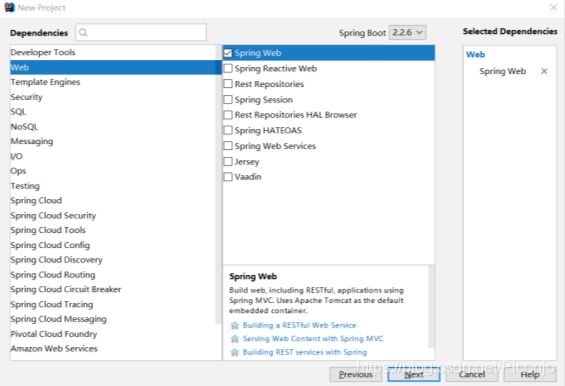
然后 创建一个Maven工程和一个SpringBoot工程
Maven工程:
SpringBoot工程:
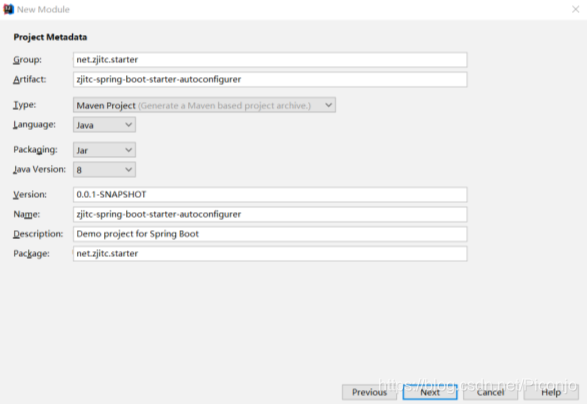
Maven工程作为启动器 SpringBoot工程作为自动配置模块
三、配置
1、首先 配置好pom文件的依赖
启动器项目的pom文件需要引入自动配置模块:
<!-- 启动器 -->
<dependencies>
	<!-- 引入自动配置模块 -->
	<dependency>
		<groupId>net.zjitc.starter</groupId>
		<artifactId>zjitc-spring-boot-starter-autoconfigurer</artifactId>
		<version>0.0.1-SNAPSHOT</version>
	</dependency>
</dependencies>
自动配置模块的pom文件必须得引入spring-boot-starter:
因为spring-boot-starter是所有starter都需要引入的基本配置
<dependencies>
	<dependency>
		<groupId>org.springframework.boot</groupId>
		<artifactId>spring-boot-starter</artifactId>
	</dependency>
</dependencies>
2、接下来 是写自动配置模块:
HelloProperties.java 属性类:
属性类中定义了自动配置需要用到的全部属性参数
在该类中 可用@ConfigurationProperties注解来指定前缀
这样的话 在配置文件中即可用指定的前缀来修改参数了
@ConfigurationProperties(prefix = "zjitc.hello")
public class HelloProperties {

    // 两个属性 用于绑定配置
    private String prefix;
    private String suffix;

    public String getPrefix() {
        return prefix;
    }

    public void setPrefix(String prefix) {
        this.prefix = prefix;
    }

    public String getSuffix() {
        return suffix;
    }

    public void setSuffix(String suffix) {
        this.suffix = suffix;
    }
}
HelloService.java 方法类
里面提供了要执行的方法:
public class HelloService {

	// 需要创建配置类对象 因为要使用配置类中的参数
    HelloProperties helloProperties;

    public String sayHello(String name)
    {
        // 使用配置类中的参数
        return helloProperties.getPrefix()+name+helloProperties.getSuffix();
    }

    public HelloProperties getHelloProperties() {
        return helloProperties;
    }

    public void setHelloProperties(HelloProperties helloProperties) {
        this.helloProperties = helloProperties;
    }
}
HelloServiceAutoConfiguration.java 自动配置类
该类是一个自动配置类 但首先必须得是配置类 因此要用@Configuration注解来注明
@ConditionalOnWebApplication注解代表了只有是Web应用才会生效
@EnableConfigurationProperties注解让指定的属性类中的属性生效 传入要使其生效的属性类的class即可
在该类中 对方法类进行了初始化的配置:
// 自动配置类
@Configuration
// 只有Web应用才会生效
@ConditionalOnWebApplication
// 让属性类中的属性生效
@EnableConfigurationProperties(HelloProperties.class)
public class HelloServiceAutoConfiguration {

    @Autowired
    HelloProperties helloProperties;

    @Bean
    public HelloService helloService()
    {
        HelloService helloService=new HelloService();
        // 设置属性配置文件
        helloService.setHelloProperties(helloProperties);
        return helloService;
    }
}
然后 需要配置/METE-INF/spring.factories配置文件
在该配置文件中 配置启动时加载的自动配置类的路径:
# 指定启动时要加载的自动配置类
org.springframework.boot.autoconfigure.EnableAutoConfiguration=\
net.zjitc.starter.HelloServiceAutoConfiguration
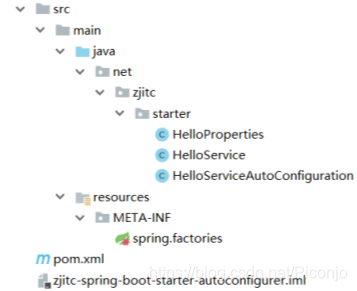
最后 目录是这样的:
进入Maven的install生命周期 将自动配置模块和启动器都安装到仓库中
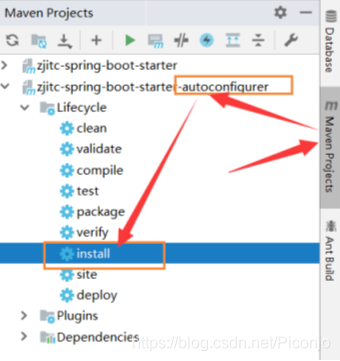
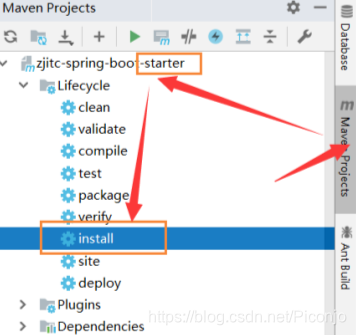
安装到仓库中之后 在别的项目中即可直接使用坐标来引入
四、测试
再创建一个项目 用于测试:
只需要引入启动器的坐标即可:
因为启动器会将自动配置的所有相关依赖全部导入
<!-- 引入自定义的starter -->
<dependency>
	<groupId>net.zjitc.zjitc</groupId>
	<artifactId>zjitc-spring-boot-starter</artifactId>
	<version>1.0-SNAPSHOT</version>
</dependency>
接下来就简单了
测试类:
@RestController
public class HelloController {

    @Autowired
    HelloService helloService;

    @GetMapping("hello")
    public String hello()
    {
        return helloService.sayHello("Piconjo");
    }
}

能够导入启动器中的类 说明启动器已经被引入了
由于测试调用的方法需要用到两个属性 而这两个属性又没有事先设定好初始值
因此需要在测试项目中配置一下属性:
# 配置前后缀
zjitc.hello.prefix=ZJITC
zjitc.hello.suffix=SOFTWARE1801
测试成功

