第一步:
在官网上下载boost库的最新版本。
进官网可能有点慢,多等一会。而且下载速度也不是很快,可以先让它自己下载着,不要死等。
第二步:
将文件解压。
解压后的文件夹如下所示:

第三步:
打开vs的工具命令行,跳转到解压的目录

执行bootstrap.bat这个批处理文件。
结果如下:

执行过程有点慢。

我们会发现刚才的目录中多了几个文件:

然后在刚才的命令行中执行
bjam.exe --toolset=msvc-14.1 architecture=x86 address-model=64 link=static --build-type=complete --with-system --with-thread --with-date_time --with-filesystem --with-serialization
结果显示为:
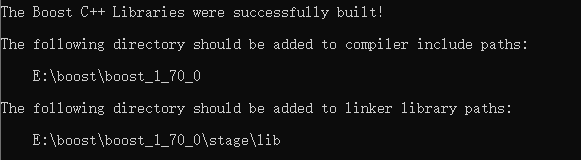
此时boost已经安装成功。
第三步
我们在vs中新建项目配置属性如下:项目->属性->VC++目录
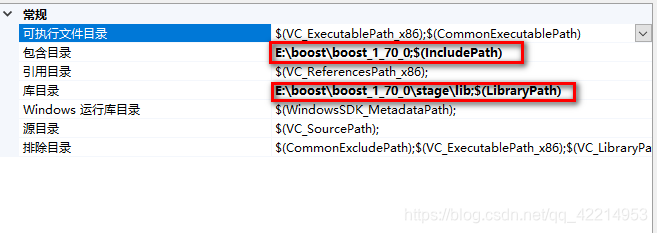
这样boost库就可以正常使用了。
输入代码进行测试:
#include <iostream>
#include <boost/bind.hpp>
#include <string>
using namespace std;

class Hello
{
public:
	void say(string name)
	{ cout << name << " say: hello world!" << endl; }
};

int main()
{
	Hello h;
	auto func = boost::bind(&Hello::say, &h, "zhang san");
	func();
	return 0;
}

boost库成功运行!!!
