1、拓扑
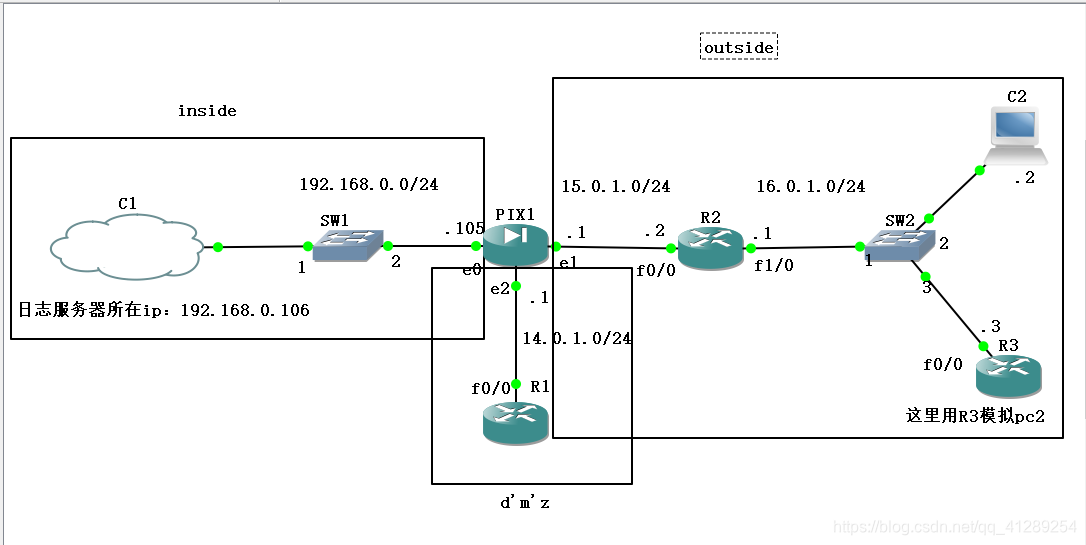
pix 的inside接口与日志服务器在同一个网段,用inside接口向日志服务器发送日志,kiwi日志服务器搭建在win server 2003上,c1桥接本地网卡
2、配置
R1
R1#conf
Configuring from terminal, memory, or network [terminal]?
Enter configuration commands, one per line.  End with CNTL/Z.
R1(config)#end
R1#co
*Mar  1 00:01:25.435: %SYS-5-CONFIG_I: Configured from console by console
R1#conf t
Enter configuration commands, one per line.  End with CNTL/Z.
R1(config)#int f0/0
R1(config-if)#ip address 14.0.1.2 255.255.255.0
R1(config-if)#no sh
*Mar  1 00:02:36.535: %LINK-3-UPDOWN: Interface FastEthernet0/0, changed state to up
*Mar  1 00:02:37.535: %LINEPROTO-5-UPDOWN: Line protocol on Interface FastEthernet0/0, changed state to up
R1(config-if)#exit
R1(config)#ip route 16.0.1.0 255.255.255.0 14.0.1.1
R1(config)#line vty 0 4
R1(config-line)#password zwish
R1(config-line)#exit
R2
R2#conf t
Enter configuration commands, one per line.  End with CNTL/Z.
R2(config)#int f0/0
R2(config-if)#ip address 15.0.1.2 255.255.255.0
R2(config-if)#no sh
R2(config-if)#int f
*Mar  1 00:04:00.327: %LINK-3-UPDOWN: Interface FastEthernet0/0, changed state to up
*Mar  1 00:04:01.327: %LINEPROTO-5-UPDOWN: Line protocol on Interface FastEthernet0/0, changed state to up
R2(config-if)#int f1/0
R2(config-if)#ip address 16.0.1.1 255.255.255.0
R2(config-if)#end
R2#
*Mar  1 00:04:30.591: %SYS-5-CONFIG_I: Configured from console by console
R2#conf t
Enter configuration commands, one per line.  End with CNTL/Z.
R2(config)#int f1/0
R2(config-if)#ip address 16.0.1.1 255.255.255.0
R2(config-if)#no sh
R2(config-if)#
*Mar  1 00:15:41.179: %LINK-3-UPDOWN: Interface FastEthernet1/0, changed state to up
*Mar  1 00:15:42.179: %LINEPROTO-5-UPDOWN: Line protocol on Interface FastEthernet1/0, changed state to up
R2(config-if)#exit
R2(config)#ip route 0.0.0.0 0.0.0.0 15.0.1.1
PIX
pixfirewall> en
Password:
pixfirewall# conf t
pixfirewall(config)# int e0
pixfirewall(config-if)# ip address 192.168.0.105
pixfirewall(config-if)# no sh
pixfirewall(config-if)# nameif inside
INFO: Security level for "inside" set to 100 by default.
pixfirewall(config-if)# int e1
pixfirewall(config-if)# ip address 15.0.1.1 255.255.255.0
pixfirewall(config-if)# no sh
pixfirewall(config-if)# nameif outside
INFO: Security level for "outside" set to 0 by default.
pixfirewall(config-if)# int e2
pixfirewall(config-if)# ip address 14.0.1.1 255.255.255.0
pixfirewall(config-if)# no sh
pixfirewall(config-if)# nameif dmz
INFO: Security level for "dmz" set to 0 by default.
pixfirewall(config-if)# security-level 50

pixfirewall(config-if)# exit
pixfirewall(config)# static (dmz,outside) 15.0.1.3 14.0.1.2
#允许pc1 ping R1
pixfirewall(config)# access-list test1 permit icmp host 16.0.1.2 host 15.0.1.3
pixfirewall(config)# access-group test1 in int outside
pixfirewall(config)# exit
pixfirewall# ping 14.0.1.2
Type escape sequence to abort.
Sending 5, 100-byte ICMP Echos to 14.0.1.2, timeout is 2 seconds:
!!!!!
Success rate is 100 percent (5/5), round-trip min/avg/max = 10/12/20 ms
pixfirewall# ping 16.0.1.2
Type escape sequence to abort.
Sending 5, 100-byte ICMP Echos to 16.0.1.2, timeout is 2 seconds:
No route to host 16.0.1.2

Success rate is 0 percent (0/1)
pixfirewall# conf t
pixfirewall(config)# route outside 16.0.1.0 255.255.255.0 15.0.1.1
#允许pc2 telnet R1
pixfirewall(config)# access-list test1 extended permit tcp host 16.0.1.3 host 15.0.1.3

#开启日志
pixfirewall(config)# logging on
pixfirewall(config)# logging host inside 192.168.0.106
pixfirewall(config)# logging trap 7
pixfirewall(config)# exit
pc1是用的vpcs,因为pc2需要telnet功能,但好像vpcs实现不了,就用一个路由器模拟了
R3模拟pc2
R3#conf t
Enter configuration commands, one per line.  End with CNTL/Z.
R3(config)#no ip routing
R3(config)#default gateway 16.0.1.1
R3(config)#end
R3#conf t
Enter configuration commands, one per line.  End with CNTL/Z.
R3(config)#int f0/0
R3(config-if)#ip address 16.0.1.3 255.255.255.0
R3(config-if)#no sh
R3(config-if)#end
4、测试
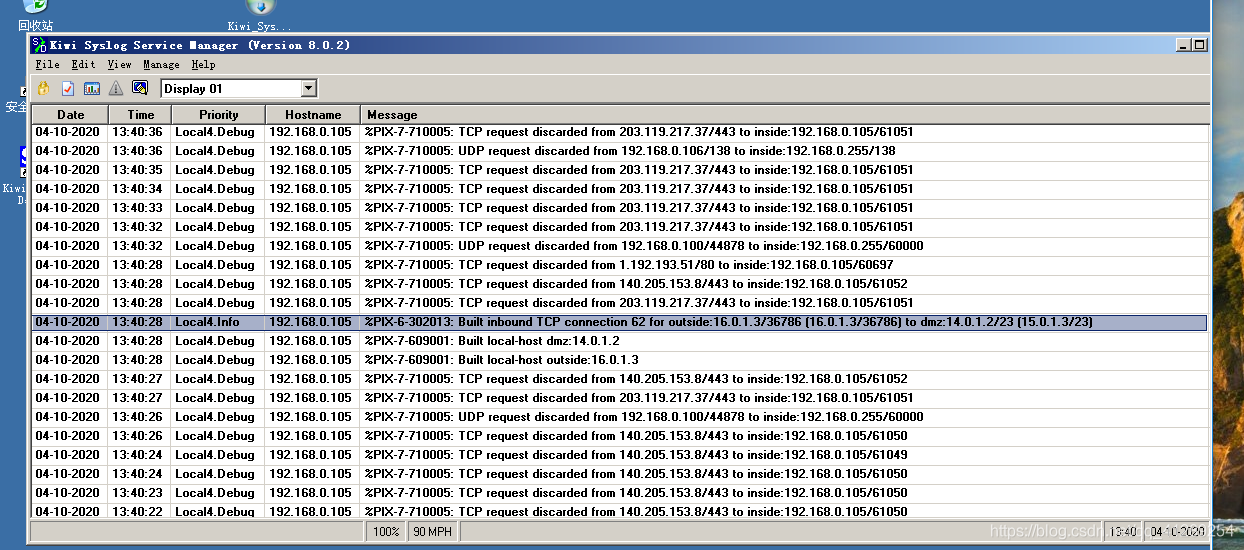
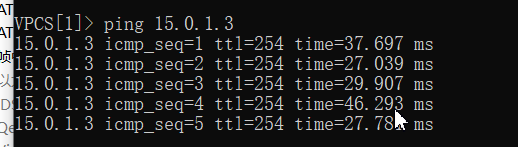
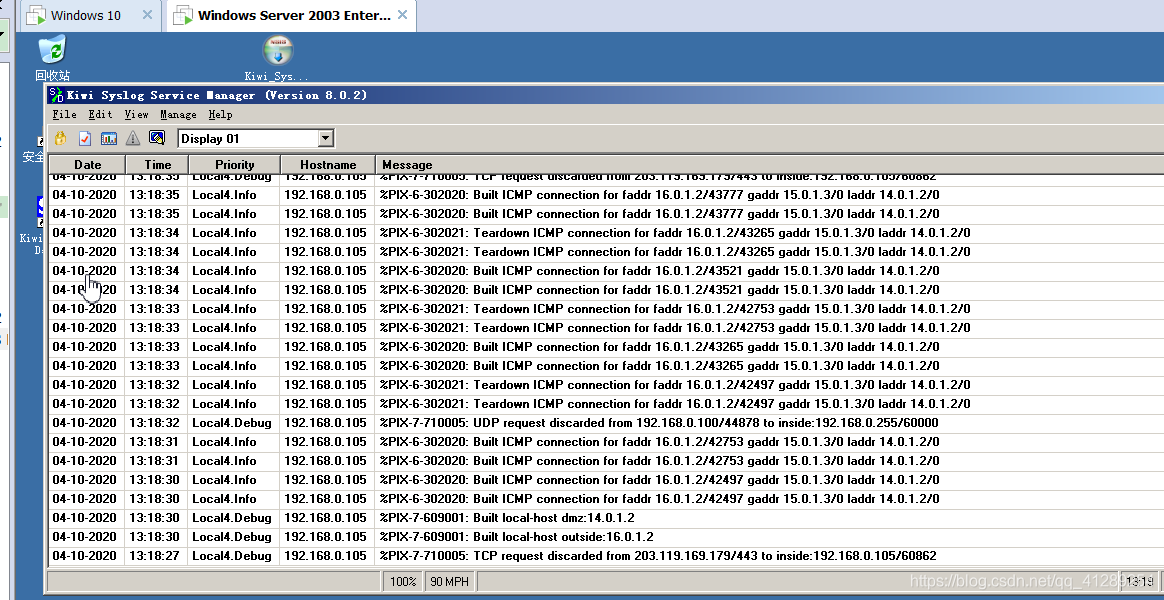
1)pc1 ping R1
日志
2)pc2 telnet R1
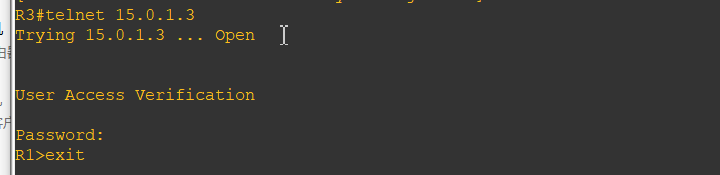
日志(这里因为我桥接的网卡是可以正常上网的,pix的inside与本机和虚拟机在同一网段,所以可能有其他一些网络上的无关流量也被记录了,所以日志在不停的更新。。)