前言
学习过EAST后我们开始学习CTPN,CTPN也是文本识别的一种,相比于 EAST,CTPN对水平文本的处理效果更好,但是缺点在于他无法处理倾斜文本框,今天我们要介绍的是CTPN的数据处理部分,话不多说上干货。
split_label.py
import os
import sys

import cv2 as cv
import numpy as np
from tqdm import tqdm

sys.path.append(os.getcwd())
from utils.prepare.utils import orderConvex, shrink_poly

DATA_FOLDER = "/media/D/DataSet/mlt_selected/"
OUTPUT = "data/dataset/mlt/"
MAX_LEN = 1200
MIN_LEN = 600

im_fns = os.listdir(os.path.join(DATA_FOLDER, "image"))
im_fns.sort()

if not os.path.exists(os.path.join(OUTPUT, "image")):
    os.makedirs(os.path.join(OUTPUT, "image"))
if not os.path.exists(os.path.join(OUTPUT, "label")):
    os.makedirs(os.path.join(OUTPUT, "label"))

for im_fn in tqdm(im_fns):
    try:
        _, fn = os.path.split(im_fn)
        bfn, ext = os.path.splitext(fn)
        if ext.lower() not in ['.jpg', '.png']:
            continue

        gt_path = os.path.join(DATA_FOLDER, "label", 'gt_' + bfn + '.txt')
        img_path = os.path.join(DATA_FOLDER, "image", im_fn)

        img = cv.imread(img_path)
        img_size = img.shape
        im_size_min = np.min(img_size[0:2])
        im_size_max = np.max(img_size[0:2])

        im_scale = float(600) / float(im_size_min)
        if np.round(im_scale * im_size_max) > 1200:
            im_scale = float(1200) / float(im_size_max)
        new_h = int(img_size[0] * im_scale)
        new_w = int(img_size[1] * im_scale)

        new_h = new_h if new_h // 16 == 0 else (new_h // 16 + 1) * 16
        new_w = new_w if new_w // 16 == 0 else (new_w // 16 + 1) * 16

        re_im = cv.resize(img, (new_w, new_h), interpolation=cv.INTER_LINEAR)
        re_size = re_im.shape

        polys = []
        with open(gt_path, 'r') as f:
            lines = f.readlines()
        for line in lines:
            splitted_line = line.strip().lower().split(',')
            x1, y1, x2, y2, x3, y3, x4, y4 = map(float, splitted_line[:8])
            poly = np.array([x1, y1, x2, y2, x3, y3, x4, y4]).reshape([4, 2])
            poly[:, 0] = poly[:, 0] / img_size[1] * re_size[1]
            poly[:, 1] = poly[:, 1] / img_size[0] * re_size[0]
            poly = orderConvex(poly)
            polys.append(poly)

            # cv.polylines(re_im, [poly.astype(np.int32).reshape((-1, 1, 2))], True,color=(0, 255, 0), thickness=2)

        res_polys = []
        for poly in polys:
            # delete polys with width less than 10 pixel
            if np.linalg.norm(poly[0] - poly[1]) < 10 or np.linalg.norm(poly[3] - poly[0]) < 10:
                continue

            res = shrink_poly(poly)
            # for p in res:
            #    cv.polylines(re_im, [p.astype(np.int32).reshape((-1, 1, 2))], True, color=(0, 255, 0), thickness=1)

            res = res.reshape([-1, 4, 2])
            for r in res:
                x_min = np.min(r[:, 0])
                y_min = np.min(r[:, 1])
                x_max = np.max(r[:, 0])
                y_max = np.max(r[:, 1])

                res_polys.append([x_min, y_min, x_max, y_max])

        cv.imwrite(os.path.join(OUTPUT, "image", fn), re_im)
        with open(os.path.join(OUTPUT, "label", bfn) + ".txt", "w") as f:
            for p in res_polys:
                line = ",".join(str(p[i]) for i in range(4))
                f.writelines(line + "\r\n")
                # for p in res_polys:
                #    cv.rectangle(re_im,(p[0],p[1]),(p[2],p[3]),color=(0,0,255),thickness=1)

                # cv.imshow("demo",re_im)
                # cv.waitKey(0)
    except:
        print("Error processing {}".format(im_fn))
sys.path.append(os.getcwd())
这句语句有两个函数,os.getcwd返回当前目录,sys.path.append将当前目录作为自定义路径添加到环境变量中。
from utils import orderConvex, shrink_poly
这里有两个自定义函数都是在utils中建立的:
import numpy as np
from shapely.geometry import Polygon


def pickTopLeft(poly):
    idx = np.argsort(poly[:, 0])
    if poly[idx[0], 1] < poly[idx[1], 1]:
        s = idx[0]
    else:
        s = idx[1]

    return poly[(s, (s + 1) % 4, (s + 2) % 4, (s + 3) % 4), :]


def orderConvex(p):
    points = Polygon(p).convex_hull
    points = np.array(points.exterior.coords)[:4]
    points = points[::-1]
    points = pickTopLeft(points)
    points = np.array(points).reshape([4, 2])
    return points


def shrink_poly(poly, r=16):
    # y = kx + b
    x_min = int(np.min(poly[:, 0]))
    x_max = int(np.max(poly[:, 0]))

    k1 = (poly[1][1] - poly[0][1]) / (poly[1][0] - poly[0][0])
    b1 = poly[0][1] - k1 * poly[0][0]

    k2 = (poly[2][1] - poly[3][1]) / (poly[2][0] - poly[3][0])
    b2 = poly[3][1] - k2 * poly[3][0]

    res = []

    start = int((x_min // 16 + 1) * 16)
    end = int((x_max // 16) * 16)

    p = x_min
    res.append([p, int(k1 * p + b1),
                start - 1, int(k1 * (p + 15) + b1),
                start - 1, int(k2 * (p + 15) + b2),
                p, int(k2 * p + b2)])

    for p in range(start, end + 1, r):
        res.append([p, int(k1 * p + b1),
                    (p + 15), int(k1 * (p + 15) + b1),
                    (p + 15), int(k2 * (p + 15) + b2),
                    p, int(k2 * p + b2)])
    return np.array(res, dtype=np.int).reshape([-1, 8])
这里重要的是两个函数:
1>orderConvex
凸包函数:作用是将检测框的坐标点传入,通过凸包函数,变成面积。
2>shrink_poly
就是将上面的每一个标记框都给拆分成宽为16的矩形框
后几句是设置输出路径和最大最小尺寸。
im_fns = os.listdir(os.path.join(DATA_FOLDER, "image"))
这里是提取图片文件夹下的列表,其实就是提取每一个图片的图片名,保存在im-fns中。
im_fns.sort()
sort() 函数用于对原列表进行排序,如果指定参数,则使用比较函数指定的比较函数。该方法没有返回值,但是会对列表的对象进行排序。
然后是判断文件夹是否存在如果不存在则建立。
 _, fn = os.path.split(im_fn)
        bfn, ext = os.path.splitext(fn)
        if ext.lower() not in ['.jpg', '.png']:
            continue

        gt_path = os.path.join(DATA_FOLDER, "label", 'gt_' + bfn + '.txt')
        img_path = os.path.join(DATA_FOLDER, "image", im_fn)

        img = cv.imread(img_path)
        img_size = img.shape
        im_size_min = np.min(img_size[0:2])
        im_size_max = np.max(img_size[0:2])

        im_scale = float(600) / float(im_size_min)
        if np.round(im_scale * im_size_max) > 1200:
            im_scale = float(1200) / float(im_size_max)
        new_h = int(img_size[0] * im_scale)
        new_w = int(img_size[1] * im_scale)

        new_h = new_h if new_h // 16 == 0 else (new_h // 16 + 1) * 16
        new_w = new_w if new_w // 16 == 0 else (new_w // 16 + 1) * 16

        re_im = cv.resize(img, (new_w, new_h), interpolation=cv.INTER_LINEAR)
        re_size = re_im.shape
这块首先将返回文件名和路径将路径存储在fn中,利用路径将文件名和扩展名区分开来。然后用lower函数将扩展名大小写转化,然后判断是否存在。
gt_path = os.path.join(DATA_FOLDER, "label", 'gt_' + bfn + '.txt')
img_path = os.path.join(DATA_FOLDER, "image", im_fn)
分别将组合后的路径保存起来。
然后分别求长宽化为标准尺寸后较大那个,然后作为缩放尺寸,目的是使长宽等比例缩放,且保证缩放后的尺寸不会超过最大尺寸。并且保证尺寸为16的整数倍(方便后面缩放),将图片尺寸重置。
 polys = []
        with open(gt_path, 'r') as f:
            lines = f.readlines()
        for line in lines:
            splitted_line = line.strip().lower().split(',')
            x1, y1, x2, y2, x3, y3, x4, y4 = map(float, splitted_line[:8])
            poly = np.array([x1, y1, x2, y2, x3, y3, x4, y4]).reshape([4, 2])
            poly[:, 0] = poly[:, 0] / img_size[1] * re_size[1]
            poly[:, 1] = poly[:, 1] / img_size[0] * re_size[0]
            poly = orderConvex(poly)
            polys.append(poly)
这块做的是读取文本框坐标,然后根据刚才求得的缩放尺寸将坐标进行缩放。这里有这麽一句话 splitted_line = line.strip().lower().split(’,’)作用是就是把字符串(str)的头和尾的空格,以及位于头尾的\n \t之类给删掉。只剩下坐标。
 res_polys = []
        for poly in polys:
            # delete polys with width less than 10 pixel
            if np.linalg.norm(poly[0] - poly[1]) < 10 or np.linalg.norm(poly[3] - poly[0]) < 10:
                continue

            res = shrink_poly(poly)
            # for p in res:
            #    cv.polylines(re_im, [p.astype(np.int32).reshape((-1, 1, 2))], True, color=(0, 255, 0), thickness=1)

            res = res.reshape([-1, 4, 2])
            for r in res:
                x_min = np.min(r[:, 0])
                y_min = np.min(r[:, 1])
                x_max = np.max(r[:, 0])
                y_max = np.max(r[:, 1])

                res_polys.append([x_min, y_min, x_max, y_max])
判断一下文本框的大小,如果大于10,就将他们变成多个宽度为16的文本框然后保存起来。
cv.imwrite(os.path.join(OUTPUT, "image", fn), re_im)
        with open(os.path.join(OUTPUT, "label", bfn) + ".txt", "w") as f:
            for p in res_polys:
                line = ",".join(str(p[i]) for i in range(4))
                f.writelines(line + "\r\n")
                # for p in res_polys:
                #    cv.rectangle(re_im,(p[0],p[1]),(p[2],p[3]),color=(0,0,255),thickness=1)

                # cv.imshow("demo",re_im)
                # cv.waitKey(0)
将重置尺寸后的图片保存起来,writelines方法用于向文件中写入一序列的字符串。然后就把更改以后的文本框坐标以特定的格式写入文件夹中。
总结
这篇数据处理部分大部分写完了,这部分的作用是对文本框和图片处理,分为两部分,1是将尺寸规范化,2是将原本的长文本框转化为宽度为16的小文本框。因为CTPN的思想就是得到一个个宽度为16长度不等的Anchor所以训练时也要用相应的标签作为训练集。
最后的话
还是以前的话,我是初学者可能错误很多还望见谅,还有好多资料出处未能注明,所以在此致以歉意。
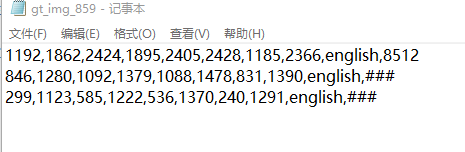
附:icdar数据集标签:
处理后的数据集: