概述
tensorflow2.0发布已经一年多了,实在觉得tensorflow1.x比较难用,很多地方API混乱,对新手不太友好。但是感觉tf2.0版本的就很不错,融合了keras,相对来说比较容易上手。所以写下自学tf2.0的笔记。难免会有不足或是错误,李姐万岁。
实例
首先看一个简单的例子,实现一个分类任务,数据集是tf2.0中自带的fashion_minist。
首先导入必要的模块
import tensorflow as tf
import matplotlib as mpl
import matplotlib.pyplot as plt
import pandas as pd
import numpy as np
接下来加载数据集:
fashion_mnist = tf.keras.datasets.fashion_mnist
(x_train_all, y_train_all),(x_test, y_test) = fashion_mnist.load_data()
我们可以看一下数据集的情况
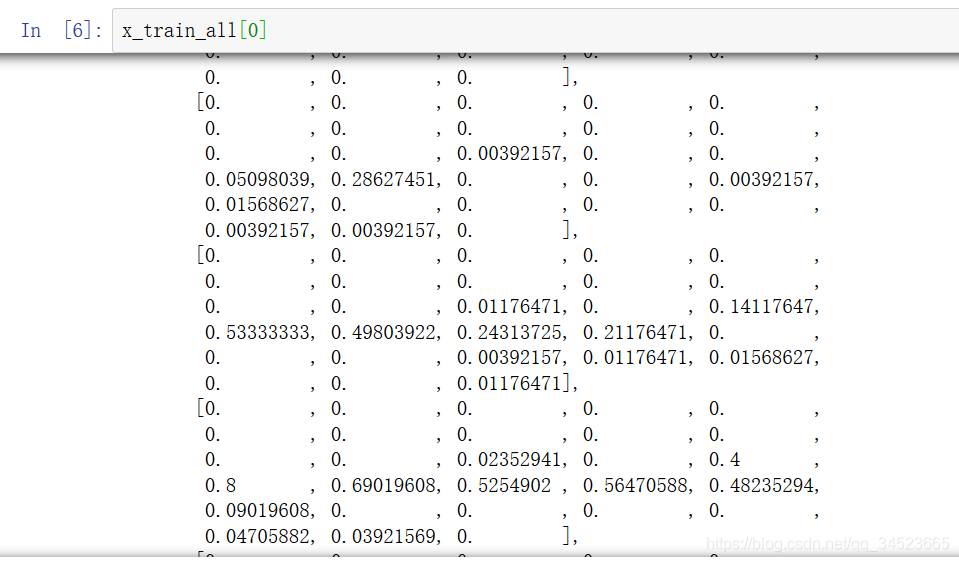
x_train_all[0]
因为是图像数据,所以出来的是一个二维数组。
 (篇幅有限,就截一部分了)
我们知道像素值都是在0-255之间的数,这里我们需要把这些值归一到0-1之间,便于计算。
x_train_all = x_train_all / 255.0
x_test = x_test / 255.0
然后我们再来看看结果:
x_train_all[0]
 像素值被压缩到0-1之间了。
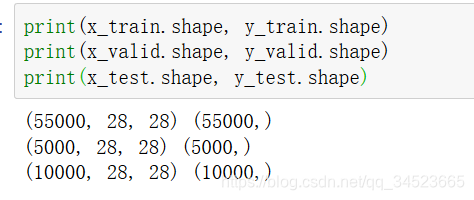
然后我们将数据分一下,5000训练集,5000验证机,剩下10000作为测试集。
x_train, x_valid = x_train_all[5000:], x_train_all[:5000]
y_train, y_valid = y_train_all[5000:], y_train_all[:5000]
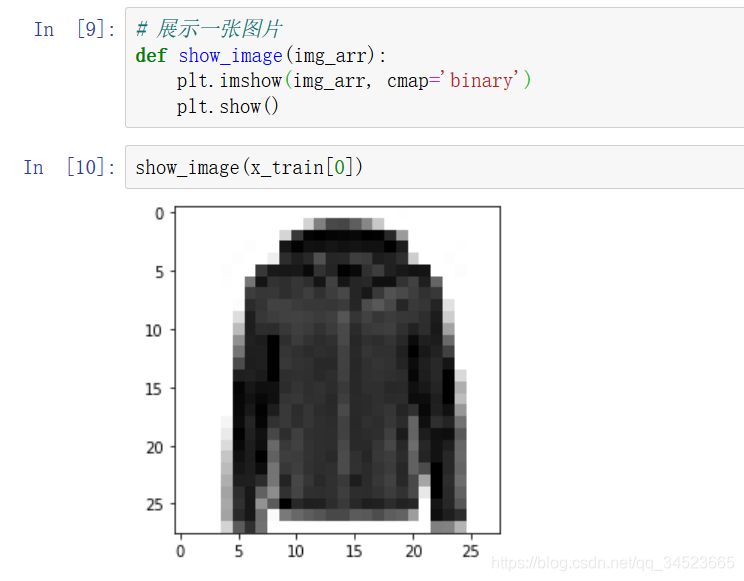
 我们可以看看其中的数据是什么样子的。
 现在我们把数据处理完了,接下来就要利用tf来构建模型了。
# 构建模型
model = tf.keras.models.Sequential() #相当于一个容器
model.add(tf.keras.layers.Flatten(input_shape=[28,28]))
model.add(tf.keras.layers.Dense(300, activation=tf.keras.activations.relu))
model.add(tf.keras.layers.Dense(100, activation=tf.keras.activations.relu))
model.add(tf.keras.layers.Dense(10, activation=tf.keras.activations.softmax))
我们构建了model中的一个sequential容器,然后在容器中添加层就可以了。第一个层是flatten层(tf中层首字母都是大写),参数是输入的形状,我们首先把二维矩阵给打平,然后构建三个全连接层,也就是dense层,第一个参数就是神经元的个数,后面的参数有激活函数。这样一个简单的模型就搭建好了。搭建好模型后,我们需要编译模型。
# 模型编译
model.compile(
              loss=tf.keras.losses.sparse_categorical_crossentropy,
              optimizer=tf.keras.optimizers.SGD(lr=0.001),
              metrics = ['accuracy']
             )
编译模型用的是model中的compile函数,我们在里面确定loss是什么,还有优化器(以及学习率),metrics是评估模型的指标,这里我们使用准确率来评估。
接下来使用fit函数给模型一些训练相关的参数,训练集,验证集,epochs。这样模型才能开始训练。
history = model.fit(x_train, y_train, epochs = 5, validation_data=(x_valid, y_valid))
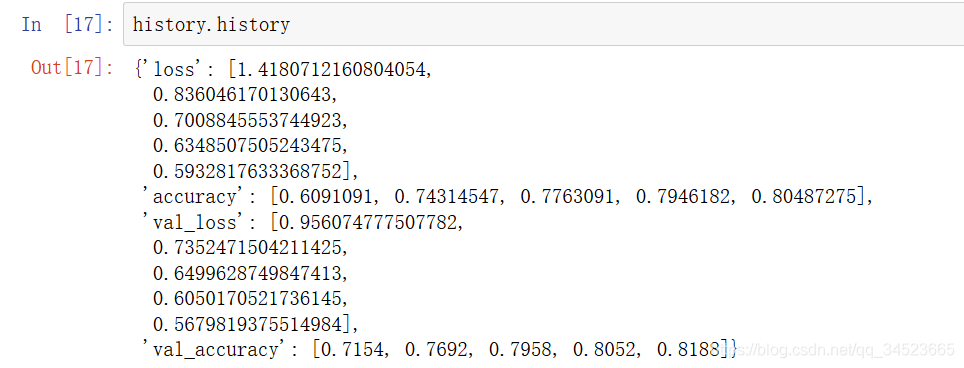
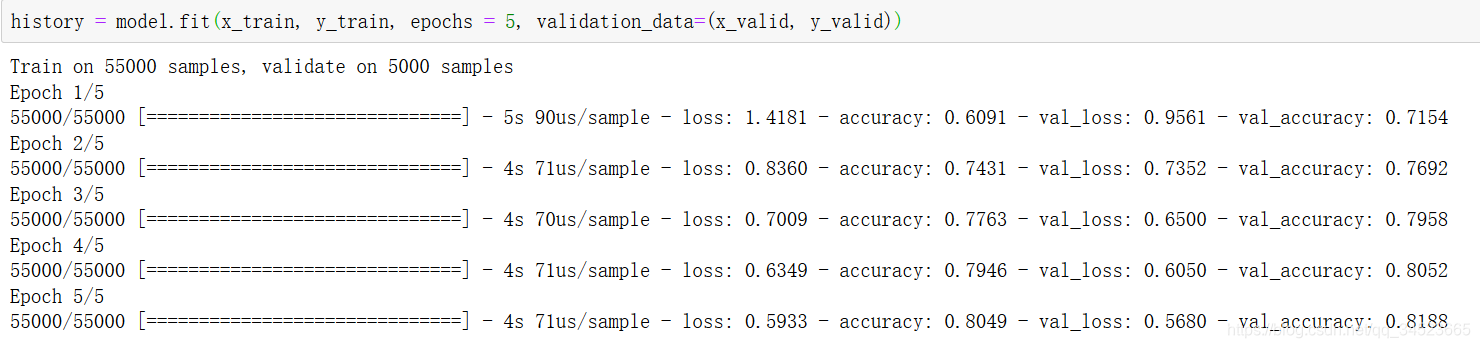 我们使用history可以查看5个epoch的loss和准确率这样的变化。
 最后我们可以把损失跟准确率这样的参数画出来。
def plot_learing_show(history):
    pd.DataFrame(history.history).plot(figsize=(8, 5))
    plt.grid(True)
    plt.gca().set_ylim(0,1)
    plt.show()
plot_learing_show(history)
 最终我们可以看一下在测试集上进行预测的结果。
test_history = model.evaluate(x_test,y_test)
test_history
 这样一个流程就走完了,tensorflow2.0还是相当简单的。
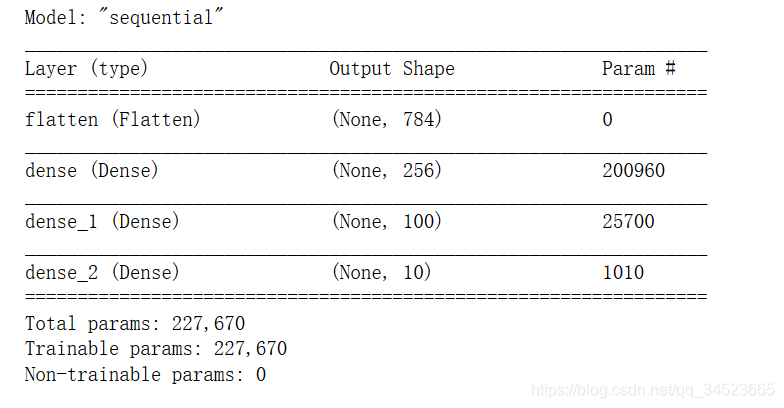
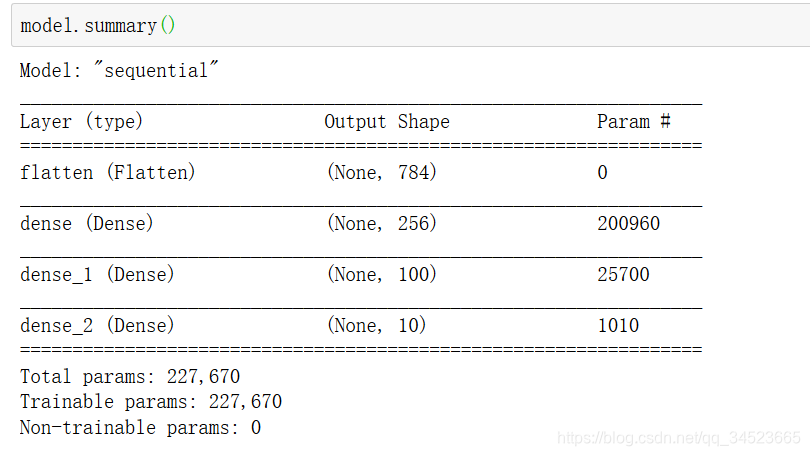
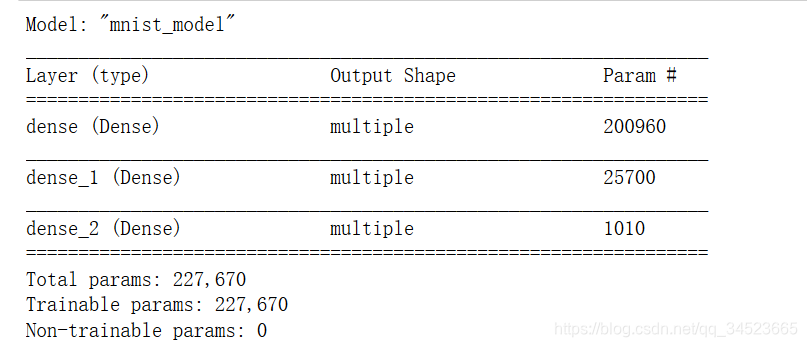
这就是我们使用sequential容器去构建一个线性模型的情况,我们可以看一下这个模型。
model.summary()
构建模型的其他方式
序列化构建第二种方式
与第一种构建方式非常类似,序列式构建还是使用sequential这个函数,在函数内部按顺序写入各个隐层。
model = keras.models.Sequential(
    [
        keras.layers.Flatten(input_shape=[28,28]),
        keras.layers.Dense(256, activation=keras.activations.relu),
        keras.layers.Dense(100, activation=keras.activations.relu),
        keras.layers.Dense(10, activation=keras.activations.softmax)
    ]
)
效果是一样的:
第三种方式——函数式构建模型
函数式构建模型就是把上一层的结果当作下一层的输入,这种输入输出的形式就跟函数一样。
# 函数式构建 记住一句话:把层当做函数来使用
input = Input(shape=[28,28]) #输入
x = Flatten()(input) #把Flatten()当成函数f, 简化一下呢 x = f(input)
x = Dense(256, activation='relu')(x) #把Dense(256, activation='relu') 当成函数g 简化一下呢 x = g(x)
x = Dense(100, activation='relu')(x) #把Dense(100, activation='relu') 当成函数p 简化一下呢 p = p(x)
output = Dense(10, activation='softmax')(x) #把Dense(10, activation='softmax') 当成函数h 简化一下呢 h = h(x)
model = keras.Model(inputs = [input], outputs = [output]) #最后用keras.Model将input和output建立关系
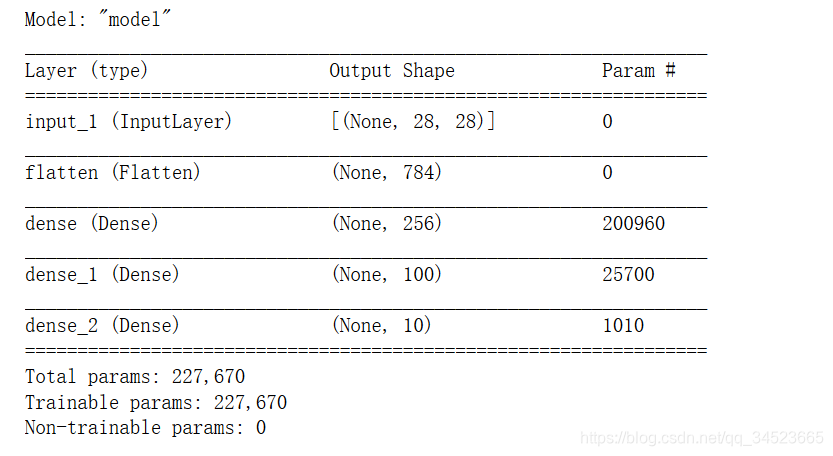
第四种方式——子类化构建模型
子类化构建模型就是把模型当作一个类,继承keras.Model这个类,然后在__init__()属性中类似于序列式定义各个层,再定一个call方法,像函数式构建一样,将每个曾关联起来,最终返回输出。
这种方式构建模型非常灵活,要自己设计模型就需要用这种子类化的构建方式。
# 子类化方式构建
class MnistModel(keras.Model):
    def __init__(self, **kwargs): # 类似序列式定义各个层次
        super().__init__(**kwargs)
        self.hidden_layer1 = Dense(units=256, activation='relu')
        self.hidden_layer2 = Dense(units=100, activation='relu')
        self.output_layer = Dense(units=10, activation='softmax')
    def call(self, input):  # 类似函数式,将每次之间的关系进行关联
        x = Flatten()(input)
        hidden_layer1 = self.hidden_layer1(x)
        hidden_layer2 = self.hidden_layer2(hidden_layer1)
        output = self.output_layer(hidden_layer2)
        return output
 model = MnistModel()
 在我们这个小demo中,四种方式构建情况差不多,最终的效果也是差不多的。
