目录
一. File类
1.简单介绍
- File类的一个对象既能代表一个特定的文件的名称,又能代表一个目录下的一组文件的名称。
- File 能新建、删除、重命名文件和目录,但 File 不能访问文件内容本身。如果需要访问文件内容本身,则需要使用输入/输出流。
- 想要在Java程序中表示一个真实存在的文件或目录,那么必须有一个File对 象,但是Java程序中的一个File对象,可能没有一个真实存在的文件或目录。
- 后续File类的对象常会作为参数传递到流的构造器中,指明读取或写入的"终点"。
2.基本用法
在文件系统中,每个文件都存放在一个目录下。*绝对文件名( absolute file name) 是由文件名和它的完整路径以及驱动器字母组成。相对文件名是相对于当前工作目录的。*例如,c:\book\Welcome.java 是文件Welcome.java 在 Windows 操作系统上的绝对文件名。Welcome.java 是一个相对文件名。
windows和DOS系统默认使用“\”来表示
UNIX和URL使用“/”来表示
Java程序支持跨平台运行,因此路径分隔符要慎用。为了解决这个隐患,File类提供了一个常量:
public static final String separator。根据操作系统,动态的提供分隔符。
File file = new File(“D:”+File.separator +“JavaSE”+File.separator +“JavaProject”);
2.1 构造方法
public File(String pathname)以pathname为路径创建File对象,可以是绝对路径或者相对路径public File(String parent,String child)以parent为父路径,child为子路径创建File对象。public File(File parent,String child)根据一个父File对象和子文件路径创建File对象
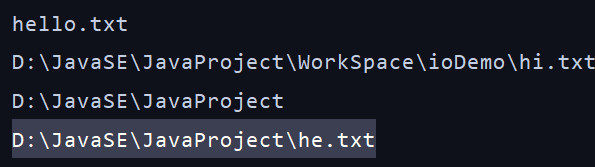
//构造器一 :public File(String pathname)
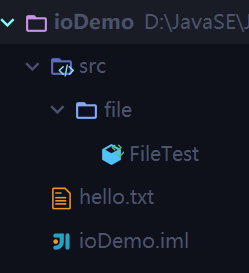
File file1 = new File("hello.txt");//相对路径
File file2 = new File("D:\\JavaSE\\JavaProject\\WorkSpace\\ioDemo\\hi.txt");//绝对路径
System.out.println(file1);
System.out.println(file2);
//构造器二:public File(String parent,String child)
File file3 = new File("D:\\JavaSE", "JavaProject");
System.out.println(file3);
//构造器三:public File(File parent,String child)
File file4 = new File(file3, "he.txt");
System.out.println(file4);
输出结果:
2.2 常用方法
2.2.1 File类的获取功能
public String getAbsolutePath():获取绝对路径
public String getPath() :获取路径
public String getName() :获取名称
public String getParent():获取上层文件目录路径。若无,返回null,若文件对象中是相对路径,则返回null;
public long length() :获取文件长度(即:字节数)。不能获取目录的长度。
public long lastModified() :获取最后一次的修改时间,毫秒值,若该文件不在硬盘中真实存在,返回0。
public String[] list() :获取指定目录下的所有文件或者文件目录的名称数组
public File[] listFiles() :获取指定目录下的所有文件或者文件目录的File数组
@Test
public void test4() {
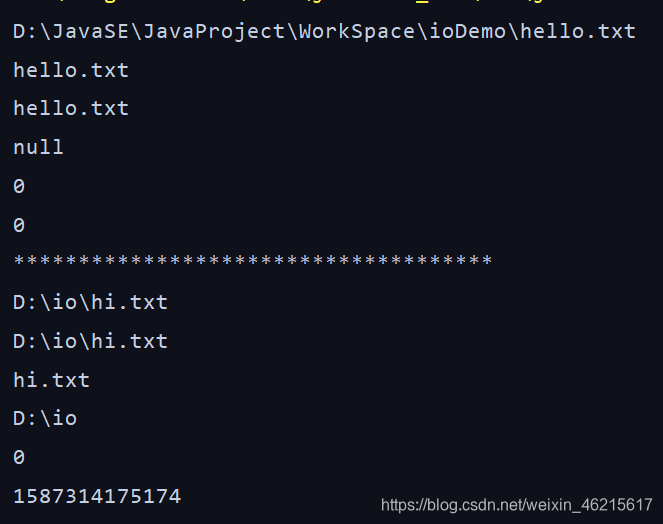
File file1 = new File("hello.txt");//不存在,只是一个对象
File file2 = new File("D:\\io\\hi.txt");//在硬盘存在
System.out.println(file1.getAbsolutePath());
System.out.println(file1.getPath());
System.out.println(file1.getName());
System.out.println(file1.getParent());
System.out.println(file1.length());
System.out.println(file1.lastModified());
System.out.println("*************************************");
System.out.println(file2.getAbsolutePath());
System.out.println(file2.getPath());
System.out.println(file2.getName());
System.out.println(file2.getParent());
System.out.println(file2.length());
System.out.println(file2.lastModified());
}
输出结果:
2.2.2 File类的判断功能
public boolean isDirectory():判断是否是文件目录
public boolean isFile() :判断是否是文件
public boolean exists() :判断是否存在
public boolean canRead() :判断是否可读
public boolean canWrite() :判断是否可写
public boolean isHidden() :判断是否隐藏
@Test
public void test5(){
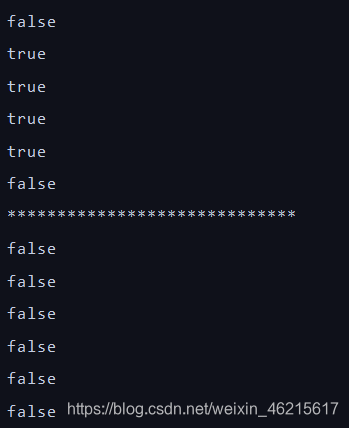
File file1 = new File("hello.txt");//在硬盘中真实存在
File file2 = new File("hello1.txt");//不真实存中
System.out.println(file1.isDirectory());
System.out.println(file1.isFile());
System.out.println(file1.exists());
System.out.println(file1.canRead());
System.out.println(file1.canWrite());
System.out.println(file1.isHidden());
System.out.println("*****************************");
System.out.println(file2.isDirectory());
System.out.println(file2.isFile());
System.out.println(file2.exists());
System.out.println(file2.canRead());
System.out.println(file2.canWrite());
System.out.println(file2.isHidden());
System.out.println("*********************************");
File file3 = new File("d:\\io");//真实存在
File file4 = new File("d:\\io1");//不存在
System.out.println(file3.isDirectory());
System.out.println(file3.isFile());
System.out.println(file3.exists());
System.out.println(file3.canRead());
System.out.println(file3.canWrite());
System.out.println(file3.isHidden());
System.out.println("*****************************");
System.out.println(file4.isDirectory());
System.out.println(file4.isFile());
System.out.println(file4.exists());
System.out.println(file4.canRead());
System.out.println(file4.canWrite());
System.out.println(file4.isHidden());
}
输出结果:

2.2.3 File类的其他功能
public boolean createNewFile() :创建文件。若文件存在,则不创建,返回false。指定文件的目录要存在。
public boolean delete():删除文件或者文件夹,删除注意事项:Java中的删除不走回收站。要想文件夹删除成功,最后一个文件目录下不能有子目录或文件
@Test
public void test6() throws IOException {
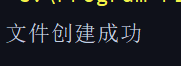
File file1 = new File("hello.txt");//此时文件不存在
if (!file1.exists()){
//文件的创建
boolean newFile = file1.createNewFile();
System.out.println("文件创建成功");
}else{
boolean delete = file1.delete();
System.out.println("原文件删除成功");
}
}
public boolean mkdir() :创建文件目录。如果此文件目录存在,就不创建了。如果此文件目录的上层目录不存在,也不创建。
public boolean mkdirs() :创建文件目录。如果上层文件目录不存在,一并创建

@Test
public void test7() {
    //文件目录的创建
    File file1 = new File("d:\\io\\io1\\io2");//此时只有io目录存在
    boolean mkdir = file1.mkdir();
    if (mkdir) {
        System.out.println("创建成功1");
    }

    File file2 = new File("d:\\io\\io1\\io2");//此时只有io目录存在
    boolean mkdirs = file2.mkdirs();
    if (mkdirs) {
        System.out.println("创建成功2");
    }
}
输出结果:

public boolean renameTo(File dest):把文件重命名为指定的文件路径,比如:file1.renameTo(file2)为例: 要想保证返回true,需要file1在硬盘中是存在的,且file2不能在硬盘中存在。
    @Test
    public void test9(){
        File file1 = new File("hello.txt");//在硬盘中存在内容为"hello world!"
        File file2 = new File("D:\\io\\hi.txt");//hi.txt不存在
        boolean renameTo = file1.renameTo(file2);
        System.out.println(renameTo);
    }
输出结果:生成了原本不存在的hi.txt文件,内容为hello world! hello.txt位置发生移动。

idea中main()方法中File的默认相对路径和Junit Test 方法中File的路径不同
public class FileMainTest {
    public static void main(String[] args) {
        File file = new File("hello.txt");
        System.out.println("main" + file.getAbsoluteFile());//输出结果:mainD:\JavaSE\JavaProject\WorkSpace\hello.txt
    }

    @Test
    public void test1() {
        File file = new File("hello.txt");
        System.out.println("test" + file.getAbsoluteFile());//输出结果:testD:\JavaSE\JavaProject\WorkSpace\ioDemo\hello.txt
    }
}
二. IO流
1. 简单介绍
Java 提供了许多实现文件输人 / 输出的类。这些类可以分为文本 I/O 类(text I/O class)和二进制 I/O 类(binary I/O class)。
- 输入对象(输入流)读取外部数据(磁盘、光盘等存储设备的数据)到程序(内存)中,操作过程中,我们是以 程序(内存)的角度。
- 输出对象(输出流)将程序(内存)数据输出到磁盘、光盘等存储设备中。

1.1 流的分类
- 按操作数据单位不同分为:字节流(8 bit),字符流(16 bit)
- 按数据流的流向不同分为:输入流,输出流
- 按流的角色的不同分为:节点流,处理流
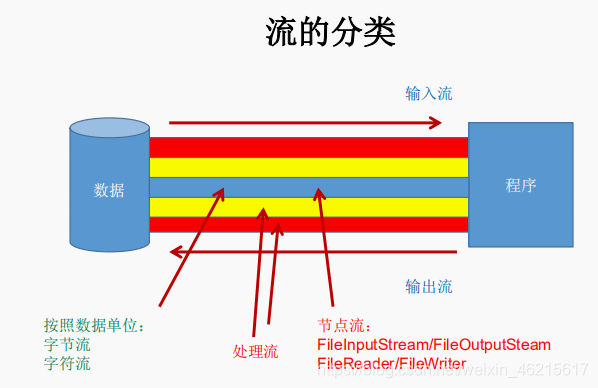

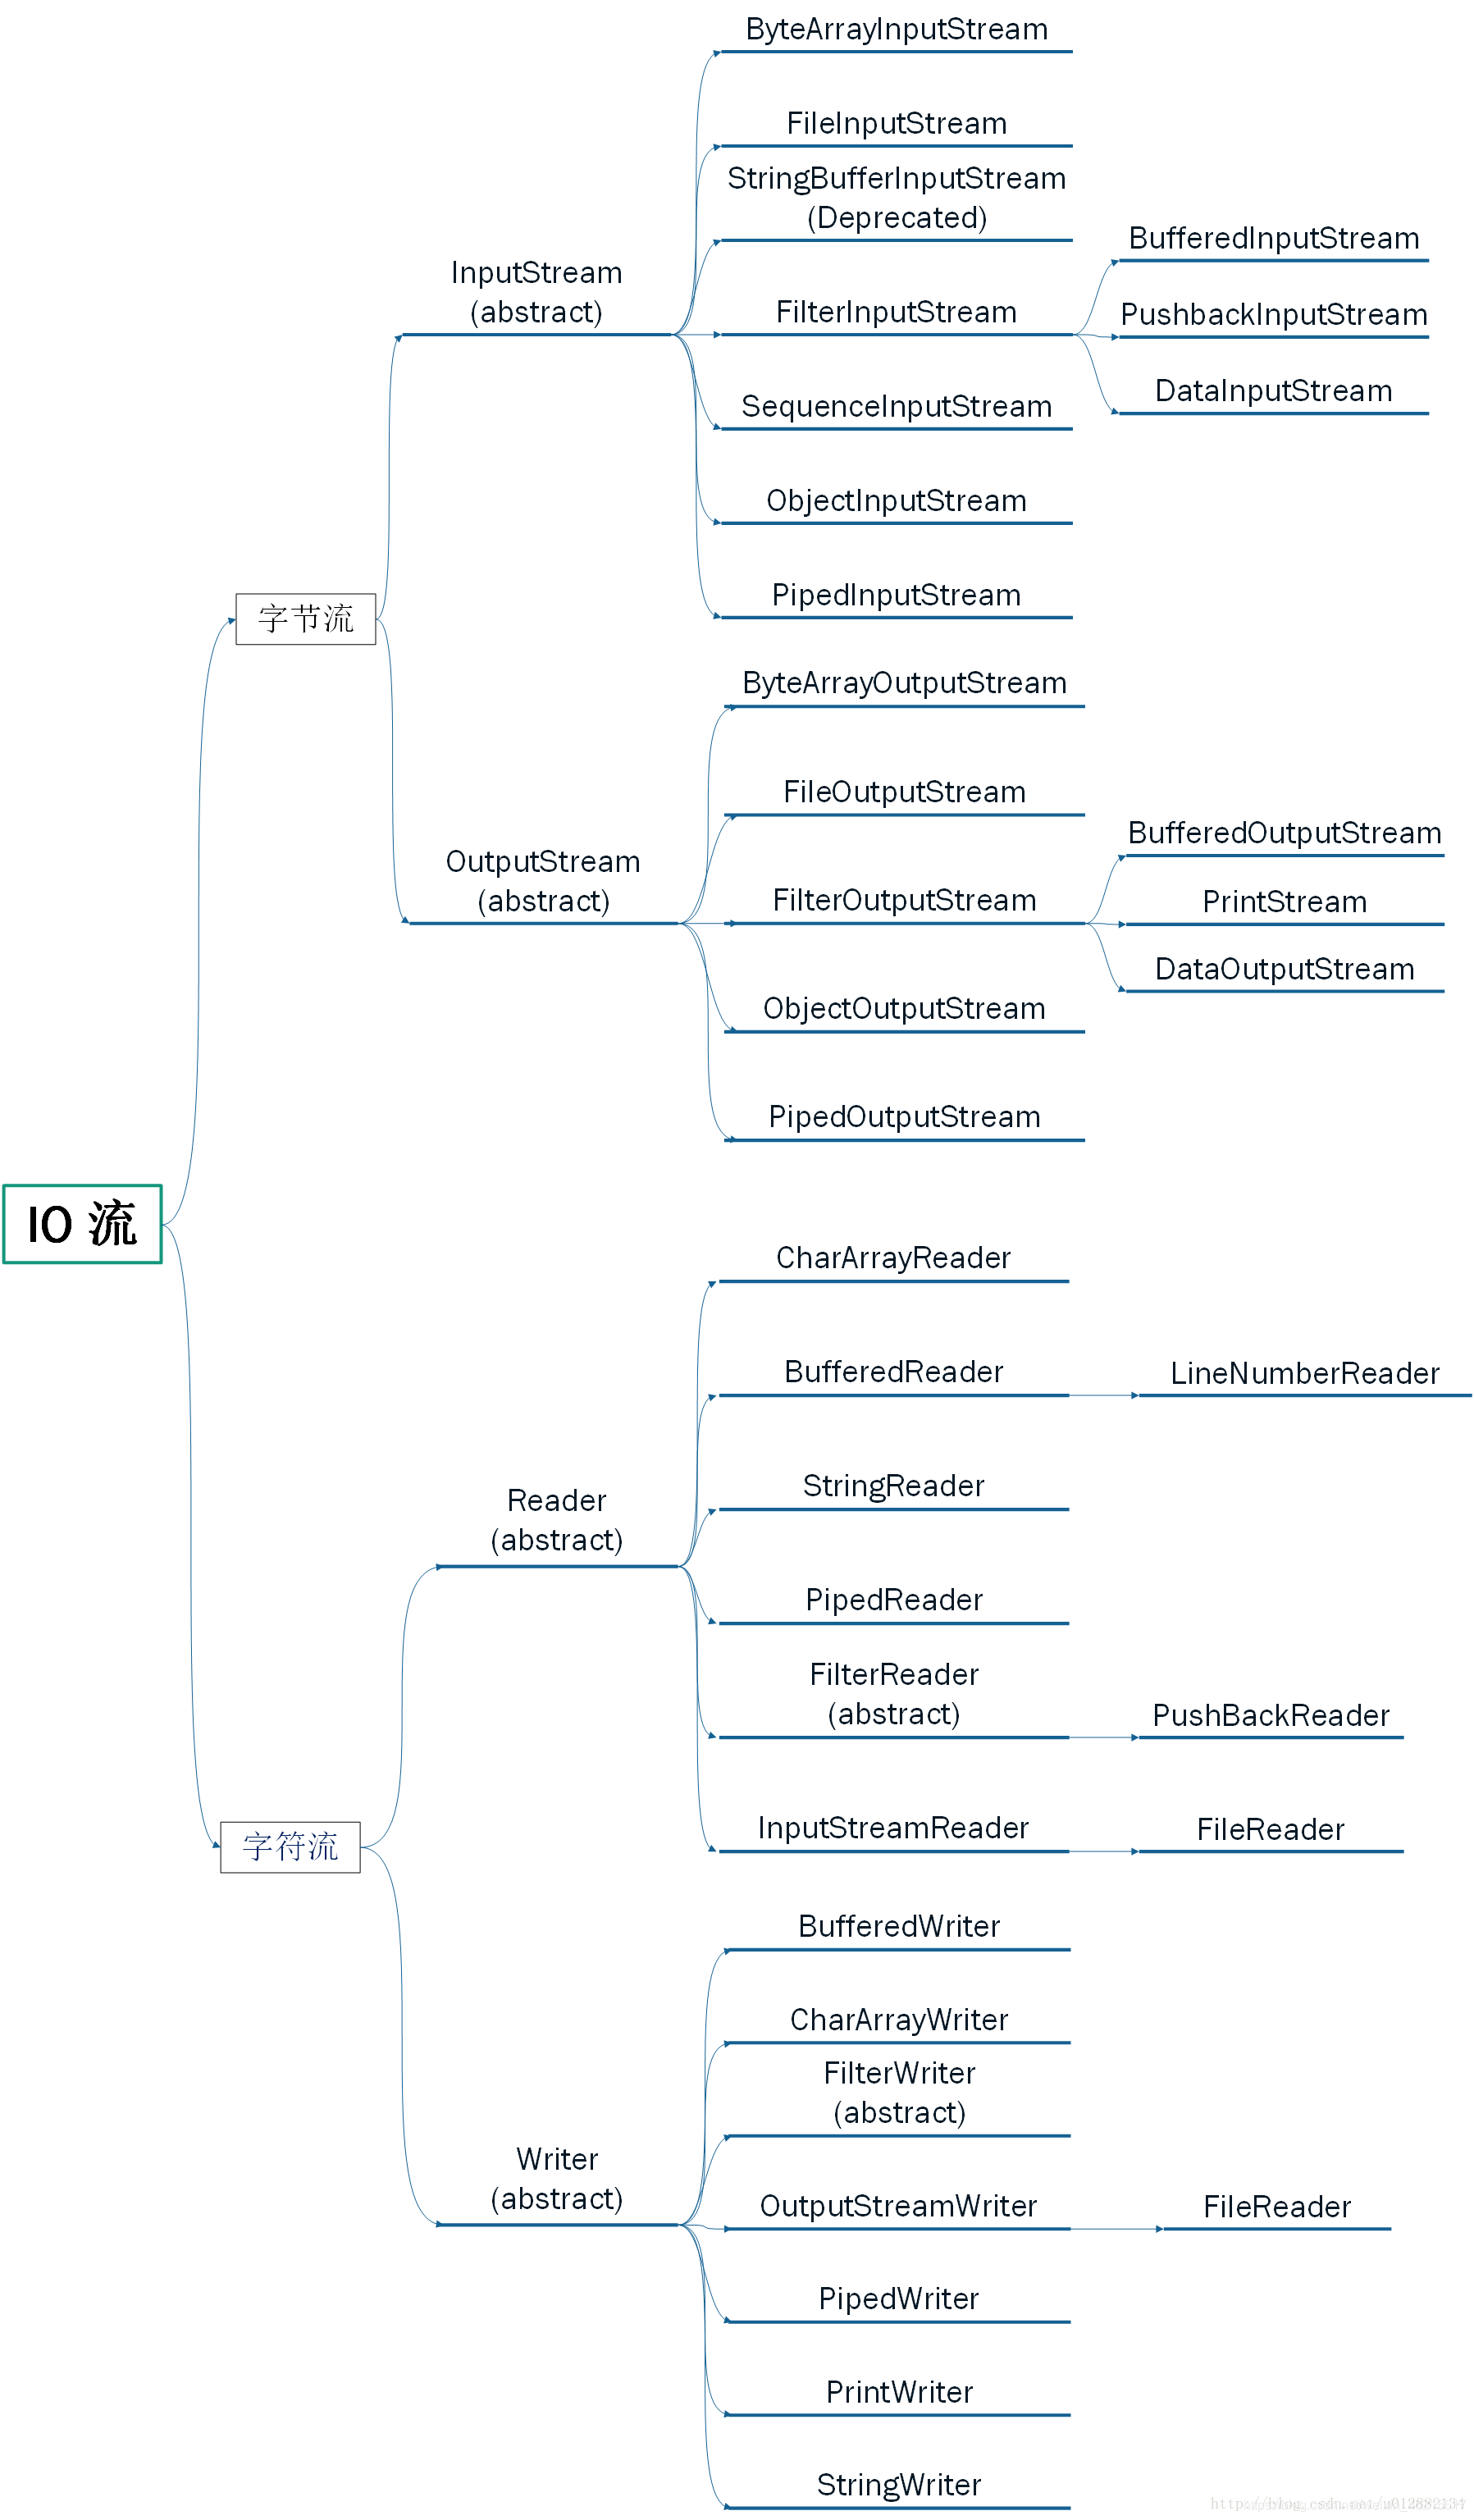
- Java的IO流共涉及40多个类,实际上非常规则,都是从如下4个 抽象基类派生的。
- 由这四个类派生出来的子类名称都是以其父类名作为子类名后缀。
2. 节点流(文件流)
- 定义文件路径时,注意:可以用“/”或者“\”。
- 在写入一个文件时,如果使用构造器FileOutputStream(file),则目录下有同名文件将被覆盖。
- 如果使用构造器FileOutputStream(file,true),则目录下的同名文件不会被覆盖,在文件内容末尾追加内容。
- 在读取文件时,必须保证该文件已存在,否则报异常。
- 字节流操作字节,比如:.mp3,.avi,.rmvb,mp4,.jpg,.doc,.ppt
- 字符流操作字符,只能操作普通文本文件。最常见的文本文件:.txt,.java,.c,.cpp 等语言的源代码。尤其注意.doc,excel,ppt这些不是文本文件。
2.1 FileReader/FileWriter(字符流)
2.1.1 FileReader常用方法
int read():读取单个字符。作为整数读取的字符,范围在 0 到 65535 之间 (0x00-0xffff)(2个
字节的Unicode码),如果已到达流的末尾,则返回 -1int read(char[] cbuf):将字符读入数组。如果已到达流的末尾,则返回 -1。否则返回本次读取的字符数。int read(char[] cbuf,int off,int len):将字符读入数组的某一部分。存到数组cbuf中,从off处开始存储,最多读len个字符。如果已到达流的末尾,则返回 -1。否则返回本次读取的字符数。public void close() throws IOException:关闭此输入流并释放与该流关联的所有系统资源。
2.1.2 基本用法
几乎所有的I/O类中的方法都会抛出异常 ;java.io.IOException。因此,必须在方法中声明会抛出:java.io.IOException 异常,或者将代码放到 try-catch 块中。
 //将module下的hello.txt文件内容读入程序中,并输出到控制台
 @Test
    public void test1() throws IOException {
        FileReader fr = null;
        try {
            //1.File类的实例化
            File file = new File("hello.txt");

            //2.FileReader流的实例化
            fr = new FileReader(file);

            //3.读入的操作 使用read(char[] cbuf)
            char[] cbuf = new char[5];
            int len;
            while ((len = fr.read(cbuf)) != -1) {
                //方法一
                // for (int i = 0; i < len; i++) {//不能用cbuf.length
                //     System.out.print(cbuf[i]);
                // }
                //方法二
                String s = new String(cbuf, 0, len);
                System.out.print(s);
            }
        } catch (IOException e) {
            e.printStackTrace();
        } finally {
            if (fr != null) {
                try {
                    //4.资源的关闭
                    fr.close();
                } catch (IOException e) {
                    e.printStackTrace();
                }
            }
        }
    }
输出结果:

2.1.1 FileWriter常用方法
void write(int c):写入单个字符。要写入的字符包含在给定整数值的 16 个低位中,16 高位被忽略。 即写入0 到 65535 之间的Unicode码。void write(char[] cbuf):写入字符数组。void write(char[] cbuf,int off,int len):写入字符数组的某一部分。从off开始,写入len个字符写入字符串。void write(String str,int off,int len):写入字符串的某一部分。void flush():刷新该流的缓冲,则立即将它们写入预期目标。public void close()throws IOException :关闭此输出流并释放与该流关联的所有系统资源
2.1.2 基本用法
- 输出操作,对应的File可以不存在的。并不会报异常
- File对应的硬盘中的文件如果不存在,在输出的过程中,会自动创建此文件。
File对应的硬盘中的文件如果存在:
① 如果流使用的构造器是:FileWriter(file,false) / FileWriter(file):对原有文件的覆盖
② 如果流使用的构造器是:FileWriter(file,true):不会对原有文件覆盖,而是在原有文件基础上追加内容
//从内存中写出数据到硬盘的文件里
@Test
    public void test2() {
        FileWriter fw = null;
        try {
            //1.创建File类的对象,指明写出的文件
            File file = new File("hello1.txt");

            //2.提供FileWrite的对象,用于数据的写出
            fw = new FileWriter(file);

            //3.写出的操作
            fw.write("I have a dream!\n");
            fw.write("you need to have a dream!");
        } catch (IOException e) {
            e.printStackTrace();
        } finally {
            if (fw != null) {
                //4.关闭资源
                try {
                    fw.close();
                } catch (IOException e) {
                    e.printStackTrace();
                }
            }
        }
    }

实现文本之间的复制
 @Test
    public void test3() {
        FileReader fr = null;
        FileWriter fw = null;
        try {
            //1.创建File类的对象,指明读入与写出的文件
            File srcFile = new File("hello.txt");
            File destFile = new File("hello2.txt");

            //2.創建输入流与输出流的对象
            fr = new FileReader(srcFile);
            fw = new FileWriter(destFile);

            //3.数据的读入与写出的操作
            char[] cbuf = new char[5];
            int len;
            while ((len = fr.read(cbuf)) != -1) {
                fw.write(cbuf, 0, len);
            }
        } catch (IOException e) {
            e.printStackTrace();
        } finally {
            //4.关闭流资源
            try {
                if (fw != null)
                    fw.close();
            } catch (IOException e) {
                e.printStackTrace();
            }
            try {
                if (fr != null)
                    fr.close();
            } catch (IOException e) {
                e.printStackTrace();
            }
        }
    }
2.2 FileInputStream/FileOutputStream(字节流)
2.2.1 FileInputStream常用方法
int read():从输入流中读取数据的下一个字节。返回 0 到 255 范围内的 int 字节值。如果因为已经到达流末尾而没有可用的字节,则返回值 -1。int read(byte[] b):从此输入流中将最多 b.length 个字节的数据读入一个 byte 数组中。如果因为已经到达流末尾而没有可用的字节,则返回值 -1。否则以整数形式返回实际读取的字节数。int read(byte[] b, int off,int len):将输入流中最多 len 个数据字节读入 byte 数组。尝试读取 len 个字节,但读取的字节也可能小于该值。以整数形式返回实际读取的字节数。如果因为流位于文件末尾而没有可用的字节,则返回值 -1。public void close() throws IOException:关闭此输入流并释放与该流关联的所有系统资源。
2.2.2 FileOutputStream常用方法
void write(int b):将指定的字节写入此输出流。write 的常规协定是:向输出流写入一个字节。要写入的字节是参数 b 的八个低位。b 的 24 个高位将被忽略。 即写入0~255范围的。void write(byte[] b):将 b.length 个字节从指定的 byte 数组写入此输出流。write(b) 的常规协定是:应该与调用 write(b, 0, b.length) 的效果完全相同。void write(byte[] b,int off,int len):将指定 byte 数组中从偏移量 off 开始的 len 个字节写入此输出流。public void flush()throws IOException:刷新此输出流并强制写出所有缓冲的输出字节,调用此方法指示应将这些字节立即写入它们预期的目标。public void close() throws IOException:关闭此输出流并释放与该流关联的所有系统资源。
2.2.3 基本用法
 @Test
    public void test1() {
        FileInputStream fis = null;
        FileOutputStream fos = null;
        try {
            //1.造文件对象
            File srcFile = new File("photo1.jpg");
            File destFile = new File("photo2.jpg");

            //2.造流
            fis = new FileInputStream(srcFile);
            fos = new FileOutputStream(destFile);

            //3.读数据
            byte[] buffer = new byte[5];
            int len;
            while ((len = fis.read(buffer)) != -1) {
                fos.write(buffer, 0, len);
            }
        } catch (IOException e) {
            e.printStackTrace();
        } finally {
            //4.关闭资源
            try {
                if (fos != null)
                    fos.close();
            } catch (IOException e) {
                e.printStackTrace();
            }
            try {
                if (fis != null)
                    fis.close();
            } catch (IOException e) {
                e.printStackTrace();
            }
        }
    }
复制成功

3.缓冲流
- 为了提高数据读写的速度,Java API提供了带缓冲功能的流类,在使用这些流类时,会创建一个内部缓冲区数组,缺省使用8192个字节(8Kb)的缓冲区。
- 当读取数据时,数据按块读入缓冲区,其后的读操作则直接访问缓冲区
- 当使用BufferedInputStream读取字节文件时,BufferedInputStream会一次性从文件中读取8192个(8Kb),存在缓冲区中,直到缓冲区装满了,才重新从文件中读取下一个8192个字节数组。
- 向流中写入字节时,不会直接写到文件,先写到缓冲区中直到缓冲区写满,BufferedOutputStream才会把缓冲区中的数据一次性写到文件里。使用方法flush()可以强制将缓冲区的内容全部写入输出流
- 关闭流的顺序和打开流的顺序相反。只要关闭最外层流即可,关闭最外层流也会相应关闭内层节点流
- flush()方法的使用:手动将buffer中内容写入文件
- 如果是带缓冲区的流对象的close()方法,不但会关闭流,还会在关闭流之前刷新缓冲区,关闭后不能再写出
3.1 BufferedInputStream/BufferedOutputStream
@Test
public void test1() {
BufferedInputStream bis = null;
BufferedOutputStream bos = null;
try {
//1.造文件对象
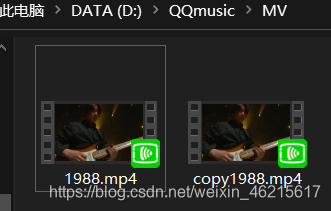
File srcFile = new File("D:\\QQmusic\\MV\\1988.mp4");
File descFile = new File("D:\\QQmusic\\MV\\copy1988.mp4");
//2.1造节点流
FileInputStream fis = new FileInputStream(srcFile);
FileOutputStream fos = new FileOutputStream(descFile);
//2.2造缓冲流
bis = new BufferedInputStream(fis);
bos = new BufferedOutputStream(fos);
//3.数据读入与写出操作
byte[] buffer = new byte[1024];
int len;
while ((len = bis.read(buffer)) != -1) {
bos.write(buffer, 0, len);
}
} catch (IOException e) {
e.printStackTrace();
} finally {
//4.关闭资源
try {
if (bos != null)
bos.close();
} catch (IOException e) {
e.printStackTrace();
}
try {
if (bis != null)
bis.close();
} catch (IOException e) {
e.printStackTrace();
}
//说明:先关闭外层的流,再关闭内层的流
// 关闭外层流的同时,内层流也会自动的进行关闭。关于内层流的关闭,我们可以省略.
// fos.close();
// fis.close();
}
}
结果:成功复制
3.2 BufferedReader/BufferedWriter
    @Test
    public void test2() throws IOException {
        BufferedReader br = null;
        BufferedWriter bw = null;
        try {
            //创建文件和相应的流
            //  BufferedReader br = new BufferedReader(new FileReader(new File("hello.txt")));
            br = new BufferedReader(new FileReader("hello.txt"));
            bw = new BufferedWriter(new FileWriter("hello3.txt"));

            //读写操作
            //方式一
            char[] cbuf = new char[1024];
            int len;
            while ((len = br.read(cbuf)) != -1) {
                bw.write(cbuf, 0, len);
            }
//        //方式二
//        String data;
//        while ((data = br.readLine())!= null){//一次读取字符文本文件的一行字符
//            bw.write(data);//data中不包含换行符, 一次写入一行字符串
//            bw.newLine();
//            //bw.write(data + "\n");
//        }
        } catch (IOException e) {
            e.printStackTrace();
        } finally {
            try {
                if (bw != null)
                    bw.close();
            } catch (IOException e) {
                e.printStackTrace();
            }
            try {
                if (br != null)
                    br.close();
            } catch (IOException e) {
                e.printStackTrace();
            }
        }
    }
4.转换流
4.1 InputStreamReader/OutputStreamWriter
- 转换流提供了在字节流和字符流之间的转换
- Java API提供了两个转换流:
- InputStreamReader:将InputStream转换为Reader
- OutputStreamWriter:将Writer转换为OutputStream
- 字节流中的数据都是字符时,转成字符流操作更高效。
- 很多时候我们使用转换流来处理文件乱码问题。实现编码和解码的功能。
- 编码:字符串——>字节数组
- 解码:字节数组——>字符串
/**
* 综合使用InputStreamReader和OutputStreamWriter
*/
@Test
public void test1() {
InputStreamReader isr = null;//默认IDE的字符集
OutputStreamWriter osw = null;
try {
//1.造文件对象
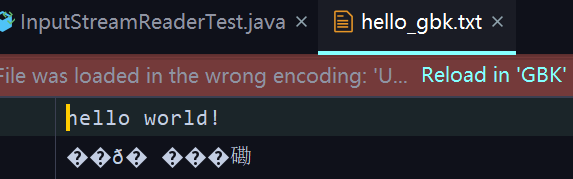
File file1 = new File("hello.txt");
File file2 = new File("hello_gbk.txt");
//2.造流
FileInputStream fis = new FileInputStream(file1);
FileOutputStream fos = new FileOutputStream(file2);
//InputStreamReader isr = new InputStreamReader(fis,"UTF-8");
isr = new InputStreamReader(fis);
osw = new OutputStreamWriter(fos, "gbk");
//OutputStreamWriter osw = new OutputStreamWriter(fos, "gbk");
//3.数据读写过程
char[] cbuf = new char[20];
int len;
while ((len = isr.read(cbuf)) != -1) {
osw.write(cbuf, 0, len);
}
} catch (IOException e) {
e.printStackTrace();
} finally {
//4.关闭资源
try {
if (isr != null)
isr.close();
} catch (IOException e) {
e.printStackTrace();
}
try {
if (osw != null)
osw.close();
} catch (IOException e) {
e.printStackTrace();
}
}
}

5.对象流
5.2 对象的的序列化
- ObjectlnputStream 类和 ObjectOutputStream 类除了可以实现基本数据类型与字符串的输人和输出之外,还可以实现对象的输人和输出。
- 序列化:用ObjectOutputStream类保存基本类型数据或对象的机制
- 反序列化:用ObjectInputStream类读取基本类型数据或对象的机制
- ObjectOutputStream和ObjectInputStream不能序列化static和transient修饰的成员变量
- 对象序列化机制允许把内存中的Java对象转换成平台无关的二进制流,从而允许把这种二进制流持久地保存在磁盘上,或通过网络将这种二进制流传输到另一个网络节点。//当其它程序获取了这种二进制流,就可以恢复成原来的Java对象
- 序列化的好处在于可将任何实现了Serializable接口的对象转化为字节数据,使其在保存和传输时可被还原
- 序列化是 RMI(Remote Method Invoke – 远程方法调用)过程的参数和返回值都必须实现的机制,而 RMI 是 JavaEE 的基础。因此序列化机制是JavaEE 平台的基础
- 如果需要让某个对象支持序列化机制,则必须让对象所属的类及其属性是可序列化的,为了让某个类是可序列化的,该类必须实现如下两个接口之一。否则,会抛出NotSerializableException异常
- Serializable
- Externalizable
- 凡是实现Serializable接口的类都有一个表示序列化版本标识符的静态变量:
- private static final long serialVersionUID;
- serialVersionUID用来表明类的不同版本间的兼容性。简言之,其目的是以序列化对象进行版本控制,有关各版本反序列化时是否兼容。
- 如果类没有显示定义这个静态常量,它的值是Java运行时环境根据类的内部细节自动生成的。若类的实例变量做了修改,serialVersionUID 可能发生变化。故建议,显式声明
- 简单来说,Java的序列化机制是通过在运行时判断类的serialVersionUID来验证版本一致性的。在进行反序列化时,JVM会把传来的字节流中的serialVersionUID与本地相应实体类的serialVersionUID进行比较,如果相同就认为是一致的,可以进行反序列化,否则就会出现序列化版本不一致的异常。(InvalidCastException)
谈谈你对java.io.Serializable接口的理解,我们知道它用于序列化,是空方法接口,还有其它认识吗?
- 实现了Serializable接口的对象,可将它们转换成一系列字节,并可在以后完全恢复回原来的样子。这一过程亦可通过网络进行。这意味着序列化机制能自动补偿操作系统间的差异。换句话说,可以先在Windows机器上创建一个对象,对其序列化,然后通过网络发给一台Unix机器,然后在那里准确无误地重新“装配”。不必关心数据在不同机器上如何表示,也不必关心字节的顺序或者其他任何细节。
- 由于大部分作为参数的类如String、Integer等都实现了java.io.Serializable的接口,也可以利用多态的性质,作为参数使接口更灵活。
5.1 ObjectInputStream/ObjectOutputStream
若某个类实现了 Serializable 接口,该类的对象就是可序列化的:
- 创建一个 ObjectOutputStream
- 调用 ObjectOutputStream 对象的writeObject(对象) 方法输出可序列化对象
- 注意写出一次,操作flush()一次
反序列化
- 创建一个 ObjectInputStream
- 调用 readObject() 方法读取流中的对象
强调:如果某个类的属性不是基本数据类型或 String
类型,而是另一个引用类型,那么这个引用类型必须是可序列化的,否则拥有该类型的Field 的类也不能序列化
package objectTest;

import org.junit.Test;

import java.io.*;

/**
 * @author mazouri
 * @create 2020-04-21 20:08
 */
public class ObjectInOutputStream {
    /**
     * 序列化过程:将内存中的java对象保存到磁盘中或通过网络传输出去
     * 使用ObjectOutputStream实现
     */
    @Test
    public void test1() {
        ObjectOutputStream oos = null;
        try {
            oos = new ObjectOutputStream(new FileOutputStream("object.dat"));
            oos.writeObject(new Person("张三", 18));
            //刷新操作
            oos.flush();

            oos.writeObject(new Person("李四", 23, 1001, new Account(5000)));
            oos.flush();
        } catch (IOException e) {
            e.printStackTrace();
        } finally {
            try {
                if (oos != null)
                    oos.close();
            } catch (IOException e) {
                e.printStackTrace();
            }
        }
    }

    /*
     *反序列化:将磁盘文件中的对象还原为内存中的一个java对象
     *使用ObjectInputStream来实现
     */
    @Test
    public void test2() {
        ObjectInputStream ois = null;
        try {
            ois = new ObjectInputStream(new FileInputStream("object.dat"));

            Person p = (Person) ois.readObject();
            Person p1 = (Person) ois.readObject();

            System.out.println(p + "\n" + p1);
        } catch (IOException | ClassNotFoundException e) {
            e.printStackTrace();
        } finally {
            try {
                if (ois != null)
                    ois.close();
            } catch (IOException e) {
                e.printStackTrace();
            }
        }
    }
}
输出结果:

6.随机存取文件流
- 到现在为止, 所使用的所有流都是只读的(read.only ) 或只写的(write.only)。这些流称为顺序( sequential)流。使用顺序流打开的文件称为顺序访问文件。顺序访问文件的内容不能更新。然而,经常需要修改文件。Java 提供了 RandomAccessFile 类,允许在文件的任意位置上进行读写。使用RandomAccessFile 类打开的文件称为随机访问文件。
- RandomAccessFile 声明在java.io包下,但直接继承于java.lang.Object类。并且它实现了DataInput、DataOutput这两个接口,也就意味着这个类既可以读也可以写
- RandomAccessFile 类支持 “随机访问” 的方式,程序可以直接跳到文件的任意地方来读、写文件
- 支持只访问文件的部分内容
- 可以向已存在的文件后追加内容
- RandomAccessFile 对象包含一个记录指针,用以标示当前读写处的位置。RandomAccessFile 类对象可以自由移动记录指针:
- long getFilePointer():获取文件记录指针的当前位置
- void seek(long pos):将文件记录指针定位到 pos 位置
6.1 RandomAccessFile
构造器
- public RandomAccessFile(File file, String mode)
- public RandomAccessFile(String name, String mode)
创建 RandomAccessFile 类实例需要指定一个 mode 参数,该参数指
定 RandomAccessFile 的访问模式:- r: 以只读方式打开
- rw:打开以便读取和写入
- rwd:打开以便读取和写入;同步文件内容的更新
- rws:打开以便读取和写入;同步文件内容和元数据的更新
- 如果模式为只读r。则不会创建文件,而是会去读取一个已经存在的文件,如果读取的文件不存在则会出现异常。 如果模式为rw读写。如果文件不存在则会去创建文件,如果存在则不会创建。
    @Test
    public void test1() {

        RandomAccessFile raf1 = null;
        RandomAccessFile raf2 = null;
        try {
            //1.
            raf1 = new RandomAccessFile(new File("爱情与友情.jpg"),"r");
            raf2 = new RandomAccessFile(new File("爱情与友情1.jpg"),"rw");
            //2.
            byte[] buffer = new byte[1024];
            int len;
            while((len = raf1.read(buffer)) != -1){
                raf2.write(buffer,0,len);
            }
        } catch (IOException e) {
            e.printStackTrace();
        } finally {
            //3.
            if(raf1 != null){
                try {
                    raf1.close();
                } catch (IOException e) {
                    e.printStackTrace();
                }

            }
            if(raf2 != null){
                try {
                    raf2.close();
                } catch (IOException e) {
                    e.printStackTrace();
                }

            }
        }
    }

    @Test
    public void test2() throws IOException {

        RandomAccessFile raf1 = new RandomAccessFile("hello.txt","rw");

        raf1.seek(3);//将指针调到角标为3的位置
        raf1.write("xyz".getBytes());//

        raf1.close();

    }
    /*
    使用RandomAccessFile实现数据的插入效果
     */
    @Test
    public void test3() throws IOException {

        RandomAccessFile raf1 = new RandomAccessFile("hello.txt","rw");

        raf1.seek(3);//将指针调到角标为3的位置
        //保存指针3后面的所有数据到StringBuilder中
        StringBuilder builder = new StringBuilder((int) new File("hello.txt").length());
        byte[] buffer = new byte[20];
        int len;
        while((len = raf1.read(buffer)) != -1){
            builder.append(new String(buffer,0,len)) ;
        }
        //调回指针,写入“xyz”
        raf1.seek(3);
        raf1.write("xyz".getBytes());

        //将StringBuilder中的数据写入到文件中
        raf1.write(builder.toString().getBytes());

        raf1.close();
    }
}
