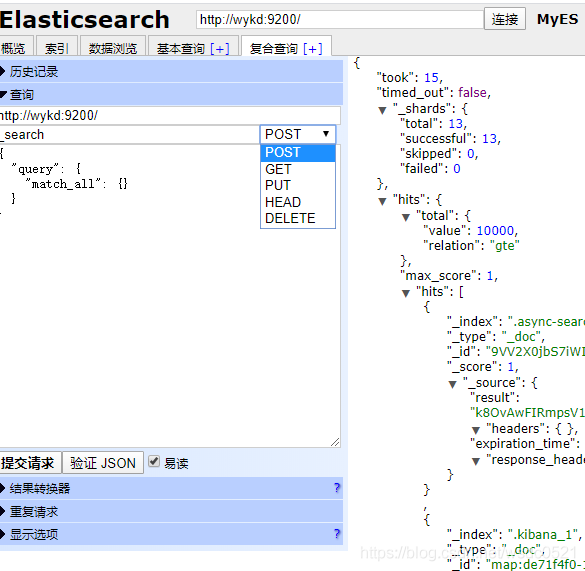
前面讲完了ELK的应用,我们可以通过curl命令或者java或python的request命令,或者kibana的开发面板对ES的数据直接操作,本篇介绍一个轻量又好用的插件:es-head。
ELK系列(一)、安装ElasticSearch+Logstash+Kibana+Filebeat-v7.7.0
ELK系列(二)、在Kibana中使用RESTful操作ES库
ELK系列(四)、Logstash读取nginx日志写入ES中
ELK系列(五)、Logstash修改@timestamp时间为日志的产生时间
ELK系列(六)、修改Nginx日志为Json格式并使用Logstash导入至ES
ELK系列(七)、Filebeat+Logstash采集多个日志文件并写入不同的ES索引中
ELK系列(八)、使用Filebeat+Redis+Logstash收集日志数据
ELK系列(十)、ES中文分词器IK插件安装和配置远程词库热加载
-------------------------------------ElasticSearch插件es-head安装及使用-------------------------------------
环境准备
CentOS7
ElasticSearchv7.7.0
Nodejs
es-head需要nodejs环境编译,先看看机器中是否已经有nodejs环境,如果没有的话我们先要安装nodejs环境:
nodjs官网:https://nodejs.org/en/download/
我下载的最新版v12.17:https://nodejs.org/dist/v12.17.0/node-v12.17.0-linux-x64.tar.xz
解压安装nodejs:
#解压
tar xvJf node-v12.17.0-linux-x64.tar.xz

#配置环境变量
mv node-v12.17.0-linux-x64 /opt/app/
vim /etc/profile

#新增下面的内容
export NODE_HOME=/opt/app/node-v12.17.0-linux-x64
export PATH=$JAVA_HOME/bin:$NODE_HOME/bin:$PATH

#刷新环境变量
source /etc/profile
测试node命令:
node -v

自此,需要的环境已准备完毕,下面开始安装es-head插件。
下载
地址:https://github.com/mobz/elasticsearch-head
可使用git命令在线下载,或者下载zip包之后,离线安装都可以。
使用git命令下载:
git clone https://github.com/mobz/elasticsearch-head.git
下载zip包并解压:
https://github.com/mobz/elasticsearch-head/archive/master.zip
unzip elasticsearch-head-master.zip
编译安装
安装
进入目录执行npm命令安装:
cd elasticsearch-head-master/
npm install
修改npm源
如果npm install一直卡在fetchMetadata: sill 不动的话,是因为访问的npm registry网络不行,我们可以修改为淘宝的仓库:
#查看npm仓库
npm config get registry
#或
npm info express

#修改为淘宝的源
npm config set registry https://registry.npm.taobao.org

这时候再执行npm install 速度就快很多了,这时候出现这个错误:
> [email protected] install /home/wyk/elasticsearch-head-master/node_modules/phantomjs-prebuilt
> node install.js

internal/modules/cjs/loader.js:969
  throw err;
  ^

Error: Cannot find module '/home/wyk/elasticsearch-head-master/node_modules/phantomjs-prebuilt/install.js'
    at Function.Module._resolveFilename (internal/modules/cjs/loader.js:966:15)
    at Function.Module._load (internal/modules/cjs/loader.js:842:27)
    at Function.executeUserEntryPoint [as runMain] (internal/modules/run_main.js:71:12)
    at internal/main/run_main_module.js:17:47 {
  code: 'MODULE_NOT_FOUND',
  requireStack: []
}
...
npm ERR! code ELIFECYCLE
npm ERR! errno 1
npm ERR! [email protected] install: `node install.js`
npm ERR! Exit status 1
npm ERR!
npm ERR! Failed at the [email protected] install script.
npm ERR! This is probably not a problem with npm. There is likely additional logging output above.

npm ERR! A complete log of this run can be found in:
npm ERR! /root/.npm/_logs/2020-05-27T03_40_09_380Z-debug.log忽略[email protected]
修改安装命令再安装就行了,出现下面的结果就是安装成功了:
npm install [email protected] --ignore-scripts
启动验证
配置ES:
vim $ES_HOME/config/elasticsearch.yml
http.cors.enabled: true
http.cors.allow-origin: "*"
修改完ES配置重启ES后,在es-head目录下使用下面的命令启动es-head:
npm run start
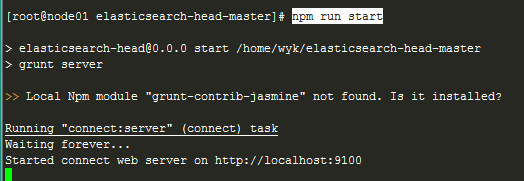
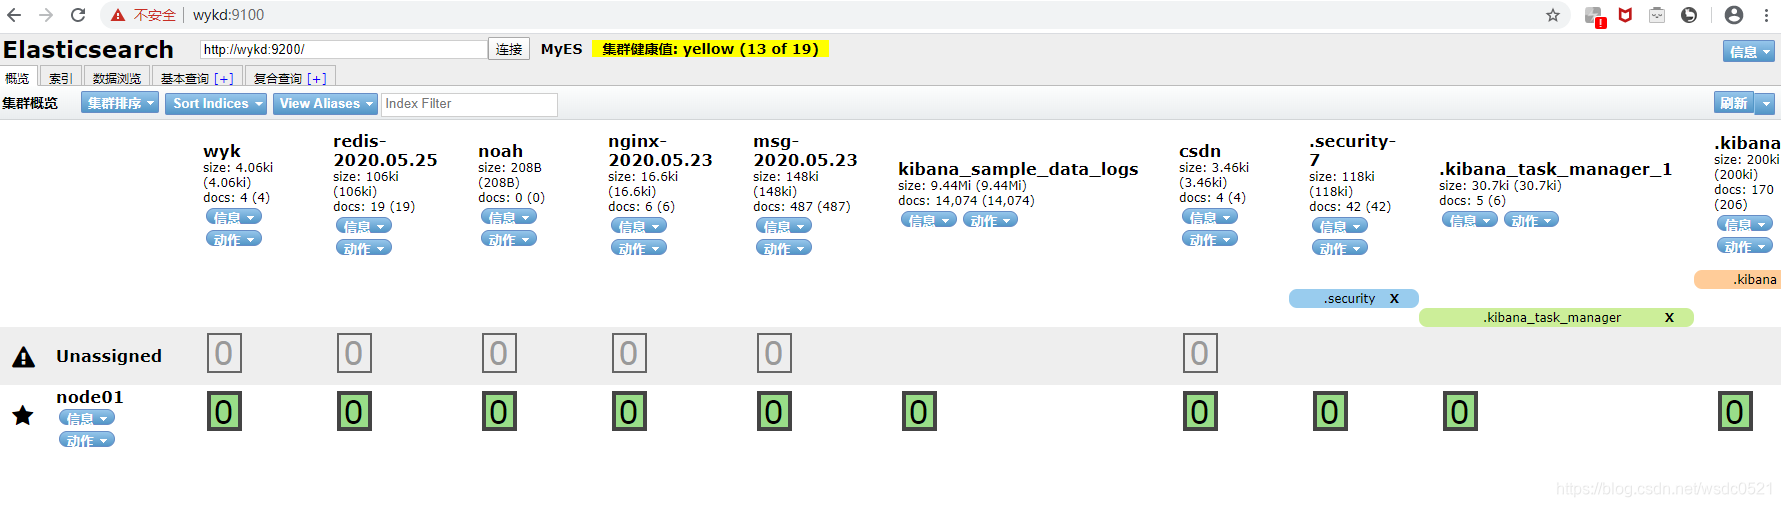
根据提示,我们访问http://wykd:9100 看看效果,已成功启动并访问我们的ES集群:

es-head使用密码访问ES
前面我们介绍过,推荐大家的ES开启安全认证,那么es-head怎么访问开启了XPACK安全认证的ES集群呢? 把集群修改其中一项配置然后重启ES集群:
vim $ES_HOME/config/elasticsearch.yml
http.cors.enabled: true
http.cors.allow-origin: "*"
#http.cors.allow-headers: Authorization  #这个配置改为下面的
http.cors.allow-headers: Authorization,X-Requested-With,Content-Length,Content-Type
xpack.security.enabled: true
xpack.security.transport.ssl.enabled: true
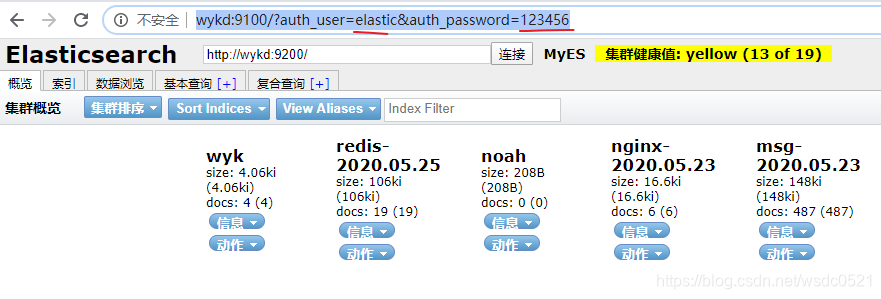
使用下面的路径访问带有XPACK安全认证的ES集群,密码改为自己的即可:
http://wykd:9100/?auth_user=elastic&auth_password=123456
希望本文对你有帮助,请点个赞鼓励一下作者吧~ 谢谢!