文章目录
目录准备
-
准备用户
ES不能以root身份启动。所以要提前新建一个用户,以完成后续操作。
useradd wuyujin添加新用户
su wuyujin切换到新用户。以下操作皆由用户wuyujin执行。 -
准备文件夹
我习惯把自己安装的环境放在/opt下。
关于ElasticSearch有一个成熟的技术栈ELK(ElasticSearch + Logstash + Kibana),为了后续可能会有的扩展:
新建文件夹sudo mkdir /opt/elk/,
修改父文件夹权限sudo chown wuyujin -R /opt/elk/
后续的ELK相关扩展我都会放在/opt/elk/下 -
下载
wget https://artifacts.elastic.co/downloads/elasticsearch/elasticsearch-6.1.1.tar.gz
更多版本见ElasticSearch 官网下载页 -
解压到指定目录
tar -zxvf elasticsearch-6.1.1.tar.gz -C /opt/elk/ -
进入解压好的目录
cd /opt/elk/elasticsearch-6.1.1/,并查看目录结构ll
wuyujin@ubuntu18:/opt/elk/elasticsearch-6.1.1$ ll
total 240
drwxr-xr-x  7 wuyujin wuyujin   4096 12月 17  2017 ./
drwxr-xr-x  3 wuyujin root      4096 2月   7 19:36 ../
drwxr-xr-x  2 wuyujin wuyujin   4096 12月 17  2017 bin/
drwxr-xr-x  2 wuyujin wuyujin   4096 12月 17  2017 config/
drwxr-xr-x  2 wuyujin wuyujin   4096 12月 17  2017 lib/
-rw-r--r--  1 wuyujin wuyujin  11358 12月 17  2017 LICENSE.txt
drwxr-xr-x 15 wuyujin wuyujin   4096 12月 17  2017 modules/
-rw-rw-r--  1 wuyujin wuyujin 191887 12月 17  2017 NOTICE.txt
drwxr-xr-x  2 wuyujin wuyujin   4096 12月 17  2017 plugins/
-rw-r--r--  1 wuyujin wuyujin   9326 12月 17  2017 README.textile
wuyujin@ubuntu18:/opt/elk/elasticsearch-6.1.1$
启动ES /opt/elk/elasticsearch-6.1.1/bin/elasticsearch
若有报错,解决方案见:ES启动常见错误
正常启动如下:
wuyujin@ubuntu18:/opt/elk/elasticsearch-6.1.1$ /opt/elk/elasticsearch-6.1.1/bin/elasticsearch
[2020-02-07T11:46:37,669][INFO ][o.e.n.Node               ] [] initializing ...
[2020-02-07T11:46:37,854][INFO ][o.e.e.NodeEnvironment    ] [YlLXEJ_] using [1] data paths, mounts [[/ (/dev/sda1)]], net usable_space [388.8gb], net total_space [457.4gb], types [ext4]
[2020-02-07T11:46:37,859][INFO ][o.e.e.NodeEnvironment    ] [YlLXEJ_] heap size [990.7mb], compressed ordinary object pointers [true]
[2020-02-07T11:46:37,861][INFO ][o.e.n.Node               ] node name [YlLXEJ_] derived from node ID [YlLXEJ_MSG-k5JPgHt1flw]; set [node.name] to override
[2020-02-07T11:46:37,861][INFO ][o.e.n.Node               ] version[6.1.1], pid[7109], build[bd92e7f/2017-12-17T20:23:25.338Z], OS[Linux/5.3.0-28-generic/amd64], JVM[Oracle Corporation/Java HotSpot(TM) 64-Bit Server VM/1.8.0_241/25.241-b07]
[2020-02-07T11:46:37,861][INFO ][o.e.n.Node               ] JVM arguments [-Xms1g, -Xmx1g, -XX:+UseConcMarkSweepGC, -XX:CMSInitiatingOccupancyFraction=75, -XX:+UseCMSInitiatingOccupancyOnly, -XX:+AlwaysPreTouch, -Xss1m, -Djava.awt.headless=true, -Dfile.encoding=UTF-8, -Djna.nosys=true, -XX:-OmitStackTraceInFastThrow, -Dio.netty.noUnsafe=true, -Dio.netty.noKeySetOptimization=true, -Dio.netty.recycler.maxCapacityPerThread=0, -Dlog4j.shutdownHookEnabled=false, -Dlog4j2.disable.jmx=true, -XX:+HeapDumpOnOutOfMemoryError, -Des.path.home=/opt/elk/elasticsearch-6.1.1, -Des.path.conf=/opt/elk/elasticsearch-6.1.1/config]
[2020-02-07T11:46:40,330][INFO ][o.e.p.PluginsService     ] [YlLXEJ_] loaded module [aggs-matrix-stats]
[2020-02-07T11:46:40,331][INFO ][o.e.p.PluginsService     ] [YlLXEJ_] loaded module [analysis-common]
[2020-02-07T11:46:40,332][INFO ][o.e.p.PluginsService     ] [YlLXEJ_] loaded module [ingest-common]
[2020-02-07T11:46:40,332][INFO ][o.e.p.PluginsService     ] [YlLXEJ_] loaded module [lang-expression]
[2020-02-07T11:46:40,332][INFO ][o.e.p.PluginsService     ] [YlLXEJ_] loaded module [lang-mustache]
[2020-02-07T11:46:40,333][INFO ][o.e.p.PluginsService     ] [YlLXEJ_] loaded module [lang-painless]
[2020-02-07T11:46:40,333][INFO ][o.e.p.PluginsService     ] [YlLXEJ_] loaded module [mapper-extras]
[2020-02-07T11:46:40,333][INFO ][o.e.p.PluginsService     ] [YlLXEJ_] loaded module [parent-join]
[2020-02-07T11:46:40,333][INFO ][o.e.p.PluginsService     ] [YlLXEJ_] loaded module [percolator]
[2020-02-07T11:46:40,333][INFO ][o.e.p.PluginsService     ] [YlLXEJ_] loaded module [reindex]
[2020-02-07T11:46:40,333][INFO ][o.e.p.PluginsService     ] [YlLXEJ_] loaded module [repository-url]
[2020-02-07T11:46:40,334][INFO ][o.e.p.PluginsService     ] [YlLXEJ_] loaded module [transport-netty4]
[2020-02-07T11:46:40,334][INFO ][o.e.p.PluginsService     ] [YlLXEJ_] loaded module [tribe]
[2020-02-07T11:46:40,334][INFO ][o.e.p.PluginsService     ] [YlLXEJ_] no plugins loaded
[2020-02-07T11:46:44,343][INFO ][o.e.d.DiscoveryModule    ] [YlLXEJ_] using discovery type [zen]
[2020-02-07T11:46:45,108][INFO ][o.e.n.Node               ] initialized
[2020-02-07T11:46:45,109][INFO ][o.e.n.Node               ] [YlLXEJ_] starting ...
[2020-02-07T11:46:45,307][INFO ][o.e.t.TransportService   ] [YlLXEJ_] publish_address {127.0.0.1:9300}, bound_addresses {[::1]:9300}, {127.0.0.1:9300}
[2020-02-07T11:46:45,325][WARN ][o.e.b.BootstrapChecks    ] [YlLXEJ_] max file descriptors [4096] for elasticsearch process is too low, increase to at least [65536]
[2020-02-07T11:46:45,326][WARN ][o.e.b.BootstrapChecks    ] [YlLXEJ_] max virtual memory areas vm.max_map_count [65530] is too low, increase to at least [262144]
[2020-02-07T11:46:48,459][INFO ][o.e.c.s.MasterService    ] [YlLXEJ_] zen-disco-elected-as-master ([0] nodes joined), reason: new_master {YlLXEJ_}{YlLXEJ_MSG-k5JPgHt1flw}{gj17a7gsSpCN9fzEIo8v_g}{127.0.0.1}{127.0.0.1:9300}
[2020-02-07T11:46:48,468][INFO ][o.e.c.s.ClusterApplierService] [YlLXEJ_] new_master {YlLXEJ_}{YlLXEJ_MSG-k5JPgHt1flw}{gj17a7gsSpCN9fzEIo8v_g}{127.0.0.1}{127.0.0.1:9300}, reason: apply cluster state (from master [master {YlLXEJ_}{YlLXEJ_MSG-k5JPgHt1flw}{gj17a7gsSpCN9fzEIo8v_g}{127.0.0.1}{127.0.0.1:9300} committed version [1] source [zen-disco-elected-as-master ([0] nodes joined)]])
[2020-02-07T11:46:48,550][INFO ][o.e.h.n.Netty4HttpServerTransport] [YlLXEJ_] publish_address {127.0.0.1:9200}, bound_addresses {[::1]:9200}, {127.0.0.1:9200}
[2020-02-07T11:46:48,551][INFO ][o.e.n.Node               ] [YlLXEJ_] started
[2020-02-07T11:46:48,559][INFO ][o.e.g.GatewayService     ] [YlLXEJ_] recovered [0] indices into cluster_state
这是没有修改配置文件直接运行的结果,其中:
YlLXEJ_是随机生成的节点名node.name。
[o.e.c.s.MasterService ]该行后面的127.0.0.1:9300是集群内多个ES节点通讯的端口。
[o.e.h.n.Netty4HttpServerTransport]该行后面的{127.0.0.1:9200}是本ES节点监听的HTTP地址。
NOTE 运行ES后,在ES根目录下会多出两个文件夹:data/和logs/
wuyujin@ubuntu18:/opt/elk/elasticsearch-6.1.1$ ll
total 248
drwxr-xr-x  9 wuyujin wuyujin   4096 2月   7 19:38 ./
drwxr-xr-x  3 wuyujin root      4096 2月   7 19:36 ../
drwxr-xr-x  2 wuyujin wuyujin   4096 12月 17  2017 bin/
drwxr-xr-x  2 wuyujin wuyujin   4096 12月 17  2017 config/
drwxr-xr-x  3 wuyujin wuyujin   4096 2月   7 19:38 data/
drwxr-xr-x  2 wuyujin wuyujin   4096 12月 17  2017 lib/
-rw-r--r--  1 wuyujin wuyujin  11358 12月 17  2017 LICENSE.txt
drwxr-xr-x  2 wuyujin wuyujin   4096 2月   7 19:38 logs/
drwxr-xr-x 15 wuyujin wuyujin   4096 12月 17  2017 modules/
-rw-rw-r--  1 wuyujin wuyujin 191887 12月 17  2017 NOTICE.txt
drwxr-xr-x  2 wuyujin wuyujin   4096 12月 17  2017 plugins/
-rw-r--r--  1 wuyujin wuyujin   9326 12月 17  2017 README.textile
wuyujin@ubuntu18:/opt/elk/elasticsearch-6.1.1$
wuyujin@ubuntu18:/opt/elk/elasticsearch-6.1.1$ tree -h logs/
logs/
├── [   0]  elasticsearch_deprecation.log
├── [   0]  elasticsearch_index_indexing_slowlog.log
├── [   0]  elasticsearch_index_search_slowlog.log
└── [4.4K]  elasticsearch.log

0 directories, 4 files
wuyujin@ubuntu18:/opt/elk/elasticsearch-6.1.1$
wuyujin@ubuntu18:/opt/elk/elasticsearch-6.1.1$ tree -h data/
data/
└── [4.0K]  nodes
    └── [4.0K]  0
        ├── [   0]  node.lock
        └── [4.0K]  _state
            ├── [ 140]  global-0.st
            └── [  71]  node-0.st

3 directories, 3 files
wuyujin@ubuntu18:/opt/elk/elasticsearch-6.1.1$
要注意data/下新增的数据(其中包含接集群名称、节点名称等)。

- 测试
两种方式测试:通过浏览器或命令行。- 浏览器访问
127.0.0.1:9200这个地址是Netty4HttpServerTransport那一行后面的地址publish_address。
若正常如下图:
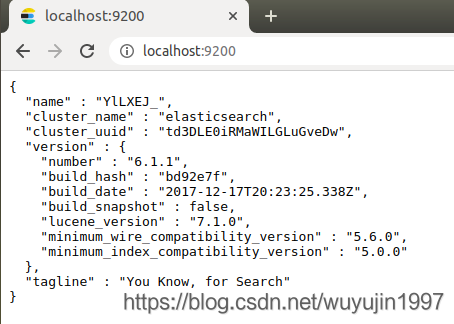
如果是在服务器上调配,没有图形化界面,就只能通过命令行,如下: - 命令行
curl -X GET "http://localhost:9200"可以得到响应。
wuyujin@ubuntu18:/opt/elk/elasticsearch-6.1.1$ curl -X GET "http://localhost:9200" { "name" : "YlLXEJ_", "cluster_name" : "elasticsearch", "cluster_uuid" : "td3DLE0iRMaWILGLuGveDw", "version" : { "number" : "6.1.1", "build_hash" : "bd92e7f", "build_date" : "2017-12-17T20:23:25.338Z", "build_snapshot" : false, "lucene_version" : "7.1.0", "minimum_wire_compatibility_version" : "5.6.0", "minimum_index_compatibility_version" : "5.0.0" }, "tagline" : "You Know, for Search" } wuyujin@ubuntu18:/opt/elk/elasticsearch-6.1.1$ - 浏览器访问
若有以上响应,则启动成功。
ES配置(单节点)
-
查询本机IP
ifconfig
ES默认监听的IP地址是本机的127.0.0.1,启动后而只可以在本机通过127.0.0.1或localhost加端口号访问。
如果想要被其他的机器访问,则需要配置为本机的IP。
我的机器IP是192.168.1.6,是一个局域网IP。
这个IP会在后面的配置中用到。 -
修改配置文件(单节点配置)
gedit ./config/elasticsearch.yml
ES配置 官网文档
# 集群名称
cluster.name: cluster-wuyujin
# 节点名称
node.name: node-liubei

# 监听的地址
network.host: 192.168.1.6
http.port: 9200

# 发现集群内的其他节点
# discovery.zen.minimum_master_nodes: 2
# discovery.zen.ping.unicase.hosts: ["192.168.1.6"]

# 本节点是否存储数据
node.data: true
# 本节点是否可被选举为主节点
node.master: true

# 允许跨域资源访问(ES-head插件)
http.cors.enabled: true
http.cors.allow-origin: "*"

# 日志和数据的存储路径(注意权限)
# path.logs: /path/to/logs
# path.data: /path/to/data
然后启动ES,访问curl -X GET "192.168.1.6:9200"。并在局域网内别的机器访问192.168.1.6:9200进行测试。
NOTE 有的时候会报错。注释掉network.host: 192.168.1.6配置行就可以正常启动。
- 关于
network.host127.0.0.1或localhost默认值。只能在本机访问。- 如
192.168.1.6,别的机器可以访问到的IP,则在本机部署启动之后,在别的机器上也可以访问。
多节点配置
ES的本质是一个分布式数据库,其底层调用了使用倒排索引存储数据的Lucene,所以查询关键词所在位置的执行速度明显优于关系型数据库。
准备三个节点,暂时部署在同一台机器上(因为我暂时只有一台测试机),机器IP为192.168.1.6。
三台机器的节点名称分别为node-liubei, node-guanyu, node-zhangfei。
依次监听的HTTP端口号为:9201, 9202, 9203。
- 解压
tar -zxvf elasticsearch-6.1.1.zip -C /opt/elk/cluster-wuyujin
进入该文件夹cd /opt/elk/cluster-wuyujin/
查看内容ll
wuyujin@ubuntu18:~$ cd /opt/elk/cluster-wuyujin/
wuyujin@ubuntu18:/opt/elk/cluster-wuyujin$ # 查看文件夹内容
wuyujin@ubuntu18:/opt/elk/cluster-wuyujin$ ll
total 12
drwxr-xr-x 3 wuyujin wuyujin 4096 2月   7 21:25 ./
drwxr-xr-x 4 wuyujin root    4096 2月   7 21:21 ../
drwxr-xr-x 7 wuyujin wuyujin 4096 12月 17  2017 elasticsearch-6.1.1/
wuyujin@ubuntu18:/opt/elk/cluster-wuyujin$ # 复制三份目录,名称非别为刘关张(可自定义)
wuyujin@ubuntu18:/opt/elk/cluster-wuyujin$ cp elasticsearch-6.1.1/ es-liubei -r
wuyujin@ubuntu18:/opt/elk/cluster-wuyujin$ cp elasticsearch-6.1.1/ es-guanyu -r
wuyujin@ubuntu18:/opt/elk/cluster-wuyujin$ cp elasticsearch-6.1.1/ es-zhangfei -r
wuyujin@ubuntu18:/opt/elk/cluster-wuyujin$ # 删除不需要的文件夹
wuyujin@ubuntu18:/opt/elk/cluster-wuyujin$ rm elasticsearch-6.1.1/ -rf
wuyujin@ubuntu18:/opt/elk/cluster-wuyujin$ ll
total 20
drwxr-xr-x 5 wuyujin wuyujin 4096 2月   7 21:26 ./
drwxr-xr-x 4 wuyujin root    4096 2月   7 21:21 ../
drwxr-xr-x 7 wuyujin wuyujin 4096 2月   7 21:25 es-guanyu/
drwxr-xr-x 7 wuyujin wuyujin 4096 2月   7 21:25 es-liubei/
drwxr-xr-x 7 wuyujin wuyujin 4096 2月   7 21:25 es-zhangfei/
wuyujin@ubuntu18:/opt/elk/cluster-wuyujin$
以上,文件夹名称和之后配置文件中的集群/节点名称并无关系。只要一一对应即可 。
- 配置文件
分别修改三个实例中的./config/elasticsearch.yml文件。配置分别为:- 编辑liubei的配置文件
gedit es-liubei/config/elasticsearch.yml
- 编辑liubei的配置文件
cluster.name: cluster-wuyujin

node.name: node-liubei
network.host: 192.168.1.6
http.port: 9201

discovery.zen.minimum_master_nodes: 2
discovery.zen.ping.unicase.hosts: ["192.168.1.6"]

node.data: true
node.master: true

http.cors.enabled: true
http.cors.allow-origin: "*"

# path.logs: /path/to/logs
# path.data: /path/to/data
- 编辑guanyu `gedit es-guanyu/config/elasticsearch.yml`
cluster.name: cluster-wuyujin

node.name: node-guanyu
network.host: 192.168.1.6
http.port: 9202

discovery.zen.minimum_master_nodes: 2
discovery.zen.ping.unicase.hosts: ["192.168.1.6"]

node.data: true
node.master: true

http.cors.enabled: true
http.cors.allow-origin: "*"

# path.logs: /path/to/logs
# path.data: /path/to/data
- 编辑zhangfei `gedit es-zhangfei/config/elasticsearch.yml`
cluster.name: cluster-wuyujin

node.name: node-zhangfei
network.host: 192.168.1.6
http.port: 9203

discovery.zen.minimum_master_nodes: 2
discovery.zen.ping.unicase.hosts: ["192.168.1.6"]

node.data: true
node.master: true

http.cors.enabled: true
http.cors.allow-origin: "*"

# path.logs: /path/to/logs
# path.data: /path/to/data
- 启动
之前一直是直接启动ES,在shell上打印消息。缺点是关闭该shell窗口也会造成ES的停止。
ES后台启动:elasticsearch --daemonizedaemon是守护进程的意思。
执行以下命令,将三个节点都启动(如果想先调试启动无误的话,可以依次在多个shell中启动):
./es-liubei/bin/elasticsearch --daemonize
./es-guanyu/bin/elasticsearch --daemonize
./es-zhangfei/bin/elasticsearch --daemonize
- 访问测试
curl -X GET "192.168.1.6:9201"
curl -X GET "192.168.1.6:9202"
curl -X GET "192.168.1.6:9203"
应该依次可以看到节点的信息(包括节点所属的集群名称,节点的名称等)
- 停止
ps -aux | grep elastic      # 查找相关进程
kill -9 进程号      # 根据pid杀死对应的进程
插件elasticsearch-head的使用
假设读者已经知道ES-head的用途。以下为环境搭建过程:
- 下载
wget https://codeload.github.com/mobz/elasticsearch-head/zip/master
github 下载页面 - 解压
unzip elasticsearch-head-master.zip - 进入文件夹
cd elasticsearch-head-master/ - 安装node依赖
npm install - ES-head是一个node应用,启动它
npm run start。启动时读取的配置信息在package.json中,可自行修改。 - 浏览器访问ES-head localhost:9100
- 使用ES-head插件要访问哪个节点呢?填写其地址即可(访问一个集群中的任一节点效果相同)
如:192.168.1.6:9201,点击连接按钮,即可看到各个节点的信息(需要在ES中提前设置好跨域访问)。
之前在各个节点的配置文件已经设置过了跨域访问(否则不能使用ES-head读写访问ES的数据):
http.cors.enabled: true
http.cors.allow-origin: "*"
三个端口:9100, 9200, 9300
- 9100 ES-head插件默认监听的端口,访问ES-head:ip:9100,若ES-head插件运行于本地,则ip为localhost或127.0.0.1.
- 9300 同一个ES集群中,多个节点之间通信的端口,一般不修改。
- 9200 每一个ES节点都会监听该机器上的一个端口,用于接受HTTP请求。
相当于tomcat的8080。
当一台机器上运行好几个服务器的时候,这个端口不能重复。否则报错port already bind。
ES启动常见错误
max file descriptors [4096] for elasticsearch process is too low, increase to at least [65536]
最大文件打开个数:4096太少,需要增加到至少为65535。
修改文件:/etc/security/limits.conf
添加配置:
# max file descriptors [4096] for elasticsearch process is too low, increase to at least [65536]
*               soft    nofile          65536
*               hard    nofile          65536
测试 ulimit -Sn; ulimit -Hn。(也可以使用命令行sudo ulimit -n 65535设置参数值)
max number of threads [3818] for user [es] is too low, increase to at least [4096]
配置文件同上,/etc/security/limits.conf
用户的最大线程数:3818太少,需要增加到至少为4096。
# max number of threads [3818] for user [es] is too low, increase to at least [4096]
*               soft    nproc           4096
*               hard    nproc           4096
测试: ulimit -Su; ulimit -Hu。也可以使用命令行sudo ulimit -u 4096设置参数值。
-
max virtual memory areas vm.max_map_count [65530] is too low, increase to at least [262144]
最大的虚拟内存区域vm.max_map_count参数的值:65530太少了,增加到至少262144。
依旧有两种修改方式:- 修改配置文件
vi /etc/sysctl.conf
增加vm.max_map_count=262144
使配置生效sysctl -p - 直接命令行修改,执行:
sudo sysctl -w vm.max_map_count=262144
- 修改配置文件
-
权限问题
ES不能用root权限启动,否则会报错Caused by: java.lang.RuntimeException: can not run elasticsearch as root
所以用普通用户执行即可。
用普通用户启动ES需要保证前提:ES的文件夹权限必须授权给该普通用户chown 用户名 -R 目录名,否则会出现没有访问权限的错误。
