MobX一直是主要用于JS的主要的状态管理技术。flutter 现在关于状态管理的方案有 Scoped Model,Inherited Widget,Redux for Flutter,甚至是BLoC 。
之前写React的时候就有用过mobx,很是喜欢 , 现在发现提供了dart版本,于是来学习一下. 也许会成为最好用的状态管理工具呢
介绍
MobX只是一个状态管理库,可以很容易地将应用程序的被动数据与UI连接起来.
使用
导包
首先,我们将导入mobx,flutter_mobx,作为我们的依赖项。
此外,我们必须导入mobx_codegen和build_runner作为dev依赖项。
dependencies:
  flutter:
    sdk: flutter

  mobx: ^0.1.4
  flutter_mobx: ^0.1.3

dev_dependencies:
  flutter_test:
    sdk: flutter
  mobx_codegen: ^0.1.3
  build_runner: ^1.4.0
创建可观察对象
然后我们先创建一个dart文件:
/*
 * author: Created by 李卓原 on 2019/5/16.
 * email: [email protected]
 *
 */

import 'package:mobx/mobx.dart';

part 'counter.g.dart';

class Counter = CounterBase with _$Counter;

abstract class CounterBase implements Store {
  @observable
  int value = 0;

  @action
  void increment() {
    value++;
  }

  @action
  void decrement() {
    value--;
  }

  @action
  void set(int value) {
    this.value = value;
  }
}
没有什么复杂的内容,就是创建一个类,其中有一个可观察的value属性.
之后运行 pub run build_runner build
如果无效请运行 flutter packages pub run build_runner build
要有以下两行代码,这个命令才会生成counter.g.dart文件
part 'counter.g.dart';

class Counter = CounterBase with _$Counter;
如果要在进行更改时使其在后台运行,请使用:
pub run build_runner watch
运行这个命令之后, 当你的可观察类有内容修改时,会自动根据最新代码生成对应的.g.dart文件
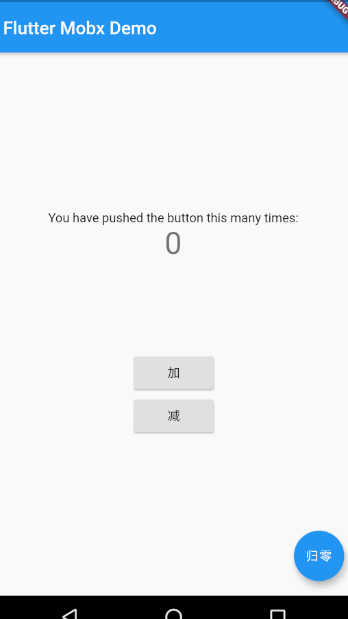
使用可观察对象来展示数据
可将要观察的组件用Observer包裹:
            Observer(
              builder: (_) => Text(
                    '${counter.value}',
                    style: Theme.of(context).textTheme.display1,
                  ),
            ),
class _MyHomePageState extends State<MyHomePage> {
  final Counter counter = Counter();

  @override
  Widget build(BuildContext context) {
    return Scaffold(
      appBar: AppBar(
        title: Text(widget.title),
      ),
      body: Center(
        child: Column(
          mainAxisAlignment: MainAxisAlignment.center,
          children: <Widget>[
            Text(
              'You have pushed the button this many times:',
            ),
            Observer(
              builder: (_) => Text(
                    '${counter.value}',
                    style: Theme.of(context).textTheme.display1,
                  ),
            ),
            SizedBox(height: 100),
            RaisedButton(
              child: Text('加'),
              onPressed: counter.increment,
            ),
            RaisedButton(
              child: Text('减'),
              onPressed: counter.decrement,
            ),
          ],
        ),
      ),
      floatingActionButton: FloatingActionButton(
        onPressed: () {
          counter.set(0);
        },
        tooltip: '归零',
        child: Text('归零'),
      ), // This trailing comma makes auto-formatting nicer for build methods.
    );
  }
}
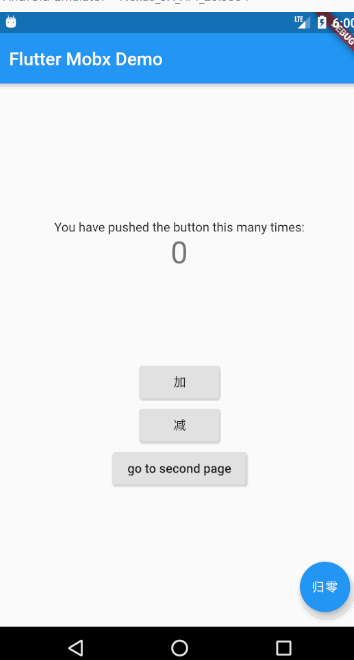
效果:
多个页面共享状态
假设我有几个页面都需要展示这个count , 怎么做到改变一处,其他的地方也跟着改变呢?
在Counter类中添加以下代码:
final Counter counter = Counter();
即创建了一个全局的counter,用的时候用这个counter就可以了.
第一个页面:
class _MyHomePageState extends State<MyHomePage> {
  // final Counter counter = Counter();
  @override
  Widget build(BuildContext context) {
    return Scaffold(
      appBar: AppBar(
        title: Text(widget.title),
      ),
      body: Center(
        child: Column(
          mainAxisAlignment: MainAxisAlignment.center,
          children: <Widget>[
            Text(
              'You have pushed the button this many times:',
            ),
            Observer(
              builder: (_) => Text(
                    '${counter.value}',
                    style: Theme.of(context).textTheme.display1,
                  ),
            ),
            SizedBox(height: 100),
            RaisedButton(
              child: Text('加'),
              onPressed: counter.increment,
            ),
            RaisedButton(
              child: Text('减'),
              onPressed: counter.decrement,
            ),
            RaisedButton(
                child: Text('go to second page'),
                onPressed: () => Navigator.pushNamed(context, '/second')),
          ],
        ),
      ),
      floatingActionButton: FloatingActionButton(
        onPressed: () {
          counter.set(0);
        },
        tooltip: '归零',
        child: Text('归零'),
      ), // This trailing comma makes auto-formatting nicer for build methods.
    );
  }
}
第二个页面:
class _SecondPageState extends State<SecondPage> {
  @override
  Widget build(BuildContext context) {
    return Scaffold(
      appBar: AppBar(
        title: Text('second page'),
      ),
      body: Center(
        child: Observer(
          builder: (_) => Text(
                'count is ${counter.value}',
                style: TextStyle(fontSize: 30),
              ),
        ),
      ),
      floatingActionButton: FloatingActionButton(
        child: Icon(Icons.add),
        onPressed: counter.increment,
      ),
    );
  }
}