Debug_printf_Viewer 使用方法
平时调试代码的时候,都喜欢用printf函数来输出一些打印信息,来提示自己代码的执行情况。
在刚开始接触这个调试方法的时候,通常采用的方式是浪费一个芯片的串口,然后利用TTL转USB模块,在PC端的串口调试助手中打印提示信息。
另一种方式是硬件仿真的时候可以利用J-Link等工具实现的一种打印提示信息的方式。
有时不需要硬件,只想看一下软件代码运算的结果,这时可通过MDK输出一些打印信息用于调试代码。
这里总结一下在软件仿真调试时,使用 printf 的方法。
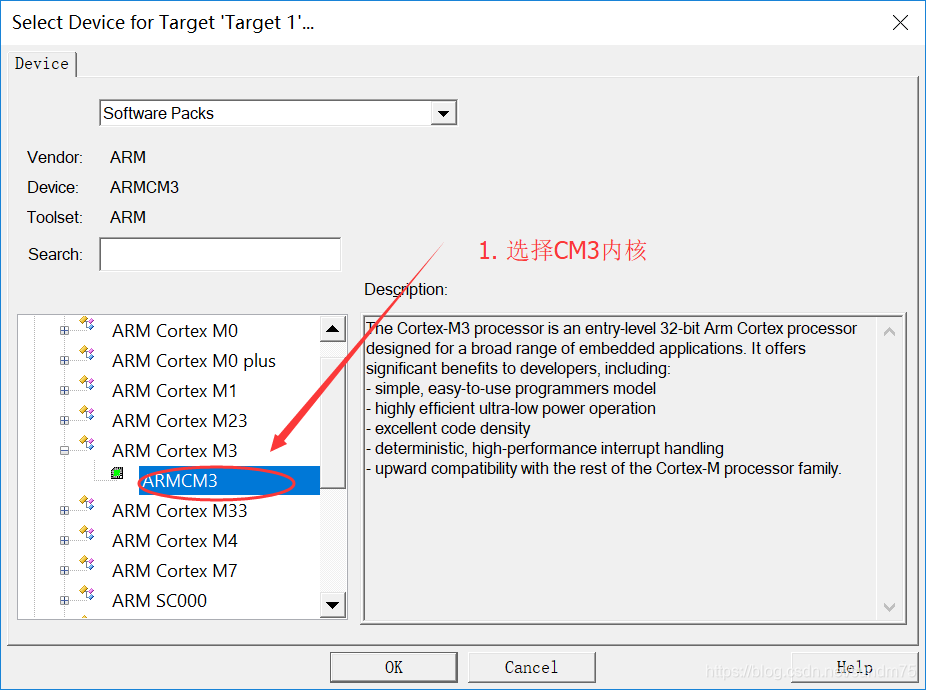
1.首先新建工程
选择 CM3 内核,选择存储位置,并 在创建工程的过程中,勾选 CMSIS 的 core 和 startup.

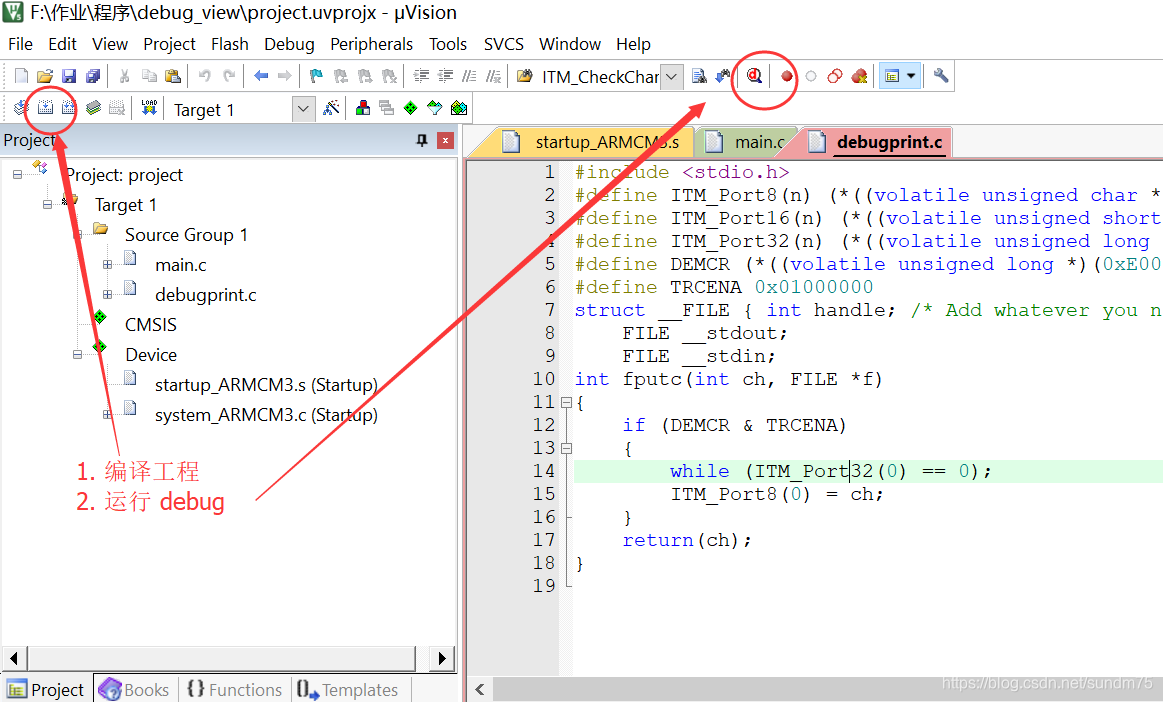
2. 添加 main.c 和 debugprint.c 文件
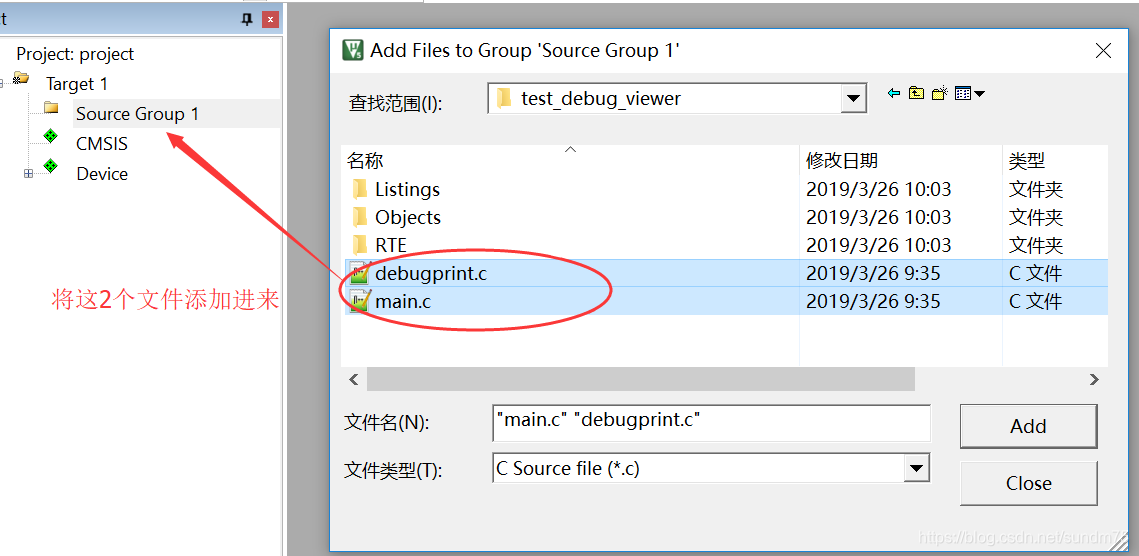
main.c 文件:
#include <stdio.h>
int main(void)
{
 int i;
 while(1)
 {
  printf("hello world i=%d \r\n",i);
  i++;
 }
}
debugprint.c 文件:
#include <stdio.h>
#define ITM_Port8(n) (*((volatile unsigned char *)(0xE0000000+4*n)))
#define ITM_Port16(n) (*((volatile unsigned short*)(0xE0000000+4*n)))
#define ITM_Port32(n) (*((volatile unsigned long *)(0xE0000000+4*n)))
#define DEMCR (*((volatile unsigned long *)(0xE000EDFC)))
#define TRCENA 0x01000000
struct __FILE { int handle; /* Add whatever you need here */ };
    FILE __stdout;
    FILE __stdin;
int fputc(int ch, FILE *f)
{
    if (DEMCR & TRCENA)
    {
        while (ITM_Port32(0) == 0);
        ITM_Port8(0) = ch;
    }
    return(ch);
}
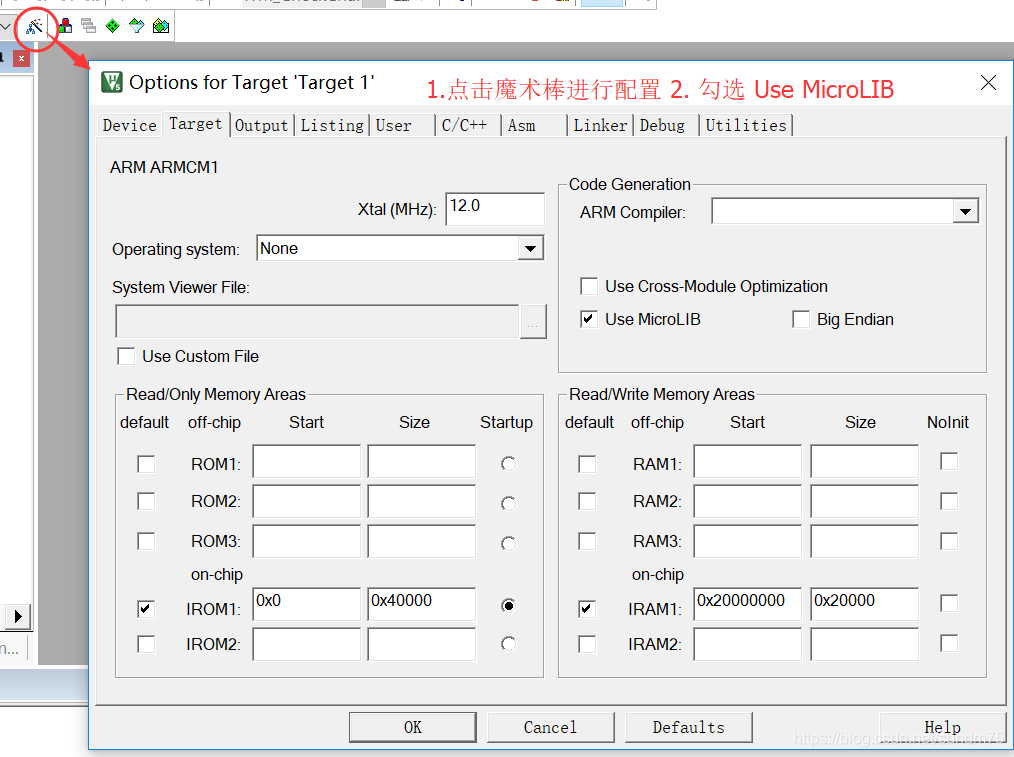
3. 添加微库,配置工程为仿真模式
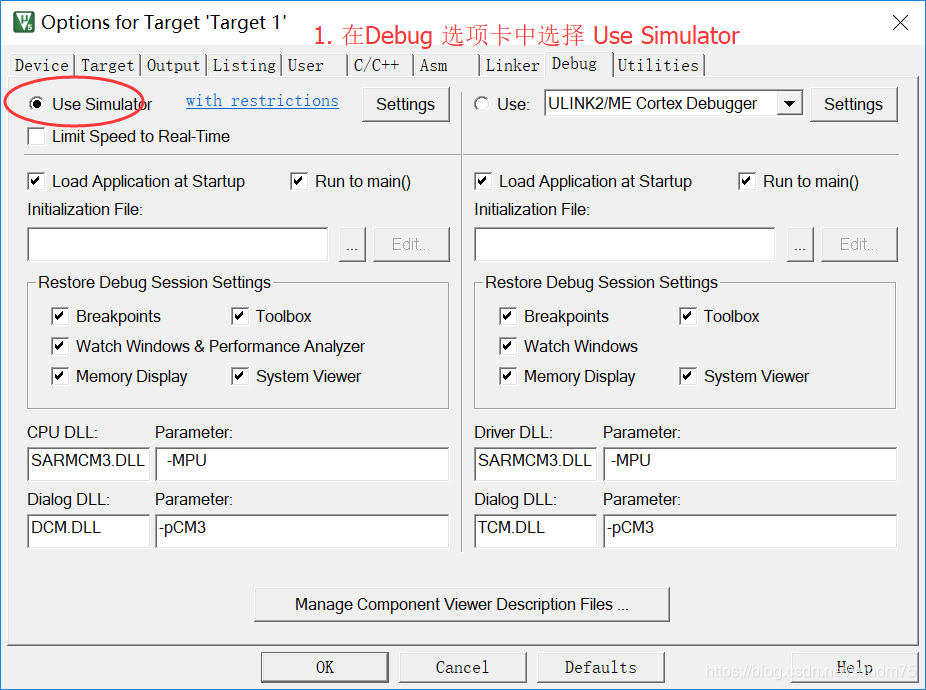
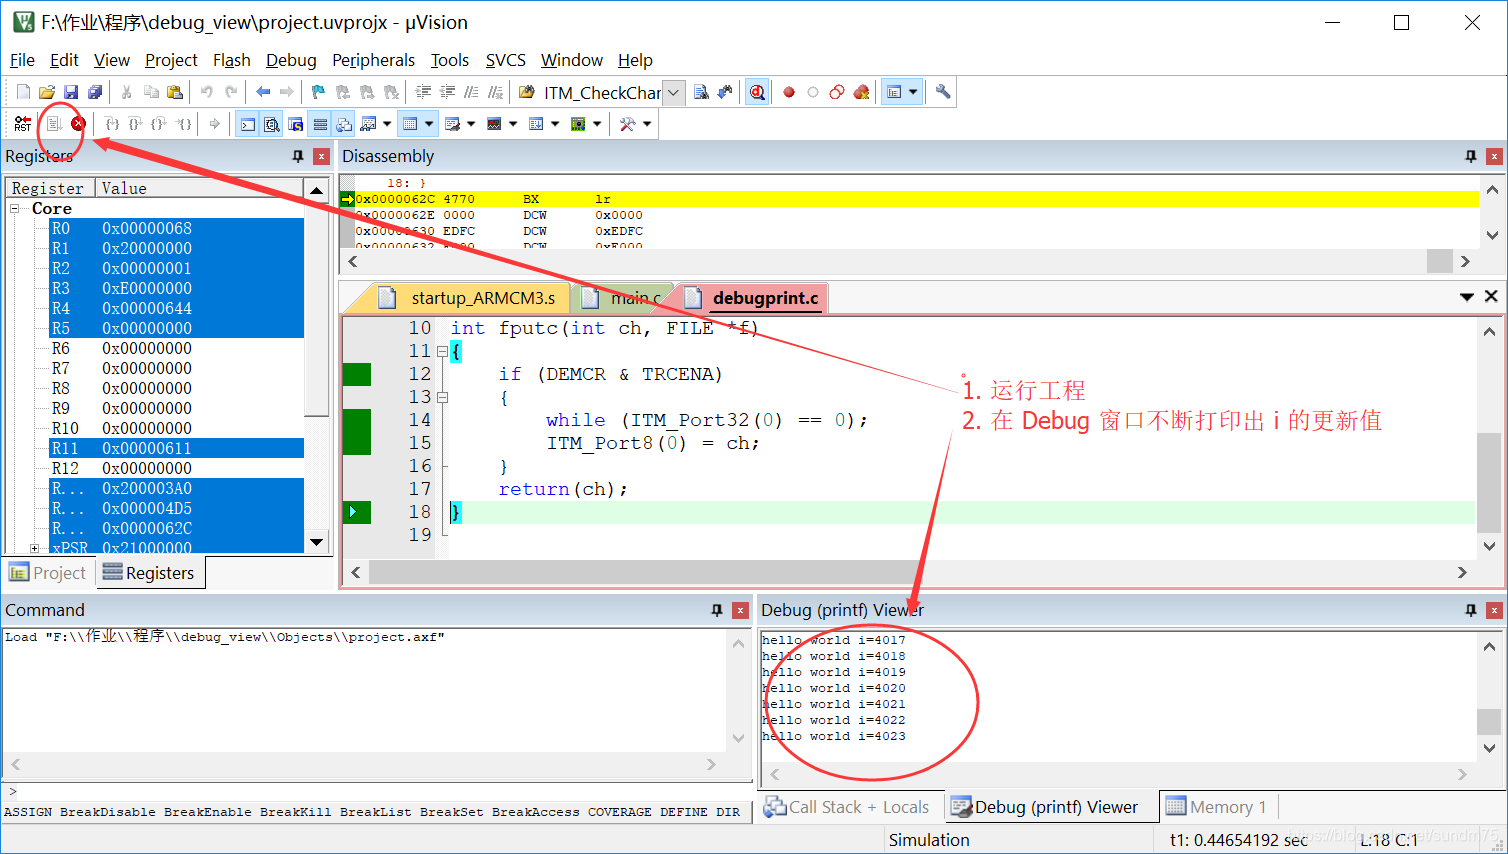
4. 在 Debug窗口 配置显示 Debug_printf_Viewer
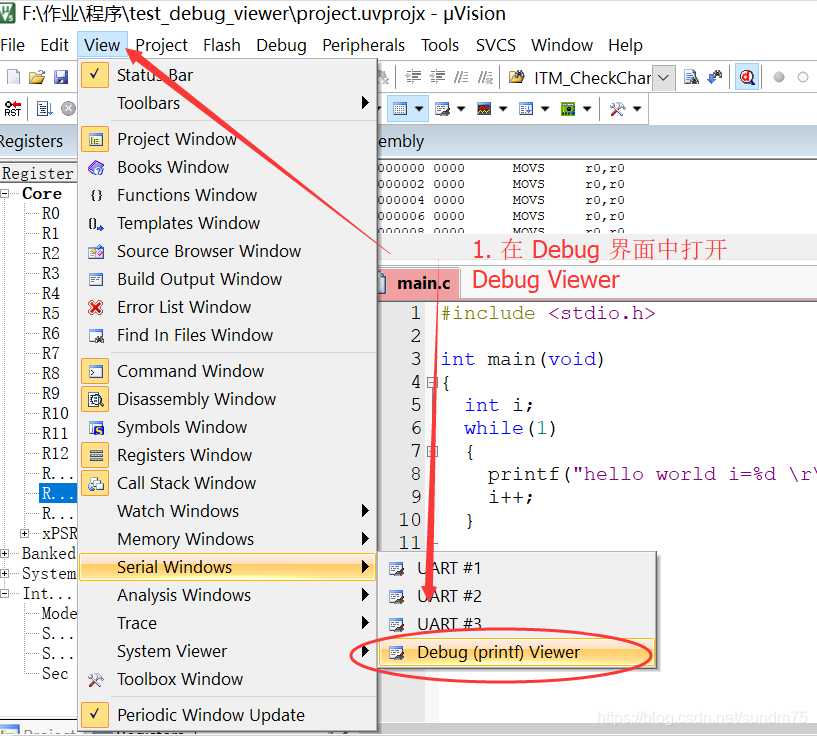
5. 运行程序,看到打印结果