1.VO对象转化JSON说明
1.VO转化JSON原理
1.JSON串中的内容,就是对象的属性和属性的值.
2.JSON串在进行转化时,调用对象身上的get/set方法.获取属性和属性的值.
//树形结构的格式要求.
@Data	//get 获取属性值   set  为属性赋值
@Accessors(chain=true)
@NoArgsConstructor
@AllArgsConstructor
public class EasyUITree {

	private Long id;
	private String text;	//文本信息
	private String state;	//节点状态 open/closed

	public void setLyj() {

	}

	public String getLyj() {

		return "LYJ你好,注意身体!!!";
	}
}
2.F12开发者工具说明
1).

2).网络请求的资源

3).响应信息

3.导入聚合项目
说明:由于京淘项目是一个聚合工程.所以需要导入项目时,需要通过如下步骤
1).选择maven,导入项目

2).将项目导入工作空间中.

3).导入项目

4.商品信息修改
4.1 页面分析

4.2 商品修改的业务接口介绍
1.url请求地址: /item/update
2.用户请求参数: 整个form表单参数
3.返回值结果: 采用系统返回值数据.
业务说明:当用户点击更新操作时,需要接收用户请求参数. 根据商品的ID号实现数据修改.
4.3 编辑ItemController
/**
	 * 完成商品更新操作
	 * 1.url: http://localhost:8091/item/update
	 * 2.请求参数:  form表单     使用对象接收.
	 * 3.返回值结果: 系统返回值数据
	 */
	@RequestMapping("/update")
	public SysResult itemUpdate(Item item) {

		itemService.itemUpdate(item);
		return SysResult.success();
	}
4.4 编辑ItemService
//MP更新操作时,如果使用byId的方式操作,则where id = #{xxxxx},根据主键更新.
	//其余的参数都会作为更新的数据进行操作.
	@Override
	public void itemUpdate(Item item) {

		item.setUpdated(new Date());
		itemMapper.updateById(item);

	}
5 商品删除
5.1 页面分析
1).请求url地址
2).请求参数

3).页面ajax

5.2 商品删除的业务接口
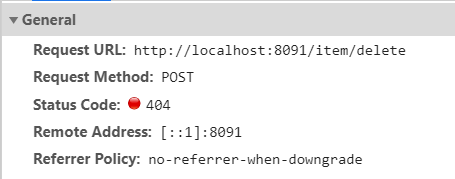
- url地址: /item/delete
- 请求的参数: ids: 1474392211,1474392205,1474392204
- 返回值结果: 系统返回值变量
- 业务说明: 用户可以一次性的删除多个商品信息.最好的方式应该批量删除.
5.3 编辑ItemController
/**
	 * 完成商品删除操作
	 * 1.url: http://localhost:8091/item/delete
	 * 2.请求参数:  ids: 101,102,103   3个值
	 * 3.返回值结果: 系统返回值数据
	 *
	 * sql:delete from tb_item where id=100 and id=101 and id=102
	 *
	 * String[] strIds = ids.split(",");
		Long[] longIds = {};
		for(int i=0;i<strIds.length;i++){

			longIds[i] = Long.parseLong(strIds[i]);
		}

		说明:根据用户提交的参数,可以自动的实现数据类型的转化.
		规则: 字符串使用","号进行分割,则利用[]形式转化数据.
	 */
	@RequestMapping("/delete")
	public SysResult itemDelete(Long[] ids) {

		//1.需要将字符串转化为字符串数组
		itemService.itemDeletes(ids);
		return SysResult.success();
	}
5.4 编辑ItemService
@Override
	public void itemDeletes(Long[] ids) {
		//Long[] ids  数组不是集合
		List<Long> idList = Arrays.asList(ids);
		itemMapper.deleteBatchIds(idList);
	}
6商品上架/下架操作
6.1 业务说明
当用户点击上架/下架操作时,修改商品的状态信息. status=1表示上架 status=2表示下架.
6.2页面分析
1).下架操作
2).上架操作
3.页面JS
说明:根据springMVC的规范上架/下架操作是不同的url请求地址,所以需要完成业务时,需要编辑2个Controller的方法分别进行业务拦截.
需求: 通过一个方法,实现用户的上架/下架的操作? restFul风格!!!
restFul规则: 可以动态的获取url中的参数 上架操作status=1,下架操作status=2

6.3业务优化
说明:由于上架和下架操作状态码分别为1/2,所以通过1/2的方法,可以判断用户的操作行为.则修改url提交方式.实现批量操作.
$.post("/item/2",params, function(data){
            			if(data.status == 200){
            				$.messager.alert('提示','下架商品成功!',undefined,function(){
            					$("#itemList").datagrid("reload");
            				});
            			}
            		});

$.post("/item/1",params, function(data){
            			if(data.status == 200){
            				$.messager.alert('提示','上架商品成功!',undefined,function(){
            					$("#itemList").datagrid("reload");
            				});
            			}
            		});
修改之后的请求路径信息:


6.4编辑ItemController
/**
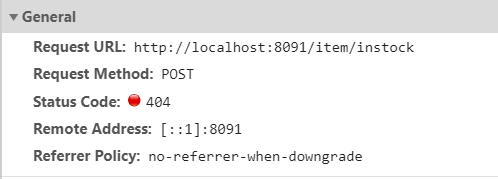
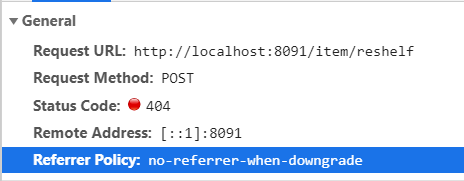
* 旧请求:http://localhost:8091/item/instock
* http://localhost:8091/item/reself
* 修改的参数 update tb_item set status = 1/2
*
* 修改后的请求:http://localhost:8091/item/1
* http://localhost:8091/item/2
*
*
* url分析:http://localhost:8091/item/1
* 参数: ids=101,102,103
* 返回值: SysResult对象
*/
@RequestMapping("/{status}")
public SysResult updateStatus(@PathVariable Integer status,Long[] ids) {
itemService.updateStatus(status,ids);
return SysResult.success();
}
6.5编辑ItemService
/**
	 * 批量的数据修改
	 * entity: 修改数据的值
	 * updateWrapper: 修改的条件构造器
	 * sql: update tb_item set status=1,updated=#{date}
	 * 		where id in (101,102,103);
	 */
	@Override
	public void updateStatus(Integer status, Long[] ids) {
		Item item = new Item();
		item.setStatus(status)
			.setUpdated(new Date());
		//拼接修改条件
		UpdateWrapper<Item> updateWrapper = new UpdateWrapper<>();
		List<Long> idList = Arrays.asList(ids);
		updateWrapper.in("id", idList);
		itemMapper.update(item, updateWrapper);
	}
7.富文本编辑器介绍
7.1 商品描述介绍
说明:商品描述和商品信息是典型的一对一对应关系.
一般条件下用户只需要查询商品信息,但是如果用户需要展现商品详情时,才会去查询商品详情表.主要的原因就是为了用户查询的速度更快.

7.2 富文本介绍
KindEditor是一套开源的HTML可视化编辑器,主要用于让用户在网站上获得所见即所得编辑效果,兼容IE、Firefox、Chrome、Safari、Opera等主流浏览器。
<%@ page language="java" contentType="text/html; charset=utf-8"
    pageEncoding="utf-8"%>
<!DOCTYPE html PUBLIC "-//W3C//DTD HTML 4.01 Transitional//EN" "http://www.w3.org/TR/html4/loose.dtd">
<html>
<head>
<meta http-equiv="Content-Type" content="text/html; charset=utf-8">
<link href="/js/kindeditor-4.1.10/themes/default/default.css" type="text/css" rel="stylesheet">
<script type="text/javascript" charset="utf-8" src="/js/kindeditor-4.1.10/kindeditor-all-min.js"></script>
<script type="text/javascript" charset="utf-8" src="/js/kindeditor-4.1.10/lang/zh_CN.js"></script>
<script type="text/javascript" charset="utf-8" src="/js/jquery-easyui-1.4.1/jquery.min.js"></script>

<script type="text/javascript">
	$(function(){
		//初始化富文本编辑器.
		KindEditor.ready(function(){
			KindEditor.create("#editor")
		})
	})
</script>
</head>
<body>
<h1>富文本编辑器</h1>
<textarea style="width:700px;height:350px" id="editor"></textarea>
</body>
</html>
7.3创建商品描述信息POJO
@TableName("tb_item_desc")
@Data
@Accessors(chain=true)
@NoArgsConstructor
@AllArgsConstructor
public class ItemDesc extends BasePojo{
	@TableId					//只设定主键,不设置自增.
	private Long itemId;		//商品id号,id应该与商品表ID一致
	private String itemDesc;	//商品详情信息

}
7.4创建商品描述信息POJO
package com.jt.pojo;

import com.baomidou.mybatisplus.annotation.TableId;
import com.baomidou.mybatisplus.annotation.TableName;

import lombok.AllArgsConstructor;
import lombok.Data;
import lombok.NoArgsConstructor;
import lombok.experimental.Accessors;

@TableName("tb_item_desc")
@Data
@Accessors(chain=true)
@NoArgsConstructor
@AllArgsConstructor
public class ItemDesc extends BasePojo{
	@TableId					//只设定主键,不设置自增.
	private Long itemId;		//商品id号,id应该与商品表ID一致
	private String itemDesc;	//商品详情信息

}
7.5编辑ItemDescMapper

7.6重构商品新增
7.6.1编辑ItemController
@RequestMapping("/save")
	public SysResult saveItem(Item item,ItemDesc itemDesc) {

		itemService.saveItem(item,itemDesc);
		return SysResult.success(); //用户入库成功!!!!
	}
7.6.2编辑ItemService
/**
	 * 现在需要同时入库2张表数据
	 * 1.item    2.itemDesc
	 *
	 */
	@Override
	@Transactional
	public void saveItem(Item item, ItemDesc itemDesc) {
		item.setStatus(1)
			.setCreated(new Date())
			.setUpdated(item.getCreated()); //保证用户入库时间一致
		itemMapper.insert(item);		//只有item对象入库之后,才会有主键值

		//思路:能否将入库操作完成之后,自动的实现数据的回显!!!!
		//MP中的新增操作的会自动的实现数据的回显.
		//如果不用MP则应该如何实现回显??
		itemDesc.setItemId(item.getId());		//添加主键信息
		itemDesc.setCreated(item.getCreated())	//保证时间一致
				.setUpdated(item.getCreated());
		itemDescMapper.insert(itemDesc);
	}
7.6.3传统的Mybatis实现主键回显
<insert id="" keyProperty="id" keyColumn="" useGeneratedKeys="true" ></insert>
8.商品详情回显
8.1 页面分析
1).页面url地址
2.页面JS

8.2 编辑ItemController
/**
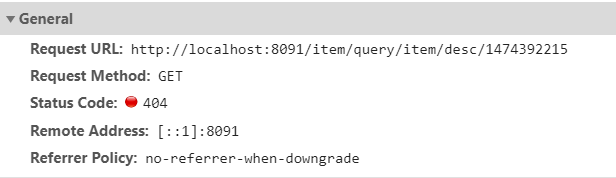
* 1.url:http://localhost:8091/item/query/item/desc/1474392215
* 2.请求参数: 参数位于url中
* 3.返回值类型: SysResult对象
*/
@RequestMapping("/query/item/desc/{itemId}")
public SysResult findItemDescById(@PathVariable Long itemId) {
//1.根据id.查询商品详情信息
ItemDesc itemDesc = itemService.findItemDescById(itemId);
return SysResult.success(itemDesc);
}
8.3 编辑ItemService
@Override
	public ItemDesc findItemDescById(Long itemId) {

		return itemDescMapper.selectById(itemId);
	}
8.4 页面效果

9 重构商品修改
9.1重构ItemController
/**
	 * 完成商品更新操作
	 * 1.url: http://localhost:8091/item/update
	 * 2.请求参数:  form表单     使用对象接收.
	 * 3.返回值结果: 系统返回值数据
	 */
	@RequestMapping("/update")
	public SysResult itemUpdate(Item item,ItemDesc itemDesc) {

		itemService.itemUpdate(item,itemDesc);
		return SysResult.success();
	}
9.2重构ItemService
//MP更新操作时,如果使用byId的方式操作,则where id = #{xxxxx},根据主键更新.
	//其余的参数都会作为更新的数据进行操作.
	@Override
	@Transactional
	public void itemUpdate(Item item,ItemDesc itemDesc) {

		item.setUpdated(new Date());
		itemMapper.updateById(item);

		itemDesc.setItemId(item.getId())
				.setUpdated(item.getUpdated());
		itemDescMapper.updateById(itemDesc);

	}
10.关联删除
说明:编辑itemService.实现item表与itemDesc表的关联删除.
//关联删除
	@Transactional
	@Override
	public void itemDeletes(Long[] ids) {
		//Long[] ids  数组不是集合
		List<Long> idList = Arrays.asList(ids);
		itemMapper.deleteBatchIds(idList);
		itemDescMapper.deleteBatchIds(idList);
	}
11.文件上传
11.1 文件上传入门案例
11.1.1编辑页面HTML
<%@ page language="java" contentType="text/html; charset=UTF-8"
    pageEncoding="UTF-8"%>
<!DOCTYPE html PUBLIC "-//W3C//DTD HTML 4.01 Transitional//EN" "http://www.w3.org/TR/html4/loose.dtd">
<html>
<head>
<meta http-equiv="Content-Type" content="text/html; charset=UTF-8">
<title>Insert title here</title>
</head>
<body>
	<h1>实现文件长传</h1>

	<!--enctype="开启多媒体标签"  string类型  -->
	<form action="http://localhost:8091/file" method="post"
	enctype="multipart/form-data">
		<input name="fileImage" type="file" />
		<input type="submit" value="提交"/>
	</form>
</body>
</html>
11.1.2检查页面结构

11.1.3编辑FileController
package com.jt.controller;

import java.io.File;
import java.io.IOException;

import org.springframework.web.bind.annotation.RequestMapping;
import org.springframework.web.bind.annotation.RestController;
import org.springframework.web.multipart.MultipartFile;

@RestController
public class FileController {

	/**
	 * 完成文件上传入门案例
	 *
	 * url:/file
	 * 参数: fileImage
	 * 返回值: String
	 *
	 * SpringMVC中如果需要接收文件参数.则一般利用MultipartFile
	 * 来接收参数....
	 * 文件上传步骤:
	 * 		1.定义指定的文件目录   E:\JT_IMAGE
	 * 		2.获取文件名称
	 * 		3.将数据写入磁盘,执行文件上传操作.
	 * @throws IOException
	 * @throws IllegalStateException
	 */

	@RequestMapping("/file")
	public String file(MultipartFile fileImage) throws IllegalStateException, IOException {

		//1.创建目录
		File file = new File("E:\\JT_IMAGE");
		//2.判断文件目录是否存在
		if(!file.exists()) {
			//如果目录不存在则新建目录
			file.mkdirs();	//创建多级目录.
		}

		//3.获取文件名称
		String fileName = fileImage.getOriginalFilename();

		//4.封装文件对象
		File realFile = new File("E:/JT_IMAGE/"+fileName);

		//5.实现文件上传
		fileImage.transferTo(realFile);//将字节信息,按照指定的文件位置进行输出.
		return "文件上传成功!!!!!";
	}
}
11.2 商品图片上传
11.2.1 业务接口说明
- url地址:Request URL: http://localhost:8091/pic/upload
- 请求参数: uploadFile
- 返回值结果:
{"error":0,"url":"图片的保存路径","width":图片的宽度,"height":图片的高度}
error:表示是否有错 url:图片虚拟地址
11.2.2 封装图片返回值对象VO
@Data
@Accessors(chain=true)
@NoArgsConstructor
@AllArgsConstructor
public class FileImage {
	// `{"error":0,"url":"图片的保存路径","width":图片的宽度,"height":图片的高度}`
	private Integer error;	//0 表示上传成功    1.表示上传失败
	private String url;		//用户图片的虚拟机地址
	private Integer width;
	private Integer height;

	public static FileImage fail() {

		return new FileImage(1, null, null, null);
	}

	public static FileImage success(String url,Integer width,Integer height) {

		return new FileImage(0, url, width, height);
	}
}
11.2.3 编辑FileController
@Autowired
	private FileService  fileService;
	/**
	 * 实现图片上传
	 * url地址:Request URL: http://localhost:8091/pic/upload
	      请求参数: uploadFile
             返回值结果: FileImage
	 */
	@RequestMapping("/pic/upload")
	public FileImage upload(MultipartFile uploadFile) {

		return fileService.upload(uploadFile);
	}
11.2.4 编辑FileService
说明:暂时将业务简单化的完成,了解文件上传的结构,了解什么是虚拟路径即可.
@Service
public class FileServiceImpl implements FileService {

	//问题:安全性问题   2.目录问题   3.文件名问题
	@Override
	public FileImage upload(MultipartFile uploadFile) {
		//1.创建目录
		File file = new File("E:\\JT_IMAGE");
		//2.判断文件目录是否存在
		if(!file.exists()) {
			//如果目录不存在则新建目录
			file.mkdirs();	//创建多级目录.
		}

		//3.获取文件名称
		String fileName = uploadFile.getOriginalFilename();

		//4.封装文件对象
		File realFile = new File("E:/JT_IMAGE/"+fileName);

		//5.实现文件上传
		try {
			uploadFile.transferTo(realFile);
		} catch (IllegalStateException | IOException e) {

			e.printStackTrace();
		}
		//1.url地址:图片虚拟地址
		String url = "https://img14.360buyimg.com/n0/jfs/t1/132202/25/2275/134238/5ee8771bEf1d8463a/9969c9589e9c170a.jpg";
		return FileImage.success(url, 400, 400);
	}

}
作业
1.了解文件上传结构
2.重构京淘项目.将代码重新编辑.完成CURD操作.
3.了解 什么是正向代理/什么是反向代理