一、 环境
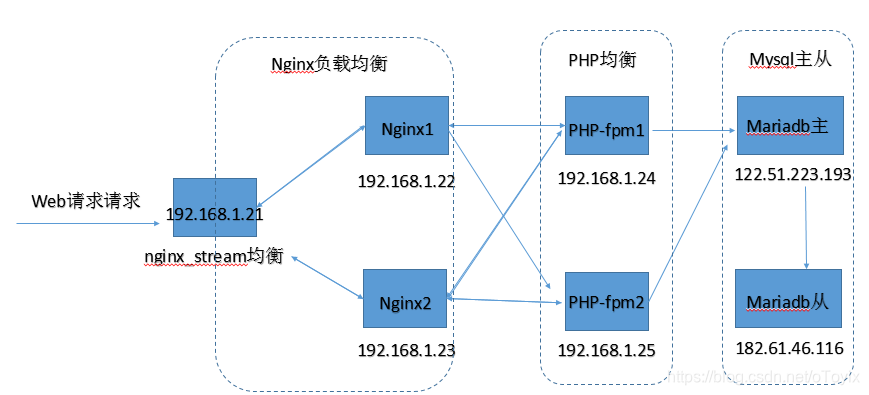
二、流程(思路)
1、先安装LNMP(192.168.1.22+192.168.1.24+122.51.223.193),安装wordpress
2、配置nginx负载均衡
3、添加php均衡
4、配置mariadb主从
三、安装lnmp及wordpress
1、安装nginx(192.168.1.22)
1)、Nginx安装
Nginx这里使用阿里的epel源直接yum安装
[root@localhost ~]# wget -O /etc/yum.repos.d/epel.repo http://mirrors.aliyun.com/repo/epel-7.repo
[root@localhost ~]# yum clean all
[root@localhost ~]# yum makecache
[root@localhost ~]# yum install –y nginx-1.16.1  安装nginx-1.16.1版本
下载wordpress并放至项目目录
[root@localhost src]# wget -c https://wordpress.org/latest.tar.gz -O /usr/share/nginx/html/wordpress.tar.gz
[root@localhost src]# cd /usr/share/nginx/html/
[root@localhost html]# tar xf wordpress.tar.gz
[root@localhost html]# chown -R nginx:nginx wordpress
2)、配置
vim /etc/nginx/nginx.conf
[root@localhost html]# vim /etc/nginx/nginx.conf
        location / {
                root         /usr/share/nginx/html/wordpress;
                index   index.php;
        }

        location ~ \.php$ {
               root           /data/nginx/html/wordpress/;  PHP的目录
               fastcgi_pass   192.168.1.24:9000;
               fastcgi_index  index.php;
               fastcgi_param  SCRIPT_FILENAME  $document_root$fastcgi_script_name;
               include        fastcgi_params;
        }
2、安装PHP(192.168.1.24)
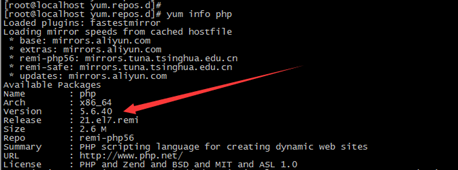
1)、更换清华源,安装php5.6,默认是5.4
[root@localhost ~]# yum install https://mirrors.tuna.tsinghua.edu.cn/remi/enterprise/remi-release-7.rpm
[root@localhost yum.repos.d]# vim remi.repo
30 enabled=1
安装php
[root@localhost ~]# yum install php php-fpm php-mysql php-devel php-xml –y
配置php-fpm用户组
[root@localhost ~]# vim /etc/php-fpm.d/www.conf
user = nginx
group = nginx
listen = 192.168.1.24:9000
;listen.allowed_clients =	这里指的是nginx服务的IP,这里将他注释
[root@localhost ~]# chown -R nginx:nginx /var/lib/php/session/
[root@localhost ~]# mkdir -p /data/nginx/html		PHP的目录
[root@localhost ~]# chown -R nginx:nginx /data/nginx/html/	PHP的目录
项目同步,将nginx的项目目录同步到PHP的目录中,包含权限
[root@localhost ~]# rsync -av [email protected]:/usr/share/nginx/html/wordpress /data/nginx/html/

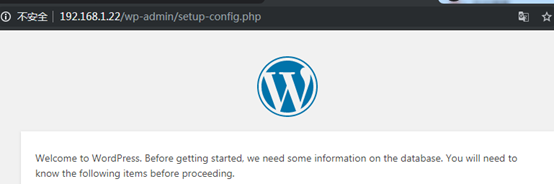
关闭selinux,开启9000端口后访问浏览器
3、安装mariadb(122.51.223.193)
安装
[root@VM_0_14_centos ~]# yum install mariadb mariadb-devel mariadb-server mariadb-libs –y
[root@VM_0_14_centos ~]# systemctl start  mariadb
对PHP授权
[root@VM_0_14_centos ~]# mysql
Welcome to the MariaDB monitor.  Commands end with ; or \g.
Your MariaDB connection id is 2
Server version: 5.5.65-MariaDB MariaDB Server

Copyright (c) 2000, 2018, Oracle, MariaDB Corporation Ab and others.

Type 'help;' or '\h' for help. Type '\c' to clear the current input statement.

MariaDB [(none)]> create database wordpress charset utf8;
Query OK, 1 row affected (0.00 sec)

MariaDB [(none)]> grant all on wordpress.* to "wordpress"@"%" identified by "123456";
Query OK, 0 rows affected (0.00 sec)

MariaDB [(none)]> flush privileges;
Query OK, 0 rows affected (0.01 sec)
注:这里是公网对内网授权,所以写的是"%"
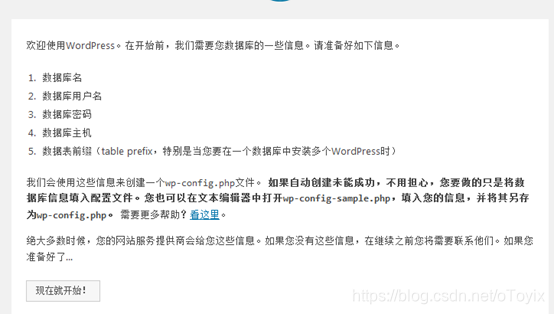
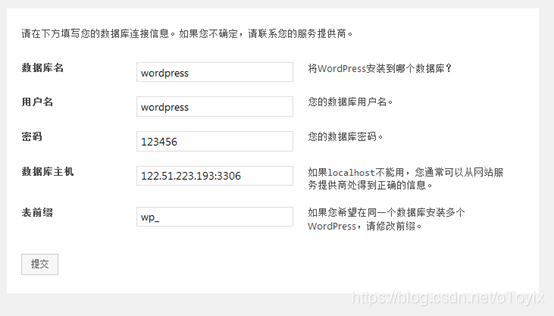
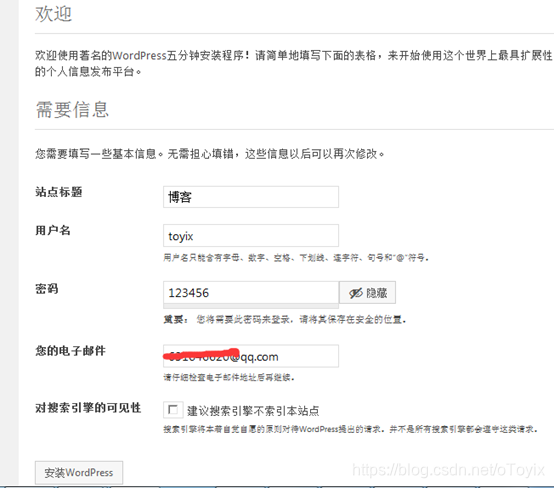
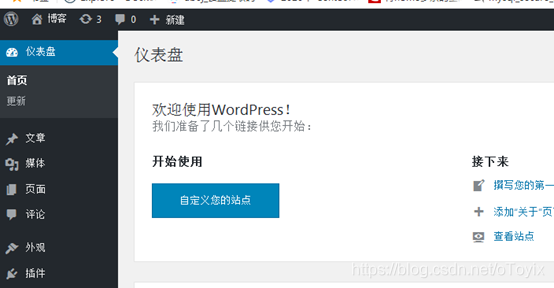
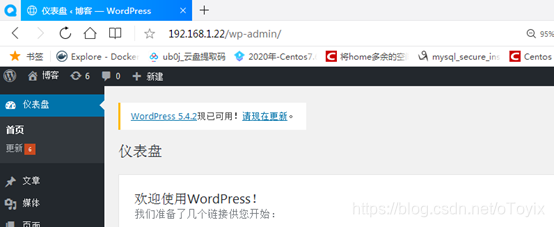
4、浏览器安装wrodpress
注:如果有页面排版乱码的现象,需要反同步一下nginx的项目目录
Php端
[root@localhost html]# rsync -av /data/nginx/html/wordpress/ [email protected]:/usr/share/nginx/html/wordpress/
四、安装配置nginx集群
1、配置
Nginx1:192.168.1.22服务器
[root@localhost ~]# vim /etc/nginx/nginx.conf
server {
        listen       80 default_server;
        listen       [::]:80 default_server;
        #server_name  _;
        root         /usr/share/nginx/html/wordpress;
        index    index.php;

        # Load configuration files for the default server block.
        include /etc/nginx/default.d/*.conf;

        location / {
                root         /usr/share/nginx/html/wordpress;
                index   index.php;
        }

        location ~ \.php$ {
               root           /data/nginx/html/wordpress/;
               fastcgi_pass   192.168.1.24:9000;
               fastcgi_index  index.php;
               fastcgi_param  SCRIPT_FILENAME  $document_root$fastcgi_script_name;
               include        fastcgi_params;
        }
Nginx1:192.168.1.23服务器 同上
Nginx1:192.168.1.21均衡服务器
[root@localhost ~]# vim /etc/nginx/nginx.conf
[root@localhost ~]# vim /etc/nginx/nginx.conf   注:这里upstream块与server平级,都在http块中
               upstream web {
                ip_hash;
                server 192.168.1.22 weight=1;
                server 192.168.1.23 weight=1;
               }
        server {
                listen 80;
                server_name blog.yjy.com;

                location /{
                        proxy_pass http://web;
                        proxy_next_upstream error http_404 http_502;
                 }
        }
浏览器访问
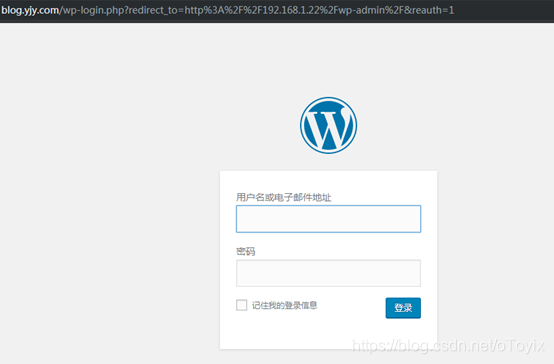
此时,停止任意一台nginx服务器,都不影响客户使用
五、配置php-fpm均衡
Php-fpm2 192.168.1.25配置
[root@localhost ~]# vim /etc/php-fpm.d/www.conf
user = nginx
group = nginx
listen = 192.168.1.24:9000
#listen.allowed_clients =	这里指的是nginx服务的IP,这里将他注释
[root@localhost ~]# chown -R nginx:nginx /var/lib/php/session/
[root@localhost ~]# mkdir -p /data/nginx/html		PHP的目录
[root@localhost ~]# chown -R nginx:nginx /data/nginx/html/	PHP的目录
其他安装步骤一样,直接同步动态目录
[root@localhost ~]# rsync -av [email protected]:/data/nginx/html/ /data/nginx/html/
nginx1(192.168.1.22)及nginx2(192.168.1.23)上面配置php-fpm均衡
[root@localhost ~]# vim /etc/nginx/nginx.conf
        upstream cgi_wordpress{
                server 192.168.1.24:9000;
                server  192.168.1.25:9000;
                }

        location ~ \.php$ {
               root           /data/nginx/html/wordpress/;
               fastcgi_pass   cgi_wordpress;
               fastcgi_index  index.php;
               fastcgi_next_upstream error;		增加此行
               fastcgi_param  SCRIPT_FILENAME  $document_root$fastcgi_script_name;
               include        fastcgi_params;
        }
测试php均衡,停止192.168.1.24上面的PHP-fpm,看是否可以继续访问网页

六、配置主从
1、配置my.cnf
Mariadb master(122.51.223.193)配置
[root@VM_0_14_centos ~]# vim /etc/my.cnf
[mysqld]
log-bin=mariadb-bin
server-id=1
mariadb slave(60.165.98.10)配置
[root@instance-plpaum9p ~]# vim /etc/my.cnf
[mysqld]
server-id=2
2、启动mariadb
[root@VM_0_14_centos ~]# systemctl restart mariadb	   master
[root@instance-plpaum9p ~]# systemctl restart mariadb		slave
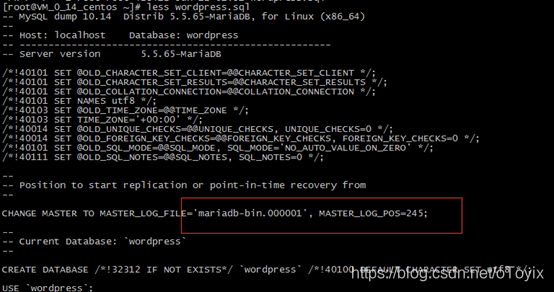
3、主库wordpress数据导出且记录bin文件与pos点
[root@VM_0_14_centos ~]# mysqldump -B --master-data wordpress >wordpress.sql
[root@VM_0_14_centos ~]# less wordpress.sql
4、主库授权
MariaDB [(none)]> grant replication slave on *.* to "tongbu"@"182.61.46.116" identified by "123456";
Query OK, 0 rows affected (0.00 sec)

MariaDB [(none)]> flush privileges;
Query OK, 0 rows affected (0.00 sec)
5、从库
新建wordpress数据库
MariaDB [(none)]> create database wordpress charset utf8;
数据导入
[root@instance-plpaum9p ~]# mysql <wordpress.sql
连接主库
MariaDB [(none)]> change master to master_host="122.51.223.193",
    -> master_user="tongbu",
    -> master_password="123456",
    -> master_log_file="mariadb-bin.000001",
    -> master_log_pos=245;
Query OK, 0 rows affected (0.01 sec)

MariaDB [(none)]> slave start;
Query OK, 0 rows affected (0.00 sec)

MariaDB [(none)]> show slave status\G
*************************** 1. row ***************************
               Slave_IO_State: Waiting for master to send event
                  Master_Host: 122.51.223.193
                  Master_User: tongbu
                  Master_Port: 3306
                Connect_Retry: 60
              Master_Log_File: mariadb-bin.000001
          Read_Master_Log_Pos: 476
               Relay_Log_File: mariadb-relay-bin.000002
                Relay_Log_Pos: 762
        Relay_Master_Log_File: mariadb-bin.000001
             Slave_IO_Running: Yes
            Slave_SQL_Running: Yes
              Replicate_Do_DB:
          Replicate_Ignore_DB:
           Replicate_Do_Table:
       Replicate_Ignore_Table:
      Replicate_Wild_Do_Table:
  Replicate_Wild_Ignore_Table:
                   Last_Errno: 0
                   Last_Error:
                 Skip_Counter: 0
          Exec_Master_Log_Pos: 476
              Relay_Log_Space: 1058
              Until_Condition: None
               Until_Log_File:
                Until_Log_Pos: 0
           Master_SSL_Allowed: No
           Master_SSL_CA_File:
           Master_SSL_CA_Path:
              Master_SSL_Cert:
            Master_SSL_Cipher:
               Master_SSL_Key:
        Seconds_Behind_Master: 0
Master_SSL_Verify_Server_Cert: No
                Last_IO_Errno: 0
                Last_IO_Error:
               Last_SQL_Errno: 0
               Last_SQL_Error:
  Replicate_Ignore_Server_Ids:
             Master_Server_Id: 1
1 row in set (0.00 sec)
6、主从测试
在wordpress中新建用户,在从库中查


测试OK
注:主从同步时,如果只同步一个数据库,
1、在主的my.cnf中加上一句binlog-do-db=wrodpress,见下
[mysqld]
log-bin=mariadb-bin
server-id=1
binlog-do-db=wrodpress
2、主库授权时,不用另说明授权库
3、从库change master时,不用添加同步数据库的说明
------------end