目录
五、创建 bat 文件启动 jupyter notebook
一、Jupyter Notebook 的安装
打开 cmd 窗口,通过 pip 安装:pip install jupyter


二、pip install jupyter 执行报错解决
【Python】报错:No matching distribution found for ipykernel (from XXX) —— win 10:pip 安装第三方库时报错解决
扫描二维码关注公众号,回复:
11561934 查看本文章

【Python】报错:You should consider upgrading via the 'python -m pip install --upgrade pip' command.
三、配置 Jupyter notebook 目录路径
(1)安装完成先不要启动,先配置目录路径,重新打开 cmd 窗口,默认 C 盘打开,执行以下命令:
生成默认配置文件到:C:\Users\lenovo\.jupyter\jupyter_notebook_config.py
jupyter notebook --generate-config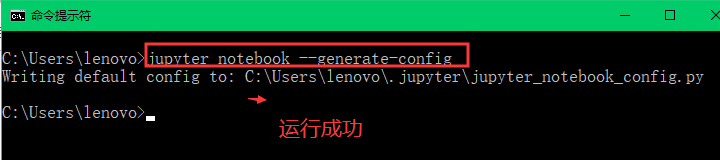

(2)打开 jupyter_notebook_config.py 搜索 c.NotebookApp.notebook_dir(大概在266行)
把 # 号去掉,把值改为你要存放 Jupyter notebook 文件的目录路径,以后 Jupyter notebook 创建的文件都会保存到这个目录路径中:


四、启动 Jupyter notebook
打开 cmd 命令提示符窗口输入 jupyter notebook 回车,然后浏览器就会打开Jupyter notebook(需关闭直接关闭窗口即可 ):
jupyter notebook

五、创建 bat 文件启动 jupyter notebook
(1)新建文件名为 Jupyter notebook.bat 的文件,用 Notepad++ 编辑该文件,添加以下内容:
@echo off
echo 启动 jupyter notebook
jupyter notebook
(2)编码选择 “ 使用 ANSI 编码 ”,否则运行后 cmd 窗口打印中文会乱码,保存:


(3)将文件保存在桌面,双击运行该文件,即可直接启动 Jupyter Notebook :
