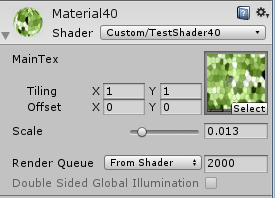
今天分享一个超简单实现模糊效果的方法,先上图:

核心代码就这句:
注意要在3.0以上的版本才能使用


在采样后做偏移采样再叠加,效果与下面的代码类似:
float4 frag(v2f o):SV_TARGET{
	fixed4 color = tex2D(_MainTex,o.uv);//,float2(_Scale,_Scale),float2(_Scale,_Scale)

	float2 uv1= o.uv +float2(_Scale,_Scale);
	fixed4 color2 = tex2D(_MainTex,uv1);

	float2 uv2= o.uv -float2(_Scale,_Scale);
	fixed4 color3 = tex2D(_MainTex,uv2);

	return (color+color2+color3)/3;
}
下面的完整代码:
Shader "Custom/TestShader40" {
	Properties{
		_MainTex("MainTex",2D)="White"{}
		_Scale("Scale",Range(0,0.1))=0
	}
	SubShader{
		Tags { "RenderType"="Opaque" }
		Pass{
			CGPROGRAM
				#pragma vertex vert
				#pragma fragment frag
				#pragma target 3.0
				#include "Lighting.cginc"

				sampler2D  _MainTex;
				float4 _MainTex_ST;
				float _Scale;

				struct a2v{
					float4 pos:POSITION;
					float4 uv:TEXCOORD0;
				};

				struct v2f{
					float4 wPos:SV_POSITION;
					float2 uv:TEXCOORD0;
				};

				v2f vert(a2v v){
					v2f o;
					o.wPos = UnityObjectToClipPos(v.pos);
					o.uv=TRANSFORM_TEX(v.uv,_MainTex);

					return o;
				}

				float4 frag(v2f o):SV_TARGET{
					fixed4 color = tex2D(_MainTex,o.uv,float2(_Scale,_Scale),float2(_Scale,_Scale));

					return color;
				}
			ENDCG
		}
	}
}