来自于深度之眼课程。
- 安装anaconda的目的是为了创建虚拟环境(用到了conda);安装pycharm的目的就是用其做编译器;安装cuda的目的是装GPU。
pytorch安装(gpu版)
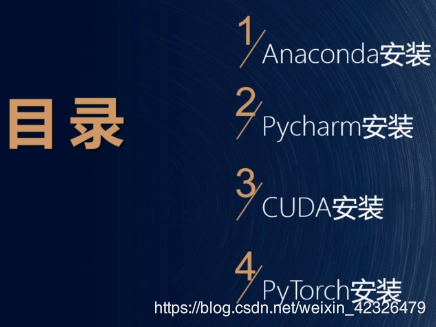
1.Anaconda安装
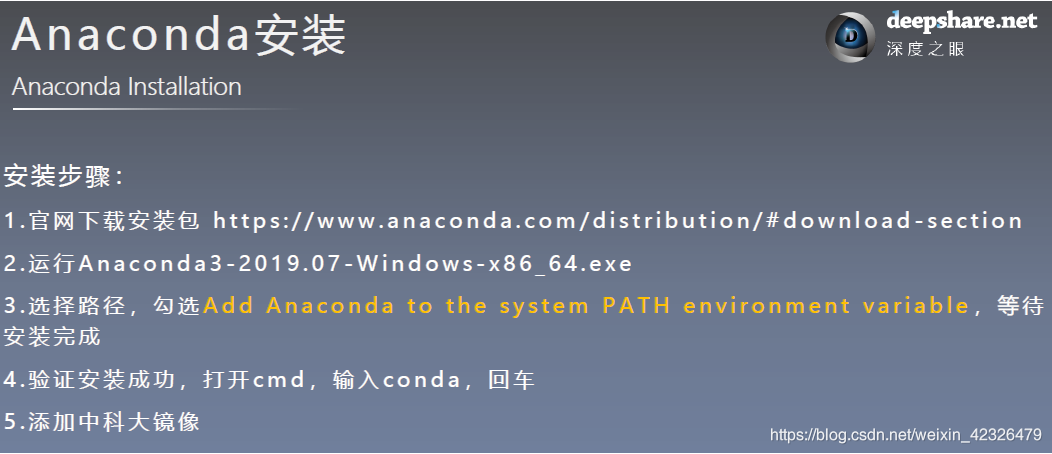
- 上面安装的第三步非常重要,注意勾选,因为它指的是把anaconda添加到系统环境变量。
————————————————————————————————————————————————
- 国内可用Anaconda 源的镜像站及换国内源方法:
#中科大
conda config --add channels https://mirrors.ustc.edu.cn/anaconda/pkgs/main/
conda config --add channels https://mirrors.ustc.edu.cn/anaconda/pkgs/free/
conda config --add channels https://mirrors.ustc.edu.cn/anaconda/cloud/conda-forge/
conda config --add channels https://mirrors.ustc.edu.cn/anaconda/cloud/msys2/
conda config --add channels https://mirrors.ustc.edu.cn/anaconda/cloud/bioconda/
conda config --add channels https://mirrors.ustc.edu.cn/anaconda/cloud/menpo/
conda config --set show_channel_urls yes

#清华
conda config --add channels https://mirrors.tuna.tsinghua.edu.cn/anaconda/pkgs/free/
conda config --add channels https://mirrors.tuna.tsinghua.edu.cn/anaconda/cloud/conda-forge
conda config --add channels https://mirrors.tuna.tsinghua.edu.cn/anaconda/cloud/msys2/
conda config --set show_channel_urls yes

----------------------------------------------------------------------------
conda config --show查看用的哪个源
conda config --remove-key channels删除正在使用的源
- 将中科大或者清华的源复制放入命令行中,目的是在用conda下载安装包的时候会快些。
————————————————————————————————————————————————
conda create -n pytorch_1.4.0_gpu python=3.7#GPU
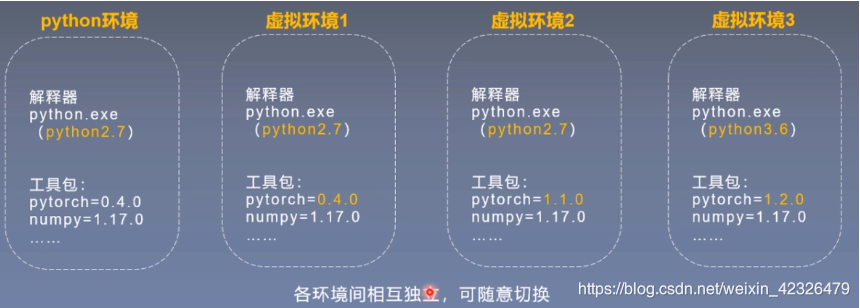
- 此命令是为了给pycharm的虚拟环境创建名称,其中,pytorch_1.4.0_gpu是自定义的(名字好记一些,短一点比较好)。在这个下载过程,如果很慢可以来回切换镜像源(切换时记得先删除,上面有删除的命令)。如下图所示,虚拟环境可以很多个,pytorch也要在相应的虚拟环境下下载。
————————————————————————————————————————————————
- 接着就可以用conda查看创建的虚拟环境了。
conda activate pytorch_1.4.0_gpu#打开该环境
conda deactivate#退出当前环境
conda info --envs#查看所有的虚拟环境
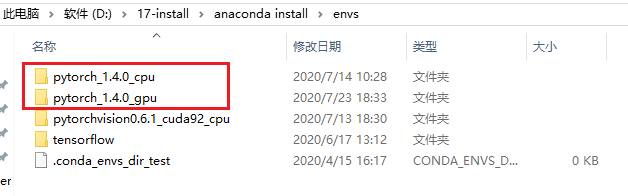
- 在anaconda的安装目录的envs下就能找到了。
2.Pycharm安装
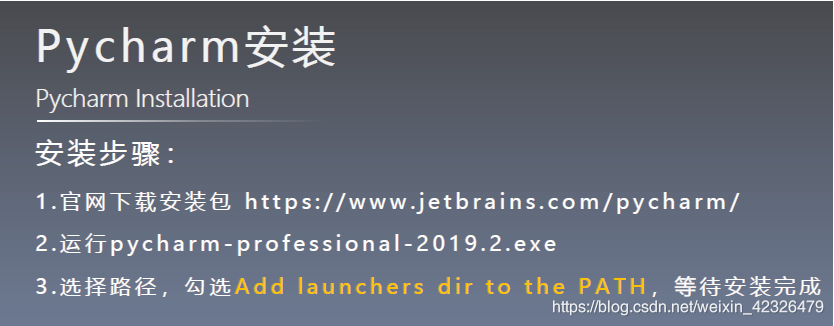
- 选最新的前一个版本(专业)下载,激活步骤详见:https://shimo.im/docs/GJTqgHqh6kGYkKKY/read
————————————————————————————————————————————————
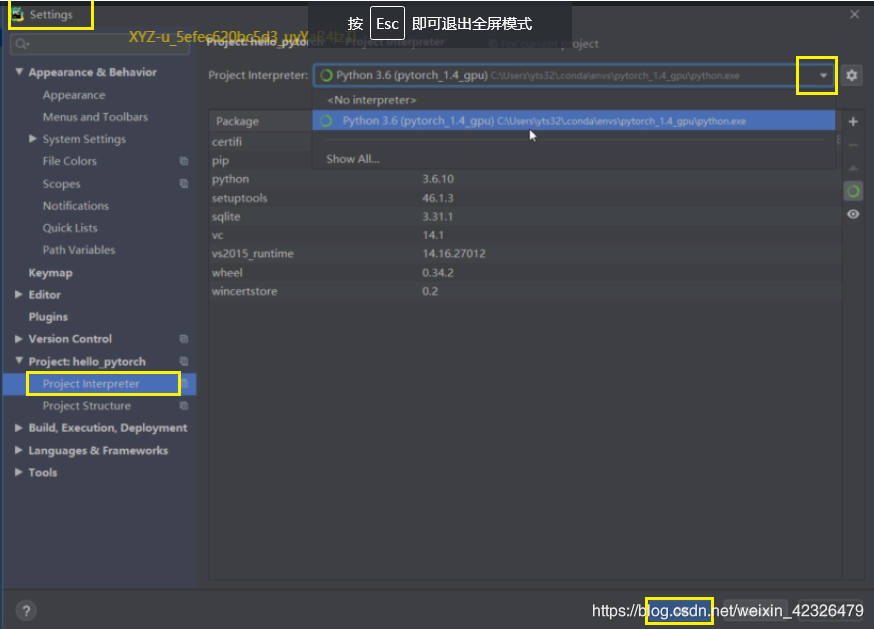
- 在pycharm里找刚创建好的虚拟环境(按目录找,基本在anaconda的安装目录的envs里)。
- 然后打开pycharm,页面最下方有个terminal,它就相当于系统的命令行。(先暂停到这,不要关闭)
conda activate pytorch_1.4.0_gpu
————————————————————————————————————————————————

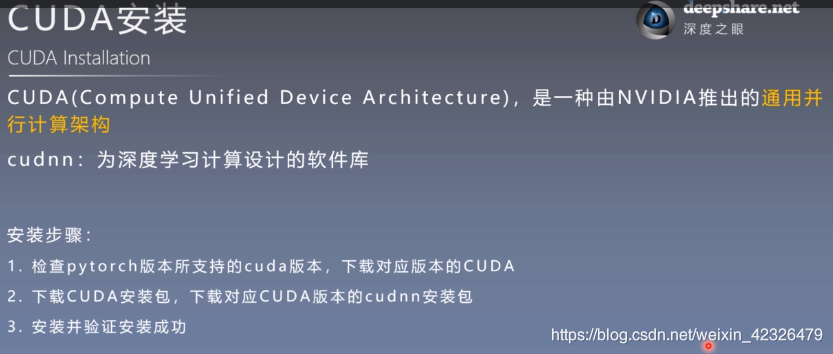
3.cuda安装
- cuda官网:https://developer.nvidia.com/cuda-92-download-archive
- 注意事项:第一:版本要和电脑显卡对应,https://blog.csdn.net/weixin_42326479/article/details/107842951;第二:安装时要取消Visual
Studio
Intergration进行安装;第三:最后要卸载图形驱动程序(如果第四步执行成功,可省略第三步)
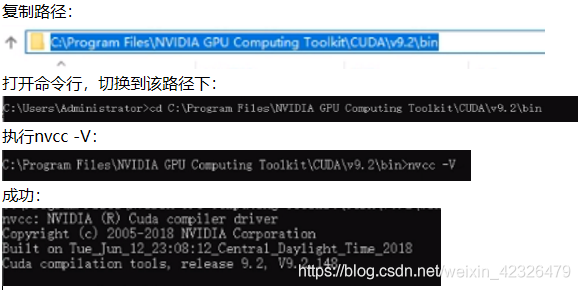
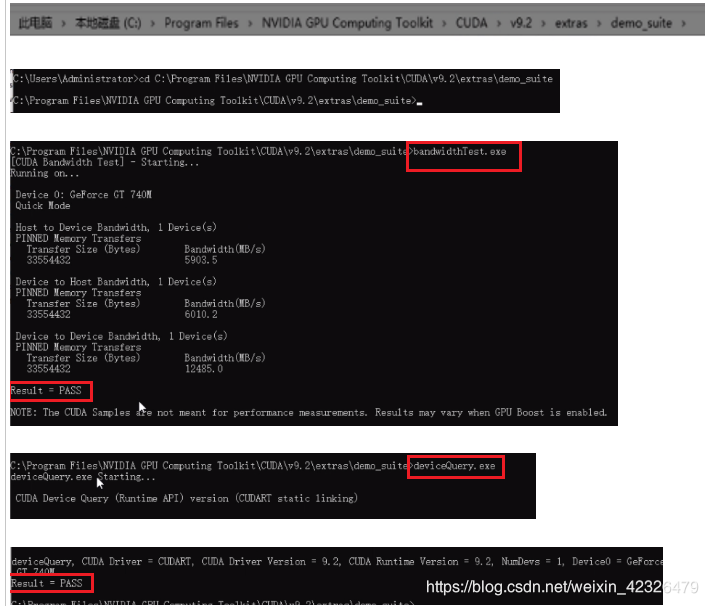
第四:检查是否安装成功(cd到安装目录下,检查nvcc -V),如下:
4.cudnn安装

-
注意事项:这里是安装cudnn,需要注册,地址:https://developer.nvidia.com/cudnn,然后点击download。(要与cuda的版本10.1对应)
-
最后,验证是否安装成功(cd到安装目录下,检查这两个 bandwidthTest.exe deviceQuery.exe):
———————————————————————————————————————————————— -
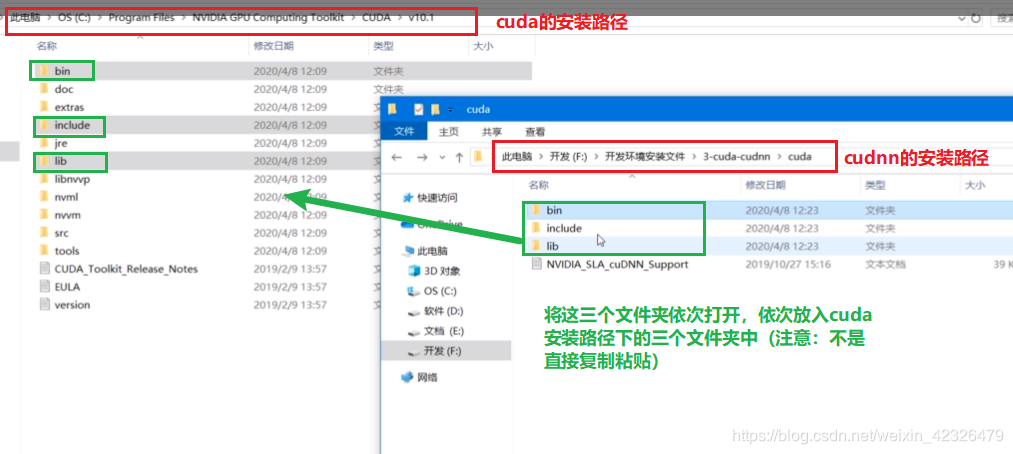
安装完cuda和cudnn后,要将cudnn的三个文件复制到cuda里。(注意不是直接复制)如下:
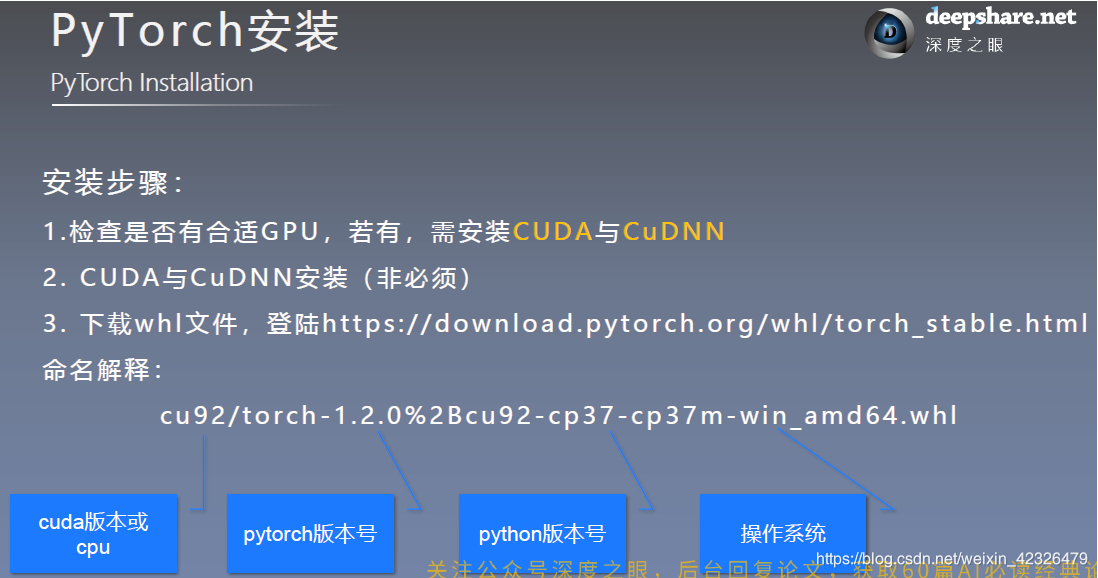
5.pytorch安装
-
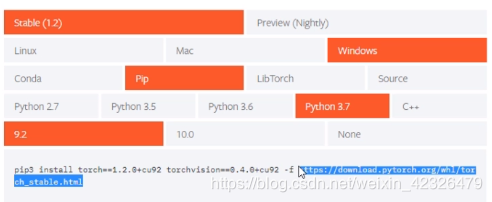
安装网站:https://pytorch.org/get-started/locally/
————————————————————————————————————————————————
-
注意事项:直接搜索选中的网址,在网址内用快捷键 Ctrf+F 搜索。
-
GPU版本:搜索下载两个文件,分别如下:


- 注意事项:CPU是以cpu开头;GPU以cu开头。这两个都要下载torch和torchvision。
————————————————————————————————————————————————
- 打开还未关闭的pycharm,点击页面最下方的terminal,激活cpu的虚拟环境。
conda activate pytorch_1.4.0_cpu
cd C:\Users\YUE123\Downloads
dir
先加一下镜像源加速一下:
#清华
pip config set global.index-url https://pypi.tuna.tsinghua.edu.cn/simple
开始安装torch和torchvision:
pip install torch-1.4.0+cpu-cp37-cp37m-win_amd64.whl
pip install torchvision-0.5.0+cpu-cp37-cp37m-win_amd64.whl
(torch-1.4.0+cpu-cp37-cp37m-win_amd64.whl和torchvision-0.5.0+cpu-cp37-cp37m-win_amd64.whl是根据刚才的dir命令查找自己安装的名称)
————————————————————————————————————————————————
觉得讲的细,就抓紧上车吧,我还能赚个推广费,开心。