1 准备工作
1.1 设备信息
- 型号:Raspberry Pi 4B+
- 内存(RAM):4 GB
- 存储(ROM):16 GB(这里是闪迪卡,一定要是空的)
1.2 镜像信息
- [不推荐] 2020-08-20-raspios-buster-arm64.img(之前在清华开源软件站下的 64 位的版本,现在找不到了,暂时也不想找。有需要的可以到官网下,也可以到清华开源软件站下。有些硬件可能用的是 32 位的驱动(比如说3.5的屏幕驱动),因此不首先推荐安装 64 位的系统)
- 2020-12-02-raspios-buster-armhf.img(传送门:https://mirrors.tuna.tsinghua.edu.cn/raspberry-pi-os-images/raspios_armhf/images/raspios_armhf-2020-12-04/2020-12-02-raspios-buster-armhf.zip,资源来自
清华开源软件站)
树莓派官网提供的镜像是 .ISO 的,但是提供的 Raspberry Pi Imager 却不支持,ISO 转 IMG 有点麻烦,所以就直接在清华开源软件站下了,解压就能用。
1.3 工具
- Raspberry Pi Imager v 1.4(官网下的。传送门https://www.raspberrypi.org/software/)
2 安装步骤
2.1 Step 1 烧录 SD 卡
2.1.1 选择镜像

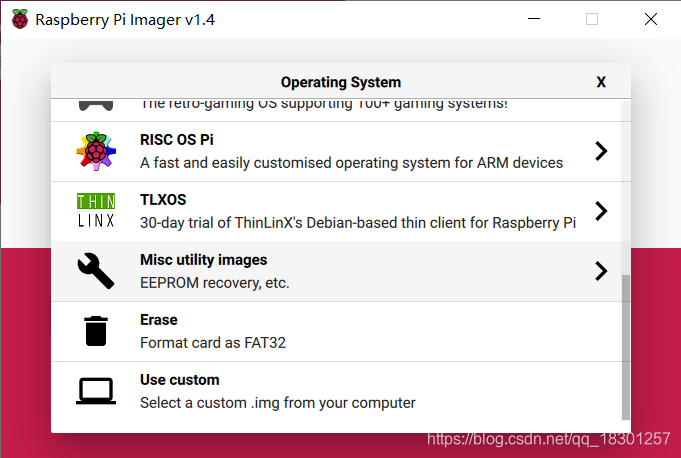
往下滑动,找到 Use custom 点击
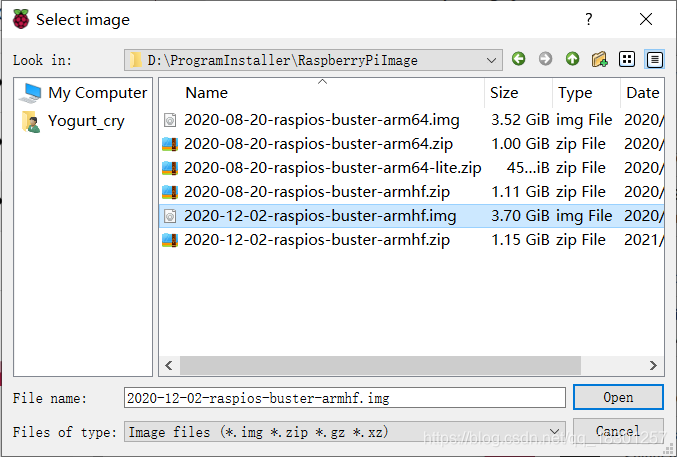
在弹出的对话框中找到存放镜像的路径,选择镜像
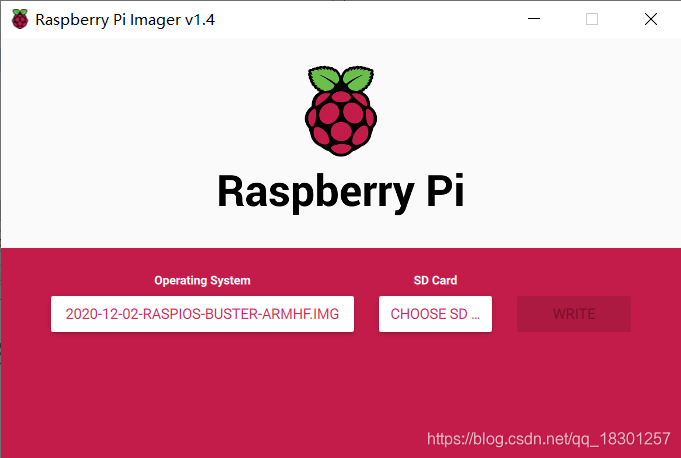
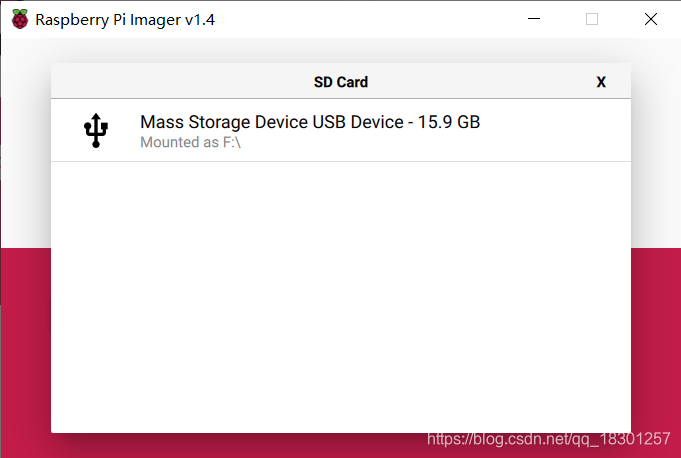
2.1.2 选择 SD 卡
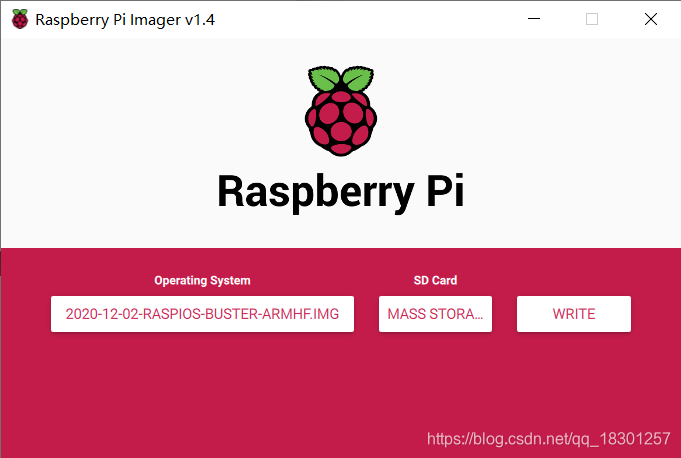
2.1.3 开始烧录
点击 WRITE,开始烧录
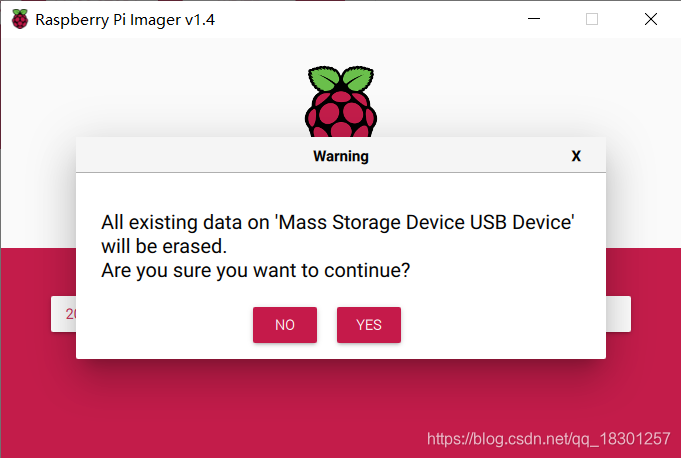
选择 YES

剩下就是等待。。。30 分钟内就完成了

选择 CONTINUE
3 初始化树莓派
3.1 添加配置文件
将 SD 卡拔下之后重新插入读卡器,进入磁盘 boot,找到 config.txt ,将里面的内容替换为下方内容
# For more options and information see
# http://rpf.io/configtxt
# Some settings may impact device functionality. See link above for details

# uncomment if you get no picture on HDMI for a default "safe" mode
#hdmi_safe=1

# uncomment this if your display has a black border of unused pixels visible
# and your display can output without overscan
disable_overscan=1

# uncomment the following to adjust overscan. Use positive numbers if console
# goes off screen, and negative if there is too much border
#overscan_left=16
#overscan_right=16
#overscan_top=16
#overscan_bottom=16

# uncomment to force a console size. By default it will be display's size minus
# overscan.
#framebuffer_width=1280
#framebuffer_height=720

# uncomment if hdmi display is not detected and composite is being output
hdmi_force_hotplug=1

# uncomment to force a specific HDMI mode (this will force VGA)
#hdmi_group=1
#hdmi_mode=1

# uncomment to force a HDMI mode rather than DVI. This can make audio work in
# DMT (computer monitor) modes
#hdmi_drive=2

# uncomment to increase signal to HDMI, if you have interference, blanking, or
# no display
config_hdmi_boost=4

# uncomment for composite PAL
#sdtv_mode=2

#uncomment to overclock the arm. 700 MHz is the default.
#arm_freq=800

# Uncomment some or all of these to enable the optional hardware interfaces
#dtparam=i2c_arm=on
#dtparam=i2s=on
#dtparam=spi=on

# Uncomment this to enable infrared communication.
#dtoverlay=gpio-ir,gpio_pin=17
#dtoverlay=gpio-ir-tx,gpio_pin=18

# Additional overlays and parameters are documented /boot/overlays/README

# Enable audio (loads snd_bcm2835)
dtparam=audio=on

# Enable DRM VC4 V3D driver on top of the dispmanx display stack
dtoverlay=vc4-fkms-v3d
max_framebuffers=2
arm_64bit=1
3.2 添加 WiFi 配置
如果自己有输出的屏幕,可以直接插上线启动树莓派,然后再自己手动配置 WiFi 信息即可。如果没有,那么就要设置一下了,不然没法通过 ssh 连接上它。
在 config.txt 同一目录下,新增一个文件 wpa_supplicant.conf,然后输入以下内容。(注意:这里需要连接的 WiFi 是没有密码的,有密码的没有测试过,下次测试了之后再补充上来)
ctrl_interface=DIR=/var/run/wpa_supplicant GROUP=netdev
update_config=1
country=GB
network={
    ssid="WiFi名称"
    key_mgmt=NONE
}
启动树莓派,即可生效
3.3 添加固定 IP 配置
在 config.txt 同一目录下,找到 cmdline.txt 文件,在最开头输入
ip=[ip地址]
记得输入 IP 地址后要空格,然后启动树莓派,即可生效
4 启动树莓派
树莓派插上 SD 卡,插上 Type-C 电源线,插上键鼠。
(注意:不要插上 HDMI 线,原先测试的时候,想看一下 WiFi 的连接状态,结果无论如何都连不上 WiFi,后面重新刷了系统之后没有连接 HDMI 线,树莓派就自动连接上 WiFi 了,如果有知道什么原因的小伙伴可以在评论区给我留言,感激不尽)
5 连接树莓派
这两天发现 Win10 自带了 SSH。突然间觉得手上的 XShell6 不香了。试用了一下之后发现,Win10 的更方便,感觉可以准备不用 XShell 了。先试用一段时间再说。
由于连接无线路由器,因此我们可以在路由器的管理界面中找到树莓派的 IP 地址,找到之后,我们可以通过 SSH 对它进行连接。
5.1 添加 ssh
在 config.txt 同一目录下,新增一个文件 ssh 即可。
5.2 ssh 连接
树莓派默认的登录名为 pi, 密码为 raspberry。
ssh pi@ip地址
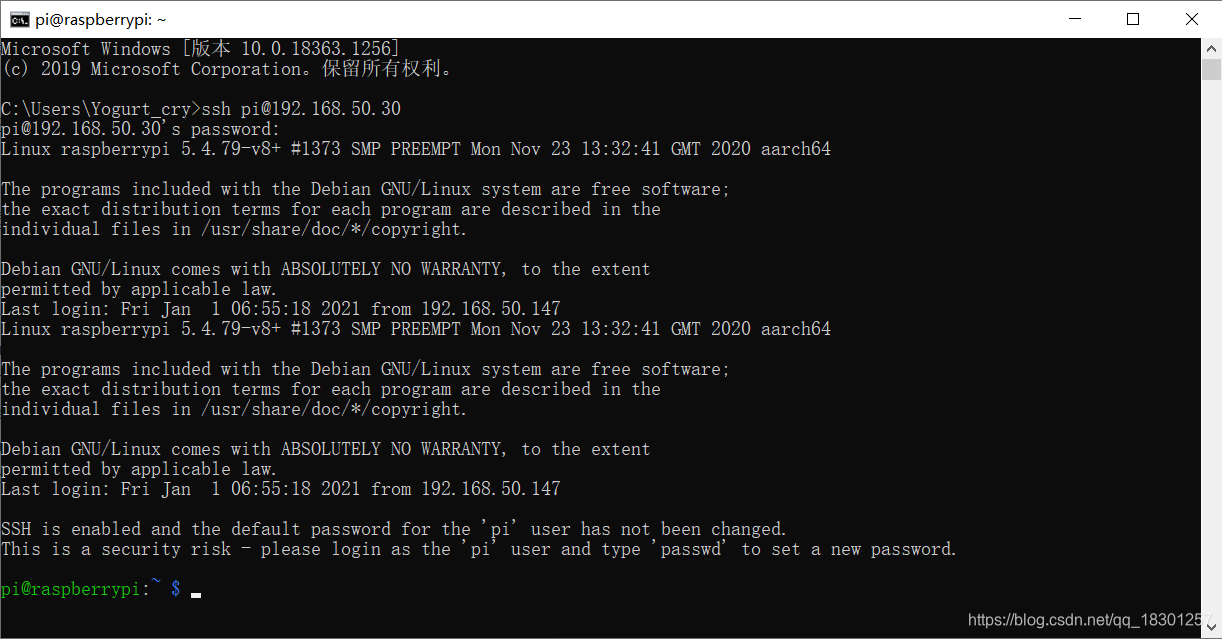
到此,这里就进入了树莓派的系统了。
6 配置树莓派
6.1 修改初始密码
# 修改树莓派初始密码
sudo passwd pi
# 修改 root 密码
sudo passwd root
6.2 修改系统语言
sudo raspi-config
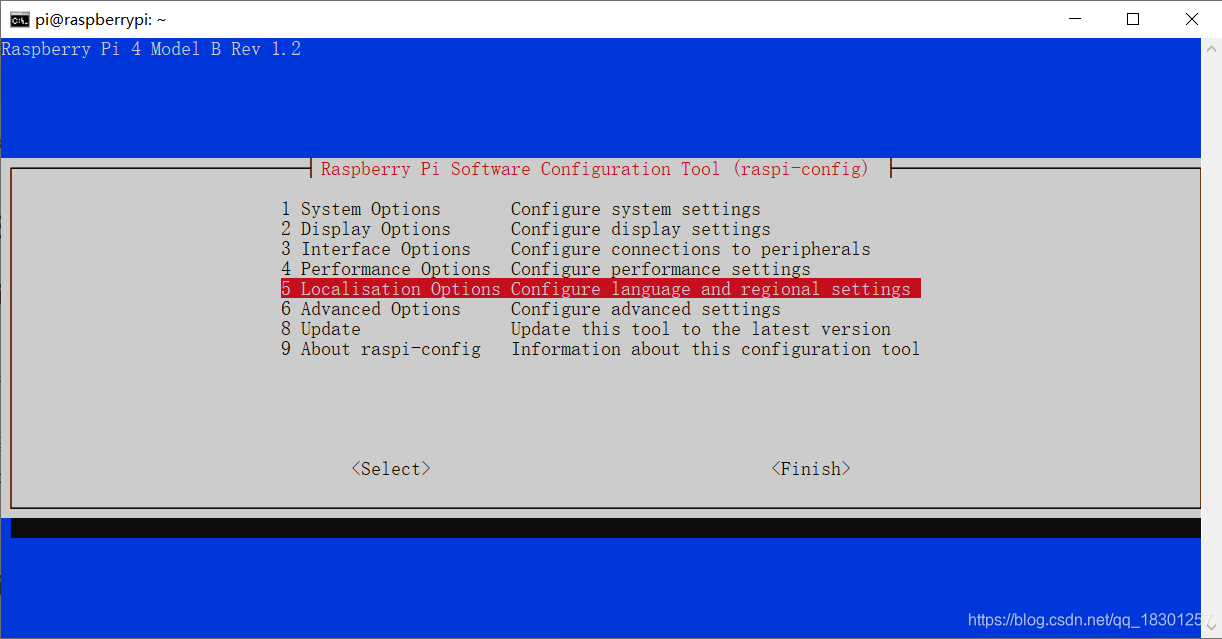
选择 Localisation Options
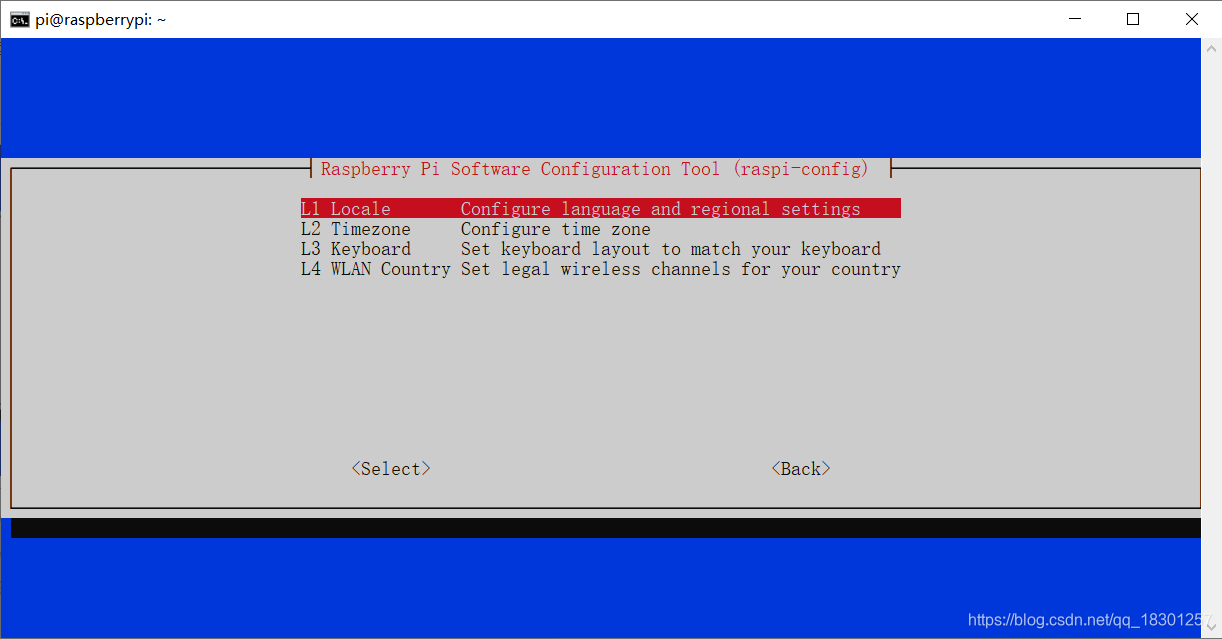
选择 Locale
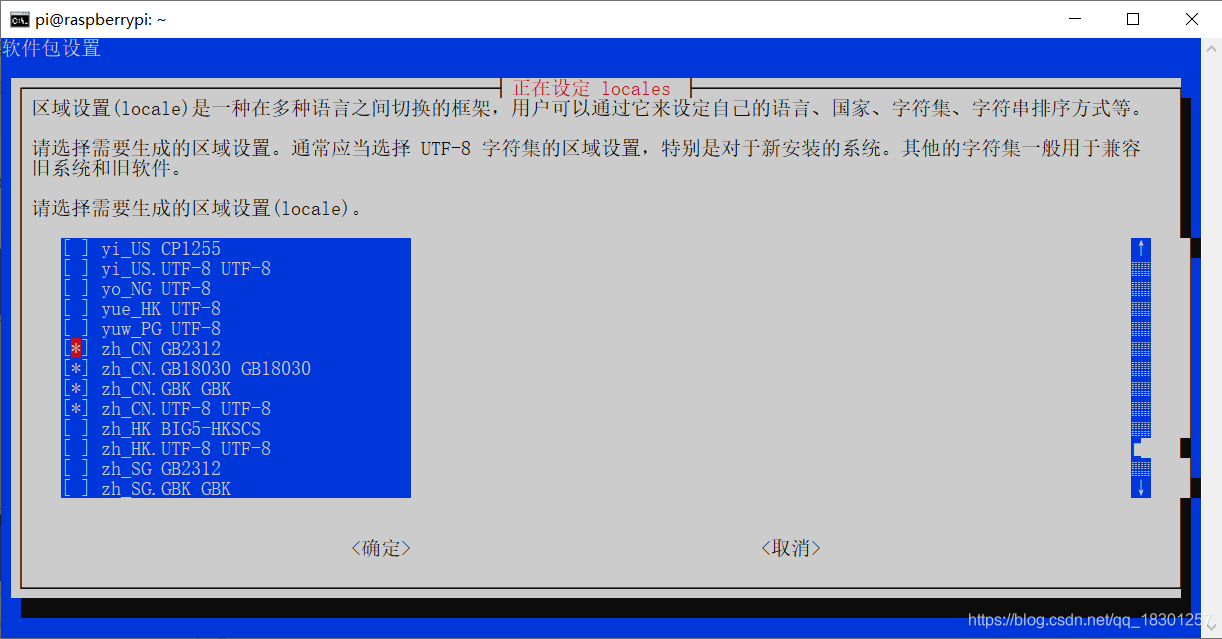
用方向键一直往下,找到上图中打 * 号的几个选项,使用空格键选中
- zh_CN GB2312
- zh_CN.GB18030 GB18030
- zh_CN.GBK GBK
- zh_CN.UTF-8 UTF-8
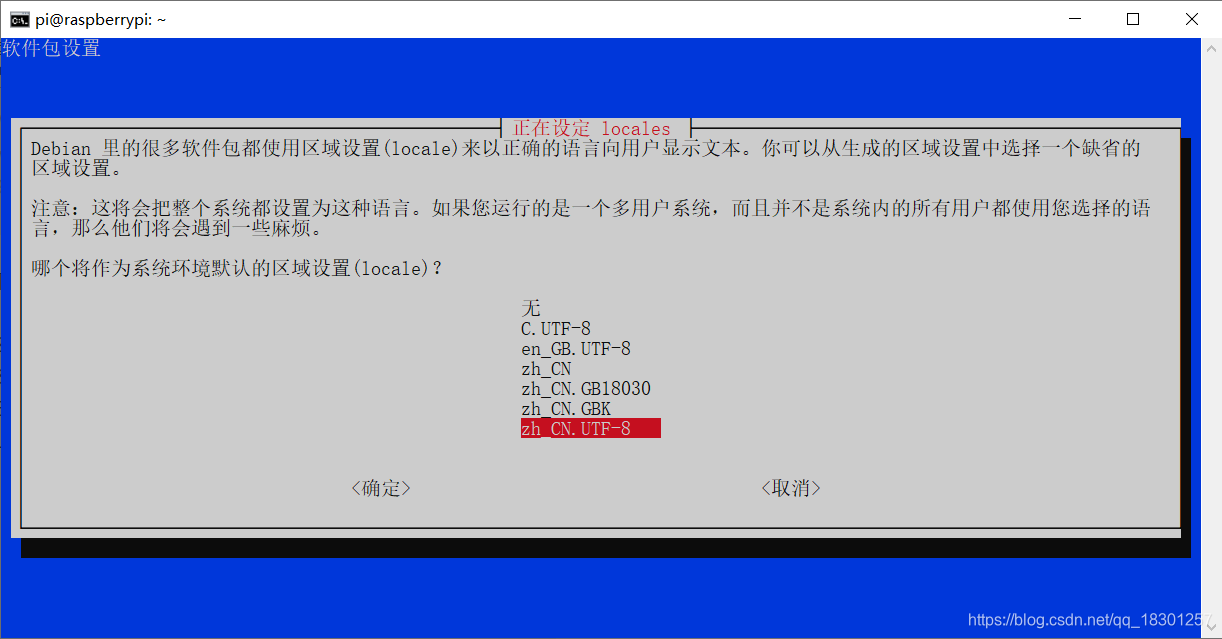
选择默认语言 zh_CN.UTF-8 UTF-8 ,选择 确定 之后等待设置。
设置完成后,重新启动树莓派。
sudo reboot
6.3 修改软件源
# 备份软件源
sudo cp /etc/apt/sources.list /etc/apt/sources.list.backup
sudo cp /etc/apt/sources.list.d/raspi.list /etc/apt/sources.list.d/raspi.list.backup

# 打开软件源
sudo nano /etc/apt/sources.list
将文件里的所有内容替换为以下内容
deb http://mirrors.tuna.tsinghua.edu.cn/raspbian/raspbian/ buster main non-free contrib rpi
deb-src http://mirrors.tuna.tsinghua.edu.cn/raspbian/raspbian/ buster main non-free contrib rpi
# 打开树莓派源
sudo nano /etc/apt/sources.list.d/raspi.list
将文件里的所有内容替换为以下内容
deb http://mirrors.tuna.tsinghua.edu.cn/raspberrypi/ buster main ui
执行完以上操作后,执行树莓派系统更新
sudo apt-get update
sudo apt-get upgrade
接下来的慢慢等待就好
6.4 修改 Python 源
sudo nano /etc/pip.conf
将里面的内容替换为
[global]
extra-index-url=https://pypi.tuna.tsinghua.edu.cn/simple
6.5 配置 3.5 寸屏幕驱动
因为 Yogurt 买了一个 3.5 寸的屏幕,所以需要安装驱动才能运行,这一步不是必须的。
git clone https://github.com/goodtft/LCD-show.git
cd LCD-show/
sudo su
./LCD35-show
需要注意的是:在 Yogurt 测试一天一夜的过程中,发现并不是所有的屏幕驱动都是能用的,因此需要看一下购买时的说明书或者卡片,再来安装驱动。
7 连接 VNC
看习惯了图形界面,看命令行可能会有点不习惯,那么就需要远程桌面来解决了。这里用的是 VNC Viewer。树莓派已经预装了,我们只要在控制端安装 VNC 工具就好了。
下载传送门:https://www.realvnc.com/download/file/viewer.files/VNC-Viewer-6.20.529-Windows.exe
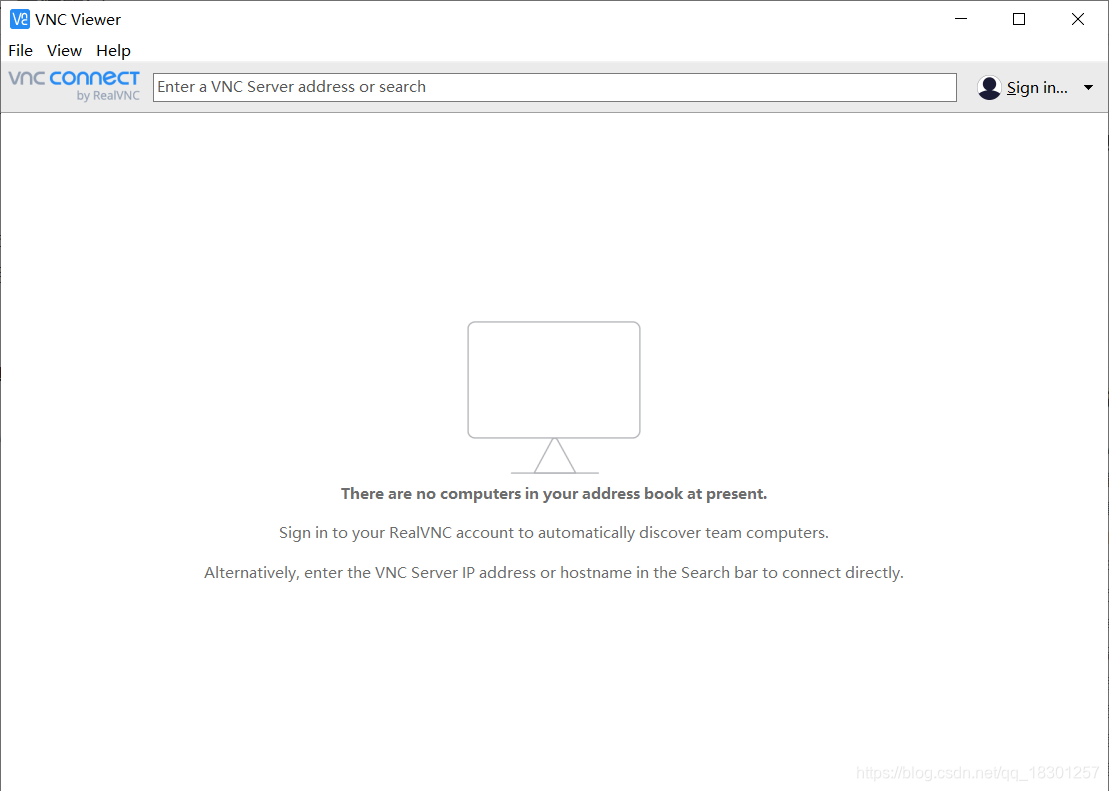
安装完打开之后就是这个样子了。
在最上面输入树莓派的 IP 地址即可连接。
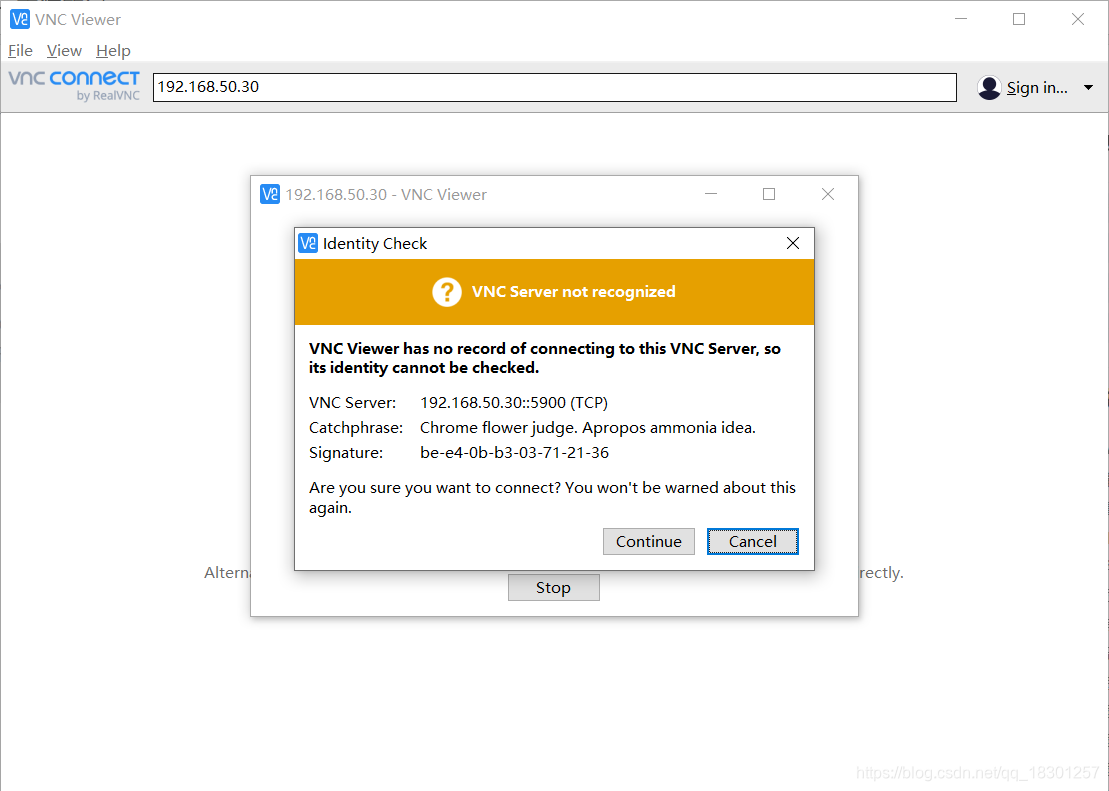
选择 Continue
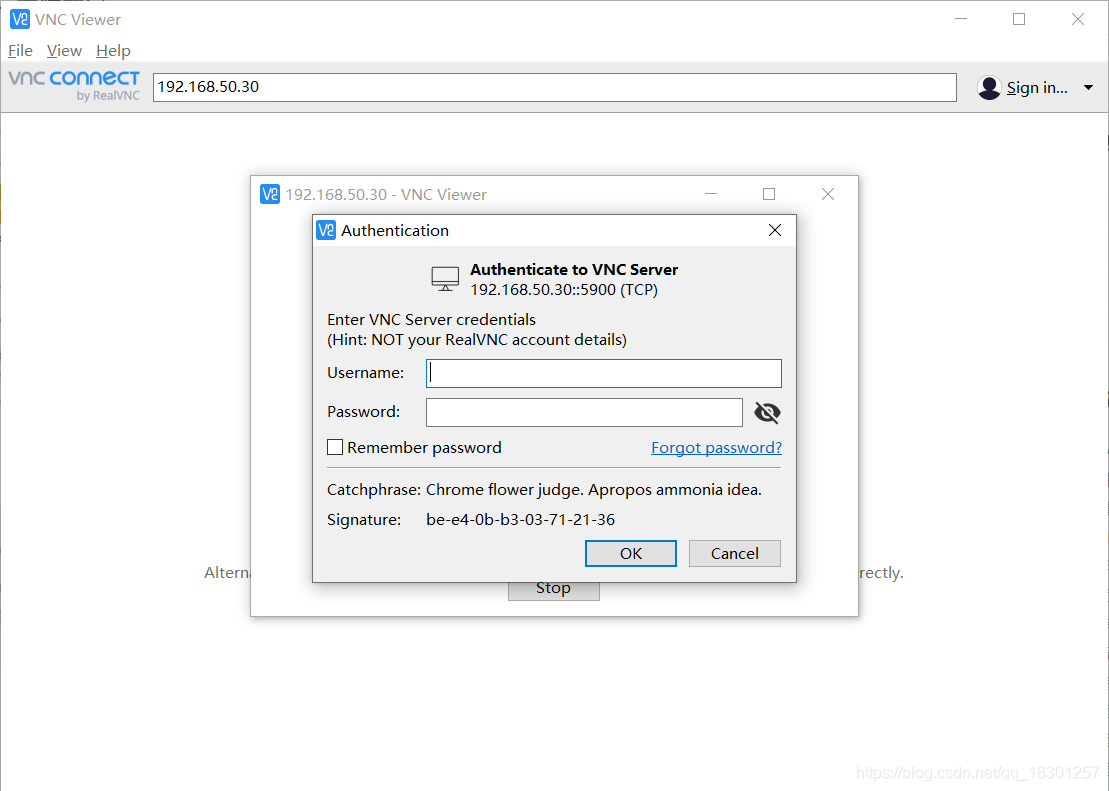
输入树莓派的 登录名 和 密码
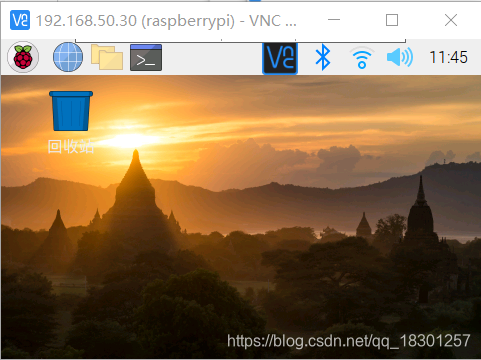
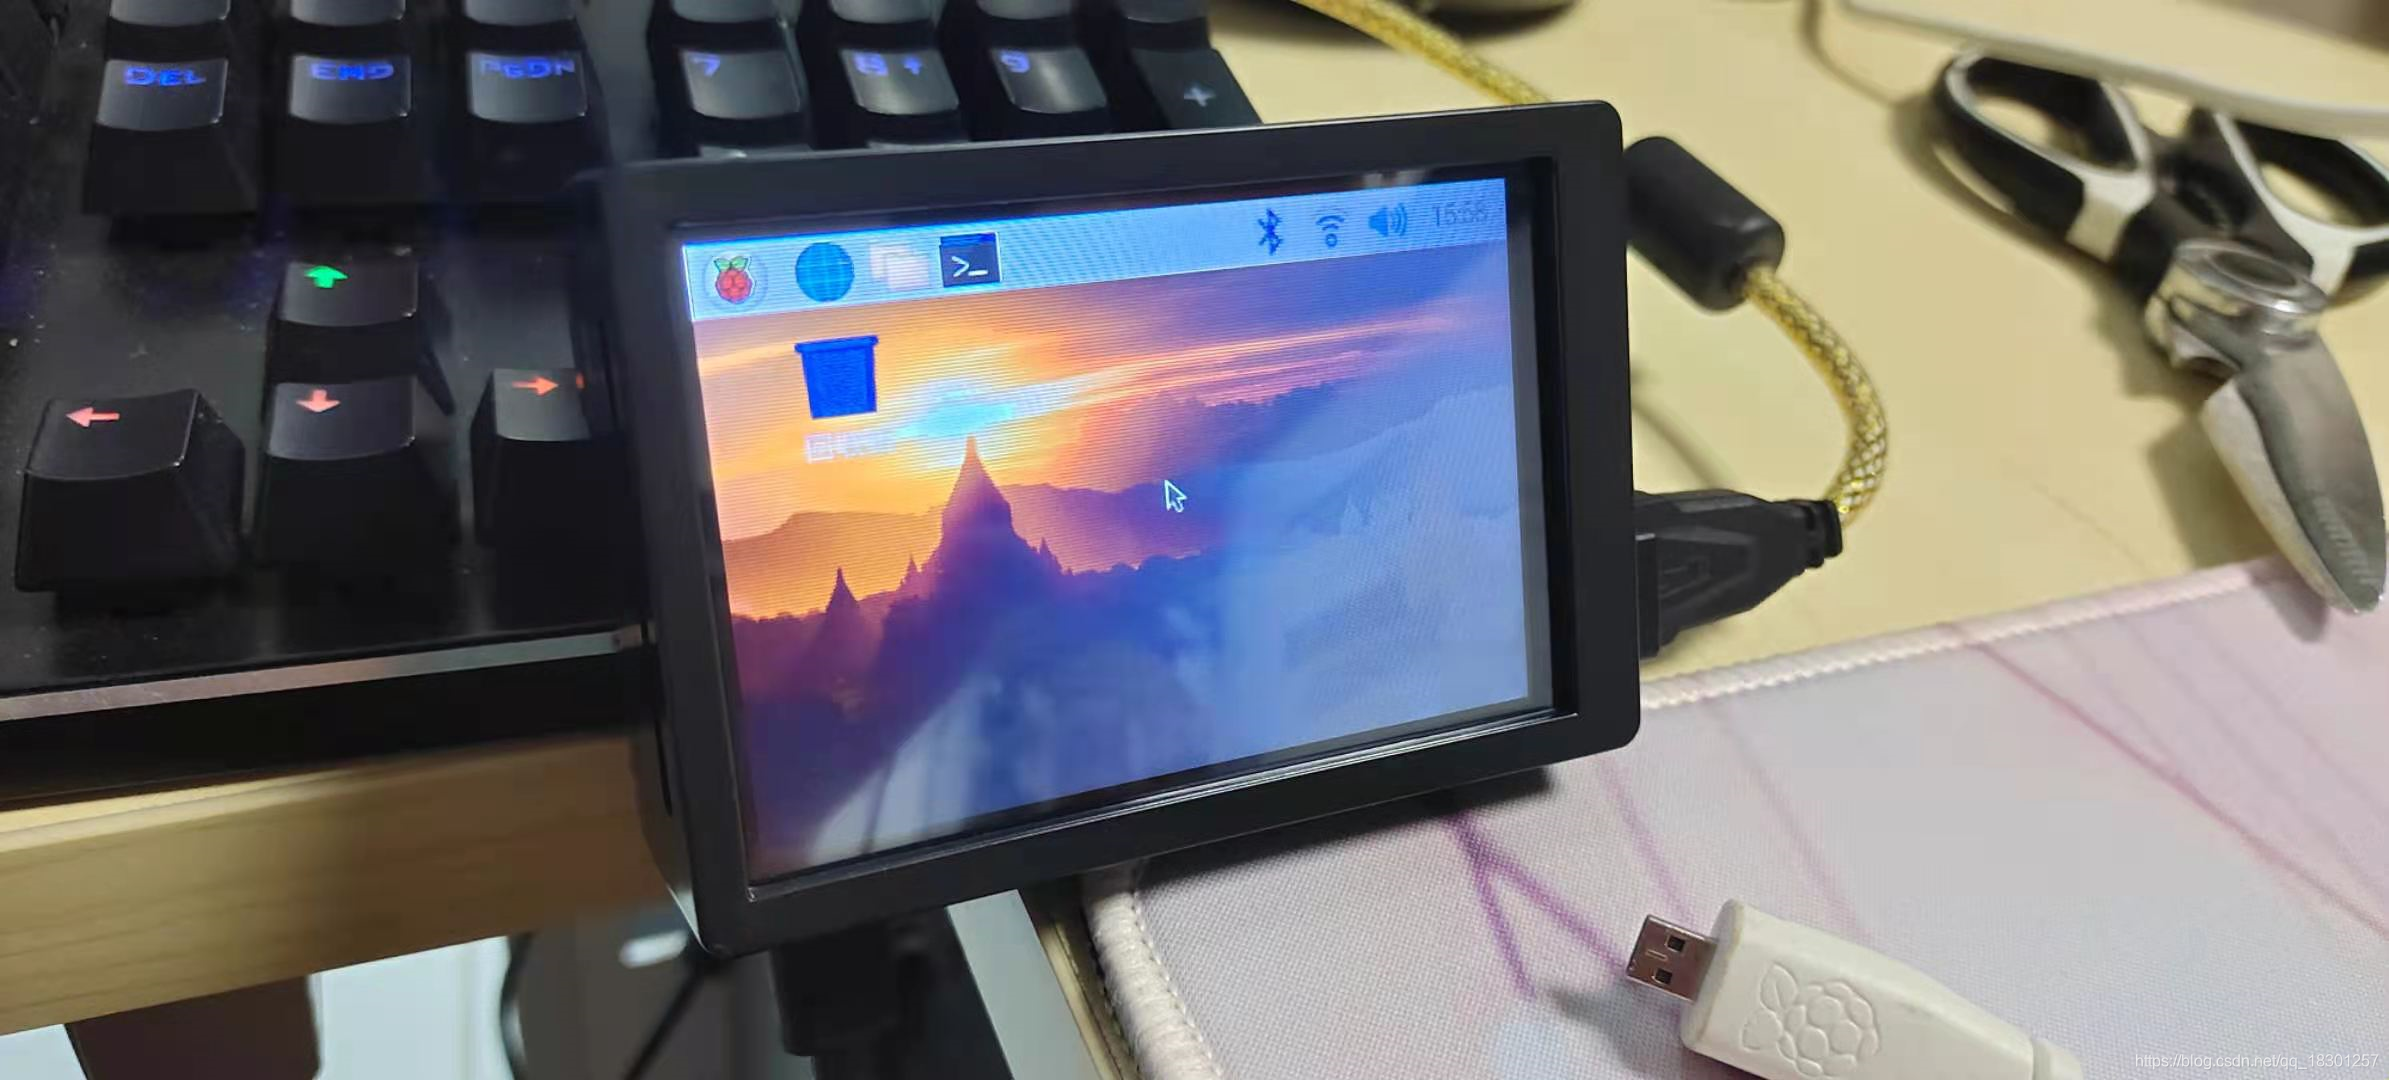
进入系统之后就是这样了,这里屏幕小是因为这台是有一个 3.5 寸屏幕,所以远程也是按照这个屏幕 480 x 360 的分辨率来的,正常来说,都会默认为1280 x 720 的。
以上就是本次树莓派安装的全部过程了。