- 第六阶段模块四 SSM单体架构项目(上)
- 任务一:拉勾教育后台管理系统: 课程管理模块开发(SSM)
- 任务二:拉勾教育后台管理系统: 广告和用户管理模块开发(SSM)
- 任务三:拉勾教育后台管理系统: 权限管理模块开发(SSM)
- 任务四:拉勾教育后台管理系统: Git(SSM)
- 第六阶段模块五 SSM单体架构项目(下)
- 任务一 SSM项目前端开发_1
- 任务二 SSM前端项目开发_2
- 任务三 SSM项目前端开发_3
第六阶段模块四 SSM单体架构项目(上)
任务一:拉勾教育后台管理系统: 课程管理模块开发(SSM)
1. 项目架构
1.1 项目介绍
拉勾教育后台管理系统,是提供给拉勾教育的相关业务人员使用的一个后台管理系统, 业务人员可以在这个后台管理系统中,对课程信息、广告信息、用户信息、 权限信息等数据进行维护.
在 web阶段,我们已经完成了拉勾教育后台管理系统中课程模块, 接下来将对拉勾教育后台管理系统进行升级改造,基于SSM框架来完成课程信息模块,广告信息模块,用户信息模块,权限信息模块
1.2 页面原型展示
访问 http://eduboss.lagou.com
(已经基于微服务架构进行了实现并且进行了上线)
用户名: 密码:

1.3 技术选型
1.3.1 前端技术选型
| 前端技术 | 说明 |
|---|---|
| Vue.js | 是一套用于构建用户界面的渐进式JavaScript框架 |
| Element UI 库 | element-ui 是饿了么前端出品的基于 Vue.js的 后台组件库,方便程序员进行页面快速布局和构建 |
| node.js | 简单的说 Node.js 就是运行在服务端的 JavaScript 运行环境 . |
| axios | 对ajax的封装, 简单来说就是ajax技术实现了局部数据的刷新,axios实现了对ajax的封装, |
1.3.2 后端技术选型
| 后端技术 | 说明 |
|---|---|
| Web层 | 借助springmvc接收请求,进行视图跳转 |
| Service层 | 借助spring进行IOC、AOP、及事务管理 |
| dao层 | 借助mybatis进行数据库交互 |
1.4 项目开发环境
- 开发工具
○ 后端: IDEA 2019
○ 前端: VS code
○ 数据库客户端工具: SQLYog - 开发环境
○ JDK 11
○ Maven 3.6.3
○ MySQL 5.7
2. Maven进阶使用(Maven聚合工程)
2.1 maven基础知识回顾
2.1.1 maven介绍
maven 是一个项目管理工具,主要作用是在项目开发阶段对Java项目进行依赖管理和项目构建(maven两大核心)。
依赖管理:就是对jar包的管理。通过导入maven坐标,就相当于将仓库中的jar包导入了当前项目中。
项目构建:通过maven的一个命令就可以完成项目从清理、编译、测试、报告、打包,部署整个过程(也就是maven生命周期)。

2.1.2 maven的仓库类型
1.本地仓库
2.远程仓库
①maven中央仓库(地址:http://repo2.maven.org/maven2/)
②maven私服(公司局域网内的仓库,需要自己搭建)
③其他公共远程仓库(例如apache提供的远程仓库,地址:http://repo.maven.apache.org/maven2/)
本地仓库—》maven私服—》maven中央仓库
2.1.3 maven常用命令
clean:	 	清理
compile:	编译		src下的源文件编译成class文件
test: 		测试		自动执行单元测试
package:	打包		jar包 war包 根据packaging中的设置
install: 	安装		打包并安装到本地仓库
2.1.4 maven坐标书写规范
dependency: 表示是依赖
groupId: 公司域名反写(通常) com开头盈利阻止 org开头非盈利阻止
artifactId: 项目名

2.2 maven的依赖传递
2.2.1 什么是依赖传递
在maven中,依赖是可以传递的,假设存在三个项目,分别是项目A,项目B以及项目C。假设C依赖B,B依赖A,那么我们可以根据maven项目依赖的特征不难推出项目C也依赖A。


通过上面的图可以看到,我们的web项目直接依赖了spring-webmvc,而spring-webmvc依赖了spingaop、spring-beans等。最终的结果就是在我们的web项目中间接依赖了spring-aop、spring-beans等。
依赖冲突
由于依赖传递现象的存在, spring-webmvc 依赖 spirng-beans-5.1.5,spring-aop 依赖 springbeans-5.1.6,但是发现 spirng-beans-5.1.5 加入到了工程中,而我们希望 spring-beans-5.1.6 加入工程。这就造成了依赖冲突。

2.2.2 如何解决依赖冲突
1.使用maven提供的依赖调解原则
第一声明者优先原则
路径近者优先原则
2.排除依赖
3.锁定版本
2.2.3 依赖调节原则——第一声明者优先原则
在 pom 文件中定义依赖,以先声明的依赖为准。其实就是根据坐标导入的顺序来确定最终使用哪个传递过来的依赖。

结论:通过上图可以看到,spring-aop和spring-webmvc都传递过来了spring-beans,但是因为spring-aop在前面,所以最终使用的spring-beans是由spring-aop传递过来的,而spring-webmvc传递过来的spring-beans则被忽略了。
2.2.4 依赖调节原则——路径近者优先原则

总结:直接依赖大于依赖传递
2.2.5 排除依赖
可以使用exclusions标签将传递过来的依赖排除出去。

2.2.6 版本锁定(常用)
采用直接锁定版本的方法确定依赖jar包的版本,版本锁定后则不考虑依赖的声明顺序或依赖的路径,以锁定的版本为准添加到工程中,此方法在企业开发中经常使用。
版本锁定的使用方式:
第一步:在dependencyManagement标签中锁定依赖的版本
第二步:在dependencies标签中声明需要导入的maven坐标
①在dependencyManagement标签中锁定依赖的版本

②在dependencies标签中声明需要导入的maven坐标

2.2.7 properties标签的使用
<properties>
	<spring.version>5.1.5.RELEASE</spring.version>
	<springmvc.version>5.1.5.RELEASE</springmvc.version>
	<mybatis.version>3.5.1</mybatis.version>
</properties>
<!--锁定jar版本-->
<dependencyManagement>
	<dependencies>
		<!-- Mybatis -->
		<dependency>
			<groupId>org.mybatis</groupId>
			<artifactId>mybatis</artifactId>
			<version>${mybatis.version}</version>
		</dependency>
		<!-- springMVC -->
		<dependency>
			<groupId>org.springframework</groupId>
			<artifactId>spring-webmvc</artifactId>
			<version>${springmvc.version}</version>
		</dependency>
		<!-- spring -->
		<dependency>
			<groupId>org.springframework</groupId>
			<artifactId>spring-context</artifactId>
			<version>${spring.version}</version>
		</dependency>
		<dependency>
			<groupId>org.springframework</groupId>
			<artifactId>spring-core</artifactId>
			<version>${spring.version}</version>
		</dependency>
		<dependency>
		<groupId>org.springframework</groupId>
		<artifactId>spring-aop</artifactId>
		<version>${spring.version}</version>
		</dependency>
		<dependency>
			<groupId>org.springframework</groupId>
			<artifactId>spring-web</artifactId>
			<version>${spring.version}</version>
		</dependency>
		<dependency>
			<groupId>org.springframework</groupId>
			<artifactId>spring-expression</artifactId>
			<version>${spring.version}</version>
		</dependency>
		<dependency>
			<groupId>org.springframework</groupId>
			<artifactId>spring-beans</artifactId>
			<version>${spring.version}</version>
		</dependency>
		<dependency>
			<groupId>org.springframework</groupId>
			<artifactId>spring-aspects</artifactId>
			<version>${spring.version}</version>
		</dependency>
		<dependency>
			<groupId>org.springframework</groupId>
			<artifactId>spring-context-support</artifactId>
			<version>${spring.version}</version>
		</dependency>
		<dependency>
			<groupId>org.springframework</groupId>
			<artifactId>spring-test</artifactId>
			<version>${spring.version}</version>
		</dependency>
		<dependency>
			<groupId>org.springframework</groupId>
			<artifactId>spring-jdbc</artifactId>
			<version>${spring.version}</version>
		</dependency>
		<dependency>
			<groupId>org.springframework</groupId>
			<artifactId>spring-tx</artifactId>
			<version>${spring.version}</version>
		</dependency>
	</dependencies>
</dependencyManagement>
2.3 maven聚合工程(分模块)
概念: 在现实生活中,汽车厂家进行汽车生产时,由于整个生产过程非常复杂和繁琐,工作量非常大,所以厂家都会将整个汽车的部件分开生产,最终再将生产好的部件进行组装,形成一台完整的汽车。

2.3.1 分模块构建maven工程分析
在企业项目开发中,由于项目规模大,业务复杂,参与的人员比较多,一般会通过合理的模块拆分将一个大型的项目拆分为N多个小模块,分别进行开发。而且拆分出的模块可以非常容易的被其他模块复用
常见的拆分方式有两种:
第一种:按照业务模块进行拆分,每个模块拆分成一个maven工程,例如将一个项目分为用户模块,订单模块,购物车模块等,每个模块对应就是一个maven工程
第二种:按照层进行拆分,例如持久层、业务层、表现层等,每个层对应就是一个maven工程
不管上面那种拆分方式,通常都会提供一个父工程,将一些公共的代码和配置提取到父工程中进行统一管理和配置。
maven_parent: 父工程, 资源的统一管理, 依赖管理, 版本锁定
maven_pojo: 实体类
maven_dao: 数据库交互的代码
maven_service: 业务逻辑处理
maven_web: 接收请求,视图跳转
依赖
maven_dao 要用到 maven_pojo 中的实体类, 那么在 maven_dao 的 pom.xml 中引入 maven_pojo 工程的坐标

2.3.2 maven工程的继承
在Java语言中,类之间是可以继承的,通过继承,子类就可以引用父类中非private的属性和方法。同样,在maven工程之间也可以继承,子工程继承父工程后,就可以使用在父工程中引入的依赖。继承的目的是为了消除重复代码。

2.3.3 maven工程的聚合
在maven工程的pom.xml文件中可以使用标签将其他maven工程聚合到一起,聚合的目的是为了进行统一操作。
例如拆分后的maven工程有多个,如果要进行打包,就需要针对每个工程分别执行打包命令,操作起来非常繁琐。这时就可以使用标签将这些工程统一聚合到maven父工程中,需要打包的时候,只需要在此工程中执行一次打包命令,其下被聚合的工程就都会被打包了。

2.3.3 maven聚合工程_搭建拉勾教育后台管理系统
工程整体结构如下:
1)lagou_edu_home_parent为父工程,其余工程为子工程,都继承父工程lagou_edu_home_parent
2)lagou_edu_home_parent工程将其子工程都进行了聚合
3)子工程之间存在依赖关系:
ssm_domain依赖ssm_utils
ssm_dao依赖ssm_domain
ssm_service依赖ssm_dao
ssm_web依赖ssm_service
① 父工程lagou_edu_home_parent构建
修改pom.xml,添加依赖
<properties>
	<spring.version>5.1.5.RELEASE</spring.version>
	<springmvc.version>5.1.5.RELEASE</springmvc.version>
	<mybatis.version>3.5.1</mybatis.version>
</properties>
<!--锁定jar版本-->
<dependencyManagement>
<dependencies>
	<!-- Mybatis -->
	<dependency>
		<groupId>org.mybatis</groupId>
		<artifactId>mybatis</artifactId>
		<version>${mybatis.version}</version>
	</dependency>
	<!-- springMVC -->
	<dependency>
		<groupId>org.springframework</groupId>
		<artifactId>spring-webmvc</artifactId>
		<version>${springmvc.version}</version>
	</dependency>
	<!-- spring -->
	<dependency>
		<groupId>org.springframework</groupId>
		<artifactId>spring-context</artifactId>
		<version>${spring.version}</version>
	</dependency>
	<dependency>
		<groupId>org.springframework</groupId>
		<artifactId>spring-core</artifactId>
		<version>${spring.version}</version>
	</dependency>
	<dependency>
		<groupId>org.springframework</groupId>
		<artifactId>spring-aop</artifactId>
		<version>${spring.version}</version>
	</dependency>
	<dependency>
		<groupId>org.springframework</groupId>
		<artifactId>spring-web</artifactId>
		<version>${spring.version}</version>
	</dependency>
	<dependency>
		<groupId>org.springframework</groupId>
		<artifactId>spring-expression</artifactId>
		<version>${spring.version}</version>
	</dependency>
	<dependency>
		<groupId>org.springframework</groupId>
		<artifactId>spring-beans</artifactId>
		<version>${spring.version}</version>
	</dependency>
	<dependency>
		<groupId>org.springframework</groupId>
		<artifactId>spring-aspects</artifactId>
		<version>${spring.version}</version>
	</dependency>
	<dependency>
		<groupId>org.springframework</groupId>
		<artifactId>spring-context-support</artifactId>
		<version>${spring.version}</version>
	</dependency>
	<dependency>
		<groupId>org.springframework</groupId>
		<artifactId>spring-test</artifactId>
		<version>${spring.version}</version>
	</dependency>
	<dependency>
		<groupId>org.springframework</groupId>
		<artifactId>spring-jdbc</artifactId>
		<version>${spring.version}</version>
	</dependency>
	<dependency>
		<groupId>org.springframework</groupId>
		<artifactId>spring-tx</artifactId>
		<version>${spring.version}</version>
		</dependency>
		</dependencies>
</dependencyManagement>
<dependencies>
	<!--mybatis坐标-->
	<dependency>
		<groupId>mysql</groupId>
		<artifactId>mysql-connector-java</artifactId>
		<version>5.1.47</version>
	</dependency>
	<dependency>
		<groupId>com.alibaba</groupId>
		<artifactId>druid</artifactId>
		<version>1.1.15</version>
	</dependency>
	<dependency>
		<groupId>org.mybatis</groupId>
		<artifactId>mybatis</artifactId>
	</dependency>
	<dependency>
		<groupId>junit</groupId>
		<artifactId>junit</artifactId>
		<version>4.12</version>
	</dependency>
	<!--spring坐标-->
	<dependency>
		<groupId>org.springframework</groupId>
		<artifactId>spring-context</artifactId>
	</dependency>
	<dependency>
		<groupId>org.aspectj</groupId>
		<artifactId>aspectjweaver</artifactId>
		<version>1.8.13</version>
	</dependency>
	<dependency>
		<groupId>org.springframework</groupId>
		<artifactId>spring-jdbc</artifactId>
	</dependency>
	<dependency>
		<groupId>org.springframework</groupId>
		<artifactId>spring-tx</artifactId>
	</dependency>
	<dependency>
		<groupId>org.springframework</groupId>
		<artifactId>spring-test</artifactId>
	</dependency>
	<!--mybatis整合spring坐标-->
	<dependency>
		<groupId>org.mybatis</groupId>
		<artifactId>mybatis-spring</artifactId>
		<version>1.3.1</version>
	</dependency>
	<!--springMVC坐标-->
	<dependency>
		<groupId>org.springframework</groupId>
		<artifactId>spring-webmvc</artifactId>
	</dependency>
	<dependency>
		<groupId>javax.servlet</groupId>
		<artifactId>javax.servlet-api</artifactId>
		<version>3.1.0</version>
		<scope>provided</scope>
	</dependency>
	<dependency>
		<groupId>javax.servlet.jsp</groupId>
		<artifactId>jsp-api</artifactId>
		<version>2.2</version>
		<scope>provided</scope>
	</dependency>
	<dependency>
		<groupId>jstl</groupId>
		<artifactId>jstl</artifactId>
		<version>1.2</version>
	</dependency>
	<dependency>
		<groupId>com.fasterxml.jackson.core</groupId>
		<artifactId>jackson-databind</artifactId>
		<version>2.9.8</version>
	</dependency>
	<dependency>
		<groupId>com.fasterxml.jackson.core</groupId>
		<artifactId>jackson-core</artifactId>
		<version>2.9.8</version>
	</dependency>
	<dependency>
		<groupId>com.fasterxml.jackson.core</groupId>
		<artifactId>jackson-annotations</artifactId>
		<version>2.9.0</version>
	</dependency>
	<dependency>
		<groupId>com.github.pagehelper</groupId>
		<artifactId>pagehelper</artifactId>
		<version>4.1.6</version>
	</dependency>
	<!-- Beanutils -->
	<dependency>
		<groupId>commons-beanutils</groupId>
		<artifactId>commons-beanutils</artifactId>
		<version>1.8.3</version>
	</dependency>
	<dependency>
		<groupId>commons-fileupload</groupId>
		<artifactId>commons-fileupload</artifactId>
		<version>1.3.1</version>
	</dependency>
	<!-- 解决跨域问题所需依赖 -->
	<dependency>
		<groupId>com.thetransactioncompany</groupId>
		<artifactId>cors-filter</artifactId>
		<version>2.5</version>
	</dependency>
</dependencies>
<build>
	<plugins>
		<plugin>
			<groupId>org.apache.maven.plugins</groupId>
			<artifactId>maven-compiler-plugin</artifactId>
			<version>3.1</version>
			<configuration>
				<source>1.8</source>
				<target>1.8</target>
				<encoding>UTF-8</encoding>
			</configuration>
		</plugin>
	</plugins>
</build>
② 子工程ssm_utils构建
③ 子工程ssm_domain构建
<!-- 依赖ssm_utils -->
<dependencies>
	<dependency>
		<groupId>com.lagou</groupId>
		<artifactId>ssm_utils</artifactId>
		<version>1.0-SNAPSHOT</version>
	</dependency>
</dependencies>
④ 子工程ssm_dao构建
配置ssm_domain工程的pom.xml文件
<!--依赖ssm_domain-->
<dependencies>
	<dependency>
		<groupId>com.lagou</groupId>
		<artifactId>ssm_domain</artifactId>
		<version>1.0-SNAPSHOT</version>
	</dependency>
</dependencies>
创建DAO接口和Mapper映射文件
package com.lagou.dao;
import com.lagou.domain.Test;
import java.util.List;
public interface TestMapper {


	public List<Test> findAllTest();
}
<?xml version="1.0" encoding="UTF-8" ?>
<!DOCTYPE mapper PUBLIC "-//mybatis.org//DTD Mapper 3.0//EN"
"http://mybatis.org/dtd/mybatis-3-mapper.dtd">
<mapper namespace="com.lagou.dao.TestMapper">
	<select id="findAllTest" resultType="com.lagou.domain.Test">
		select * from test;
	</select>
</mapper>
在resources目录下创建spring配置文件applicationContext-dao.xml
(之前是在一个工程中进行的ssm整合, 现在是聚合工程不仅要对代码进行拆分也要对spring核心配置文件进行拆分, 对spring配置文件也进行三份的拆分, 分别对应dao层 service层 web层)
<?xml version="1.0" encoding="UTF-8"?>
<beans xmlns="http://www.springframework.org/schema/beans"
xmlns:xsi="http://www.w3.org/2001/XMLSchema-instance"
xmlns:context="http://www.springframework.org/schema/context"
xmlns:tx="http://www.springframework.org/schema/tx"
xmlns:aop="http://www.springframework.org/schema/aop"
xsi:schemaLocation="
http://www.springframework.org/schema/beans
http://www.springframework.org/schema/beans/spring-beans.xsd
http://www.springframework.org/schema/context
http://www.springframework.org/schema/context/spring-context.xsd
http://www.springframework.org/schema/tx
http://www.springframework.org/schema/tx/spring-tx.xsd
http://www.springframework.org/schema/aop
http://www.springframework.org/schema/aop/spring-aop.xsd">
	<!--spring整合mybatis-->
	<context:property-placeholder location="classpath:jdbc.properties">
	</context:property-placeholder>
	<bean id="dataSource" class="com.alibaba.druid.pool.DruidDataSource">
		<property name="driverClassName" value="${jdbc.driver}"/>
		<property name="url" value="${jdbc.url}"/>
		<property name="username" value="${jdbc.username}"/>
		<property name="password" value="${jdbc.password}"/>
	</bean>
	<!--sqlSessionFactory的创建权交给了spring 生产sqlSession-->
	<bean id="sqlSessionFactory"
	class="org.mybatis.spring.SqlSessionFactoryBean">
		<property name="dataSource" ref="dataSource"></property>
		<property name="typeAliasesPackage" value="com.lagou.domain"></property>
		<!--引入加载mybatis的核心配置文件,可以不用去加载-->
		<property name="configLocation" value="classpath:SqlMapConfig.xml">
		</property>
	</bean>
	<!--mapper映射扫描 MapperScannerConfigurer扫描该包下所有接口,生成代理对象存到IOC容
	器中-->
	<bean class="org.mybatis.spring.mapper.MapperScannerConfigurer">
		<property name="basePackage" value="com.lagou.dao"></property>
	</bean>
</beans>
sqlMapConfig.xml
<?xml version="1.0" encoding="UTF-8"?>
<!DOCTYPE configuration PUBLIC "-//mybatis.org//DTD Config 3.0//EN"
"http://mybatis.org/dtd/mybatis-3-config.dtd">
<configuration>
	<settings>
		<!-- 是否开启自动驼峰命名规则(camel case)映射,即从数据库列名 A_COLUMN 到属性名
		aColumn 的类似映射 a_name aName-->
		<setting name="mapUnderscoreToCamelCase" value="true"/>
	</settings>
</configuration>
⑤子工程ssm_service构建
第一步:创建ssm_service工程
第二步:配置ssm_service工程的pom.xml文件
service层调用dao层方法完成业务逻辑处理, 需要引入dao工程依赖, 构建项目时已经添加依赖, 这里检查一下就好
<dependencies>
	<dependency>
		<groupId>com.lagou</groupId>
		<artifactId>ssm_dao</artifactId>
		<version>1.0-SNAPSHOT</version>
	</dependency>
</dependencies>
第三步:创建TestService接口和实现类
public interface TestService {


	public List<Test> findAllTest();
}
@Service
public class TestServiceImpl implements TestService {


	@Autowired
	private TestMapper testMapper;
	@Override
	public List<Test> findAllTest() {


		List<Test> allTest = testMapper.findAllTest();
		return allTest;
	}
}
web层调用service层方法, 所以需要生成 TestServiceImpl 实现类存到IOC容器中, 这样才能在web层进行调用, ==> @Service
第四步:创建spring配置文件applicationContext-service.xml
进行service的相关配置, service中通过spring做了一些IOC管理 : 实体类进行了一些bean对象创建保存到IOC容器管理, 通过注解实现的, 所以需要在spring配置文件中配置注解扫描 + 我们在项目中只会加载一个spring核心配置文件, 这一个核心配置文件会借助import标签加载applicationContext-service.xml, 而applicationContext-service.xml加载了applicationContext-dao.xml, 所以看似只加载了一个spring核心配置文件, 实际上我们把拆分的spring核心配置文件都进行了加载
<?xml version="1.0" encoding="UTF-8"?>
<beans xmlns="http://www.springframework.org/schema/beans"
xmlns:xsi="http://www.w3.org/2001/XMLSchema-instance"
xmlns:context="http://www.springframework.org/schema/context"
xmlns:tx="http://www.springframework.org/schema/tx"
xmlns:aop="http://www.springframework.org/schema/aop"
xsi:schemaLocation="
http://www.springframework.org/schema/beans
http://www.springframework.org/schema/beans/spring-beans.xsd
http://www.springframework.org/schema/context
http://www.springframework.org/schema/context/spring-context.xsd
http://www.springframework.org/schema/tx
http://www.springframework.org/schema/tx/spring-tx.xsd
http://www.springframework.org/schema/aop
http://www.springframework.org/schema/aop/spring-aop.xsd">

<!--配置IOC相关操作:开启注解扫描-->
<context:component-scan base-package="com.lagou.service">
</context:component-scan>
<!--加载applicationContext-service.xml时也会加载applicationContext-dao.xml-->
<import resource="classpath:applicationContext_dao.xml"/>
</beans>
⑥子工程ssm_web构建
第一步:创建maven_web工程,注意打包方式为war
第二步:配置maven_web工程的pom.xml文件
<dependencies>
	<dependency>
		<groupId>com.lagou</groupId>
		<artifactId>ssm_service</artifactId>
		<version>1.0-SNAPSHOT</version>
	</dependency>
</dependencies>
第三步:创建Controller
@RestController是组合注解 组合了 @Controller @ResponseBody
@ResponseBody 会把 allTest list集合转成JSON响应到页面
@RestController
@RequestMapping("/test")
public class TestController {


	@Autowired
	private TestService testService;
	@RequestMapping("/findAllTest")
	public List<Test> findAllTest(){


		List<Test> allTest = testService.findAllTest();
		return allTest;
	}
}
要使@Controller生效, 生成TestController 对象保存到IOC容器中, 所以在springmvc核心配置文件中配置注解扫描
查询到List集合后, 把它转成JSON响应给页面, @ResponseBody注解实现此功能
要使@ResponseBody生效, 在springmvc核心配置文件中配置mvc注解僧强
第四步: 创建springmvc配置文件springmvc.xml
<beans xmlns="http://www.springframework.org/schema/beans"
xmlns:mvc="http://www.springframework.org/schema/mvc"
xmlns:context="http://www.springframework.org/schema/context"
xmlns:xsi="http://www.w3.org/2001/XMLSchema-instance"
xsi:schemaLocation="http://www.springframework.org/schema/beans
http://www.springframework.org/schema/beans/spring-beans.xsd
http://www.springframework.org/schema/mvc
http://www.springframework.org/schema/mvc/spring-mvc.xsd
http://www.springframework.org/schema/context
http://www.springframework.org/schema/context/spring-context.xsd">
<!--1.组件扫描:只扫描controller-->
<context:component-scan base-package="com.lagou.controller">
</context:component-scan>
<!--2.mvc注解增强:处理器映射器及处理器适配器-->
<mvc:annotation-driven></mvc:annotation-driven>
<!--3.视图解析器: 视图跳转时配置 (这里JSON数据返回所以暂时不需要)-->
<!-- <bean id="resourceViewResolve"
class="org.springframework.web.servlet.view.InternalResourceViewResolver">
<property name="prefix" value="/"></property>
<property name="suffix" value=".html"></property>
</bean>-->
<!--4.放行静态资源-->
<mvc:default-servlet-handler></mvc:default-servlet-handler>
</beans>
第五步:编写applicationContext.xml
<?xml version="1.0" encoding="UTF-8"?>
<beans xmlns="http://www.springframework.org/schema/beans"
xmlns:xsi="http://www.w3.org/2001/XMLSchema-instance"
xmlns:context="http://www.springframework.org/schema/context"
xmlns:tx="http://www.springframework.org/schema/tx"
xmlns:aop="http://www.springframework.org/schema/aop"
xsi:schemaLocation="
http://www.springframework.org/schema/beans
http://www.springframework.org/schema/beans/spring-beans.xsd
http://www.springframework.org/schema/context
http://www.springframework.org/schema/context/spring-context.xsd
http://www.springframework.org/schema/tx
http://www.springframework.org/schema/tx/spring-tx.xsd
http://www.springframework.org/schema/aop
http://www.springframework.org/schema/aop/spring-aop.xsd">
<!--引入:applicationContext_service.xml-->
<import resource="classpath:applicationContext_service.xml"/>
</beans>
第六步:配置web.xml
<!--前端控制器-->
<servlet>
	<servlet-name>DispatcherServlet</servlet-name>
	<servletclass>org.springframework.web.servlet.DispatcherServlet</servlet-class>
	<!--实例化初始化方法时, 获取初始化参数init-param,
	根据param-name获取param-value值springmvc.xml的路径, 根据路径找到配置文件,
	对文件进行加载-->
	<init-param>
		<param-name>contextConfigLocation</param-name>
		<param-value>classpath:spring-mvc.xml</param-value>
	</init-param>
	<!--前端控制器是servlet, servlet的生命周期, 第一次请求来的时候会实例化并执行初始化操作,
	要想在服务器启动时完成servlet实例化并执行初始化操作, 就把springmvc也进行了加载-->
	<load-on-startup>2</load-on-startup>
</servlet>
<servlet-mapping>
	<servlet-name>DispatcherServlet</servlet-name>
	<url-pattern>/</url-pattern>
</servlet-mapping>
<!--中文乱码过滤器:解决post方式提交的乱码-->
<filter>
	<filter-name>CharacterEncodingFilter</filter-name>
	<filterclass>org.springframework.web.filter.CharacterEncodingFilter</filter-class>
	<init-param>
	<param-name>encoding</param-name>
	<param-value>UTF-8</param-value>
	</init-param>
</filter>
<filter-mapping>
	<filter-name>CharacterEncodingFilter</filter-name>
	<url-pattern>/*</url-pattern>
</filter-mapping>
<!--配置spring的监听器 ContextLoaderListener 监听 ServletContext对象的创建
这个对象在服务器启动时创建, 这个监听器坚挺到ServletContext被创建,
会加载applicationContext.xml,
这里有service的spring核心配置文件, 它又有dao的spring核心配置文件
也就是服务器启动时这几个配置文件同时被加载了-->
<listener>
	<listenerclass>org.springframework.web.context.ContextLoaderListener</listener-class>
</listener>
<!--全局初始化参数-->
<context-param>
	<param-name>contextConfigLocation</param-name>
	<param-value>classpath:applicationContext.xml</param-value>
</context-param>
<!--配置跨域过滤器-->
<filter>
	<filter-name>corsFilter</filter-name>
	<filter-class>com.thetransactioncompany.cors.CORSFilter</filter-class>
</filter>
<filter-mapping>
	<filter-name>corsFilter</filter-name>
	<url-pattern>/*</url-pattern>
</filter-mapping>
3. 拉勾教育后台管理系统研发
3.1 课程管理模块功能分析
在本次的项目中,首先先来完成拉勾教育后台管理系统的 课程管理模块, 课程管理模块包含了多条件查询、 图片上传、 新建&修改课程、课程状态管理、课程内容展示、回显章节对应的课程信息、新建&修改章节信息、修改章节状态、 新建&修改课时信息等接口的编写
3.1.1 课程管理
- 实现以下功能:
○ 多条件查询
○ 图片上传
○ 新建课程信息
○ 回显课程信息
○ 修改课程信息
○ 课程状态管理
○ 课程内容展示
○ 回显章节对应的课程信息
○ 新建&修改章节信息
○ 修改章节状态
○ 新建课时信息

3.2 课程管理模块表设计
3.2.1 创建数据库及表
在资料中找到 ssm_lagou_edu.sql,使用SQLYog 执行SQL脚本 ,导入表结构及表信息

3.2.2 表关系介绍
1.ER图

2.数据实体描述
2.1 课程表
| 字段名称 | 类型 | 约束 | 描述 |
|---|---|---|---|
| id | int(11) unsigned NOT NUL AUTO_INCREMENT | PK | 主键PK |
| course_name | varchar(255) | 课程名 | |
| brief | varchar(255) | 课程一句话简介 | |
| price | double(10,2) | 原价 | |
| price_tag | varchar(255) | 原价标签 | |
| discounts | double(10,2) | 优惠价 | |
| discounts_tag | varchar(255) | 优惠标签 | |
| course_description_mark_down | longtext | 描述markdown | |
| course_description | longtext | 课程描述 | |
| course_img_url | varchar(255) | 课程列表图 | |
| is_new | tinyint(1) | 是否新品 | |
| is_new_des | varchar(255) | 广告语 | |
| last_operator_id | int(11) | 最后操作者 | |
| create_time | datetime | 创建时间 | |
| update_time | datetime | 更新时间’ | |
| is_del | tinyint(1) | 是否删除 | |
| total_duration | int(11) | 总时长(分钟) | |
| course_list_img | varchar(255) | 课程列表展示图片 | |
| status | int(2) | 课程状态,0-草稿,1-上架 | |
| sort_num | int(11) | 课程排序,用于后台保存草稿时用到 | |
| preview_first_field | varchar(255) | 课程预览第一个字段 | |
| preview_second_field | varchar(255) | 课程预览第二个字段 | |
| sales | int(11) | 销量 |
2.2 章节表
| 字段名称 | 类型 | 约束 | 描述 |
|---|---|---|---|
| id | int(11) | PK | '主键ID |
| course_id | int(11) | 课程id | |
| section_name | varchar(255) | 章节名 | |
| description | varchar(255) | ‘章节描述’ | |
| status | int(1) | 状态,0:隐藏;1:待更新;2:已发布 | |
| order_num | int(11) | 排序字段 | |
| is_de | tinyint(1) | 是否删除 | |
| update_time | datetime | '更新时间 | |
| create_time | datetime | 记录创建时间 |
2.3 课时表
| 字段名称 | 类型 | 约束 | 描述 |
|---|---|---|---|
| id | int(11) | PK | 主键 |
| course_id | int(11) | 课程id | |
| section_id | int(11) | 章节id | |
| theme | varchar(255) | 课时主题 | |
| duration | int(11) | '课时时长(分钟) | |
| is_free | tinyint(1) | 是否免费 | |
| is_del | tinyint(1) | 是否删除 | |
| order_num | int(11) | 排序字段 | |
| status | int(2) | 课时状态,0-隐藏,1-未发布,2-已发布 | |
| update_time | datetime | 更新时间 | |
| create_time | datetime | 记录创建时间 |
2.4 课程媒体
| 字段名称 | 类型 | 约束 | 描述 |
|---|---|---|---|
| id | int(11) | PK | '课程媒体主键ID |
| course_id | int(11) | 课程id | |
| section_id | int(11) | 章节id | |
| cover_image_url | varchar(255) | 封面图URL | |
| duration | varchar(50) | 时长(06:02) | |
| file_edk | varchar(500) | 媒体资源文件对应的EDK | |
| file_size | double(10,2) | 文件大小MB | |
| file_name | varchar(100) | 文件名称 | |
| file_dk | varchar(100) | '媒体资源文件对应的DK | |
| duration_num | varchar(50) | 时长,秒数 | |
| file_id | varchar(50) | 媒体资源文件ID | |
| is_del | tinyint(1) | 是否删除,0未删除,1删除 | |
| update_time | datetime | 更新时间 | |
| create_time | datetime | 创建时间 |
3.3 课程管理模块接口实现
多条件课程列表查询
3.1 需求分析
根据课程名称及课程状态进行多条件查询


3.2 查看接口文档,进行编码
查看接口文档
实体类:Course
//主键
private int id;
//课程名称
private String courseName;
//课程一句话简介
private String brief;
//原价
private double price;
//原价标签
private String priceTag;
//优惠价
private double discounts;
//优惠价标签
private String discountsTag;
//课程内容markdown
private String courseDescriptionMarkDown;
//课程描述
private String courseDescription;
//课程分享图片url
private String courseImgUrl;
//是否新品
private int isNew;
//广告语
private String isNewDes;
//最后操作者
private int lastOperatorId;
//自动上架时间
private Date autoOnlineTime;
//创建时间
private Date createTime;
//更新时间
private Date updateTime;
//是否删除
private int isDel;
//总时长
private int totalDuration;
//课程列表展示图片
private String courseListImg;
//课程状态,0-草稿,1-上架
private int status;
//课程排序
private int sortNum;
//课程预览第一个字段
private String previewFirstField;
//课程预览第二个字段
private String previewSecondField;
// getter/setter....
ResponseResult
public class ResponseResult {


	private Boolean success;
	private Integer state;
	private String message;
	private Object content;
	public ResponseResult() {


	}
	public ResponseResult(Boolean success, Integer state, String message, Object
	content) {


		this.success = success;
		this.state = state;
		this.message = message;
		this.content = content;
	}
	//getter/setter..
}
实体类:CourseVo(View Object表现层对象:主要用于表现层来接收参数的)
public class CourseVO {


/**
* 课程名称
* */
private String courseName;
/**
* 课程状态
* */
private Integer status;
// getter/setter....
}
Dao层:CourseMapper
public interface CourseMapper {


/**
* 多条件课程列表查询
*/
public List<Course> findCourseByConditioin(CourseVo courseVo);
}
<?xml version="1.0" encoding="UTF-8" ?>
<!DOCTYPE mapper PUBLIC "-//mybatis.org//DTD Mapper 3.0//EN"
"http://mybatis.org/dtd/mybatis-3-mapper.dtd">
<mapper namespace="com.lagou.dao.CourseMapper">
<!-- 多条件课程列表查询 -->
<select id="findCourseByConditioin"
parameterType="com.lagou.domain.CourseVO" resultType="com.lagou.domain.Course">
SELECT
id,
course_name,
price,
sort_num,
STATUS
FROM
course
<where>
<if test="true">
and is_del != 1
</if>
<if test="courseName != null and courseName != ''">
and course_name like concat('%',#{courseName},'%')
</if>
<if test="status != null and status !=''">
and status = #{status}
</if>
</where>
</select>
Service层:CourseService
public interface CourseService {


/**
* 多条件查询课程列表
* */
public PageInfo findCourseByConditioin(CourseVO courseVO);
}
@Service
public class CourseServiceImpl implements CourseService {


@Autowired
private CourseMapper courseMapper;
@Override
public List<Course> findCourseByConditioin(CourseVO courseVO) {


	List<Course> courseList = courseMapper.findCourseByConditioin(courseVO);
	return courseList;
}
Web层:CourseController
@RequestBody : 获取请求体内容进行封装 : 前台发送来JSON串, 对JSON串进行解析, 并且根据key value对应封装到CourseVO类的属性上
@RestController
@RequestMapping("/course")
public class CourseController {


@Autowired
private CourseService courseService;
/**
* 查询课程信息&条件查询 接口
* */
@RequestMapping("/findCourseByConditioin")
public ResponseResult findCourseByConditioin(@RequestBody CourseVO courseVO)
{


	List<Course> courseList =
	courseService.findCourseByConditioin(courseVO);
	ResponseResult result = new ResponseResult(true,200,"响应成
	功",courseList);
	return result;
}
日志
把工程代码通过tomcat部署发布
项目在运行当中就会产生很多状态信息
而且与数据库交互的时候, 如果想看到具体执行的sql, 以及我们设置的参数, 这些相关信息的时候, 我们可以在项目中添加相关日志, 这样就可以把信息输出到控制台
dao层添加
log4j.properties
### direct log messages to stdout ###
log4j.appender.stdout=org.apache.log4j.ConsoleAppender
log4j.appender.stdout.Target=System.out
log4j.appender.stdout.layout=org.apache.log4j.PatternLayout
log4j.appender.stdout.layout.ConversionPattern=%d{ABSOLUTE} %5p %c{1}:%L - %m%n

### direct messages to file mylog.log ###
log4j.appender.file=org.apache.log4j.FileAppender
log4j.appender.file.File=c:/mylog.log
log4j.appender.file.layout=org.apache.log4j.PatternLayout
log4j.appender.file.layout.ConversionPattern=%d{ABSOLUTE} %5p %c{1}:%L - %m%n

### set log levels - for more verbose logging change 'info' to 'debug' ###

log4j.rootLogger=debug, stdout
使用log4j, 需要引入相关jar包, 父工程pom.xml中引入
        <dependency>
            <groupId>org.slf4j</groupId>
            <artifactId>slf4j-log4j12</artifactId>
            <version>1.7.7</version>
        </dependency>
        <dependency>
            <groupId>log4j</groupId>
            <artifactId>log4j</artifactId>
            <version>1.2.17</version>
        </dependency>
TestMapper的时候 用的是 ssm_test 数据库
但是我们现在使用的数据库发生了变化, 变成了ssm_lagou_edu
数据库相关信息做一下更新
Postman测试接口
课程图片上传
需求分析:
需求:在新增课程页面需要进行图片上传,并回显图片信息


查看接口文档,进行编码
查看接口文档
基于springmvc实现文件上传, 首先要在springmvc核心配置文件中, 配置文件上传解析器, 之后可以通过这个上传解析器, 把前台上传的图片进行解析, 并且封装成MultipartFile对象
springmvc.xml
<!--5.配置文件解析器-->
<!-- 此处id为固定写法,不能随便取名-->
<bean id="multipartResolver"
class="org.springframework.web.multipart.commons.CommonsMultipartResolver">
<property name="maxUploadSize" value="1048576"></property>
</bean>
Web层:CourseController
/**
* 图片上传接口
* */
@RequestMapping("/courseUpload")
public ResponseResult fileUpload(@RequestParam("file")MultipartFile file,
HttpServletRequest request){


	try {


		//1.判断文件是否为空
		if(file.isEmpty()){


			throw new RuntimeException();
		}
		//2.获取项目部署路径
		// D:\apache-tomcat-8.5.56\webapps\ssm_web\
		String realPath = request.getServletContext().getRealPath("/");
		// D:\apache-tomcat-8.5.56\webapps\
		String webappsPath =
		realPath.substring(0,realPath.indexOf("ssm_web"));
		//3.获取原文件名
		String fileName = file.getOriginalFilename();
		//4.新文件名
		String newFileName = System.currentTimeMillis() +
		fileName.substring(fileName.lastIndexOf("."));
		//5.上传文件
		String uploadPath = webappsPath+"upload\\";
		File filePath = new File(uploadPath,newFileName);
		//如果目录不存在就创建目录
		if(!filePath.getParentFile().exists()){


			filePath.getParentFile().mkdirs();
			System.out.println("创建目录: " + filePath);
		}
		file.transferTo(filePath);
		//6.将文件名和文件路径返回
		Map<String,String> map = new HashMap<>();
		map.put("fileName",newFileName);
		map.put("filePath",LOCAL_URL+"/upload/"+newFileName);
		ResponseResult result = new ResponseResult(true,200,"响应成功",map);
		return result;
	} catch (Exception e) {


		e.printStackTrace();
		return null;
	}
}

获取到数据后 浏览器访问 图片路径 报404
upload目录需要在tomcat上进行部署
Edit Configuration - ssm-web - Deployment - + - C:\apache-tomcat-8.5.55\webapps\upload
Postman测试接口
新建课程信息
需求分析:
填写好新增课程信息后,点击保存,将表单信息保存到数据库中


查看接口文档,进行编码
查看接口文档
Dao层:CourseMapper
public interface CourseMapper {


/**
* 保存课程信息
*/
public int saveCourse(Course course);
/**
* 保存讲师信息
* */
public void saveTeacher(Teacher teacher);
}
CourseMapper.xml
<!-- 保存课程信息 -->
<insert id="saveCourse" parameterType="com.lagou.domain.Course" >
INSERT INTO course(
course_name,
brief,
preview_first_field,
preview_second_field,
course_img_url,
course_list_img,
sort_num,
price,
discounts,
sales,
discounts_tag,
course_description_mark_down,
create_time,
update_time
) VALUES(#{courseName},#{brief},#{previewFirstField},#{previewSecondField},#
{courseImgUrl},
#{courseListImg},#{sortNum},#{price},#{discounts},#{sales},#{discountsTag},#
{courseDescriptionMarkDown},
#{createTime},#{updateTime});
<selectKey resultType="java.lang.Integer" order="AFTER" keyProperty="id">
SELECT LAST_INSERT_ID();
</selectKey>
</insert>
<!-- 保存讲师信息 -->
<insert id="saveTeacher" parameterType="com.lagou.domain.Teacher">
INSERT INTO teacher(
course_id,
teacher_name,
POSITION,
description,
create_time,
update_time
) VALUES(#{courseId},#{teacherName},#{position},#{description},#
{createTime},#{updateTime});
</insert>
Domain层: 重新编写CourseVO
package com.lagou.domain;

import java.util.Date;

/*
    VO: View Object 表现层对象 在表现层接收前台参数
 */
public class CourseVO {


	//Course实体类中的所有属性复制到这里

    //讲师姓名
    private String teacherName;

    //讲师职位
    private String position;

    //讲师介绍
    private String description;

	//getter setter toString方法

}
Service层:CourseService
public interface CourseService {


/**
* 保存课程信息
* */
public void saveCourseOrTeacher(CourseVO courseVO);
}
@Service
public class CourseServiceImpl implements CourseService {


	@Autowired
	private CourseMapper courseMapper;
	@Override
	public void saveCourseOrTeacher(CourseVO courseVO) {


		try {


			//封装课程信息
			Course course = new Course();
			BeanUtils.copyProperties(course,courseVO);
			//补全信息
			Date date = new Date();
			course.setCreateTime(date);
			course.setUpdateTime(date);
			//保存课程
			courseMapper.saveCourse(course);
			//获取新插入数据的id
			int id = course.getId();
			//封装讲师信息
			Teacher teacher = new Teacher();
			BeanUtils.copyProperties(teacher,courseVO);
			//补全信息
			teacher.setCourseId(id);
			teacher.setCreateTime(date);
			teacher.setUpdateTime(date);
			//保存讲师信息
			courseMapper.saveTeacher(teacher);
		} catch (Exception e) {


			e.printStackTrace();
		}
	}
}
Web层:CourseController
@RestController
@RequestMapping("/course")
public class CourseController {


@Autowired
private CourseService courseService;
/**
* 保存&修改课程信息接口
* */
@RequestMapping("/saveOrUpdateCourse")
public ResponseResult saveOrUpdateCourse(@RequestBody CourseVO courseVO){


	try {


		if(courseVO.getId() == null){


		courseService.saveCourseOrTeacher(courseVO);
		ResponseResult result = new ResponseResult(true,200,"响应成功",null);
		return result;
	}else{


		courseService.updateCourseOrTeacher(courseVO);
		ResponseResult result = new ResponseResult(true,200,"响应成功",null);
		return result;
	}
	} catch (Exception e) {


		e.printStackTrace();
		return null;
	}
}
Postman测试接口
回显课程信息
需求分析:
点击编辑按钮,回显课程信息


查看接口文档,进行编码
查看接口文档
Dao层:CourseMapper
public interface CourseMapper {


/**
* 根据id 获取课程信息
* */
public CourseVO findCourseById(int id);
}
CourseMapper.xml
<!-- 根据id查询 -->
<select id="findCourseById" parameterType="int"
resultType="com.lagou.domain.CourseVO">
SELECT
course_name,
brief,
teacher_name,
POSITION,
description,
preview_first_field,
preview_second_field,
course_img_url,
course_list_img,
sort_num,
discounts,
price,
sales,
discounts_tag,
course_description_mark_down
FROM course LEFT JOIN teacher ON course.id = teacher.course_id
WHERE course.id = #{id}
</select>
Service层:CourseService
public interface CourseService {


/**
* 根据id获取课程信息
* */
public CourseVO findCourseById(int id);
}
@Service
public class CourseServiceImpl implements CourseService {


	@Autowired
	private CourseMapper courseMapper;
	@Override
	public CourseVO findCourseById(int id) {


		return courseMapper.findCourseById(id);
	}
}
Web层:CourseController
@RestController
@RequestMapping("/course")
public class CourseController {


	@Autowired
	private CourseService courseService;
	/**
	* 根据id获取课程信息
	* */
	* @RequestMapping("/findCourseById")
	public ResponseResult findCourseById(@RequestParam int id) {


		try {


			CourseVO courseVO = courseService.findCourseById(id);
			ResponseResult result = new ResponseResult(true,200,"响应成功",courseVO);
			return result;
		} catch (Exception e) {


			e.printStackTrace();
			return null;
		}
	}
}
Postman测试接口
修改课程信息
需求分析:
点击保存按钮,将修改后的课程信息保存到数据库中


查看接口文档,进行编码
查看接口文档
Dao层:CourseMapper
public interface CourseMapper {


/**
* 修改课程信息
* */
public void updateCourse(Course course);
/**
* 修改讲师信息
* */
public void updateTeacher(Teacher teacher);
}
CourseMapper.xml
<!-- 修改课程信息 -->
<update id="updateCourse" parameterType="com.lagou.domain.Course">
	UPDATE course
	<trim prefix="SET" suffixOverrides=",">
		<if test="courseName != null and courseName != ''">
			course_name = #{courseName},
		</if>
		<if test="brief != null and brief != ''">
			brief=#{brief},
		</if>
		<if test="previewFirstField != null and previewFirstField != ''">
			preview_first_field=#{previewFirstField},
		</if>
		<if test="previewSecondField != null and previewSecondField != ''">
			preview_second_field=#{previewSecondField},
		</if>
		<if test="courseImgUrl != null and courseImgUrl != ''">
			course_img_url=#{courseImgUrl},
		</if>
		<if test="courseListImg != null and courseListImg != ''">
			course_list_img=#{courseListImg},
		</if>
		<if test="sortNum != null and sortNum != ''">
			sort_num=#{sortNum},
		</if>
		<if test="price != null and price != ''">
			price=#{price},
		</if>
		<if test="discounts != null and discounts != ''">
			discounts=#{discounts},
		</if>
		<if test="sales != null and sales != '' or sales==0">
			sales=#{sales},
		</if>
		<if test="discountsTag != null and discountsTag != ''">
			discounts_tag=#{discountsTag},
		</if>
		<if test="courseDescriptionMarkDown != null and courseDescriptionMarkDown != ''">
			course_description_mark_down=#{courseDescriptionMarkDown},
		</if>
		<if test="updateTime != null">
			update_time=#{updateTime},
		</if>
	</trim>
	<where>
		<if test="id!=null and id != '' ">id=#{id}</if>
	</where>
</update>

<!-- 修改讲师信息 -->
<update id="updateTeacher" parameterType="com.lagou.domain.Teacher">
	UPDATE teacher
	<trim prefix="SET" suffixOverrides=",">
		<if test="teacherName != null and teacherName != ''">
			teacher_name = #{teacherName},
		</if>
		<if test="position != null and position != ''">
			position = #{position},
		</if>
		<if test="description != null and description != ''">
			description = #{description},
		</if>
		<if test="updateTime != null">
			update_time=#{updateTime}
		</if>
	</trim>
	<where>
		<if test="courseId != null and courseId != '' ">course_id = #{courseId}</if>
	</where>
</update>
Service层:CourseService
public interface CourseService {


/**
* 修改课程信息
* */
public void updateCourseOrTeacher(CourseVO courseVO);
}
@Service
public class CourseServiceImpl implements CourseService {


@Autowired
private CourseMapper courseMapper;
@Override
public void updateCourseOrTeacher(CourseVO courseVO) {


	try {


		//封装课程信息
		Course course = new Course();
		BeanUtils.copyProperties(course,courseVO);
		//补全信息
		Date date = new Date();
		course.setUpdateTime(date);
		//更新课程
		courseMapper.updateCourse(course);
		//封装讲师信息
		Teacher teacher = new Teacher();
		BeanUtils.copyProperties(teacher,courseVO);
		//补全信息
		teacher.setCourseId(course.getId());
		teacher.setUpdateTime(date);
		//更新讲师信息
		courseMapper.updateTeacher(teacher);
	} catch (Exception e) {


		e.printStackTrace();
	}
}
Web层:CourseController
@RestController
@RequestMapping("/course")
public class CourseController {


@Autowired
private CourseService courseService;
/**
* 保存&修改课程信息接口
* */
@RequestMapping("/saveOrUpdateCourse")
public ResponseResult saveOrUpdateCourse(@RequestBody CourseVO courseVO){


	try {


		if(courseVO.getId() == null){


			courseService.saveCourseOrTeacher(courseVO);
			ResponseResult result = new ResponseResult(true,200,"响应成功",null);
			return result;
		}else{


			courseService.updateCourseOrTeacher(courseVO);
			ResponseResult result = new ResponseResult(true,200,"响应成功",null);
			return result;
		}
	} catch (Exception e) {


		e.printStackTrace();
		return null;
	}
}
Postman测试接口
课程状态管理
需求分析:
在课程列表展示页面中,可以通过点击 上架/下架按钮,修改课程状态

查看接口文档,进行编码
查看接口文档
Dao层:CourseMapper
public interface CourseMapper {


/**
* 修改课程状态
* */
public void updateCourseStatus(Course course);
}
CourseMapper.xml
<!-- 修改课程状态 -->
<update id="updateCourseStatus" parameterType="com.lagou.domain.Course">
UPDATE course SET STATUS = #{status} ,update_time = #{updateTime} WHERE id = #{id}
</update>
Service层:CourseService
/**
* 修改课程状态
* */
public void updateCourseStatus(int id,int status);
@Override
public void updateCourseStatus(int id,int status) {


	try {


		//封装数据
		Course course = new Course();
		course.setStatus(status);
		course.setId(id);
		course.setUpdateTime(new Date());
		//调用Dao
		courseMapper.updateCourseStatus(course);
	} catch (Exception e) {


		e.printStackTrace();
	}
}
Web层:CourseController
/**
* 修改课程状态
* */
@RequestMapping("/updateCourseStatus")
public ResponseResult updateCourseStatus(@RequestParam int id,@RequestParam int status){


	try {


		//执行修改操作
		courseService.updateCourseStatus(id, status);
		//保存修改后的状态,并返回
		Map<String,Integer> map = new HashMap<>();
		map.put("status",status);
		ResponseResult result = new ResponseResult(true,200,"响应成功",map);
		return result;
	} catch (Exception e) {


		e.printStackTrace();
	}
	return null;
}
Postman测试接口
课程内容展示
需求分析:
需求:点击内容管理,展示课程对应的课程内容(课程内容包含了章节和课时)


查看接口文档,进行编码:
查看接口文档:
CourseSection
/**
* 章节类
* */
public class CourseSection {


//id
private Integer id;
//课程id
private int courseId;
//章节名
private String sectionName;
//章节描述
private String description;
//创建时间
private Date createTime;
//更新时间
private Date updateTime;
//是否删除
private int isDe;
//排序
private int orderNum;
//状态
private int status;
//课时集合
private List<CourseLesson> lessonList;
public List<CourseLesson> getLessonList() {


return lessonList;
}
public void setLessonList(List<CourseLesson> lessonList) {


this.lessonList = lessonList;
}
Dao层:CourseContentMapper
public interface CourseContentMapper {


/**
* 查询课程下的章节与课时信息
* */
public List<CourseSection> findSectionAndLessonByCourseId(int courseId);
}
<!-- 根据课程ID 查询课程内容(章节与课时) -->
<select id="findSectionAndLessonByCourseId" parameterType="int"
resultMap="BaseResultMap">
	SELECT
	cs.*,
<include refid="lesson_column_list"/>
	FROM course_section cs
	LEFT JOIN course_lesson cl ON cs.id = cl.section_id
	WHERE cs.course_id = #{courseId} ORDER BY cs.order_num ;
</select>
<!-- 一对多配置,一个章节下有多个课时 -->
<resultMap id="BaseResultMap" type="com.lagou.domain.CourseSection">
	<result property="id" column="id"></result>
	<result property="courseId" column="course_id"></result>
	<result property="sectionName" column="section_name"></result>
	<result property="description" column="description"></result>
	<result property="orderNum" column="order_num"></result>
	<result property="status" column="status"></result>
	<!-- 使用 collection,配置一对多关系 -->
	<collection property="lessonList" resultMap="lessionListResultMap"/>
</resultMap>
<resultMap id="lessionListResultMap" type="com.lagou.domain.CourseLesson">
	<id property="id" column="lessonId"></id>
	<result property="courseId" column="course_id"></result>
	<result property="sectionId" column="section_id"></result>
	<result property="theme" column="theme"></result>
	<result property="duration" column="duration"></result>
	<result property="isFree" column="is_free"></result>
	<result property="orderNum" column="order_num"></result>
	<result property="status" column="status"></result>
</resultMap>
<!-- 课时表字段信息 -->
<sql id="lesson_column_list">
cl.id as lessonId,
cl.course_id,
cl.section_id,
cl.theme,
cl.duration,
cl.is_free,
cl.order_num,
cl.status
</sql>
Service层:CourseContentService
public interface CourseContentService {


	public List<CourseSection> findSectionAndLessonByCourseId(int courseId);
}
@Service
public class CourseContentServiceImpl implements CourseContentService {


	@Autowired
	private CourseContentMapper contentMapper;
	@Override
	public List<CourseSection> findSectionAndLessonByCourseId(int courseId) {


		List<CourseSection> sectionList =
		contentMapper.findSectionAndLessonByCourseId(courseId);
		return sectionList;
	}
}
Web层:CourseContentController
@RestController
@RequestMapping("/courseContent")
public class CourseContentController {


	@Autowired
	private CourseContentService contentService;
	/**
	* 查询课程内容
	* */
	@RequestMapping("/findSectionAndLesson")
	public ResponseResult findSectionAndLessonByCourseId(@RequestParam int courseId){


		try {


			//调用service
			List<CourseSection> sectionList =
			contentService.findSectionAndLessonByCourseId(courseId);
			//封装数据并返回
			ResponseResult result = new ResponseResult(true,200,"响应成
			功",sectionList);
			return result;
		} catch (Exception e) {


			e.printStackTrace();
			return null;
		}
	}
}
Postman测试接口
回显章节对应的课程信息
需求分析:
需求:在课程内容界面回显课程信息

查看接口文档,进行编码:
查看接口文档:
Dao层:CourseContentMapper
public interface CourseContentMapper {


/**
* 回显章节对应的课程信息
* */
public Course findCourseByCourseId(int courseId);
}
<!-- 回显课程信息 -->
<select id="findCourseByCourseId" parameterType="int"
resultType="com.lagou.domain.Course">
SELECT id,course_name FROM course WHERE id = #{courseId}
</select>
Service层:CourseContentService
public interface CourseContentService {


	public Course findCourseByCourseId(int courseId);
}
@Service
public class CourseContentServiceImpl implements CourseContentService {


	@Autowired
	private CourseContentMapper contentMapper;
	@Override
	public Course findCourseByCourseId(int courseId) {


		Course course = contentMapper.findCourseByCourseId(courseId);
		return course;
	}
}
Web层:CourseContentController
@RestController
@RequestMapping("/courseContent")
public class CourseContentController {


@Autowired
private CourseContentService contentService;
/**
* 回显章节对应的课程信息
* */
@RequestMapping("/findCourseByCourseId")
public ResponseResult findCourseByCourseId(@RequestParam int courseId){


	try {


		//调用service
		Course course = contentService.findCourseByCourseId(courseId);
		ResponseResult result = new ResponseResult(true,200,"响应成功",course);
		return result;
	} catch (Exception e) {


		e.printStackTrace();
		return null;
	}
}
Postman测试接口
新建章节信息
需求分析:
在课程内容展示页面中,可以通过点击添加阶段按钮,添加章节信息


查看接口文档,进行编码
查看接口文档
Dao层:CourseContentMapper
/**
* 保存章节
* */
public void saveSection(CourseSection section);
<!-- 保存章节 -->
<insert id="saveSection" parameterType="com.lagou.domain.CourseSection">
INSERT INTO course_section(
	course_id,
	section_name,
	description,
	order_num,
	STATUS,
	create_time,
	update_time
)VALUES(#{courseId},#{sectionName},#{description},#{orderNum},
#{status},#{createTime},#{updateTime});
</insert>
Service层:CourseContentService
public void saveSection(CourseSection section);
@Override
public void saveSection(CourseSection section) {


	//补全信息
	Date date = new Date();
	section.setCreateTime(date);
	section.setUpdateTime(date);
	contentMapper.saveSection(section);
}
Web层:CourseContentController
@RequestMapping("/saveOrUpdateSection")
public ResponseResult saveOrUpdateSection(@RequestBody CourseSection section) {


	try {


		contentService.saveSection(section);
		return new ResponseResult(true,200,"响应成功",null);
	} catch (Exception e) {


		e.printStackTrace();
		return null;
	}
}
Postman测试接口
修改章节信息
需求分析:
点击确定按钮,将修改后的章节信息保存到数据库中


查看接口文档,进行编码
查看接口文档
Dao层:CourseContentMapper
/**
* 修改章节
* */
public void updateSection(CourseSection section);
<!-- 修改章节 -->
<update id="updateSection" parameterType="com.lagou.domain.CourseSection">
	UPDATE course_section
	<trim prefix="SET" suffixOverrides=",">
		<if test="sectionName != null and sectionName != ''">
			section_name = #{

    sectionName},
		</if>
		<if test="description != null and description != ''">
			description = #{

    description},
		</if>
		<if test="orderNum != null and orderNum != '' or orderNum == 0">
		order_num = #{

    orderNum},
		</if>
		<if test="updateTime != null">
			update_time=#{

    updateTime}
		</if>
	</trim>
	<where>
		<if test="id != null and id != '' ">id = #{

    id}</if>
	</where>
</update>
Service层:CourseContentService
public void updateSection(CourseSection section);
@Override
public void updateSection(CourseSection section) {


	//补全信息
	Date date = new Date();
	section.setUpdateTime(date);
	contentMapper.updateSection(section);
}
Web层:CourseContentController
/**
* 保存&修改章节信息
*/
@RequestMapping("/saveOrUpdateSection")
public ResponseResult saveOrUpdateSection(@RequestBody CourseSection section) {


	try {


	//判断携带id是修改操作否则是插入操作
	if(section.getId() == null){


		contentService.saveSection(section);
		return new ResponseResult(true,200,"响应成功",null);
	}else{


		contentService.updateSection(section);
		return new ResponseResult(true,200,"响应成功",null);
	}
	} catch (Exception e) {


		e.printStackTrace();
		return null;
	}
}
Postman测试接口
修改章节状态
需求分析:
需求:点击修改章节状态按钮,将当前章节信息的状态进行修改

查看接口文档,进行编码
查看接口文档
Dao层:CourseContentMapper
/**
* 修改章节状态
* */
public void updateSectionStatus(CourseSection section);
CourseContentMapper.xml
<!-- 修改章节状态 -->
<update id="updateSectionStatus"
parameterType="com.lagou.domain.CourseSection">
UPDATE course_section set
	status = #{status},
	update_time = #{updateTime}
WHERE id = #{id}
</update>
Service层:CourseContentService
public void updateSectionStatus(int id,int status);
@Override
public void updateSectionStatus(int id,int status) {


	//封装数据
	CourseSection section = new CourseSection();
	section.setId(id);
	section.setStatus(status);
	section.setUpdateTime(new Date());
	contentMapper.updateSectionStatus(section);
}
Web层:CourseContentController
/**
* 修改章节状态
* 状态,0:隐藏;1:待更新;2:已发布
* */
@RequestMapping("/updateSectionStatus")
public ResponseResult updateSectionStatus(@RequestParam int id,@RequestParam int status){


	try {


		contentService.updateSectionStatus(id,status);
		//封装最新的状态信息
		Map<String,Integer> map = new HashMap<>();
		map.put("status",status);
		ResponseResult result = new ResponseResult(true,200,"响应成功",map);
		return result;
	} catch (Exception e) {


		e.printStackTrace();
		return null;
	}
}
Postman测试接口
新建课时信息(自行完成)
需求分析:
需求:点击添加阶段按钮,将弹出页面填写的章节信息保存到数据库中


查看接口文档,进行编码
查看接口文档
Dao层:CourseContentMapper
/**
* 保存课时
* */
public void saveLesson(CourseLesson lesson);
<!-- 添加课时 -->
<insert id="saveLesson" parameterType="com.lagou.domain.CourseLesson">
INSERT INTO course_lesson (
	id,course_id,
	section_id,
	theme,
	duration,
	is_free,
	order_num,
	create_time,
	update_time
)VALUES(#{id},#{courseId},#{sectionId},#{theme},#{duration},#{isFree},
#{orderNum},#{createTime},#{updateTime});
</insert>
Service层:CourseContentService
public void saveLesson(CourseLesson lesson);
@Override
public void saveLesson(CourseLesson lesson) {


	//补全信息
	Date date = new Date();
	lesson.setCreateTime(date);
	lesson.setUpdateTime(date);
	contentMapper.saveLesson(lesson);
}
Web层:CourseContentController
	/**
	* 保存&修改课时
	* */
	@RequestMapping("/saveOrUpdateLesson")
	public ResponseResult saveOrUpdateLesson(@RequestBody CourseLesson lesson){


		try {


			if(lesson.getId() == null){


				contentService.saveLesson(lesson);
				return new ResponseResult(true,200,"响应成功",null);
			}else{


				contentService.updateLesson(lesson);
				return new ResponseResult(true,200,"响应成功",null);
			}
		} catch (Exception e) {


			e.printStackTrace();
			return null;
		}
	}
}
Postman测试接口
任务二:拉勾教育后台管理系统: 广告和用户管理模块开发(SSM)
广告模块
用户模块
广告模块
一 广告模块功能分析
在任务二中,首先先来完成拉勾教育后台管理系统的 广告管理模块, 广告模块包含了广告位列表查询、添加&修改广告位、回显广告位名称、广告分页查询、图片上传接口、新建&修改广告、回显广告信息、广告状态上下线等接口的编写
1.1 广告管理
- 实现以下功能:
○ 广告位列表查询
○ 添加&修改广告位
○ 回显广告位名称
○ 广告分页查询
○ 图片上传接口
○ 新建&修改广告接口
○ 回显广告信息
○ 广告状态上下线

二 广告管理模块表设计
2.1 创建数据库及表
在资料中找到 ssm_lagou_edu.sql,使用SQLYog 执行SQL脚本 ,导入表结构及表信息

2.2 表关系介绍
ER图

数据实体描述
1 广告位表
| 字段名称 | 字段类型 | 约束 | 字段描述 |
|---|---|---|---|
| id | int(11) | 主键 | 广告位id |
| name | varchar(255) | 广告位名称 | |
| spaceKey | varchar(255) | 广告位标识 | |
| createTime | datetime | 创建时间 | |
| updateTime | datetime | 最后更新时间 | |
| isDel | int(2) | 状态 |
2 广告表
| 字段名称 | 字段类型 | 约束 | 字段描述 |
|---|---|---|---|
| id | int(11) | 主键 | 广告ID |
| name | varchar(255) | 广告名称 | |
| spaceId | int(11) | 广告位ID | |
| keyword | varchar(255) | 关键字 | |
| htmlContent | varchar(255) | 文本内容 | |
| text | varchar(255) | 备注 | |
| img | varchar(255) | 图片链接 | |
| link | varchar(255) | 跳转地址 | |
| startTime | datetime | 开始时间 | |
| endTine | datetimedatetime | 结束时间 | |
| createTime | datetime | 创建时间 | |
| updateTime | datetime | 最后更新时间 | |
| status | int(2) | 状态(上架/下架) | |
| priority | int(4) | 优先级 |
三 广告管理模块接口实现
1. 广告位列表查询
1.1 需求分析
需求:点击广告列表按钮进行广告列表展示

1.2 查看接口文档,进行编码
查看接口文档
实体类:PromotionSpace
public class PromotionSpace {


private Integer id;
private String name;
private String spaceKey;
private Date createTime;
private Date updateTime;
private Integer isDel;
@Override
public String toString() {


return "PromotionSpace{" +
"id=" + id +
", name='" + name + '\'' +
", spaceKey='" + spaceKey + '\'' +
", createTime=" + createTime +
", updateTime=" + updateTime +
", isDel=" + isDel +
'}';
}
public Integer getId() {


return id;
}
public void setId(Integer id) {


this.id = id;
}
public String getName() {


return name;
}
public void setName(String name) {


this.name = name;
}
public String getSpaceKey() {


return spaceKey;
}
public void setSpaceKey(String spaceKey) {


this.spaceKey = spaceKey;
}
public Date getCreateTime() {


return createTime;
}
public void setCreateTime(Date createTime) {


this.createTime = createTime;
}
public Date getUpdateTime() {


return updateTime;
}
public void setUpdateTime(Date updateTime) {


this.updateTime = updateTime;
}
public Integer getIsDel() {


return isDel;
}
public void setIsDel(Integer isDel) {


this.isDel = isDel;
}
Dao层:PromotionSpaceMapper
public interface PromotionSpaceMapper {


/*
获取所有的广告位
*/
public List<PromotionSpace> findAllPromotionSpace();
}
<?xml version="1.0" encoding="UTF-8" ?>
<!DOCTYPE mapper PUBLIC "-//mybatis.org//DTD Mapper 3.0//EN"
"http://mybatis.org/dtd/mybatis-3-mapper.dtd">
<mapper namespace="com.lagou.dao.PromotionSpaceMapper">
<select id="findAllPromotionSpace"
resultType="com.lagou.domain.PromotionSpace">
select * from promotion_space
</select>
</mapper>
Service层:PromotionSpaceService
public interface PromotionSpaceService {


/*
获取所有的广告位
*/
public List<PromotionSpace> findAllPromotionSpace();
}
@Service
public class PromotionSpaceServiceImpl implements PromotionSpaceService {


@Autowired
private PromotionSpaceMapper promotionSpaceMapper;
@Override
public List<PromotionSpace> findAllPromotionSpace() {


List<PromotionSpace> allPromotionSpace =
promotionSpaceMapper.findAllPromotionSpace();
return allPromotionSpace;
}
}
Web层:PromotionSpaceController
@RestController
@RequestMapping("/PromotionSpace")
public class PromotionSpaceController {


@Autowired
private PromotionSpaceService promotionSpaceService;
/*
查询所有广告位列表
*/
@RequestMapping("/findAllPromotionSpace")
public ResponseResult findAllPromotionSpace(){


List<PromotionSpace> allPromotionSpace =
promotionSpaceService.findAllPromotionSpace();
ResponseResult responseResult = new ResponseResult(true,200,"响应成功",allPromotionSpace);
return responseResult;
}
}
Postman测试接口
2. 添加&修改广告位
1.1 需求分析
添加:点击广告列表按钮进行广告列表展示

修改:页面回显基础上,点击提交按钮 真正进行数据修改


2.2 查看接口文档,进行编码
查看接口文档
Dao层:PromotionSpaceMapper
public interface PromotionSpaceMapper {


/*
添加广告位
*/
public void savePromotionSpace(PromotionSpace promotionSpace);
/**
* 修改广告位
* */
* public void updatePromotionSpace(PromotionSpace promotionSpace);
}
<?xml version="1.0" encoding="UTF-8" ?>
<!DOCTYPE mapper PUBLIC "-//mybatis.org//DTD Mapper 3.0//EN"
"http://mybatis.org/dtd/mybatis-3-mapper.dtd">
<mapper namespace="com.lagou.dao.PromotionSpaceMapper">
<insert id="savePromotionSpace"
parameterType="com.lagou.domain.PromotionSpace">
insert into promotion_space values(null,#{name},#{spaceKey},#
{createTime},#{updateTime},#{isDel})
</insert>
<update id="updatePromotionSpace"
parameterType="com.lagou.domain.PromotionSpace">
UPDATE promotion_space SET NAME = #{name},updateTime = #{updateTime}
where id = #{id}
</update>
</mapper>
Service层:PromotionSpaceService
public interface PromotionSpaceService {


void savePromotionSpace(PromotionSpace promotionSpace);
void updatePromotionSpace(PromotionSpace promotionSpace);
}
@Service
public class PromotionSpaceServiceImpl implements PromotionSpaceService {


@Autowired
private PromotionSpaceMapper promotionSpaceMapper;
@Override
public void savePromotionSpace(PromotionSpace promotionSpace) {


// 封装PromotionSpace
UUID uuid = UUID.randomUUID();
promotionSpace.setSpaceKey(uuid.toString());
promotionSpace.setCreateTime(new Date());
promotionSpace.setUpdateTime(new Date());
promotionSpace.setIsDel(0);
promotionSpaceMapper.savePromotionSpace(promotionSpace);
}
@Override
public void updatePromotionSpace(PromotionSpace promotionSpace) {


promotionSpace.setUpdateTime(new Date());
promotionSpaceMapper.updatePromotionSpace(promotionSpace);
}
}
Web层:PromotionSpaceController
@RestController
@RequestMapping("/PromotionSpace")
public class PromotionSpaceController {


@Autowired
private PromotionSpaceService promotionSpaceService;
/*
添加&修改广告位
*/
@RequestMapping("/saveOrUpdatePromotionSpace")
public ResponseResult savePromotionSpace(@RequestBody PromotionSpace
promotionSpace){


try {


if(promotionSpace.getId() == null){


//新增
promotionSpaceService.savePromotionSpace(promotionSpace);
ResponseResult responseResult = new ResponseResult(true,200,"响应成功","");
return responseResult;
}else{


//修改
promotionSpaceService.updatePromotionSpace(promotionSpace);
ResponseResult responseResult = new ResponseResult(true,200,"响应成功","");
return responseResult;
}
} catch (Exception e) {


e.printStackTrace();
return null;
}
}
}
Postman测试接口
3.回显广告位名称
3.1 需求分析
需求:点击编辑按钮,进行广告位信息回显

3.2 查看接口文档,进行编码
查看接口文档
Dao层:PromotionSpaceMapper
public interface PromotionSpaceMapper {


/**
* 根据id 查询广告位信息
* */
PromotionSpace findPromotionSpaceById(int id);
}
<?xml version="1.0" encoding="UTF-8" ?>
<!DOCTYPE mapper PUBLIC "-//mybatis.org//DTD Mapper 3.0//EN"
"http://mybatis.org/dtd/mybatis-3-mapper.dtd">
<mapper namespace="com.lagou.dao.PromotionSpaceMapper">
<select id="findPromotionSpaceById" parameterType="int"
resultType="com.lagou.domain.PromotionSpace">
SELECT id,NAME FROM promotion_space WHERE id = #{id};
</select>
</mapper>
Service层:PromotionSpaceService
public interface PromotionSpaceService {


PromotionSpace findPromotionSpaceById(int id);
}
@Service
public class PromotionSpaceServiceImpl implements PromotionSpaceService {


@Autowired
private PromotionSpaceMapper promotionSpaceMapper;
@Override
public PromotionSpace findPromotionSpaceById(int id) {


PromotionSpace promotionSpace =
promotionSpaceMapper.findPromotionSpaceById(id);
return promotionSpace;
}
}
Web层:PromotionSpaceController
@RestController
@RequestMapping("/PromotionSpace")
public class PromotionSpaceController {


@Autowired
private PromotionSpaceService promotionSpaceService;
/**
* 根据id查询 广告位信息
* */
@RequestMapping("/findPromotionSpaceById")
public ResponseResult findPromotionSpaceById(@RequestParam int id){


PromotionSpace promotionSpace =
promotionSpaceService.findPromotionSpaceById(id);
ResponseResult result = new ResponseResult(true,200,"响应成功",promotionSpace);
return result;
}
}
4. 广告分页查询
4.1 需求分析
需求:点击广告列表,对广告信息进行分页列表展示


4.2 查看接口文档,进行编码
查看接口文档
实体类:PromotionAd
public class PromotionAd {


// 标识
private Integer id;
// 广告名
private String name;
// 广告位id
private Integer spaceId;
// 精确搜索关键词
private String keyword;
// 静态广告的内容
private String htmlContent;
// 文字一
private String text;
// 链接一
private String link;
// 开始时间
private Date startTime;
// 结束时间
private Date endTime;
private Integer status;
private Date createTime;
private Date updateTime;
// 优先级
private Integer priority;
private String img;
getter/setter..
}
PromotionAdVo
public class PromotionAdVo {


private Integer currentPage = 1;
private Integer pageSize = 10;
public Integer getCurrentPage() {


return currentPage;
}
public void setCurrentPage(Integer currentPage) {


this.currentPage = currentPage;
}
public Integer getPageSize() {


return pageSize;
}
public void setPageSize(Integer pageSize) {


this.pageSize = pageSize;
}
}
Dao层:PromotionAdMapper
public interface PromotionAdMapper {


/*
分页获取所有的广告列表
*/
public List<PromotionAd> findAllAdByPage();
}
<mapper namespace="com.lagou.dao.PromotionAdMapper">
	<resultMap id="ad_space" type="com.lagou.domain.PromotionAd">
		<id property="id" column="id"></id>
		<result property="name" column="name"/>
		<result property="spaceId" column="spaceId"/>
		<result property="keyword" column="keyword"/>
		<result property="htmlContent" column="htmlContent"/>
		<result property="text" column="text"/>
		<result property="link" column="link"/>
		<result property="startTime" column="startTime"/>
		<result property="endTime" column="endTime"/>
		<result property="createTime" column="createTime"/>
		<result property="updateTime" column="updateTime"/>
		<result property="status" column="status"/>
		<result property="priority" column="priority"/>
		<result property="img" column="img"/>
		<association property="promotionSpace"
		select="com.lagou.dao.PromotionSpaceMapper.findPromotionSpaceById"
		column="spaceId" javaType="com.lagou.domain.PromotionSpace"></association>
	</resultMap>
	<!--分页查询广告信息-->
	<select id="findAllPromotionAdByPage" resultMap="ad_space">
		select * from promotion_ad
	</select>
</mapper>
Service层:PromotionAdService
applicationContext-dao.xml
<!--2.sqlSessionFactory-->
<bean id="sqlSessionFactory" class="org.mybatis.spring.SqlSessionFactoryBean">
	<property name="dataSource" ref="dataSource"></property>
	<property name="typeAliasesPackage" value="com.lagou.domain"/>
	<property name="plugins">
		<array>
			<bean class="com.github.pagehelper.PageHelper">
				<property name="properties">
					<value>helperDialect=mysql</value>
				</property>
			</bean>
		</array>
	</property>
	<!--引入加载mybatis核心配置文件-->
	<property name="configLocation" value="classpath:sqlMapConfig.xml"></property>
</bean>
public interface PromotionAdService {


/*
分页获取所有的广告列表
*/
public PageInfo findAllAdByPage(PromotionAdVo adVo);
}
@Service
public class PromotionAdServiceImpl implements PromotionAdService {


@Autowired
private PromotionAdMapper adMapper;
@Override
public PageInfo findAllAdByPage(PromotionAdVo adVo) {


	PageHelper.startPage(adVo.getCurrentPage(),adVo.getPageSize());
	List<PromotionAd> allAd = adMapper.findAllAdByPage();
	PageInfo<PromotionAd> adPageInfo = new PageInfo<>(allAd);
	return adPageInfo;
}
}
Web层:PromotionAdController
@RestController
@RequestMapping("/PromotionAd")
public class PromotionAdController {


	@Autowired
	private PromotionAdService adService;
	/*
	分页查询所有广告信息
	*/
	@RequestMapping("/findAllPromotionAd")
	public ResponseResult findAllAdByPage(PromotionAdVo adVo) {


		PageInfo allAdByPage = adService.findAllAdByPage(adVo);
		ResponseResult responseResult = new ResponseResult(true, 200, "响应成功",allAdByPage);
		return responseResult;
	}
}
Postman测试接口
5. 图片上传接口
5.1 需求分析
需求:添加广告页面,点击上传按钮,需完成图片上传

5.2 查看接口文档,进行编码
查看接口文档
Web层:PromotionAdController
@RestController
@RequestMapping("/PromotionSpace")
public class PromotionSpaceController {


	@Autowired
	private PromotionSpaceService promotionSpaceService;
	/*
	文件上传
	*/
	@RequestMapping("/PromotionAdUpload")
	public ResponseResult fileupload(@RequestParam("file") MultipartFile file, HttpServletRequest request) throws IOException {


		try {


			//1.判断文件是否为空
			if (file.isEmpty()) {


				throw new RuntimeException();
			}
			//2.获取项目部署路径
			String realPath = request.getServletContext().getRealPath("/");
			String webappsPath = realPath.substring(0, realPath.indexOf("ssm_web"));
			//3.获取原文件名
			String fileName = file.getOriginalFilename();
			//4.新文件名
			String newFileName = System.currentTimeMillis() +
			fileName.substring(fileName.lastIndexOf("."));
			//5.上传文件
			String uploadPath = webappsPath + "upload\\";
			File filePath = new File(uploadPath, newFileName);
			//如果目录不存在就创建目录
			if (!filePath.getParentFile().exists()) {


				filePath.getParentFile().mkdirs();
				System.out.println("创建目录: " + filePath);
			}
			file.transferTo(filePath);
			//6.将文件名和文件路径返回
			Map<String, String> map = new HashMap<>();
			map.put("fileName", newFileName);
			map.put("filePath", LOCAL_URL + "/upload/" + newFileName);
			ResponseResult result = new ResponseResult(true, 200, "响应成功",map);
			return result;
		} catch (Exception e) {


			e.printStackTrace();
		}
		return null;
	}
}
Postman测试接口
6. 新建&修改广告(自行完成)
6.1 需求分析
新建需求:点击提交按钮,将页面内容保存到数据库

修改需求:点击编辑按钮,由前端实现数据回显,在回显页面进行数据修改,将修改后值更新到数据库中


6.2 查看接口文档,进行编码
查看接口文档
Dao层:PromotionAdMapper
public interface PromotionAdMapper {


	void savePromotionAd(PromotionAd promotionAd);
	void updatePromotionAd(PromotionAd promotionAd);
}
<?xml version="1.0" encoding="UTF-8" ?>
<!DOCTYPE mapper PUBLIC "-//mybatis.org//DTD Mapper 3.0//EN"
"http://mybatis.org/dtd/mybatis-3-mapper.dtd">
<mapper namespace="com.lagou.dao.PromotionAdMapper">
	<!--添加广告-->
	<insert id="savePromotionAd" parameterType="com.lagou.domain.PromotionAd" >
	INSERT INTO promotion_ad VALUES(NULL,#{name},#{spaceId},#{keyword},#
	{htmlContent},#{text},#{link},#{startTime},#{endTime},#{createTime},#
	{updateTime},#{status},#{priority},#{img});
	</insert>
	<!--更新广告-->
	<update id="updatePromotionAd" parameterType="com.lagou.domain.PromotionAd">
		update promotion_ad
		<trim prefix="SET" suffixOverrides=",">
			<if test="name != null and name != ''">
				name = #{name},
			</if>
			<if test="spaceId != null and spaceId != ''">
				spaceId = #{spaceId},
			</if>
			<if test="link != null">
				link=#{link},
			</if>
			<if test="status != null and status != '' or status == 0">
				status=#{status},
			</if>
			<if test="img != null">
				img=#{img},
			</if>
			<if test="text != null">
				text=#{text},
			</if>
			<if test="startTime != null">
				startTime=#{startTime},
			</if>
			<if test="endTime != null">
				endTime=#{endTime},
			</if>
			<if test="updateTime != null">
				updateTime=#{updateTime},
			</if>
		</trim>
		<where>
			<if test="id != null and id != '' ">id = #{id}</if>
		</where>
	</update>
</mapper>
Service层:PromotionAdService
public interface PromotionAdService {


	void savePromotionAd(PromotionAd promotionAd);
	void updatePromotionAd(PromotionAd promotionAd);
}
@Service
public class PromotionAdServiceImpl implements PromotionAdService {


	@Autowired
	private PromotionAdMapper adMapper;
	@Override
	public void savePromotionAd(PromotionAd promotionAd) {


		adMapper.savePromotionAd(promotionAd);
	}
	@Override
	public void updatePromotionAd(PromotionAd promotionAd) {


		adMapper.updatePromotionAd(promotionAd);
	}
}
Web层:PromotionAdController
@RestController
@RequestMapping("/PromotionAd")
public class PromotionAdController {


	@Autowired
	private PromotionAdService adService;
	/*
	新增或更新广告位置
	*/
	@RequestMapping("/saveOrUpdatePromotionAd")
	public ResponseResult saveOrUpdatePromotionAd(@RequestBody PromotionAd promotionAd) {


		try {


			if (promotionAd.getId() == null) {


				Date date = new Date();
				promotionAd.setCreateTime(date);
				promotionAd.setUpdateTime(date);
				adService.savePromotionAd(promotionAd);
				ResponseResult result = new ResponseResult(true, 200, "响应成功",null);
				return result;
			} else {


				Date date = new Date();
				promotionAd.setUpdateTime(date);
				adService.updatePromotionAd(promotionAd);
				ResponseResult result = new ResponseResult(true, 200, "响应成功",null);
				return result;
			}
		} catch (Exception e) {


			e.printStackTrace();
		}
		return null;
	}
}
Postman测试接口
7. 回显广告信息(自行完成)
7.1 需求分析
需求:点击编辑按钮,进行广告位名称回显

7.2 查看接口文档,进行编码
查看接口文档
Dao层:PromotionAdMapper
public interface PromotionAdMapper {


/**
* 根据id查询广告信息
* */
PromotionAd findPromotionAdById(int id);
}
<?xml version="1.0" encoding="UTF-8" ?>
<!DOCTYPE mapper PUBLIC "-//mybatis.org//DTD Mapper 3.0//EN"
"http://mybatis.org/dtd/mybatis-3-mapper.dtd">
<mapper namespace="com.lagou.dao.PromotionAdMapper">
	<!-- 根据id查询广告信息 -->
	<select id="findPromotionAdById" parameterType="int" resultType="com.lagou.domain.PromotionAd">
		SELECT
			id,
			NAME,
			spaceId,
			startTime,
			endTime,
			STATUS,
			img,
			link,
			TEXT
		FROM promotion_ad WHERE id = #{id}
	</select>
</mapper>
Service层:PromotionAdService
public interface PromotionAdService {


/*
回显广告信息
*/
PromotionAd findPromotionAdById(int id);
}
@Service
public class PromotionSpaceServiceImpl implements PromotionSpaceService {


	@Autowired
	private PromotionAdMapper adMapper;
	@Override
	public PromotionAd findPromotionAdById(int id) {


		PromotionAd promotionAd = adMapper.findPromotionAdById(id);
		return promotionAd;
	}
}
Web层:PromotionAdController
@RestController
@RequestMapping("/PromotionAd")
public class PromotionAdController {


	@Autowired
	private PromotionAdService adService;
	/**
	* 根据id回显 广告数据
	* */
	@RequestMapping("/findPromotionAdById")
	public ResponseResult findPromotionAdById(@RequestParam int id){


		try {


			PromotionAd promotionAd = adService.findPromotionAdById(id);
			ResponseResult result = new ResponseResult(true,200,"响应成功",promotionAd);
			return result;
		} catch (Exception e) {


		e.printStackTrace();
			return null;
		}
	}
}
Postman测试接口
8. 广告状态上下线
8.1 需求分析
需求:点击按钮,实现状态的动态上下线

8.2 查看接口文档,进行编码
查看接口文档
Dao层:PromotionSpaceMapper
public interface PromotionAdMapper {


	void updatePromotionAdStatus(PromotionAd promotionAd);
}
<?xml version="1.0" encoding="UTF-8" ?>
<!DOCTYPE mapper PUBLIC "-//mybatis.org//DTD Mapper 3.0//EN"
"http://mybatis.org/dtd/mybatis-3-mapper.dtd">
<mapper namespace="com.lagou.dao.PromotionAdMapper">
	<!--void updatePromotionAdStatus(PromotionAd promotionAd);-->
	<select id="updatePromotionAdStatus" parameterType="com.lagou.domain.PromotionAd">
		UPDATE promotion_ad SET STATUS = #{status} ,updatetime = #{updateTime}
		WHERE id = #{id}
	</select>
</mapper>
Service层:PromotionAdService
public interface PromotionSpaceService {


	void updatePromotionAdStatus(int id, int status);
}
@Service
public class PromotionSpaceServiceImpl implements PromotionSpaceService {


	@Autowired
	private PromotionAdMapper adMapper;
	@Override
	public void updatePromotionAdStatus(int id, int status) {


		PromotionAd promotionAd = new PromotionAd();
		promotionAd.setId(id);
		promotionAd.setStatus(status);
		promotionAd.setUpdateTime(new Date());
		adMapper.updatePromotionAdStatus(promotionAd);
	}
}
Web层:PromotionAdController
@RestController
@RequestMapping("/PromotionAd")
public class PromotionAdController {


	@Autowired
	private PromotionAdService adService;
	/*
	广告位置上下线
	*/
	@RequestMapping("/updatePromotionAdStatus")
	public ResponseResult updateCourseStatus(@RequestParam int id, @RequestParam int status) {


		try {


			//执行修改操作
			if (status == 1) {


				adService.updatePromotionAdStatus(id, status);
			} else {


				adService.updatePromotionAdStatus(id, 0);
			}
			//保存修改后的状态,并返回
			Map<String, Integer> map = new HashMap<>();
			map.put("status", status);
			ResponseResult result = new ResponseResult(true, 200, "响应成功",map);
			return result;
		} catch (Exception e) {


			e.printStackTrace();
		}
		return null;
	}
}
Postman测试接口
用户模块
一 用户模块功能分析
在任务二中,再来完成拉勾教育后台管理系统的用户管理模块, 广告管理模块包含了用户分页&条件查询、用户状态设置,(登陆、权限控制)等接口的编写
1.1 用户模块
- 实现以下功能:
○ 登陆(权限模块)
○ 权限控制(权限模块)
○ 用户分页&条件查询
○ 用户状态设置
○ 分配角色(权限模块)


二 用户管理模块表设计
2.1 创建数据库及表
在资料中找到 ssm_lagou_edu.sql,使用SQLYog 执行SQL脚本 ,导入表结构及表信息

2.2 表关系介绍
ER图

三 用户管理模块接口实现
1. 用户分页&条件查询
1.1 需求分析
需求:实现多条件分页组合查询


1.2 查看接口文档,进行编码
查看接口文档
UserVo
public class UserVo {


private Integer currentPage;
private Integer pageSize;
private String username;
@DateTimeFormat(pattern = "yyyy-MM-dd")
private Date startCreateTime;
@DateTimeFormat(pattern = "yyyy-MM-dd")
private Date endCreateTime;
public Integer getCurrentPage() {


return currentPage;
}
public void setCurrentPage(Integer currentPage) {


this.currentPage = currentPage;
}
public Integer getPageSize() {


return pageSize;
}
public void setPageSize(Integer pageSize) {


this.pageSize = pageSize;
}
public String getUsername() {


return username;
}
public void setUsername(String username) {


this.username = username;
}
public Date getStartCreateTime() {


return startCreateTime;
}
public void setStartCreateTime(Date startCreateTime) {


this.startCreateTime = startCreateTime;
}
public Date getEndCreateTime() {


return endCreateTime;
}
public void setEndCreateTime(Date endCreateTime) {


this.endCreateTime = endCreateTime;
}
}
Dao层:UserMapper
public interface UserMapper {


/*
查询所有用户
*/
public List<User> findAllUserByPage(UserVo userVo);
}
<?xml version="1.0" encoding="UTF-8" ?>
<!DOCTYPE mapper PUBLIC "-//mybatis.org//DTD Mapper 3.0//EN"
"http://mybatis.org/dtd/mybatis-3-mapper.dtd">
<mapper namespace="com.lagou.dao.UserMapper">
	<!--查询所有用户-->
	<select id="findAllUserByPage" resultType="com.lagou.domain.User">
		SELECT
			id,
			NAME,
			portrait,
			phone,
			PASSWORD,
			STATUS,
			create_time
		FROM USER
		<where>
			<if test="true">
				and is_del != 1
			</if>
			<if test="username != null">
				and name = #{username}
			</if>
			<if test="startCreateTime != null and endCreateTime != null">
				and create_time BETWEEN #{startCreateTime} AND #{endCreateTime}
			</if>
		</where>
	</select>
</mapper>
Service层:UserService
public interface UserService {


/*
查询所有用户
*/
public PageInfo findAllUserByPage(UserVo userVo);
}
@Service
public class UserServiceImpl implements UserService {


@Autowired
private UserMapper userMapper;
@Override
public PageInfo findAllUserByPage(UserVo userVo) {


// 使用pageHelper
PageHelper.startPage(userVo.getCurrentPage(),userVo.getPageSize());
List<User> allUser = userMapper.findAllUser(userVo);
PageInfo<User> pageInfo = new PageInfo<User>(allUser);
System.out.println("总条数:"+pageInfo.getTotal());
System.out.println("总页数:"+pageInfo.getPages());
System.out.println("当前页:"+pageInfo.getPageNum());
System.out.println("每页显示长度:"+pageInfo.getPageSize());
System.out.println("是否第一页:"+pageInfo.isIsFirstPage());
System.out.println("是否最后一页:"+pageInfo.isIsLastPage());
return pageInfo;
}
}
Web层:UserController
@RestController
@RequestMapping("/user")
public class UserController {


	@Autowired
	private UserService userService;

	@RequestMapping("/findAllUserByPage")
	public ResponseResult findAllUserByPage(@RequestBody UserVo userVo){


		PageInfo pageInfo = userService.findAllUserByPage(userVo);
		ResponseResult responseResult = new ResponseResult(true,200,"响应成功",pageInfo);
		List<User> list = pageInfo.getList();
		System.out.println(list);
		return responseResult;
	}
}
Postman测试接口
2. 用户状态设置(自行完成)
2.1 需求分析
点击禁用,实现用户的状态变更

用户状态:ENABLE能登录,DISABLE不能登录
2.2 查看接口文档,进行编码
查看接口文档
Dao层:UserMapper
public interface UserMapper {


/**
* 修改用户状态
* */
public void updateUserStatus(@Param("id") int id,@Param("status") String
status);
}
<?xml version="1.0" encoding="UTF-8" ?>
<!DOCTYPE mapper PUBLIC "-//mybatis.org//DTD Mapper 3.0//EN"
"http://mybatis.org/dtd/mybatis-3-mapper.dtd">
<mapper namespace="com.lagou.dao.UserMapper">
<!-- 修改用户状态 -->
<update id="updateUserStatus">
UPDATE USER SET STATUS = #{status} where id = #{id};
</update>
</mapper>
Service层:UserService
public interface UserService {


/*
* 修改用户状态
* */
public void updateUserStatus(int id, String status);
}
@Service
public class UserServiceImpl implements UserService {


	@Autowired
	private UserMapper userMapper;
	@Override
	public void updateUserStatus(int id, String status) {


		userMapper.updateUserStatus(id,status);
	}
}
Web层:UserController
@RestController
@RequestMapping("/user")
public class UserController {


	@Autowired
	private UserService userService;
	/**
	* 修改用户状态
	* ENABLE能登录,DISABLE不能登录
	* */
	@RequestMapping("/updateUserStatus")
	public ResponseResult updateUserStatus(@RequestParam int id ,@RequestParam String status){


		if("ENABLE".equalsIgnoreCase(status)){


			status = "DISABLE";
		}else{


			status = "ENABLE";
		}
		userService.updateUserStatus(id,status);
		ResponseResult responseResult = new ResponseResult(true,200,"响应成功",status);
		return responseResult;
	}
}
Postman测试接口
任务三:拉勾教育后台管理系统: 权限管理模块开发(SSM)
任务三主要课程内容:
一 权限概念介绍
二 权限模块功能分析
三 权限管理模块表设计
四 权限管理(角色模块)接口实现
五 权限管理(菜单模块)接口实现
六 权限管理(资源模块)接口实现
七 登陆、关联角色及动态菜单展示
权限模块
一 权限概念介绍
权限:权利(能做的)和限制(不能做的),在权限范围内做好自己的事情,不该看的不看,不该做的不做
认证: 验证用户名密码是否正确的过程
授权: 对用户所能访问的资源进行控制(动态显示菜单、url级别的权限控制)
为什么要实现权限系统
首先系统需要进行登陆才能访问
其次不同登陆用户要有不同的权利,而且要有不同的菜单(例如财务经理针对系统中财务相关模块进行操作,人事经理针对系统中人事模块进行操作)
权限控制基本原理
1.ACL(Access Control Lists,缩写ACL)
ACL是最早也是最基本的一种访问控制机制,它的原理非常简单:每一项资源,都配有一个列表,这个列表记录的就是哪些用户可以对这项资源执行CRUD中的那些操作。当系统试图访问这项资源时,会首先检查这个列表中是否有关于当前用户的访问权限,从而确定当前用户可否执行相应的操作。总得来说,ACL是一种面向资源的访问控制模型,它的机制是围绕“资源”展开的。
2.基于角色的访问控制RBAC(Role-Based Access Control)
RBAC是把用户按角色进行归类,通过用户的角色来确定用户能否针对某项资源进行某项操作。RBAC相对于ACL最大的优势就是它简化了用户与权限的管理,通过对用户进行分类,使得角色与权限关联起来,而用户与权限变成了间接关联。RBAC模型使得访问控制,特别是对用户的授权管理变得非常简单和易于维护,因此有广泛的应用

规则一:每个登陆的用户,可以有多个角色;
规则二:每个角色又可以拥有多个权限(包含菜单和资源);
二 权限模块功能分析
权限模块主要细分为角色模块、菜单模块、资源模块,将针对细分的三个模块进行具体功能实现,同时会完成用户登陆、用户关联角色及动态菜单显示
2.1 权限模块管理
- 实现以下功能:
○ 角色列表&条件查询(角色模块)
○ 分配菜单(角色模块)
○ 删除角色(角色模块)
○ 菜单列表查询(菜单模块)
○ 查询菜单信息回显(菜单模块)
○ 资源分页&多条件查询(资源模块)
○ 用户登陆(用户模块)
○ 动态菜单展示(权限模块)
○ 用户关联角色(用户模块)


三 权限管理模块表设计
3.1 创建数据库及表
在资料中找到 ssm_lagou_edu.sql,使用SQLYog 执行SQL脚本 ,导入表结构及表信息

3.2 表关系介绍
3.2.1.ER图


3.2.2.数据实体描述
菜单表(menu)
| 字段类型 | 类型 | 约束 | 描述 |
|---|---|---|---|
| id | int(11) | PK | 自增主键 |
| parent_id | int(11) | 父菜单id,顶级菜父菜单id为-1 | |
| href | varchar(200) | 菜单路径 | |
| icon | varchar(200) | 菜单图标 | |
| name | varchar(200) | 菜单名称 | |
| description | varchar(500) | 描述 | |
| order_num | int(11) | 排序号 | |
| shown | tinyint(2) | 是否显示 | |
| level | int(11) | 菜单层级,从0开始,越大层级越低 | |
| created_time | datetime | 创建时间 | |
| updated_time | datetime | 更新时间 | |
| created_by | varchar(100) | 创建人 | |
| updated_by | varchar(100) | 更新人 |
资源分类表(resource_category)
| 字段类型 | 类型 | 约束 | 描述 |
|---|---|---|---|
| id | int(11) | PK | 自增主键 |
| name | varchar(200) | 资源分类名称 | |
| sort | int(11) | 排序,从小到大顺序排 | |
| created_time | datetime | 创建时间 | |
| updated_time | datetime | 更新时间 | |
| created_by | varchar(100) | 创建人 | |
| updated_by | varchar(100) | 更新人 |
资源表(resource)
| 字段类型 | 类型 | 约束 | 描述 |
|---|---|---|---|
| id | int(11) | PK | 自增主键 |
| name | varchar(200) | 资源名称 | |
| url | varchar(200) | 资源url | |
| category_id | int(11) | 资源分类ID | |
| description | varchar(500) | 描述 | |
| created_time | datetime | 创建时间 | |
| updated_time | datetime | 更新时间 | |
| created_by | varchar(100) | 创建人 | |
| updated_by | varchar(100) | 更新人 |
角色表(roles)
| 字段类型 | 类型 | 约束 | 描述 |
|---|---|---|---|
| id | int(11) | PK | 自增主键 |
| code | varchar(100) | 角色code | |
| name | varchar(200) | 角色名称 | |
| description | varchar(500) | 描述 | |
| created_time | datetime | 创建时间 | |
| updated_time | datetime | 更新时间 | |
| created_by | varchar(100) | 创建人 | |
| updated_by | varchar(100) | 更新人 |
用户-角色关系表(user_role_relation)
| 字段类型 | 类型 | 约束 | 描述 |
|---|---|---|---|
| id | int(11) | PK | 自增主键 |
| user_id | int(11) | 用户ID | |
| role_id | int(11) | 角色ID | |
| created_time | datetime | 创建时间 | |
| updated_time | datetime | 更新时间 | |
| created_by | varchar(100) | 创建人 | |
| updated_by | varchar(100) | 更新人 |
角色-菜单关系表(role_menu_relation)
| 字段类型 | 类型 | 约束 | 描述 |
|---|---|---|---|
| id | int(11) | PK | 自增主键 |
| menu_id | int(11) | 菜单ID | |
| role_id | int(11) | 角色ID | |
| created_time | datetime | 创建时间 | |
| updated_time | datetime | 更新时间 | |
| created_by | varchar(100) | 创建人 | |
| updated_by | varchar(100) | 更新人 |
角色-资源关系表(role_resource_relation)
| 字段类型 | 类型 | 约束 | 描述 |
|---|---|---|---|
| id | int(11) | PK | 自增主键 |
| resource_id | int(11) | 资源ID | |
| role_id | int(11) | 角色ID | |
| created_time | datetime | 创建时间 | |
| updated_time | datetime | 更新时间 | |
| created_by | varchar(100) | 创建人 | |
| updated_by | varchar(100) | 更新人 |
四 权限管理(角色模块)接口实现
1. 角色列表查询&条件查询
1.1 需求分析
需求:点击角色列表按钮进行角色列表展示

1.2 查看接口文档,进行编码
查看接口文档
实体类:Role
public class Role {


private Integer id;
private String code;
private String name;
private String description;
private Date createdTime;
private Date updatedTime;
private String createdBy;
private String updatedBy;
//getter/setter...
}
Dao层:RoleMapper
public interface RoleMapper {


/*
查询角色列表(条件)
*/
public List<Role> findAllRole(Role role);
}
<?xml version="1.0" encoding="UTF-8" ?>
<!DOCTYPE mapper PUBLIC "-//mybatis.org//DTD Mapper 3.0//EN"
"http://mybatis.org/dtd/mybatis-3-mapper.dtd">
<mapper namespace="com.lagou.dao.RoleMapper">
	<!--查询所有角色(条件)-->
	<select id="findAllRole" resultType="com.lagou.domain.Role">
		SELECT
			id,
			CODE,
			NAME,
			description,
			created_time,
			updated_time,
			created_by,
			updated_by
		FROM roles
		<where>
		<if test="name != null and name != ''">
			and name = #{name}
		</if>
		</where>
	</select>
Service层:RoleService
public interface RoleService {


public List<Role> findAllRole(Role role);
}
@Service
public class RoleServiceImpl implements RoleService {


	@Autowired
	private RoleMapper roleMapper;
	@Override
	public List<Role> findAllRole(Role role) {


		List<Role> allRole = roleMapper.findAllRole(role);
		return allRole;
	}
}
Web层:RoleController
@RestController
@RequestMapping("/role")
public class RoleController {


	@Autowired
	private RoleService roleService;
	@RequestMapping("/findAllRole")
	public ResponseResult findAllUserByPage(@RequestBody Role role){


		List<Role> allRole = roleService.findAllRole(role);
		ResponseResult responseResult = new ResponseResult(true,200,"响应成功",allRole);
		return responseResult;
	}
}
Postman测试接口
2. 分配菜单
2.1 需求分析
需求:点击分配菜单,回显可选择菜单信息,并回显选中状态

2.2 接口1 查询所有菜单列表
查看接口文档
Dao层:MenuMapper
public interface MenuMapper {


/**
* 查询全部的父子菜单信息
* */
public List<Menu> findSubMenuListByPid(int pid);
}
<!-- 一对多: 查找子孙菜单 -->
<select id="findSubMenuListByPid" resultMap="MenuResult">
	select * from menu where parent_id = #{pid}
</select>
<!-- 根据pid 查询所有子分类集合 -->
<resultMap id="MenuResult" type="com.lagou.domain.Menu">
	<id column="id" property="id"></id>
	<result column="href" property="href"></result>
	<result column="icon" property="icon"></result>
	<result column="name" property="name"></result>
	<result column="parent_id" property="parentId"></result>
	<result column="description" property="description"></result>
	<result column="orderNum" property="order_num"></result>
	<result column="shown" property="shown"></result>
	<result column="created_time" property="createdTime"></result>
	<result column="updated_time" property="updatedTime"></result>
	<result column="created_by" property="createdBy"></result>
	<result column="updated_by" property="updatedBy"></result>
	<collection property="subMenuList" ofType="com.lagou.domain.Menu"
	select="findSubMenuListByPid" column="id" ></collection>
</resultMap>
Service层:MenuService
public interface MenuService {


public List<Menu> findSubMenuListByPid(int pid);
}
@Service
public class MenuServiceImpl implements MenuService {


	@Autowired
	private MenuMapper menuMapper;
	@Override
	public List<Menu> findSubMenuListByPid(int pid) {


		List<Menu> menuList = menuMapper.findSubMenuListByPid(pid);
		return menuList;
	}
}
Web层:RoleController
@RestController
@RequestMapping("/role")
public class RoleController {


	@Autowired
	private MenuService menuService;
	/*
	查询所有菜单信息
	*/
	@RequestMapping("/findAllMenu")
	public ResponseResult findAllMenu(){


		//-1 表示查询所有菜单数据
		List<Menu> menuList = menuService.findSubMenuListByPid(-1);
		Map<String,Object> map = new HashMap<>();
		map.put("parentMenuList",menuList);
		ResponseResult result = new ResponseResult(true,200,"响应成功",map);
		return result;
	}
}
Postman测试接口
2.3 接口2 根据角色ID查询关联菜单ID
Dao层:RoleMapperr
public interface RoleMapper {


/*
根据角色ID查询菜单信息
*/
List<String> findMenuByRoleId(Integer roleId);
}
<mapper namespace="com.lagou.dao.RoleMapper">
<!-- List<String> findMenuByRoleId(Integer roleId);-->
<select id="findMenuByRoleId" parameterType="int" resultType="string">
	SELECT m.`id`FROM roles r LEFT JOIN role_menu_relation rm ON r.id =
	rm.`role_id`LEFT JOIN menu m ON rm.`menu_id` = m.`id` WHERE r.id = #{id}
</select>
Service层:RoleService
public interface RoleService {


	/**
	* 根据ID查询角色关联菜单
	* */
	List<String> findMenuByRoleId(Integer roleId);
}
@Service
public class RoleServiceImpl implements RoleService {


	@Autowired
	private RoleMapper roleMapper;
	@Override
	public List<String> findMenuByRoleId(Integer roleId) {


		List<String> list = roleMapper.findMenuByRoleId(roleId);
		return list;
	}
}
Web层:RoleController
/**
* 查询角色关联菜单列表ID
* */
@RequestMapping("/findMenuByRoleId")
public ResponseResult findMenuByRoleId(Integer roleId){


	List<String> menuList = roleService.findMenuByRoleId(roleId);
	ResponseResult result = new ResponseResult(true,200,"响应成功",menuList);
	return result;
}
Postman测试接口
2.4 接口3 为角色分配菜单列表
Dao层:RoleMapper
public interface RoleMapper {


	/*
	角色菜单关联
	*/
	void RoleContextMenu(Role_menu_relation role_menu_relation);
}
<?xml version="1.0" encoding="UTF-8" ?>
<!DOCTYPE mapper PUBLIC "-//mybatis.org//DTD Mapper 3.0//EN"
"http://mybatis.org/dtd/mybatis-3-mapper.dtd">
<mapper namespace="com.lagou.dao.RoleMapper">
	<!--删除角色菜单关联信息-->
	<delete id="deleteRoleContextMenu" parameterType="int">
		delete from role_menu_relation where role_id = #{id}
	</delete>
	<!--角色菜单关联-->
	<insert id="RoleContextMenu"
	parameterType="com.lagou.domain.Role_menu_relation">
		insert into role_menu_relation values(null,#{menuId},#{roleId},#
		{createdTime},#{updatedTime},#{createdBy},#{updatedby})
	</insert>
</mapper>
Service层:RoleService
public interface RoleService {


	void RoleContextMenu(RoleMenuVo roleMenuVo);
}
@Service
public class RoleServiceImpl implements RoleService {


	@Override
	public void RoleContextMenu(RoleMenuVo roleMenuVo) {


		// 清空中间表
		roleMapper.deleteRoleContextMenu(roleMenuVo.getRoleId());
		for (Integer mid : roleMenuVo.getMenuIdList()) {


			Role_menu_relation role_menu_relation = new Role_menu_relation();
			role_menu_relation.setRoleId(roleMenuVo.getRoleId());
			role_menu_relation.setMenuId(mid);
			role_menu_relation.setCreatedTime(new Date());
			role_menu_relation.setUpdatedTime(new Date());
			role_menu_relation.setCreatedBy("system");
			role_menu_relation.setUpdatedby("system");
			roleMapper.RoleContextMenu(role_menu_relation);
		}
	}
}
Web层:RoleController
@RestController
@RequestMapping("/role")
public class RoleController {


	@Autowired
	private RoleService roleService;
	/*
	用户关联菜单 {roleId: 4, menuIdList: [19, 20, 7, 8, 9, 15, 16, 17, 18]}
	*/
	@RequestMapping("/RoleContextMenu")
	public ResponseResult RoleContextMenu(@RequestBody RoleMenuVo roleMenuVo){


		roleService.RoleContextMenu(roleMenuVo);
		ResponseResult result = new ResponseResult(true,200,"响应成功","");
		return result;
	}
}
Postman测试接口
3. 删除角色
3.1 需求分析
需求:点击删除按钮,将选中的角色信息删除

3.2 查看接口文档,进行编码
查看接口文档
Dao层:RoleMapper
public interface RoleMapper {


	/*
	删除角色
	*/
	void deleteRole(Integer id);
}
<?xml version="1.0" encoding="UTF-8" ?>
<!DOCTYPE mapper PUBLIC "-//mybatis.org//DTD Mapper 3.0//EN"
"http://mybatis.org/dtd/mybatis-3-mapper.dtd">
<mapper namespace="com.lagou.dao.RoleMapper">
	<delete id="deleteRole" parameterType="int">
		delete from roles where id = #{id}
	</delete>
</mapper>
Service层:RoleService
public interface RoleService {


	void deleteRole(Integer id);
}
@Service
public class RoleServiceImpl implements RoleService {


	@Autowired
	private RoleMapper roleMapper;
	@Override
	public void deleteRole(Integer id) {


		// 清空中间表
		roleMapper.deleteRoleContextMenu(id);
		roleMapper.deleteRole(id);
	}
}
Web层:RoleController
@RestController
@RequestMapping("/role")
public class RoleController {


	@Autowired
	private RoleService roleService;
	/**
	* 删除角色
	* */
	@RequestMapping("/deleteRole")
	public ResponseResult deleteRole(Integer id){


		roleService.deleteRole(id);
		ResponseResult responseResult = new ResponseResult(true,200,"响应成功","");
		return responseResult;
	}
}
Postman测试接口
五 权限管理(菜单模块)接口实现
1. 菜单列表查询
1.1 需求分析
需求:点击菜单列表,对菜单信息进行列表展示

1.2 查看接口文档,进行编码
查看接口文档
实体类:Menu
public class Menu {


//主键id
private Integer id;
//父菜单id
private int parentId;
//菜单路径
private String href;
//菜单图标
private String icon;
//菜单名称
private String name;
//描述
private String description;
//排序号
private int orderNum;
//是否展示
private int shown;
//菜单层级,从0开始
private int level;
//创建时间
private Date createdTime;
//更新时间
private Date updatedTime;
//创建人
private String createdBy;
//更新人
private String updatedBy;
// getter/setter..
}
Dao层:MenuMapper
public interface MenuMapper {


	/**
	* 查询菜单列表
	* */
	public List<Menu> findAllMenu();
}
<mapper namespace="com.lagou.dao.MenuMapper">
	<!-- 查询菜单列表 -->
	<select id="findAllMenu" resultType="com.lagou.domain.Menu">
		SELECT
		id,
		parent_id,
		href,
		icon,
		NAME,
		description,
		order_num,
		shown,
		LEVEL,
		created_time,
		updated_time,
		created_by,
		updated_by
		FROM menu
	</select>
</mapper>
Service层:MenuService
public interface MenuService {


	public List<Menu> findAllMenu();
}
@Service
public class MenuServiceImpl implements MenuService {


	@Autowired
	private MenuMapper menuMapper;
	@Override
	public List<Menu> findAllMenu() {


		List<Menu> list = menuMapper.findAllMenu();
		return list;
	}
Web层:MenuController
@RestController
@RequestMapping("/menu")
public class MenuController {


	@Autowired
	private MenuService menuService;
	/**
	* 查询菜单列表信息
	* */
	@RequestMapping("/findAllMenu")
	public ResponseResult findAllMenu(){


		List<Menu> list = menuService.findAllMenu();
		ResponseResult result = new ResponseResult(true,200,"响应成功",list);
		return result;
	}
}
Postman测试接口
2. 查询菜单信息(回显)
2.1 需求分析
需求:点击添加菜单按钮,跳转到添加菜单页面,回显当前添加菜单可以选择的上级菜单信息

2.2 查看接口文档,进行编码
查看接口文档
Dao层:MenuMapper
public interface MenuMapper {


	/**
	* 查询全部的父子菜单信息
	* */
	public List<Menu> findSubMenuListByPid(int pid);
}
<mapper namespace="com.lagou.dao.MenuMapper">
	<!-- 一对多: 查找子孙菜单 -->
	<select id="findSubMenuListByPid" resultMap="MenuResult">
		select * from menu where parent_id = #{pid}
	</select>
	<!-- 根据pid 查询所有子分类集合 -->
	<resultMap id="MenuResult" type="com.lagou.domain.Menu">
		<id column="id" property="id"></id>
		<result column="href" property="href"></result>
		<result column="icon" property="icon"></result>
		<result column="name" property="name"></result>
		<result column="parent_id" property="parentId"></result>
		<result column="description" property="description"></result>
		<result column="orderNum" property="order_num"></result>
		<result column="shown" property="shown"></result>
		<result column="created_time" property="createdTime"></result>
		<result column="updated_time" property="updatedTime"></result>
		<result column="created_by" property="createdBy"></result>
		<result column="updated_by" property="updatedBy"></result>
		<collection property="subMenuList" ofType="com.lagou.domain.Menu"
		select="findSubMenuListByPid" column="id" ></collection>
	</resultMap>
</mapper>
Service层:MenuService
public interface MenuService {


	public List<Menu> findSubMenuListByPid(int pid);
}
@Service
public class MenuServiceImpl implements MenuService {


	@Autowired
	private MenuMapper menuMapper;
	@Override
	public List<Menu> findSubMenuListByPid(int pid) {


		List<Menu> menuList = menuMapper.findSubMenuListByPid(pid);
		return menuList;
	}
}
Web层:MenuController
@RestController
@RequestMapping("/menu")
public class MenuController {


	@Autowired
	private MenuService menuService;
	/**
	* 回显菜单信息(包括父子菜单的全部信息)
	* */
	@RequestMapping("/findMenuInfoById")
	public ResponseResult findMenuInfoById(@RequestParam int id){


		if(id == -1){


			//添加操作 回显不需要查询 menu信息
			List<Menu> menuList = menuService.findSubMenuListByPid(-1);
			//封装数据
			Map<String,Object> map = new HashMap<>();
			map.put("menuInfo",null);
			map.put("parentMenuList",menuList);
			ResponseResult result = new ResponseResult(true,200,"响应成功",map);
			return result;
		}else{


			//修改操作 回显
			Menu menu = menuService.findMenuById(id);
			List<Menu> menuList = menuService.findSubMenuListByPid(-1);
			Map<String,Object> map = new HashMap<>();
			map.put("menuInfo",menu);
			map.put("parentMenuList",menuList);
			ResponseResult result = new ResponseResult(true,200,"响应成功",map);
			return result;
		}
	}
}
Postman测试接口
六 权限管理(资源模块)接口实现
1.资源分页&多条件查询
1.1 需求分析
需求:资源列表及多条件组合查询

1.2 查看接口文档,进行编码
查看接口文档
Dao层:ResourceMapper
public interface ResourceMapper {


	public List<Resource> findAllResource(ResourceVo resourceVo);
}
<?xml version="1.0" encoding="UTF-8" ?>
<!DOCTYPE mapper PUBLIC "-//mybatis.org//DTD Mapper 3.0//EN"
"http://mybatis.org/dtd/mybatis-3-mapper.dtd">
<mapper namespace="com.lagou.dao.ResourceMapper">
	<!--查询所有资源-->
	<select id="findAllResource" resultType="com.lagou.domain.Resource">
		select * from resource
		<where>
			<if test="name != null">
				and name like concat('%',#{name},'%')
			</if>
			<if test="url != null">
				and url = url
			</if>
			<if test="categoryId != null">
				and category_id = #{categoryId}
			</if>
		</where>
	</select>
</mapper>
Service层:ResourceService
public interface ResourceService {


	public PageInfo<Resource> findAllResource(ResourceVo resourceVo);
}
@Service
public class ResourceServiceImpl implements ResourceService {


	@Autowired
	private ResourceMapper resourceMapper;
	@Override
	public PageInfo<Resource> findAllResource(ResourceVo resourceVo) {


		PageHelper.startPage(resourceVo.getCurrentPage(),resourceVo.getPageSize());
		List<Resource> allResource = resourceMapper.findAllResource(resourceVo);
		PageInfo<Resource> adPageInfo = new PageInfo<Resource>(allResource);
		return adPageInfo;
	}
Web层:ResourceController
@RestController
@RequestMapping("/resource")
public class ResourceController {


	@Autowired
	private ResourceService resourceService;
	/**
	* 分页与条件查询
	* */
	@RequestMapping("/findAllResource")
	public ResponseResult findAllResource(@RequestBody ResourceVo resourceVo){


		PageInfo<Resource> allResource =
		resourceService.findAllResource(resourceVo);
		ResponseResult responseResult = new ResponseResult(true,200,"响应成
		功",allResource);
		return responseResult;
	}
}
Postman测试接口
七 登陆及动态菜单展示
1. 登陆
1.1 需求分析
需求:输入用户名密码,点击登陆按钮,进行用户登陆

加密算法MD5介绍
- 什么是MD5
MD5加密全程是Message-Digest Algoorithm 5(信息-摘要算法),它对信息进行摘要采集,再通过一定的位运算,最终获取加密后的MD5字符串。 - MD5有哪些特点
MD5加密的特点主要有以下几点:
1 针对不同长度待加密的数据、字符串等等,其都可以返回一个固定长度的MD5加密字符串。(通常32位的16进制字符串);
2 其加密过程几乎不可逆,除非维护一个庞大的Key-Value数据库来进行碰撞破解,否则几乎无法解开。
3 运算简便,且可实现方式多样,通过一定的处理方式也可以避免碰撞算法的破解。(加盐:随机字符串)
4 对于一个固定的字符串。数字等等,MD5加密后的字符串是固定的,也就是说不管MD5加密多少次,都是同样的结果。 - Java代码中如何使用MD5
(1)添加依赖
<!--MD5依赖-->
<dependency>
<groupId>org.apache.commons</groupId>
<artifactId>commons-lang3</artifactId>
<version>3.3.2</version>
</dependency>
<dependency>
<groupId>commons-codec</groupId>
<artifactId>commons-codec</artifactId>
<version>1.3</version>
</dependency>
(2)添加工具类
public class Md5 {


	public final static String md5key = "Ms2";
	/**
	* MD5方法
	* @param text 明文
	* @param key 密钥
	* @return 密文
	* @throws Exception
	*/
	public static String md5(String text, String key) throws Exception {


		//加密后的字符串
		String encodeStr= DigestUtils.md5Hex(text+key);
		System.out.println("MD5加密后的字符串为:encodeStr="+encodeStr);
		return encodeStr;
	}
	/**
	* MD5验证方法
	* @param text 明文
	* @param key 密钥
	* @param md5 密文
	* @return true/false
	* @throws Exception
	*/
	public static boolean verify(String text, String key, String md5) throws
	Exception {


		//根据传入的密钥进行验证
		String md5Text = md5(text, key);
		if(md5Text.equalsIgnoreCase(md5))
		{


			System.out.println("MD5验证通过");
			return true;
		}
		return false;
	}
	public static void main(String[] args) throws Exception {


		// 注册 用户名:tom 密码 123456
		// 添加用户的时候,要进行加密
		String lagou = Md5.md5("123456", "lagou");
		System.out.println(lagou);
		// 登陆 用户名 tom 123456 select * from user where username = tom and
		password = 123456
		// 1.根据用户名进行查询 f00485441dfb815c75a13f3c3389c0b9
		boolean verify = Md5.verify("123456", "lagou",
		"f00485441dfb815c75a13f3c3389c0b9");
		System.out.println(verify);
	}
}
1.2 查看接口文档,进行编码
查看接口文档
Dao层:UserMapper
public interface UserMapper {


	/*
	用户登陆
	*/
	public User login(User user);
}
<?xml version="1.0" encoding="UTF-8" ?>
<!DOCTYPE mapper PUBLIC "-//mybatis.org//DTD Mapper 3.0//EN"
"http://mybatis.org/dtd/mybatis-3-mapper.dtd">
<mapper namespace="com.lagou.dao.UserMapper">
	<!-- 用户登陆 -->
	<select id="login" parameterType="com.lagou.domain.User"
	resultType="com.lagou.domain.User">
		select * from user where phone = #{phone}
	</select>
</mapper>
Service层:UserService
public interface UserService {


	/*
	用户登录
	*/
	public User login(User user);
}
@Service
public class UserServiceImpl implements UserService {


	@Autowired
	private UserMapper userMapper;
	/**
	* 用户登录
	* */
	@Override
	public User login(User user) throws Exception {


		User user2 = userMapper.login(user);
		if(user2 != null && Md5.verify(user.getPassword(),"lagou",user2.getPassword())){


			return user2;
		}else {


			return null;
		}
	}
}
Web层:UserController
@RestController
@RequestMapping("/user")
public class UserController {


	@Autowired
	private UserService userService;
	/**
	* 用户登录
	* */
	@RequestMapping("/login")
	public ResponseResult login(User user, HttpServletRequest request) throws
	Exception {


		User login = userService.login(user);
		ResponseResult result = null;
		if(login !=null ){


			//保存access_token
			Map<String,Object> map = new HashMap<>();
			String access_token = UUID.randomUUID().toString();
			map.put("access_token", access_token);
			map.put("user_id",login.getId());
			HttpSession session = request.getSession();
			session.setAttribute("user_id",login.getId());
			session.setAttribute("access_token",access_token);
			result = new ResponseResult(true,1,"响应成功",map);
		}else{


			result = new ResponseResult(true,1,"用户名密码错误",null);
		}
		return result;
	}
}
Postman测试接口
2. 分配角色(回显)
2.1 需求分析
需求:点击分配角色,将该用户所具有的角色信息进行回显

2.2 查看接口文档,进行编码
查看接口文档
Dao层:UserMapper
public interface UserMapper {


	/**
	* 根据ID查询用户当前角色
	* */
	public List<Role> findUserRelationRoleById(int id);
}
<?xml version="1.0" encoding="UTF-8" ?>
<!DOCTYPE mapper PUBLIC "-//mybatis.org//DTD Mapper 3.0//EN"
"http://mybatis.org/dtd/mybatis-3-mapper.dtd">
<mapper namespace="com.lagou.dao.UserMapper">
	<!-- 根据ID查询用户当前角色 -->
	<select id="findUserRelationRoleById" resultType="com.lagou.domain.Role"
	parameterType="int">
		SELECT
		r.id,
		r.code,
		r.name,
		r.description
		FROM roles r INNER JOIN user_role_relation ur
		ON r.`id` = ur.`role_id` INNER JOIN USER u ON ur.`user_id` = u.`id`
		WHERE u.`id` = #{id}
	</select>
</mapper>
Service层:UserService
public interface UserService {


	/**
	* 获取用户拥有的角色
	* */
	public List<Role> findUserRelationRoleById(int id) ;
}
@Service
public class UserServiceImpl implements UserService {


	@Autowired
	private UserMapper userMapper;
	/**
	* 获取用户拥有的角色
	* */
	@Override
	public List<Role> findUserRelationRoleById(int id) {


		List<Role> roleList = userMapper.findUserRelationRoleById(id);
		return roleList;
	}
}
Web层:UserController
@RestController
@RequestMapping("/user")
public class UserController {


	@Autowired
	private UserService userService;
	/*
	获取用户拥有的角色
	*/
	@RequestMapping("/findUserRoleById")
	public ResponseResult findUserRoleById(int id){


		List<Role> roleList = userService.findUserRelationRoleById(id);
		return new ResponseResult(true,200,"分配角色回显成功",roleList);
	}
}
Postman测试接口
3. 分配角色
3.1 需求分析
需求:点击确定按钮,真正实现用户角色关联


3.2 查看接口文档,进行编码
查看接口文档
Dao层:UserMapper
public interface UserMapper {


	/*
	根据用户ID清空中间表
	*/
	void deleteUserContextRole(Integer userId);
	/*
	分配角色
	*/
	void userContextRole(User_Role_relation user_role_relation);
}
<?xml version="1.0" encoding="UTF-8" ?>
<!DOCTYPE mapper PUBLIC "-//mybatis.org//DTD Mapper 3.0//EN"
"http://mybatis.org/dtd/mybatis-3-mapper.dtd">
<mapper namespace="com.lagou.dao.UserMapper">
	<!-- 根据userid清空中间表关联关系 void deleteUserContextRole(Integer
	userId);-->
	<delete id="deleteUserContextRole" parameterType="int">
		delete from user_role_relation where user_id = #{userid}
	</delete>
	<!--用户角色关联 void userContextRole(Integer userId, Integer roleid);-->
	<insert id="userContextRole"
	parameterType="com.lagou.domain.User_Role_relation">
		insert into user_role_relation values(null,#{userId},#{roleId},#
		{createdTime},#{updatedTime},#{createdBy},#{updatedby})
	</insert>
</mapper>
Service层:UserService
public interface UserService {


	/*
	用户关联角色
	*/
	void userContextRole(UserVo userVo);
}
@Service
public class UserServiceImpl implements UserService {


	@Autowired
	private UserMapper userMapper;
	/*
	用户关联角色
	*/
	@Override
	public void userContextRole(UserVo userVo) {


		// 根据用户ID清空中间表的关联关系
		userMapper.deleteUserContextRole(userVo.getUserId());
		// 向中间表添加记录
		for (Integer roleid : userVo.getRoleIdList()) {


			User_Role_relation user_role_relation = new User_Role_relation();
			user_role_relation.setUserId(userVo.getUserId());
			user_role_relation.setRoleId(roleid);
			Date date = new Date();
			user_role_relation.setCreatedTime(date);
			user_role_relation.setUpdatedTime(date);
			user_role_relation.setCreatedBy("system");
			user_role_relation.setUpdatedby("system");
			userMapper.userContextRole(user_role_relation);
		}
	}
}
Web层:UserController
@RestController
@RequestMapping("/user")
public class UserController {


	@Autowired
	private UserService userService;
	/*
	分配角色
	*/
	@RequestMapping("/userContextRole")
	public ResponseResult userContextRole(@RequestBody UserVo userVo){


		userService.userContextRole(userVo);
		return new ResponseResult(true,200,"分配角色成功",null);
	}
}
Postman测试接口
4. 动态菜单显示
4.1 需求分析
需求:登陆成功后,根据用户所拥有的权限信息,进行菜单列表动态展示


4.2 查看接口文档,进行编码
查看接口文档
Dao层:UserMapper
public interface UserMapper {


	/**
	* 根据ID查询用户当前角色
	* * */
	public List<Role> findUserRelationRoleById(int id);
	/**
	* 根据角色id,查询角色拥有的顶级菜单信息
	* */
	public List<Menu> findParentMenuByRoleId(List<Integer> ids);
	/**
	* 根据PID 查询子菜单信息
	* */
	public List<Menu> findSubMenuByPid(int pid);
	/**
	* 获取用户拥有的资源权限信息
	* */
	public List<Resource> findResourceByRoleId(List<Integer> ids);
}
<?xml version="1.0" encoding="UTF-8" ?>
<!DOCTYPE mapper PUBLIC "-//mybatis.org//DTD Mapper 3.0//EN"
"http://mybatis.org/dtd/mybatis-3-mapper.dtd">
<mapper namespace="com.lagou.dao.UserMapper">
	<!-- 根据ID查询用户当前角色 -->
	<select id="findUserRelationRoleById" resultType="com.lagou.domain.Role"
	parameterType="int">
		SELECT
		r.id,
		r.code,
		r.name,
		r.description
		FROM roles r INNER JOIN user_role_relation ur
		ON r.`id` = ur.`role_id` INNER JOIN USER u ON ur.`user_id` = u.`id`
		WHERE u.`id` = #{id}
	</select>
	<!-- 根据角色id,查询角色拥有的顶级菜单信息 -->
	<select id="findParentMenuByRoleId" parameterType="java.util.List"
	resultType="com.lagou.domain.Menu">
		SELECT
		DISTINCT m.*
		FROM roles r INNER JOIN role_menu_relation rm ON r.`id` = rm.role_id
		INNER JOIN menu m ON rm.menu_id = m.id
		WHERE m.parent_id = -1 AND r.id IN
		<foreach collection="list" item="item" open="(" separator=","
		close=")">
		#{item}
		</foreach>
		GROUP BY m.id
	</select>
	<!-- 根据PID 查找子菜单 -->
	<select id="findSubMenuByPid" resultType="com.lagou.domain.Menu">
		select * from menu where parent_id = #{pid}
	</select>
	<!-- 获取用户拥有的资源权限 -->
	<select id="findResourceByRoleId" parameterType="java.util.List"
	resultType="com.lagou.domain.Resource">
		SELECT
		DISTINCT rc.*
		FROM roles r INNER JOIN role_resource_relation rrr ON r.`id` =
		rrr.`role_id`
		INNER JOIN resource rc ON rrr.`resource_id` = rc.`id` WHERE r.id IN
		<foreach item="item" index="index" collection="list" open="("
		separator="," close=")">
		#{item}
		</foreach>
		GROUP BY rc.id;
	</select>
</mapper>
Service层:UserService
public interface UserService {


	/*
	* 获取用户权限
	* */
	ResponseResult getUserPermissions(Integer id);
}
@Service
public class UserServiceImpl implements PromotionSpaceService {


	@Autowired
	private UserMapper userMapper;
	@Override
	public ResponseResult getUserPermissions(Integer id) {


		//1.获取当前用户拥有的角色
		List<Role> roleList = userMapper.findUserRelationRoleById(id);
		//2.获取角色ID,保存到 list
		List<Integer> list = new ArrayList<>();
		for (Role role : roleList) {


			list.add(role.getId());
		}
		//3.根据角色id查询 父菜单
		List<Menu> parentMenu = userMapper.findParentMenuByRoleId(list);
		//4.封装父菜单下的子菜单
		for (Menu menu : parentMenu) {


			List<Menu> subMenu = userMapper.findSubMenuByPid(menu.getId());
			menu.setSubMenuList(subMenu);
		}
		//5.获取资源权限
		List<Resource> resourceList = userMapper.findResourceByRoleId(list);
		//6.封装数据
		Map<String,Object> map = new HashMap<>();
		map.put("menuList",parentMenu); //menuList: 菜单权限数据
		map.put("resourceList",resourceList);//resourceList: 资源权限数据
		ResponseResult result = new ResponseResult(true,200,"响应成功",map);
		return result;
	}
}
Web层:UserController
@RestController
@RequestMapping("/user")
public class UserController {


	@Autowired
	private UserService userService;
	/**
	* 获取用户权限
	* */
	@RequestMapping("/getUserPermissions")
	public ResponseResult getUserPermissions(HttpServletRequest request){


		//获取请求头中的 token
		String token = request.getHeader("Authorization");
		//获取session中的access_token
		HttpSession session = request.getSession();
		String access_token = (String)session.getAttribute("access_token");
		//判断
		if(token.equals(access_token)){


			int user_id = (Integer)session.getAttribute("user_id");
			ResponseResult result = userService.getUserPermissions(user_id);
			return result;
		}else{


			ResponseResult result = new ResponseResult(false,400,"获取失败","");
			return result;
		}
	}
}
** Postman测试接口**
任务四:拉勾教育后台管理系统: Git(SSM)
课程主要内容
- 版本控制系统概述
- Git的下载与安装
- Git基本配置(本地仓库操作)
- 分支管理
- Git远程仓库
- 远程仓库的操作
- 在idea中使用Git
一、版本控制系统概述
1.1 开发中的实际场景
场景一:代码备份
小明负责的模块就要完成了,就在即将发布之前的一瞬间,电脑突然蓝屏,硬盘光荣牺牲!几个月来的努力付之东流
场景二:代码还原【版本控制】
这个项目中需要一个很复杂的功能,老王摸索了一个星期!终于有了眉目,可是这被改得面目全非的代码,已经回不到从前了。
场景三:协同开发
小刚和小强先后从文件服务器上下载了同一个文件:UserDao.java。小刚在UserDao.java文件中的第30行声明了一个方法,叫count(),先保存到了文件服务器上;小强在UserDao.java文件中的第30行声明了一个方法,叫sum(),也随后保存到了文件服务器上,于是,count()方法就只存在于小刚的记忆中了
场景四:追溯问题代码(编写人和编写时间)!
老王是另一位项目经理,每次因为项目进度挨骂之后,他都不知道该扣哪个程序员的工资!就拿这次来说吧,有个Bug调试了30多个小时才知道是因为相关属性没有在应用初始化时赋值!可是赵四、能能、老七 都不承认是自己干的!
1.2 版本控制系统
版本控制系统能追踪项目,从开始到结束的整个过程。对编程人员而言,版本控制技术是团队协作开发的桥梁,助力于多人协作同步进行大型项目开发。
软件版本控制系统的核心任务:查阅项目历史操作记录、实现协同开发。
常见的两种版本控制类型:
- 集中式版本控制工具
○ 集中式版本控制工具,版本仓库是集中存放在中央服务器的,team里每个人工作时,从中央服务器下载代码。每个人个人修改后,提交到中央版本仓库。提交(commit)代码需要联网
○ 如:SVN

1.3 Git 简介
Git — The stupid content tracker, 傻瓜内容跟踪器。Linus Torvalds 是这样介绍 Git 的。
Git是一个开源的分布式版本控制系统,可以有效、高速地处理从很小到非常大的项目的版本管理。 Git是 Linus Torvalds。他是为了帮助管理 Linux 内核开发而开发的一个的版本控制软件。最后开源了。
- 速度、简单的设计
- 对非线性开发模式的强力支持(允许成千上万个并行开发的分支)
- 完全分布式
- 有能力高效管理类似 Linux 内核一样的超大规模项目(速度和数据量)
1.3.1 Git工作流程图

操作:
- Clone:克隆,从远程仓库中克隆代码到本地仓库,第一次操作
- Push:推送,代码完成后,需要和团队成员共享代码时,将代码推送到远程仓库。
- Pull:拉取,从远程库拉代码到本地库,自动进行合并(merge),最后放到工作区。

操作:
- checkout:将本地仓库的内容检出到工作区
- add:在提交前先将代码提交到暂存区
- commit:提交到本地仓库

1.3.2 基本概念
- 本地仓库: 在本地主机上的一个代码库,可以独立存在,也可以与远程仓库进行关联
○ 工作区:对任何文件的修订(增删改),都先放在工作区,工作区不与任何仓库分支进行关联
○ 暂存区:把修订的文件,从工作区经过add(添加)后与某一个仓库分支进行关联,只要进入缓存区的文件才能commit(提交)到本地仓库。 - 远程仓库 : 在局域网或互联网上的一个主机,存放代码库的主机或平台,比如GitHub、Gitee.com(码云)
- 分支:代码存放在仓库,默认是主分支(master),可以在主分支基础上创建很多子分支,比如 develop(开发)、bugfix(bug修复)等。
一个文件夹包含.git隐藏目录(Git工作目录),说明此文件目录使用Git版本管理。
.git隐藏目录中存储了很多配置信息、日志信息和文件版本信息、暂存区信息等。.Git文件夹中有很多文件,其中有一个index文件就是暂存区,也可以叫做stage。暂存区是一个临时保存修改文件的地方。


小结
Git分布式的版本控制系统
1、Git解决那些问题:代码备份、还原;协同开发;多版本同时开发、追溯问题代码
2、Git中的基本概念:
- 本地仓库:存储所有版本代码
○ 工作区:编辑代码区
○ 暂存区:准备提交的代码都放这里 - 远程仓库:用于团队之间共享代码【枢纽】
- 分支:多个版本同时开发,master主分支,develop开发分支,test测试分支
3、Git工作流程:
- 远程仓库操作:
- clone(克隆):第一次从远程仓库下载代码
- pull(拉取):获取团队其他成员代码提交变动
- push(推送):完成后的代码上传到远程仓库
- 本地仓库操作:
- checkout(检出):将本地仓库的内容检出到工作区
- add(添加):向暂存区添加代码,准备提交
- commit(提交):把暂存区的代码提交到本地仓库
二、Git的下载与安装
2.1 下载与安装
下载地址: https://git-scm.com/download
2.2 软件安装
下载完成后可以得到如下安装文件:
双击安装
一路“下一步”使用默认选项即可。
双击下载的安装文件来安装Git。安装完成后在电脑桌面(也可以是其他目录)点击右键,如果能够看到如下两个菜单则说明Git安装成功。

备注:
- Git GUI:Git提供的图形界面工具
- Git Bash:Git提供的命令行工具
三、Git基本配置
3.1 基本配置
1.安装完成 Git 后,正式使用git前,是需要进行一些全局设置的,如用户名、邮箱。
设置的主要命令是 git config :
# 设置全局用户名
git config --global user.name "lagou_kim"
# 设置邮箱
git config --global user.email "[email protected]"
其中,--global 指定为全局配置,不使用该参数,则为当前所在仓库配置。

通过上面的命令设置的信息会保存在.gitconfig文件中
以上配置信息默认存储在用户目录下,如果设置错误,可以删除以下如图文件,重新操作以上命令即可。

2.查看配置信息
# 查看配置信息
git config --list

3.2 构建本地仓库
要使用Git对我们的代码进行版本控制,首先需要构建本地仓库
通常有两种方式:
- 在本地初始化一个Git仓库
- 从远程仓库克隆一个仓库 (远程仓库演示)
3.2.1 初始化本地Git仓库
- 在电脑的任意位置创建一个空目录(例如local_repo1)作为我们的本地Git仓库
- 进入这个目录中,点击右键打开Git bash窗口
- 执行命令Git init如果在当前目录中看到.git文件夹(此文件夹为隐藏文件夹)则说明Git仓库创建成功

3.3 本地仓库的操作【重点】
3.3.1 创建 Git 版本库
在本地创建 Git 版本库,需要使用 git init 命令。
首先,你需要新建一个存放版本库的目录,然后进入到该目录所在路径,然后执行:
git init
然后查看目录结构中,就可以看到包含有 .git 子目录,这就说明创建版本库成功了

3.3.2 查看当前文件状态
#命令形式:
git status [-s]

#更简洁的信息命令形式:
git status -s

3.3.3 将文件添加(修改)到版本库
要将一个文件纳入到版本库管理,首先要将其添加到暂存区,然后才能提交到仓库中。
将文件添加到暂存区,使用的是 git add :
# 添加单个文件到暂存区
git add Readme.txt
# 将当前目录下所有修改添加到暂存区,除按照规则忽略的之外
git add .
注意:这边空文件夹是不会被添加到暂存区中的。

- 将暂存区中的文件,提交到仓库中。需要使用
git commit:
# 如果暂存区有文件,则将其中的文件提交到仓库
git commit
# 带评论提交,用于说明提交内容、变更、作用等
git commit -m 'your comments'
注意:这边直接用 git commit 提交,会先弹出添加评论的页面。

3.3.4 查看提交历史记录
有的时候,是会需要查看自己做过哪些提交,来回顾自己完成的部分。或者需要寻找某个具体的提交来查看当时的代码。这里需要用到:
git log # 显示所有提交的历史记录
git log --pretty=oneline # 单行显示提交历史记录的内容
在 git log 的输出内容中,可以看到每次提交的 ID,是一个 40 位的字符串。

3.3.5 版本回退
有了 git log 来查看提交的历史记录,我们就可以通过 git reset --hard 来回退到我们需要的特定版本,然后使用当时的代码进行各种操作。
# 会退到 commit_id 指定的提交版本
git reset --hard 'commit_id'

回到未来的某个提交
当退回到某个提交的版本以后,再通过 git log 是无法显示在这之后的提交信息的。但是,通过 git reflog 可以获取到操作命令的历史。
因此,想要回到未来的某个提交,先通过 git reflog 从历史命令中找到想要回到的提交版本的 ID,然后通过 git reset --hard 来切换。
git reflog
git reset --hard 'commit_id'

3.3.6 删除文件
在文件未添加到暂存区之前,对想删除文件可以直接物理删除。如果文件已经被提交,则需要 git rm来删除:
git rm Readme.md // 删除已经被提交过的 Readme.md
注意: git rm 只能删除已经提交到版本库中的文件。其他状态的文件直接用这个命令操作是出错的。

3.3.7 添加文件至忽略列表
一般在工作区中,并不是所有文件都需要纳入版本控制的
这种不需要进行版本控制的通常都是些自动生成的文件。比如:idea工程文件(springmvc.iml)、编译后文件target、系统上传的图片img。
在这种情况下,我们可以在工作目录中创建一个名为 .gitignore 的文件(文件名称固定),列出要忽略的文件。

一般在工程初始化时,提前准备好需要忽略的文件列表
四、分支管理
几乎所有的版本控制系统都以某种形式支持分支。 使用分支意味着你可以把你的工作从开发主线上分离开来进行重大的Bug修改、开发新的功能,以免影响开发主线。
在开发中,一般有如下分支使用原则与流程:
- master (生产) 分支
线上分支,主分支,中小规模项目作为线上运行的应用对应的分支; - test(测试)分支
从master创建的分支,一般作为测试部门的测试分支,进行预发测试。
测试完成后,需要合并到master分支,进行上线,中小规模项目可省略此分支; - develop(开发)分支
从test创建分支,如果开发没有test分支,是从master创建的分支,一般作为开发部门的主要开发分支
如果没有其他并行开发不同期上线要求,都可以在此版本进行开发
阶段开发完成后,需要是合并到test分支继续测试,如果没有test分支,可直接合并到master分支。 - hotfix(bugfix)分支,
从master派生的分支,一般作为线上bug修复使用,修复完成后需要合并到master、test、develop分支。
4.1 查看分支
查看分支使用 git branch :
# 查看本地分支信息
git branch
# 查看相对详细的本地分支信息
git branch -v
# 查看包括远程仓库在内的分支信息
git branch -av
注意:在 git branch 的输出内容中,有一个分支,前面带有 * 号,这标识我们当前所在的分支

4.2 创建分支
当我们要修复一个 Bug,或者开发一个新特性,甚至是在初学的时候怕打乱原来的代码,都可以新建一个分支来避免对原来代码的影响。
# 新建一个名称为 dev 的分支
git branch dev

4.3 切换分支
当我们创建完分支以后,我们需要切换到新建的分支,否则,所有的修改,还是在原来的分支上。事实上,所有的改动,只能影响到当前所在的分支。
# 新建完 dev 分支以后,通过该命令切换到 dev 分支
git checkout dev

4.4 创建并切换分支
# 新建 dev 分支,并切换到该分支上
git checkout -b dev
这个命令合并了前两个独立的命令,平常使用中一般这样使用。
4.5 合并分支
当我们修复完成一个 Bug,或者开发完成一个新特性,我们就会把相关的 Bug 或者 特性的上修改合并回原来的主分支上,这时候就需要 git merge 来做分支的合并。
首先需要切换回最终要合并到的分支,如 master :
# 切换回 master 分支
git checkout master
# 将 dev 分钟中的修改合并回 master 分支
git merge dev

合并回主分支的时候,后面可能会面临到冲突的问题
git add ./
4.6 删除分支
当之前创建的分支,完成了它的使命,如 Bug 修复完,分支合并以后,这个分支就不在需要了,就可以删除它。
# 删除 dev 分支
git branch -d dev

五、Git远程仓库
5.1 添加远程库
现在我们已经在本地创建了一个Git仓库,又想让其他人来协作开发,此时就可以把本地仓库同步到远程仓库,同时还增加了本地仓库的一个备份。
那么我们如何搭建Git远程仓库呢?我们可以借助互联网上提供的一些代码托管服务平台来实现,其中比较常用的有GitHub、码云等。
- GitHub( 地址:https://github.com/ )是一个面向开源及私有软件项目的托管平台,因为只支持Git 作为唯一的版本仓库格式进行托管,故名GitHub。
- 码云(地址: https://gitee.com/ )是国内的一个代码托管平台,由于服务器在国内,所以相比于GitHub,码云速度会更快。
接下来我们演示如何将本地仓库中的代码同步到github。和码云的操作一模一样
5.2 注册GitHub
第一步:登录网址,点击sign up注册账号
第二步:填写信息,注意邮箱要真实有效
第三步:直接点击join a free plan
第四步:直接划到最下面点击complete setup
第五步:邮箱需要验证,验证完成后登陆进github
验证邮箱:进入邮箱后点击按钮,进行页面跳转
跳转页面后:点击skip this for now
第六步:登录
5.3 创建远程仓库

点击“create repository”按钮仓库就创建成功了。

5.4 同步远程仓库
Github支持两种同步方式“https”和“ssh”。如果使用https很简单基本不需要配置就可以使用,但是每次提交代码和下载代码时都需要输入用户名和密码。而且如果是公司配置的私有git服务器一般不提供https方式访问,所以我们要来着重演示“ssh”方式。
5.4.1 ssh协议
5.4.1.1 什么是ssh?
SSH是英文Secure Shell的简写形式。通过使用SSH,你可以把所有传输的数据进行加密,这样"中间人"这种攻击方式就不可能实现了,而且也能够防止DNS欺骗和IP欺骗。使用SSH,还有一个额外的好处就是传输的数据是经过压缩的,所以可以加快传输的速度。

注:使用SSH同步方式需要先生成密钥并在GitHub配置公钥
5.4.1.2 ssh密钥生成
在windows下我们可以使用 Git Bash.exe来生成密钥,右键菜单打开Git Bash

git bash 执行命令,生成公钥和私钥
ssh-keygen -t rsa

执行命令完成后,在window本地用户.ssh目录C:\Users\用户名.ssh下面生成如下名称的公钥和私钥:

5.4.2 ssh密钥配置
密钥生成后需要在github上配置密钥,本地才可以顺利访问。


在key部分将id_rsa.pub文件内容添加进去,然后点击“Add SSH key”按钮完成配置。
六、远程仓库的操作
6.1查看远程仓库
如果想查看已经配置的远程仓库服务器,可以运行 git remote 命令。 它会列出指定的每一个远程服务器的简写。 如果已经克隆了远程仓库,那么至少应该能看到 origin ,这是 Git 克隆的仓库服务器的默认名字
# 命令形式:git remote -v
# origin ——仓库服务器的默认名称

6.2 添加远程仓库
如果已经有了一个本地仓库,,然后打算将它发布到远程,供其他人协作。那么使用:
# 为本地仓库添加远程仓库
# git remote add origin your_remote_git_repo
git remote add origin [email protected]:kimyundung/repo1.git

6.3 推送本地的内容到远程仓库
当本地仓库中,代码完成提交,就需要将代码等推送到远程仓库,这样其他协作人员可以从远程仓库同步内容。
# 第一次推送时使用,可以简化后面的推送或者拉取命令使用
git push -u origin master
# 将本地 master 分支推送到 origin 远程分支
git push origin master
注意: git push -u origin master ,第一次使用时,带上-u 参数,在将本地的 master 分支推送到远程新的 master 分支的同时,还会把本地的 master 分支和远程的 master 分支关联起来。

注意
推送之前,需要先pull远端仓库,如果发现提交版本不一致,出现错误
6.4 从远程仓库获取最新内容
在多人协作过程中,当自己完成了本地仓库中的提交,想要向远程仓库推送前,需要先获取到远程仓库的最新内容。
可以通过 git fetch 和 git pull 来获取远程仓库的内容。
git fetch origin master
git pull origin master
git fetch 和 git pull 之间的区别:
git fetch是仅仅获取远程仓库的更新内容,并不会自动做合并。git pull在获取远程仓库的内容后,会自动做合并,可以看成git fetch之后git merge。

6.5 移除无效的远程仓库
如果因为一些原因想要移除一个远程仓库
# 命令形式:
git remote rm <shortname>

注意:此命令只是从本地移除远程仓库的记录,并不会真正影响到远程仓库
6.6 从远程仓库克隆
如果你想获得一份已经存在了的 Git 仓库的拷贝,这时就要用到 git clone 命令。 Git 克隆的是该 Git 仓库服务器上的几乎所有数据(包括日志信息、历史记录等),而不仅仅是复制工作所需要的文件。 当你执行 git clone 命令的时候,默认配置下远程 Git 仓库中的每一个文件的每一个版本都将被拉取下来。
如果你本地没有仓库,希望从已有的远程仓库上复制一份代码,那么你需要 git clone 。
# 通过 https 协议,克隆 Github 上 git 仓库的源码
git clone https://github.com/lagou-zimu/repo1.git
# 通过 ssh 协议,克隆 Github 上 git 仓库的源码
git clone [email protected]:lagou-zimu/repo1.git
注意: git clone 后面的仓库地址,可以支持多种协议,如 https, ssh 等。

6.7 从远程仓库中拉取
拉取 pull
# 拉取 命令形式:
git pull【远程仓库名称】【分支名称】

6.8 解决合并冲突
在一段时间,A、B用户修改了同一个文件,且修改了同一行位置的代码,此时会发生合并冲突。
A用户在本地修改代码后优先推送到远程仓库,此时B用户在本地修订代码,提交到本地仓库后,也需要推送到远程仓库,此时B用户晚于A用户推送,故需要先拉取远程仓库代码,经过合并后才能推送代码。在B用户拉取代码时,因为A、B用户同一段时间修改了同一个文件的相同位置代码,故会发生合并冲突。
A用户:修改a.java代码推送到远程仓库

B用户:修改a.java同一行代码,提交之后,合并码出现冲突

解决方法:
1.先拉取代码

2.然后打开代码解决冲突

3.再提交

小结:
远程仓库操作常用命令:
git remote #查看所有远程仓库名称
git remote -v #查看远程仓库缩略信息
git push origin master # 将本地仓库代码推送到远程仓库
git clone https://github.com/lagou-zimu/repo1.git # 克隆远程仓库代码到本地
git pull origin master # 拉取远程仓库代码到本地:(fetch+merge)
七、在Idea中使用Git
7.1 在Idea中配置Git
安装好IntelliJ IDEA后,如果Git安装在默认路径下,那么idea会自动找到Git的位置,如果更改了Git的安装位置则需要手动配置下Git的路径。选择File→Settings打开设置窗口,找到Version Control下的Git选项:

点击Test按钮,现在执行成功,配置完成

7.2 开发中idea的Git常见操作
7.2.1 初始化并提交项目到远程仓库 【项目leader操作】
执行步骤:
- 在GitHub/码云中创建远程仓库
- 将maven工程交给Git管理
- 配置忽略文件
- 提交到本地仓库
- 推送到远程仓库
执行过程:
- 在码云中创建远程仓库

- 将maven工程交给Git管理

- 配置忽略文件

- 提交到本地仓库


- 推送到远程仓库


7.2.2 克隆远程仓库到本地【开发人员】
操作步骤:
- 从远程仓库克隆


7.2.3 本地仓库常规操作【开发人员、重点】
1、新增文件
在ssm_dao模块中,新增一个GitMapper接口,新文件状态红色,未进入暂存区

加入git之后,红色变绿色,已经进入暂存区:

2、编辑文件
在ssm_dao模块中,修改GitMapper接口,文件变蓝色
正常编辑的文件默认放在暂存区,不需要再添加到暂存区

3、重置文件到修改前
比如修订了某一文件,需要重置到修改文件之前的状态,选择文件,右键菜单:选择Git—>Rollback

重置后,文件颜色自动消失,说明已重置到修改之前的状态。

4、提交到本地仓库
- 提交当前文件

7.2.4 本地仓库推送Push至远程仓库
操作步骤:
- 推送前一定要先拉取远程仓库对应分支
- 如果有冲突,先解决冲突,并提交到本地仓库
- 推送当前分支到远程仓库
操作过程:
- 推送前一定要先拉取远程仓库对应分支

- 如果有冲突,先解决冲突,并提交到本地仓库

- 推送当前分支到远程仓库

7.2.5 分支操作
操作步骤:
- 创建分支
- 切换分支执行操作
- 执行合并操作,master合并dev
操作过程:
- 创建分支


- 切换分支执行操作

- 完成合并推送到远程仓库


7.2.6 傻瓜追踪器:版本比较
对代码修改后,可以点击对比按钮,对比差异

第六阶段模块五 SSM单体架构项目(下)
任务一 SSM项目前端开发_1
1.Vue回顾
1.1 项目结构说明
- 我们使用脚手架快速构建Vue项目,项目结构如下图

|--- edu-boss 项目名称
|--- node_modules 存放依赖包的目录
|--- public 静态资源管理目录
|--- src 组件源码目录(我们写的代码)
|--- assets 存放静态图片资源(CSS也可以放在这里)
|--- components 存放基础组件,可复用
|--- router 存放了项目路由文件
|--- services 存放请求后台的 JS文件,
|--- store 保存组件之间的共享数据
|--- utils 管理公用的JS文件
|--- views 放置的为公共组件(各个主要页面)
|--- App.vue app.vue可以当做是网站首页,是一个vue项目的主组件,页面入口文件
|--- main.js 打包运行的入口文件,引入了vue模块和app.vue组件以及路由route
|--- babel.config.js babel配置文件, 对源代码进行转码(把es6=>es5)
|--- package.json 项目及工具的依赖配置文件
|--- paxkage-lock.json 依赖配置文件
|--- README.md 项目说明
|--- vue.config.js 自定义配置文件
1.2 Views 目录说明
我们来一起看一下,前端项目的页面部分:

CourseManage: 课程管理
AdvertiseManage: 广告管理
PermissionManage: 权限管理
CommentManage:公共
Users.vue: 用户管理
Login.vue: 登录
1.3 vue组件化开发
每一个***.vue 文件都可以看做是一个组件**.
组件的组成部分
- template : 组件的HTML部分
- script: 组件的JS脚本 (使用ES6语法编写)
- style: 组件的CSS样式
<!-- 1.template 代表html结构, template中的内容必须有且只有一个根元素
编写页面静态部分 就是 view部分 -->
<template>
<div>
测试页面...
</div>
</template>
<!-- 2.编写vue.js代码 -->
<script>
//可以导入其组件
// import Header from '../components/header.vue'
//默认写法, 输出该组件
export default {
name:"Home", // 组件名称,用于以后路由跳转
data() {
// 当前组件中需要使用的数据
return {
}
},
methods: {
}
}
</script>
<!-- 编写当前组件的样式代码 -->
<style scoped>
/* 页面样式 加上scoped 表示样式就只在当前组件有效*/
</style>
2.课程模块回顾
2.1 课程数据展示
在开始编写前端代码之前, 导入最新的数据库脚本文件
2.1.1 功能分析
- Course.vue 组件,完成课程数据的展示和条件查询

- 使用ElementUI 表格进行数据展示
https://element.eleme.cn/#/zh-CN/component/table

2.1.2 JS代码编写
- 定义数据部分
//数据部分
data() {
//查询条件
const filter = {
courseName: "",
status: ""
};
return {
filter,
courses: [],
loading: false
};
},
//钩子函数
created() {
this.loadCourses();
},
- 根据接口文档,编写查询课程数据方法
//方法一: 加载课程数据
loadCourses() {
this.loading = true;
const data = {
};
//查询条件
if (this.filter.courseName) data.courseName = this.filter.courseName;
if (this.filter.status) data.status = this.filter.status;
console.log(data);
//发送请求
return axios
.post("/course/findAllCourse", data)
.then(resp => {
console.log(resp.data.content);
this.courses = resp.data.content;
this.loading = false;
})
.catch(error => {
this.$message.error("数据获取失败! ! !");
});
},
- 条件查询( 访问的是同一个接口 )
<el-button @click="handleFilter()">查询</el-button>
//条件查询
handleFilter() {
this.loadCourses();
},
2.2 新建课程
2.2.1 功能分析
- 点击新建,由路由导航到 CourseItem.vue
<el-button type="primary" icon="el-icon-plus" @click="handleAdd">新建课程</elbutton>
//新建课程 路由跳转
handleAdd() {
this.$router.push({
name: "CourseItem", params: {
courseId: "new" } });
},
- router.js
{
path: "/courses/:courseId",
name: "CourseItem",
meta: {
requireAuth: true, title: "课程详情" },
component: () =>
import(
/* webpackChunkName: 'courses' */ "../views/CourseManage/CourseItem.vue"
)
},
- CourseItem组件使用ElementUI中的表单来提交课程数据
https://element.eleme.cn/#/zh-CN/component/form

2.2.2 JS代码编写
<el-button type="primary" @click="handleSave">保存</el-button>
//保存课程信息
handleSave() {
this.$refs.form.validate(valid => {
if (!valid) return false;
axios
.post("/course/saveOrUpdateCourse", this.course)
.then(res => {
this.$router.back();
})
.catch(error => {
this.$message.error("保存课程信息失败! ! !");
});
});
},
2.3 课程图片上传
2.3.1 功能分析
-
在SSM前端项目中,图片上传功能使用的是公共的通用组件 UploadImage.vue.

-
在CourseItem.vue,引入了该组件
import UploadImage from "@/components/UploadImage.vue";
<!-- 使用图片上传组件,完成图片上传 -->
<el-form-item label="课程封面" prop="courseImgUrl">
<upload-image
:content="course.courseImgUrl && [course.courseImgUrl]"
:get-urls="getCourseImgUrl"
uploadUrl="/course/courseUpload"
ref="courseCoverRef"
max="10M"
tipInfo="建议尺寸:230*300px,JPG、PNG格式,图片小于10M"
></upload-image>
</el-form-item>
2.3.2 案例演示
为了让同学们更好的理解 图片上传组件的使用,我们创建一个Vue项目来演示图片上传组件的使用方式.
- 导入准备好的Vue 基础项目

- 在components目录下创建一个 UploadImage.vue组件
https://element.eleme.cn/#/zh-CN/component/upload
<template>
<div>
<el-upload
action="https://jsonplaceholder.typicode.com/posts/"
list-type="picture-card"
:on-preview="handlePictureCardPreview"
:on-remove="handleRemove"
>
<i class="el-icon-plus"></i>
</el-upload>
<el-dialog :visible.sync="dialogVisible">
<img width="100%" :src="dialogImageUrl" alt />
</el-dialog>
</div>
</template>
<script>
export default {
data() {
return {
dialogImageUrl: "",
dialogVisible: false
};
},
methods: {
handleRemove(file, fileList) {
console.log(file, fileList);
},
handlePictureCardPreview(file) {
this.dialogImageUrl = file.url;
this.dialogVisible = true;
}
}
};
</script>
<style scoped>
</style>
- 配置路由
//布局路由
{
path: "/index",
name: "index",
component: Index,
//添加子路由,使用 children属性 来表示子路由
children: [
//图片上传子路由
{
path: "/upload",
name: "upload",
component: UploadImage,
},
],
},
- 在Index.vue 导航菜单位置添加一个图片上传选项
<el-menu-item-group>
<!-- 修改 index的路由地址 -->
<el-menu-item index="/upload">
<i class="el-icon-menu"></i>图片上传
</el-menu-item>
</el-menu-item-group>
- 访问页面进行测试
2.3.3 属性说明
| 参数 | 说明 | 类型 |
|---|---|---|
| action | 必选参数,上传的地址 | string |
| multiple | 是否支持多选文件 | boolean |
| limit | 最大允许上传个数 | number |
| before-upload | 上传文件之前的钩子,参数为上传的文件 | function(file) |
| on-success | 文件上传成功时的钩子 | function(response, file, fileList) |
| on-remove | 文件列表移除文件时的钩子 | function(file, fileList) |
| on-exceed | 文件超出个数限制时的钩子 | function(files, fileList) |
| file-list | 上传的文件列表 | array |
2.3.4 组件的引入
怎么将一个组件引入另一个组件 ? 接下来我们来演示一下 引入图片组件.
- 创建一个TestUplopad.vue组件
<template>
<div>
<!-- 使用组件,注意使用短横线连接 -->
<upload-image></upload-image>
</div>
</template>
<script>
//1.导入组件
import UploadImage from "@/components/UploadImage";
export default {
//2.注册组件
components: {
UploadImage
}
};
</script>
<style scoped>
</style>
2.3.5 组件的传参
UploadImage.vue
/*
组件传参
uploadUrl:图片上传路径,
getUrl: 函数
*/
props: ["uploadUrl", "getUrl"],
data() {
return {
uploadAction: this.uploadUrl
};
},
//上传成功后的回调函数
uploadSuccess(res, file) {
this.getUrl(file);
}
<el-upload
:action="uploadAction"
list-type="picture-card"
:on-preview="handlePictureCardPreview"
:on-remove="handleRemove"
:on-success="uploadSuccess"
>
TestUpload.vue
<template>
<div>
<!-- 使用组件,注意使用短横线连接 ,向父组件传递了两个参数
uploadUrl: 图片上传地址
:get-url:传递了一个函数
-->
<upload-image
uploadUrl="https://jsonplaceholder.typicode.com/posts/"
:get-url="show">
</upload-image>
</div>
</template>
methods: {
show(file) {
console.log(file.name);
}
}
2.3.6 课程模块图片上传
CourseItem.vue
引入图片上传组件,并使用
<el-form-item label="课程封面" prop="courseImgUrl">
<!-- 使用图片上传组件,完成图片上传 -->
<upload-image
:content="course.courseImgUrl && [course.courseImgUrl]"
:get-urls="getCourseImgUrl"
uploadUrl="/course/courseUpload"
ref="courseCoverRef"
max="10M"
tipInfo="建议尺寸:230*300px,JPG、PNG格式,图片小于10M"
></upload-image>
</el-form-item>
import UploadImage from "@/components/UploadImage.vue";
export default {
name: "CourseItem",
title: "营销信息",
components: {
Editor, UploadImage },
}
2.4 修改课程
- 点击编辑携带当前数据的id,导航到CourseItem.vue
<el-button size="mini" @click="handleNavigate('CourseItem', scope.row.id)">编辑
</el-button>
//课程编辑&内容管理路由
handleNavigate(name, id) {
this.$router.push({
name, params: {
courseId: id } });
},
- 在CourseItem组件的钩子函数中,会进行判断,如果是修改会先获取对应课程数据,进行回显
//钩子函数
created() {
//获取课程id
const id = this.$route.params.courseId;
if (!id) return this.redirectToError();
//判断是新建还是修改
if (id === "new") {
this.pathTitle = "新增课程";
this.$breadcrumbs = [
{
name: "Courses", text: "课程管理" },
{
text: "新增课程" }
];
} else {
this.$breadcrumbs = [
{
name: "Courses", text: "课程管理" },
{
text: "营销信息" }
];
this.loadCourse(id);
}
},
//回显课程信息
loadCourse(id) {
this.loading = true;
return axios
.get("/course/findCourseById?id=" + id)
.then(resp => {
console.log(resp);
this.pathTitle = resp.data.content.courseName;
this.course = Object.assign(this.course, resp.data.content);
this.course.id = id;
this.loading = false;
})
.catch(error => {
this.$message.error("回显数据失败! !");
});
},
- 修改课程与添加课程走的都是同一个后台接口,区别是修改操作必须要携带ID
2.5 课程状态管理
点击上架或者下架完成课程状态的切换.
<el-button size="mini" type="danger" v-if="scope.row.status === 1"
@click="handleToggleStatus(scope.row)">下架</el-button>
<el-button size="mini" type="success" v-else-if="scope.row.status === 0"
@click="handleToggleStatus(scope.row)">上架</el-button>
//切换课程状态
handleToggleStatus(item) {
//设置最新状态
const toggledStatus = 1 - item.status;
//请求后台接口
axios
.get("/course/updateCourseStatus", {
params: {
status: toggledStatus,
id: item.id
}
})
.then(res => {
debugger;
//设置最新的值
item.status = toggledStatus;
console.log(item);
//重新加载页面
window.location.reload;
})
.catch(error => {
this.$message.error("状态修改失败! ! !");
});
},
2.6 课程内容管理
2.6.1 获取课程内容数据
课程内容数据包括章节与课时信息, 根据课程ID 查询课程包含的章节与课时信息
<el-button size="mini" @click="handleNavigate('CourseSections', scope.row.id)">
内容管理
</el-button>
created() {
//1.显示当前页面在网站中的位置
this.$breadcrumbs = [
{
name: "Courses", text: "课程管理" },
{
text: "课程结构" }
];
//2.从路由中获取传递的参数 课程id
const id = this.$route.params.courseId;
if (!id) return this.redirectToError();
this.loading = true;
//3.加载课程信息
this.loadCourse(id);
//4.加载课程内容
this.loadSections(id);
},
//加载课程信息
loadCourse(id) {
axios
.get("/courseContent/findCourseByCourseId?courseId=" + id)
.then(res => {
const course = res.data.content;
//将数据保存到章节表单对象中
this.addSectionForm.courseId = course.id;
this.addSectionForm.courseName = course.courseName;
//将数据保存到课时表单对象中
this.addLessonForm.courseId = course.id;
this.addLessonForm.courseName = course.courseName;
})
.catch(error => {
this.$message.error("数据获取失败! ! !");
});
},
//加载课程内容(树形结构)
loadSections(courseId) {
this.loading = true;
axios
.get("/courseContent/findSectionAndLesson?courseId=" + courseId)
.then(res => {
this.sections = res.data.content;
console.log(res.data.content);
this.loading = false;
})
.catch(error => {
this.$message.error("数据获取失败! ! !");
});
},
2.6.2 章节管理
- 新建章节
<el-button type="primary" icon="el-icon-plus" @click="handleShowAddSection">添加
章节</el-button>
新增章节,需要回显章节对应的课程名称
//显示新增章节表单
handleShowAddSection() {
this.addSectionForm = {
courseId: this.addSectionForm.courseId,
courseName: this.addSectionForm.courseName
};
this.showAddSection = true;
},
- 修改章节
<el-button size="small" @click.stop="handleEditSection(data)">编辑</el-button>
//编辑章节(回显)
handleEditSection(section) {
this.addSectionForm = Object.assign(this.addSectionForm, section);
this.showAddSection = true;
},
- 添加与修改章节访问的都是同一个接口
//添加&修改章节
handleAddSection() {
axios
.post("/courseContent/saveOrUpdateSection", this.addSectionForm)
.then(res => {
this.showAddSection = false;
//重新加载列表
return this.loadSections(this.addSectionForm.courseId);
})
.then(() => {
//重置表单内容
this.addSectionForm.sectionName = "";
this.addSectionForm.description = "";
this.addSectionForm.orderNum = 0;
this.reload();
})
.catch(error => {
this.showAddSection = false;
this.$message.error("操作执行失败! ! !");
});
},
- 章节状态
章节状态有3种
//状态信息
const statusMapping = {
0: "已隐藏",
1: "待更新",
2: "已更新"
};
选择状态,点击确定修改状态
<el-button type="primary" @click="handleToggleStatus">确 定</el-button>
//修改章节状态
handleToggleStatus() {
//判断要修改的状态
if (this.toggleStatusForm.data.sectionName) {
//修改章节状态
axios
.get("/courseContent/updateSectionStatus", {
params: {
id: this.toggleStatusForm.id,
status: this.toggleStatusForm.status
}
})
.then(resp => {
this.toggleStatusForm.data.status = this.toggleStatusForm.status;
this.toggleStatusForm = {
};
this.showStatusForm = false;
this.reload();
})
.catch(error => {
this.showStatusForm = false;
this.$message.error("修改状态失败! ! !");
});
} else {
//修改课时状态
}
},
2.6.3 课时管理
课时管理 包括 课时新增、课时修改、课时状态管理. 与章节管理基本相同.
3.广告模块
3.1 广告位管理
3.1.1 广告位展示
- AdvertiseSpaces.vue 组件,为广告位页面

JS部分
data() {
return {
list: null,
listLoading: false
};
},
created() {
//加载广告位数据
this.loadPromotionSpace();
},
//方法1: 加载广告位信息
loadPromotionSpace() {
this.listLoading = true;
axios
.get("/PromotionSpace/findAllPromotionSpace")
.then(res => {
this.list = res.data.content;
this.listLoading = false;
})
.catch(err => {
this.$message("加载数据失败! ! !");
});
},
3.1.2 添加广告位
1)点击 按钮,通过路由导航到指定组件
<el-button size="mini" class="btn-add" @click="handleAdd()">添加广告位</el-button>
//添加广告位跳转
handleAdd() {
this.$router.push({
path: "/addAdvertiseSpace" });
},
2) 查看路由 router.js, 跳转到的是 AddAdvertiseSpace.vue
{
path: "addAdvertiseSpace",
name: "AddAdvertiseSpace",
component: () => import("../views/AdvertiseManage/AddAdvertiseSpace"),
meta: {
requireAuth: true, title: "添加广告位" }
},
3) 查看AddAdvertiseSpace.vue
<template>
//显示组件,并传递了参数 isEdit="false" , 表示是新增操作
<home-advertise-detail :isEdit="false"></home-advertise-detail>
</template>
<script>
//引入了AdvertiseSpaceDetail组件
import HomeAdvertiseDetail from "./AdvertiseSpaceDetail";
export default {
name: "addHomeAdvertise",
title: "添加广告位",
components: {
HomeAdvertiseDetail }
};
</script>
4)真正显示的组件是 AdvertiseSpaceDetail.vue
- 首先判断要进行 新增还是修改操作, 根据isEdit ,true 为修改,false为新增
//钩子函数
created() {
//判断是添加还是修改操作
if (this.isEdit) {
//修改
const id = this.$route.query.id;
this.loadPromotionSpace(id);
} else {
//新增
this.homeAdvertise = {
};
}
},
新增
//方法1: 保存广告位信息
handleSave() {
this.$refs.form.validate(valid => {
if (!valid) return false;
//请求后台
axios
.post(
"/PromotionSpace/saveOrUpdatePromotionSpace",
this.homeAdvertise
)
.then(res => {
//返回上个页面
this.$router.back();
})
.catch(err => {
this.$message("数据处理失败! !");
});
});
},
3.1.3 修改广告位
需要请求后台接口,进行广告位信息回显
//方法2: 回显广告位信息
loadPromotionSpace(id) {
return axios
.get("/PromotionSpace/findPromotionSpaceById?id=" + id)
.then(res => {
Object.assign(this.homeAdvertise, res.data.content);
this.homeAdvertise.id = id;
})
.catch(err => {
this.$message("数据处理失败! !");
});
}
3.2 广告管理
3.2.1 ElementUI 分页组件
- Advertises.vue 组件,为广告列表页面

- 广告列表的展示,使用到了分页组件, 接下来通过一个案例演示一下分页插件的使用.

https://element.eleme.cn/#/zh-CN/component/pagination
1. 快速使用
- 在测试项目中,创建一个PageList.vue ,复制代码如下
<template>
<div>
<div class="block">
<span class="demonstration">完整功能</span>
<el-pagination
@size-change="handleSizeChange"
@current-change="handleCurrentChange"
:current-page="currentPage4"
:page-sizes="[100, 200, 300, 400]"
:page-size="100"
layout="total, sizes, prev, pager, next, jumper"
:total="400"
></el-pagination>
</div>
</div>
</template>
<script>
export default {
methods: {
handleSizeChange(val) {
console.log(`每页 ${
val} 条`);
},
handleCurrentChange(val) {
console.log(`当前页: ${
val}`);
}
},
data() {
return {
currentPage4: 4
};
}
};
</script>
2. 属性介绍
| 参数 | 说明 | 类型 |
|---|---|---|
| page-size | 每页显示条数 | int |
| current-page | 当前页 | int |
| total | 总条数 | int |
| page-sizes | 每页显示个数选项设置 | [10, 20, 30,] |
| layout | 组件布局 |
分析:
- page-size 与 current-page 是需要前端传给后端的数据
- total 和 列表数据 是需要后端返回给前端的.
3. 事件介绍
事件 |说明| 回调函数
size-change| 每页显示条数 改变时会触发| 每页条数
current-change |当前页 改变时会触发| 当前页
4. 案例演示
- 复制下面代码到 PageList
<template>
<div class="app-container">
<div class="table-container">
<el-table ref="homeAdvertiseTable" :data="list" style="width: 100%;" border>
<el-table-column label="id" width="220" align="center">
<template slot-scope="scope">{
{scope.row.id}}</template>
</el-table-column>
<el-table-column label="广告名称" align="center" width="320">
<template slot-scope="scope">{
{scope.row.name}}</template>
</el-table-column>
<el-table-column label="广告图片" width="420" align="center">
<template slot-scope="scope">
<img style="height: 80px" :src="scope.row.img" />
</template>
</el-table-column>
</el-table>
</div>
<div class="pagination-container">
<el-pagination
background
@size-change="handlePageSizeChange"
@current-change="handleCurrentPageChange"
layout="total, sizes,prev, pager, next,jumper"
:current-page="page"
:page-sizes="[5,10, 20]"
:page-size="size"
:total="total"
></el-pagination>
</div>
</div>
</template>
- 编写JS部分代码
<script>
export default {
data() {
return {
total: 0, //总条数
size: 5, //每页显示条数
page: 1, //当前页
list: [] //广告数据
};
},
created() {
this.loadList();
},
methods: {
//加载广告数据
loadList() {
return this.axios
.get("http://localhost:8080/ssm-web/PromotionAd/findAllPromotionAd", {
params: {
currentPage: this.page,
pageSize: this.size
}
})
.then(res => {
this.list = res.data.content.list;
this.total = res.data.content.total;
this.listLoading = false;
})
.catch(error => {
this.$message.error("数据获取失败! ! !");
});
},
//每页显示条数发生变化
handlePageSizeChange(size) {
this.size = size;
this.loadList();
},
//当前页发生变化
handleCurrentPageChange(page) {
this.page = page;
this.loadList();
}
}
};
</script>
3.2.2 广告列表展示
1.需求分析
我们已经解决了分页问题,接下来再看一下广告页面要展示哪些内容:

- 广告列表的展示数据来源于两张表:
○ promotion_ad 广告表
○ promotion_space 广告位表
2.功能实现
- 数据部分
//数据部分
data() {
return {
typeMap: {
}, //保存广告位对象信息
total: 0, //总条数
size: 5, //每页显示条数
page: 1, //当前页
list: [], //广告数据
listLoading: false
};
},
- 钩子函数
created() {
//获取广告列表数据
this.loadPromotionAd();
//获取广告位置数据
this.loadPromotionSpace();
},
- 函数部分
//方法1; 获取广告列表数据
loadPromotionAd() {
this.listLoading = true;
return axios
.get("/PromotionAd/findAllPromotionAd", {
params: {
currentPage: this.page,
pageSize: this.size
}
})
.then(res => {
this.list = res.data.content.list;
this.total = res.data.content.total;
this.listLoading = false;
})
.catch(err => {
});
},
//方法2: 获取广告位置数据
loadPromotionSpace() {
this.listLoading = true;
return axios.get("/PromotionSpace/findAllPromotionSpace").then(res => {
//使用map进行遍历
res.data.content.map(item => {
//将数据保存到 typeMap key就是id,value就是 广告位对象
this.typeMap[item.id] = item;
});
this.listLoading = false;
});
},
//方法3: 获取广告位置名称
getSpaceName(spaceId) {
if (!spaceId) {
return "";
}
return this.typeMap[spaceId] && this.typeMap[spaceId].name;
},
3.2.3 广告状态修改
- 需求分析: 点击按钮实现 状态修改, 0 下线,1 上线
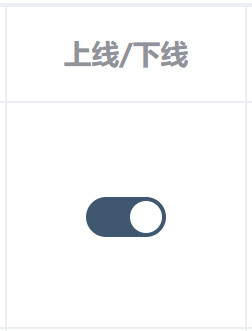
- 功能实现
页面部分,使用的是 el-switch 组件
active-value: switch:打开时的值
inactive-value : switch 关闭时的值
<!-- 上线与下线 -->
<el-table-column label="上线/下线" width="120" align="center">
<template slot-scope="scope">
<el-switch
@change="handleUpdateStatus(scope.row)"
:active-value="1"
:inactive-value="0"
v-model="scope.row.status"></el-switch>
</template>
</el-table-column>
JS部分
//方法4: 修改状态
handleUpdateStatus(row) {
this.$confirm("是否要修改上线/下线状态?", "提示", {
confirmButtonText: "确定",
cancelButtonText: "取消",
type: "warning"
}).then(() => {
//请求后台
axios
.get("/PromotionAd/updatePromotionAdStatus", {
params: {
id: row.id,
status: row.status
}
})
.then(res => {
this.loadPromotionAd();
})
.catch(err => {
this.$message("修改状态失败! ! !");
});
});
},
3.2.4 广告新增&修改
1. 需求分析
- 点击添加广告,触发事件
<el-button size="mini" class="btn-add" @click="handleAdd()">添加广告</el-button>
- 路由导航到指定组件
//跳转到新增
handleAdd() {
this.$router.push({
path: "/addAdvertise" });
},
- 查看路由信息,跳转到的是 AddAdvertise.vue组件
{
path: "addAdvertise",
name: "AddAdvertise",
component: () => import("../views/AdvertiseManage/AddAdvertise"),
meta: {
requireAuth: true, title: "添加广告" }
},
- AddAdvertise.vue组件
在AddAdvertise组件中,引入了 AdvertiseDetail组件,真正的操作是在这个组件中完成的
:isEdit=“false” : false表示是新增操作
<template>
<home-advertise-detail :isEdit="false"></home-advertise-detail>
</template>
<script>
import HomeAdvertiseDetail from './AdvertiseDetail'
export default {
name: 'addHomeAdvertise',
title: '添加广告',
components: {
HomeAdvertiseDetail }
}
</script>
- AdvertiseDetail.vue 组件
该组件是进行 新增和修改广告的页面.

2.功能实现
数据部分
data() {
return {
homeAdvertise, //广告表单对象
typeOptions: [] //广告位下拉列表
};
},
钩子函数
created() {
//判断是新增还是修改
if (this.isEdit) {
//修改
const id = this.$route.query.id;
this.loadPromotion(id);
} else {
//新增
this.homeAdvertise = {
};
}
this.loadPromotionSpace();
},
方法
//方法1: 获取广告位置数据
loadPromotionSpace() {
return axios.get("/PromotionSpace/findAllPromotionSpace").then(res => {
//使用map函数进行遍历,获取广告位id 与 name,保存到typeOptions
this.typeOptions = res.data.content.map(item => {
return {
label: item.name, value: item.id };
});
});
},
//方法2: 保存广告信息
handleSave() {
this.$refs.form.validate(valid => {
if (!valid) return false;
axios
.post("/PromotionAd/saveOrUpdatePromotionAd", this.homeAdvertise)
.then(res => {
//返回上个页面 并刷新
this.$router.back();
})
.catch(err => {
});
});
},
//方法3: 修改回显广告信息
loadPromotion(id) {
return axios
.get("/PromotionAd/findPromotionAdById?id=" + id)
.then(res => {
Object.assign(this.homeAdvertise, res.data.content);
this.homeAdvertise.id = id;
})
.catch(err => {
});
},
任务二 SSM前端项目开发_2
1.用户管理
1.1 分页&条件查询用户数据
查询条件:
1. 用户手机号
2. 注册时间,包含开始日期和结束日期

1.1.1 日期选择器组件
在查询条件中使用了 ElementUI中的日期选择器,我们一起来简单学习一下日期选择器的使用.
https://element.eleme.cn/#/zh-CN/component/date-picker#mo-ren-xian-shi-ri-qi

- 在测试项目中,创建一个 TestDate.vue组件,复制代码到页面
<template>
<div>
<div class="block">
<span class="demonstration">带快捷选项</span>
<el-date-picker
v-model="dateTime"
type="daterange"
align="right"
unlink-panels
range-separator="至"
start-placeholder="开始日期"
end-placeholder="结束日期"
:picker-options="pickerOptions"
></el-date-picker>
<el-button type="primary" @click="getDate">查询</el-button>
</div>
</div>
</template>
<script>
export default {
data() {
return {
pickerOptions: {
shortcuts: [
{
text: "最近一周",
onClick(picker) {
const end = new Date();
const start = new Date();
start.setTime(start.getTime() - 3600 * 1000 * 24 * 7);
picker.$emit("pick", [start, end]);
}
},
{
text: "最近一个月",
onClick(picker) {
const end = new Date();
const start = new Date();
start.setTime(start.getTime() - 3600 * 1000 * 24 * 30);
picker.$emit("pick", [start, end]);
}
},
{
text: "最近三个月",
onClick(picker) {
const end = new Date();
const start = new Date();
start.setTime(start.getTime() - 3600 * 1000 * 24 * 90);
picker.$emit("pick", [start, end]);
}
}
]
},
dateTime: ""
};
},
methods: {
getDate() {
const params = {
};
params.startCreateTime = this.dateTime[0];
params.startCreateTime.setHours(0);
params.startCreateTime.setMinutes(0);
params.startCreateTime.setSeconds(0);
params.endCreateTime = this.dateTime[1];
params.endCreateTime.setHours(23);
params.endCreateTime.setMinutes(59);
params.endCreateTime.setSeconds(59);
console.log(params);
}
}
};
</script>
1.1.2 功能实现
数据部分
//数据部分
return {
pickerOptions,//日期选择器选项设置
total: 0, //总条数
size: 10, //每页显示条数
page: 1, //当前页
filter,
users: [],
loading: false,
allocAdminId: "",
allocDialogVisible: false,
allocRoleIds: [],
allRoleList: []
};
JS部分
created() {
//初始化用户数据
this.loadUsers();
}
//方法1: 加载用户数据
loadUsers() {
this.loading = true;
//设置参数
const params = {
currentPage: this.page, pageSize: this.size };
//过滤条件
if (this.filter.username) params.username = this.filter.username;
//设置日期参数
if (this.filter.resTime) {
params.startCreateTime = this.filter.resTime[0];
params.startCreateTime.setHours(0);
params.startCreateTime.setMinutes(0);
params.startCreateTime.setSeconds(0);
params.endCreateTime = this.filter.resTime[1];
params.endCreateTime.setHours(23);
params.endCreateTime.setMinutes(59);
params.endCreateTime.setSeconds(59);
}
//请求后台接口
return axios
.post("/user/findAllUserByPage", params)
.then(res => {
this.users = res.data.content.list; //用户数据
this.total = res.data.content.total;
this.loading = false;
})
.catch(err => {
this.$message("获取数据失败! ! !");
});
},
1.2 用户状态设置
状态按钮
<el-button size="mini" type="text" @click="handleToggleStatus(scope.row)">
{
{ scope.row.status == "ENABLE" ? "禁用" : "启用" }}</el-button>
JS部分
//修改用户状态
handleToggleStatus(item) {
return axios
.get("/user/updateUserStatus", {
params: {
id: item.id,
status: item.status
}
})
.then(res => {
debugger;
console.log(res.data.content);
item.status = res.data.content;
})
.catch(err => {
this.$message.error("状态修改失败! ! !");
});
},
2.权限管理
2.1 角色管理
2.1.1 展示&查询角色列表
- 角色组件是 Roles.vue ,在该组件中对角色信息进行管理

- 需求分析

- 功能实现
- 数据部分
data() {
return {
listQuery: {
name: "" },
list: null,
listLoading: false,
dialogVisible: false,
role: Object.assign({
}, defaultRole),
isEdit: false
};
},
- 钩子函数,调用loadRoles,获取角色数据
created() {
//获取角色列表
this.loadRoles();
},
//获取角色数据
loadRoles() {
return axios
.post("/role/findAllRole", this.listQuery)
.then(res => {
this.list = res.data.content;
this.listLoading = false;
})
.catch(err => {
});
},
- 请求携带的参数是: listQuery
<el-input v-model="listQuery.name" class="input-width" placeholder="角色名称"
clearable></el-input>
//条件查询
handleSearchList() {
this.loadRoles();
},
2.1.2 添加&修改角色
- 页面部分
<el-button size="mini" class="btn-add" @click="handleAdd()" style="margin-left:
20px">
添加角色</el-button>
- 打开添加角色窗口的方法
//添加角色弹窗
handleAdd() {
this.dialogVisible = true; //打开对话框
this.isEdit = false; //false 修改操作
this.role = Object.assign({
}, defaultRole);
},
- 添加角色对话框,使用v-model 进行双向数据绑定.
<!-- 添加&修改 角色对话框 -->
<el-dialog :title="isEdit?'编辑角色':'添加角色'" :visible.sync="dialogVisible"
width="40%">
<el-form :model="role" label-width="150px" size="small">
<el-form-item label="角色名称:">
<el-input v-model="role.name" style="width: 250px"></el-input>
</el-form-item>
<el-form-item label="角色编码:">
<el-input v-model="role.code" style="width: 250px"></el-input>
</el-form-item>
<el-form-item label="描述:">
<el-input v-model="role.description" type="textarea" :rows="5" style="width: 250px"></el-input>
</el-form-item>
</el-form>
<span slot="footer" class="dialog-footer">
<el-button @click="dialogVisible = false" size="small">取 消</el-button>
<el-button type="primary" @click="handleSave()" size="small">确 定</elbutton>
</span>
</el-dialog>
- 添加角色方法
//添加&修改角色
handleSave() {
axios
.post("/role/saveOrUpdateRole", this.role)
.then(res => {
this.dialogVisible = false;
this.loadRoles();
})
.catch(error => {
this.$message.error("保存课程信息失败! ! !");
});
},
- 修改角色的方法
修改按钮,点击传递当前行数据对象
<el-button size="mini" type="text" @click="handleUpdate( scope.row)">编辑</elbutton>
显示对话框,回显数据
//修改角色弹窗
handleUpdate( row) {
this.dialogVisible = true;
this.isEdit = true;
//回显数据
this.role = Object.assign({
}, row);
},
修改角色,还是调用的handleSave 方法
2.1.3 删除角色
<el-button size="mini" type="text" @click="handleDelete(scope.row)">删除</elbutton>
这里使用到了ElementIUI中的 MessageBox 弹框
https://element.eleme.cn/#/zh-CN/component/message-box#options
handleDelete(row) {
this.$confirm("是否要删除该角色?", "提示", {
confirmButtonText: "确定",
cancelButtonText: "取消",
type: "warning"
}).then(() => {
axios("/role/deleteRole?id=" + row.id)
.then(res => {
this.loadRoles();
})
.catch(err => {
this.$message.error("操作失败! ! !");
});
});
},
2.1.4 为角色分配菜单
1.需求分析
- 为角色分配菜单,一个角色可以拥有多个菜单权限
- 一个菜单权限也可以被多个角色拥有

- 角色与菜单之间的关系 是多对多

- 点击分配菜单,页面展示效果

- 前端要实现的效果
○ 第一步: 获取到所有的菜单数据,在树形控件中进行展示
○ 第二步: 将当前角色拥有的菜单权限,勾选上
2. 菜单展示功能实现
- 分配菜单按钮,点击传递当前行数据
<el-button size="mini" type="text"
@click="handleSelectMenu(scope.row)">分配菜单</el-button>
- 路由导航到 allocMenu
//为角色分配菜单
handleSelectMenu(row) {
this.$router.push({
path: "/allocMenu", query: {
roleId: row.id } });
},
- routes.js
{
path: "allocMenu",
name: "AllocMenu",
component: () =>
import(
/* webpackChunkName: 'allocMenu' */ "../views/PermissionManage/AllocMenu"
),
meta: {
requireAuth: true, title: "角色菜单管理" }
},
- 在AllocMenu.vue组件中完成 为角色分配菜单操作

- 数据部分
data() {
return {
menuTreeList: [], //菜单数据
checkedMenuId: [], //被选中的菜单
//树形结构子节点设置
defaultProps: {
children: "subMenuList",
label: "name"
},
roleId: null
};
},
- 钩子函数
//钩子函数
created() {
//获取路由携带的id
this.roleId = this.$route.query.roleId;
//获取菜单列表
this.treeList();
//获取角色所拥有的菜单信息
this.getRoleMenu(this.roleId);
},
//方法1: 获取菜单列表,使用树形控件展示
treeList() {
axios.get("/role/findAllMenu").then(res => {
console.log(res.data.content);
//获取树形控件所需数据
this.menuTreeList = res.data.content.parentMenuList;
});
},
//方法2: 获取当前角色所拥有菜单列表id
getRoleMenu(roleId) {
axios.get("/role/findMenuByRoleId?roleId=" + roleId).then(res => {
console.log(res.data.content);
//将已有菜单权限设置为选中
this.$refs.tree.setCheckedKeys(res.data.content);
});
},
3.分配菜单功能实现
分配菜单按钮
<div style="margin-top: 20px" align="center">
<el-button type="primary" @click="handleSave()">保存</el-button>
<el-button @click="handleClear()">清空</el-button>
</div>
方法
//方法3: 修改角色所拥有的菜单列表
handleSave() {
//debugger;
//获取所有被选中的节点
const checkedNodes = this.$refs.tree.getCheckedNodes();
//定义常量 保存被选中的菜单id
const checkedMenuIds = [];
if (checkedNodes != null && checkedNodes.length > 0) {
//遍历获取节点对象
for (let i = 0; i < checkedNodes.length; i++) {
const checkedNode = checkedNodes[i];
//保存菜单列表id
checkedMenuIds.push(checkedNode.id);
//判断: 当前节点为子节点 && 其父ID在数组没有出现过,就保存这个父Id
if (
checkedNode.parentId !== -1 &&
checkedMenuIds.filter(item => checkedNode.parentId).length === 0
) {
checkedMenuIds.push(checkedNode.parentId);
}
}
}
this.$confirm("是否分配菜单?", "提示", {
confirmButtonText: "确定",
cancelButtonText: "取消",
type: "warning"
}).then(() => {
//准备参数
const params = {
roleId: this.roleId, //角色ID
menuIdList: checkedMenuIds //当前角色拥有的菜单权限ID
};
//请求后台
axios
.post("/role/RoleContextMenu", params)
.then(res => {
this.$router.back();
})
.catch(err => {
this.$message.error("权限分配失败! ! !");
});
});
},
2.2 菜单管理
菜单组件是 Menus.vue ,在该组件中对菜单信息进行管理

2.2.1 展示菜单列表
- 需求分析: 菜单列表的展示是带有分页的.

- 功能实现
- 数据部分
data() {
return {
total: 0, //总条数
size: 10, //每页显示条数
page: 1, //当前页
list: [], //广告数据
listLoading: true,
parentId: 0 //菜单父id
};
},
- 钩子函数
created() {
//获取菜单列表
this.loadMenuList();
},
//方法1: 加载菜单列表数据
loadMenuList() {
this.listLoading = true;
return axios
.get("/menu/findAllMenu", {
params: {
currentPage: this.page,
pageSize: this.size
}
})
.then(res => {
this.list = res.data.content.list;
this.total = res.data.content.total;
this.listLoading = false;
})
.catch(error => {
this.$message.error("数据获取失败! ! !");
});
},
2.2.2 新增&修改菜单
1. 路由跳转流程
- 新增按钮, 点击跳转
<el-button class="btn-add" @click="handleAddMenu()" size="mini">添加菜单</elbutton>
//新增菜单跳转
handleAddMenu() {
this.$router.push("/addMenu");
},
2)AddMenu.vue 组件中引入了MenuDetail
<template>
<menu-detail :is-edit='false'></menu-detail>
</template>
<script>
import MenuDetail from './MenuDetail'
export default {
name: 'addMenu',
title: '添加菜单',
components: {
MenuDetail }
}
</script>
- MenuDetail.vue 中完成菜单的新增与修改操作

2.需求分析
在打开新增菜单页面后, 需要展示一个下拉框,下拉框中的数据是所有的顶级父菜单.

3.功能实现
- 数据部分
data() {
return {
menu, //菜单对象
selectMenuList: [], //下拉列表数据
rules
};
},
- 钩子函数
在钩子函数中会进行判断,如果是修改操作,就根据ID 查询当前菜单信息,以及父菜单信息
如果是新增操作,则只查询父类菜单信息即可
created() {
if (this.isEdit) {
//修改,回显菜单信息
const id = this.$route.query.id;
//获取当前菜单和父菜单信息
this.findMenuInfoById(id);
} else {
//新增
this.menu = {
};
//获取父类菜单信息
this.findMenuInfoById(-1);
}
},
//方法1: 添加或修改 下拉父菜单回显
findMenuInfoById(id) {
axios
.get("/menu/findMenuInfoById?id=" + id)
.then(res => {
debugger;
console.log(res.data);
//判断不为null,修改操作需要回显
if (res.data.content.menuInfo != null) {
this.menu = res.data.content.menuInfo;
}
//获取到父菜单信息,保存到selectMenuList
this.selectMenuList = res.data.content.parentMenuList.map(item => {
return {
id: item.id, title: item.name };
});
//-1 显示 无上级菜单 (unshift向数组的开头添加一个元素)
this.selectMenuList.unshift({
id: -1, title: "无上级菜单" });
})
.catch(err => {
this.$message.error("数据获取失败! ! !");
});
},
- 点击保存
<el-button type="primary" @click="handleSave()">提交</el-button>
//保存菜单
handleSave() {
this.$refs.form.validate(valid => {
if (!valid) return false;
axios
.post("/menu/saveOrUpdateMenu", this.menu)
.then(res => {
this.$router.back();
})
.catch(error => {
this.$message.error("保存课程信息失败! ! !");
});
});
}
2.3 资源管理
资源组件是 Resources.vue ,在该组件中对资源信息进行管理.

2.3.1 展示&查询资源列表
- 展示资源数据 带有分页

- 查询资源数据,查询条件有三个
- 资源名称
- 资源路径
- 资源分类信息: 下拉列表

- 数据部分
//查询条件
const listQuery = {
currentPage: 1,
pageSize: 5,
name: null,
url: null,
categoryId: null
};
//资源对象
const defaultResource = {
id: null,
name: null,
url: null,
categoryId: null,
description: ""
};
data() {
return {
listQuery,//查询条件
total: 0,
list: [], //资源数据
cateList: [], //资源分类数据
listLoading: false,
dialogVisible: false,
resource: Object.assign({
}, defaultResource),
isEdit: false,
categoryOptions: [],
defaultCategoryId: null
};
},
- 钩子函数
- 在钩子函数中,需要获取资源 ,以及资源分类的数据
//钩子函数
created() {
//获取资源数据
this.getResourceList();
//获取资源分类数据
this.getResourceCateList();
},
- getResourceList() 方法获取的是资源信息
//方法1: 获取资源数据
getResourceList() {
this.listLoading = true;
axios
.post("/resource/findAllResource", this.listQuery)
.then(res => {
this.list = res.data.content.list;
this.total = res.data.content.total;
this.listLoading = false;
})
.catch(err => {
this.$message.error("数据获取失败! ! !");
});
},
- getResourceCateList() 方法获取的是资源分类信息,在下拉框中展示
//方法2: 获取资源分类数据
getResourceCateList() {
axios
.get("/ResourceCategory/findAllResourceCategory")
.then(res => {
this.cateList = res.data.content;
//遍历获取资源分类
for (let i = 0; i < this.cateList.length; i++) {
const cate = this.cateList[i];
//将资源分类名与id保存到 categoryOptions中,供下拉列表展示
this.categoryOptions.push({
label: cate.name, value: cate.id });
}
this.defaultCategoryId = this.cateList[0].id;
})
.catch(err => {
this.$message.error("数据获取失败! ! !");
});
},
- 查询
<el-button style="float:right" type="primary" @click="handleSearchList()"
size="small">
查询搜索</el-button>
//查询条件对象
const listQuery = {
currentPage: 1,
pageSize: 5,
name: null,
url: null,
categoryId: null
};
//查询按钮
handleSearchList() {
this.getResourceList();
},
2.3.2 新增&修改资源
- 添加按钮
<el-button size="mini" class="btn-add" @click="handleAdd()" style="margin-left:
20px">
添加</el-button>
- 显示添加资源表单的对话框
//添加资源回显
handleAdd() {
this.dialogVisible = true; //显示表单
this.isEdit = false; //新增为false
this.resource = Object.assign({
}, defaultResource); //资源对象
this.resource.categoryId = this.defaultCategoryId; //保存默认分类id
},

3) 资源分类信息使用下拉菜单进行展示:
v-model 的值为当前被选中的 el-option 的 value 属性值
| 属性 | 说明 |
|---|---|
| value | 选项的值 |
| label | 选项的标签名 |
| key | 作为 value 唯一标识的键名 |
<el-form-item label="资源分类:">
<el-select v-model="resource.categoryId" placeholder="全部" clearable
style="width: 250px">
<el-option
v-for="item in categoryOptions"
:key="item.value"
:label="item.label"
:value="item.value"
></el-option>
</el-select>
</el-form-item>
- 点击保存
<el-button type="primary" @click="handleSave()" size="small">确 定</el-button>
//添加&修改资源
handleSave() {
axios
.post("/resource/saveOrUpdateResource", this.resource)
.then(res => {
this.dialogVisible = false;
this.getResourceList();
})
.catch(error => {
this.$message.error("操作失败! ! !");
});
},
- 修改操作, 参数是当前行数据
<el-button size="mini" type="text" @click="handleUpdate(scope.row)">编辑</elbutton>
- 回显操作
//编辑资源 回显
handleUpdate(row) {
debugger;
this.dialogVisible = true;
this.isEdit = true;
this.resource = Object.assign({
}, row);
},
任务三 SSM项目前端开发_3
1.用户权限控制
1.1 用户登录
1.1.1 流程分析
-
用户登录界面,需要输入手机号密码

-
登录组件 login.vue

- 登录按钮
<el-button type="primary" :loading="loading" @click="submit('login-form')">{
{ loading ? 'Loading...' : '登录' }}</el-button>
- 提交表的方法
//提交登录表单
submit(ref) {
//校验
this.$refs[ref].validate(valid => {
if (!valid) return false;
this.error = null;
this.loading = true;
//发送登录请求
this.$store.dispatch("createToken", this.model)
.then(res => {
if (res.state !== 1) {
this.error = {
title: "Error occurred",
message: "Abnormal, please try again later!"
};
}
this.$router.replace({
path: this.$route.query.redirect || "/" });
this.loading = false;
})
.catch(err => {
this.loading = false;
});
});
}
}
-
this.$store.dispatch(“createToken”, this.model)
- 这段代码的意思是调用 store仓库的actions.js中的createToken方法
- 这段代码的意思是调用 store仓库的actions.js中的createToken方法
-
发送登录请求,进行登录的代码
/**
* 创建新的客户端令牌
*/
createToken: async ({
commit }, {
username, password }) => {
//请求后台登录接口
const res = await TokenService.userLogin({
phone: username.trim(),
password: password.trim()
});
console.log(res);
//判断结果不等于1,登录失败
if (res.state !== 1) {
return Promise.resolve(res);
}
//获取到content
const result = res.content;
//将token保存
commit(CHANGE_SESSION, {
accessToken: result.access_token
});
return res;
},
- TokenService
import {
TokenService, UserService } from "../services";

//登录请求 async ES6语法, 作用: 发送异步请求
export const userLogin = async (data) => {
//await 表示等待接收返回的数据
return await PostRequest(`${
process.env.VUE_APP_API_FAKE}/user/login${
Serialize(data)}`)
}
1.2 动态获取用户菜单
1.2.1 流程分析
-
在我们登录成功后, 会立即发送第二个请求, 来获取用户的菜单权限列表

-
在actions.js 中完成请求后台接口 获取数据的操作
/**
* 获取当前登录用户权限
*/
getUserPermissions: async ({
commit }) => {
//1.请求后台 获取当前用户的权限
const res = await UserService.getUserPermissions();
//2.判断
if (!res.success) {
//获取失败直接返回 false
return res.success;
}
//3.获取数据成功,取出菜单 与 资源列表
const {
menuList, resourceList } = res.content;
//4.下面的代码 就是在生成树形结构的菜单
let menus = [];
const formatMenu = treeData => {
if (treeData.length > 0) {
return treeData.map(item => formatMenu(item));
}
const result = {
};
//shown等于表示可以显示,将内容保存
if (treeData.shown == 1) {
result.id = treeData.id;
result.text = treeData.name;
result.label = treeData.name;
result.name = treeData.href;
result.icon = treeData.icon;
result.shown = treeData.shown;
} else {
return "";
}
//获取子节点
if (treeData.subMenuList) {
result.children = [];
treeData.subMenuList.forEach(item => {
formatMenu(item) && result.children.push(formatMenu(item));
});
if (result.children.length === 0) {
delete result.children;
}
}
return result;
};
const memusMap = {
};
const splapMenu = treeData => {
if (treeData.length > 0) {
return treeData.map(item => splapMenu(item));
}
const result = {
};
result.id = treeData.id;
result.text = treeData.name;
result.label = treeData.name;
result.name = treeData.href;
result.icon = treeData.icon;
result.shown = treeData.shown;
result.name && (memusMap[result.name] = result);
if (treeData.subMenuList) {
result.children = [];
treeData.subMenuList.forEach(item => {
result.children.push(splapMenu(item));
});
}
return result;
};
splapMenu(menuList);
menus = formatMenu(menuList);
commit(CHANGE_SIDERBAR_MENU, menus);
return {
menus, resourceList, menuList, memusMap };
},
1.3 验证Token
1.3.1 导航守卫
- 在执行路由之前先执行的一些钩子函数,比如验证用户是否有权限之类的操作,就需要使用.
- authorize.js 中配置了导航守卫,来对用户的登录进行限制
// 导航守卫 to要访问的url, from从哪个路径跳转过来, next() 放行
router.beforeHooks.unshift((to, from, next) => {
//不需要验证直接放行
if (!to.meta.requireAuth) return next();
//需要验证token,调用 store中的checkToken方法
store.dispatch("checkToken").then(valid => {
//判断是否存在token
if (valid) {
//发送请求到后台,在后台再次判断token是否存在
store.dispatch("getUserPermissions").then(res => {
if (!res) {
//失效 清除token
store.dispatch("deleteToken");
//跳转到登录页面
return next({
name: "ToLogin" });
}
//token正确, 导航到对应的页面
const {
memusMap } = res;
if (memusMap.Courses && to.name === "Home") {
return next();
} else if (memusMap[to.name]) {
return next();
} else if (Object.keys(memusMap).length > 0) {
return next({
name: memusMap[Object.keys(memusMap)[0]].name });
} else {
next({
name: "PermissionDenied" });
}
});
return next();
}
// unauthorized
console.log("Unauthorized");
//用户没有登录 跳转到登录页面
next({
name: "Login", query: {
redirect: to.fullPath } });
});
});
- 在actions.js 中检查token是否可用
checkToken: async ({
commit, getters }) => {
//取出token
const token = getters.session.accessToken;
if (!token) {
//不可用
return Promise.resolve(false);
}
return Promise.resolve(true);
},
1.4 用户角色分配
1.4.1 流程分析
- 点击分配角色按钮

<el-button size="mini" type="text" @click="handleSelectRole(scope.row)">分配角色
</el-button>
- 分配角色对话框

1.4.2 代码部分
- 显示对话框
//分配角色
handleSelectRole(row) {
//保存用户ID
this.allocAdminId = row.id;
//获取角色列表
this.getRoleList();
//获取当前用户拥有的角色
this.getUserRoleById(row.id);
//打开对话框
this.allocDialogVisible = true;
},
- 获取角色列表,在下拉菜单中展示
getRoleList(id) {
return axios
.post("/role/findAllRole", this.listQuery)
.then(res => {
this.allRoleList = res.data.content.map(item => {
return {
id: item.id, name: item.name };
});
})
.catch(err => {
});
},
- 获取当前用户拥有的角色,回显默认选中
getUserRoleById(id) {
axios.get("/user/findUserRoleById?id=" + id).then(res => {
const allocRoleList = res.data.content;
this.allocRoleIds = [];
if (allocRoleList != null && allocRoleList.length > 0) {
for (let i = 0; i < allocRoleList.length; i++) {
this.allocRoleIds.push(allocRoleList[i].id);
}
}
});
},
- 为用户分配角色
handleAllocRole() {
const params = {
userId: this.allocAdminId,
roleIdList: this.allocRoleIds
};
axios.post("/user/userContextRole", params).then(res => {
this.allocDialogVisible = false;
});
},
2. nginx
2.1 什么是nginx?
Nginx(发音同 engine x)是一款轻量级的Web 服务器/反向代理服务器及电子邮件(IMAP/POP3)代理服务器,并在一个BSD-like 协议下发行。由俄罗斯的程序设计师Igor Sysoev(伊戈尔·西索夫)所开发,供俄国大型的入口网站及搜索引擎Rambler(漫步者)(俄文:Рамблер)使用。其特点是占有内存少,并发能力强,事实上nginx的并发能力确实在同类型的网页服务器中表现较好,中国大陆使用nginx网站用户有:新浪、网易、 腾讯等。

优点:
- 占用内存少,并发能力强
- Nginx专为性能优化而开发, 在高连接并发的情况下,能够支持高达 50,000 个并发连接数的响应.
- Nginx支持热部署, 可以在不间断服务的情况下,对软件版本进行升级.
2.2 应用场景
-
http服务器: Nginx是一个http服务可以独立提供http服务。可以做网页静态服务器。
-
虚拟主机: 可以实现在一台服务器虚拟出多个网站。例如个人网站使用的虚拟主机。
-
反向代理,负载均衡 : 当网站的访问量达到一定程度后,单台服务器不能满足用户的请求时,需要用多台服务器集群可以使用nginx做反向代理。并且多台服务器可以平均分担负载,不会因为某台服务器负载高宕机而某台服务器闲置的情况。
2.3 Nginx安装
下载nginx, 官方网站:http://nginx.org/
我们使用的版本是1.17.8版本。

Nginx在Linux下安装,只提供了源代码,所以我们需要进行编译.
2.3.1 安装环境配置
- 因为Nginx是C语言编写的,所以需要配置C语言编译环境 (一定要在联网状态下安装)
需要安装gcc的环境。执行命令:
yum install gcc-c++
注意: 如果执行命令出现这样的提示:

解决办法:
问题是 yum在锁定状态中,强制关掉yum进程即可
rm -f /var/run/yum.pid
- 第三方的开发包, 在编译之前需要安装这些第三方包。
-
PCRE- nginx的http模块使用pcre来解析正则表达式,所以需要在linux上安装pcre库
安装命令: yum install -y pcre pcre-devel -
zlib- nginx使用zlib对http包的内容进行gzip,所以需要在linux上安装zlib库。
安装命令: yum install -y zlib zlib-devel -
openssl- OpenSSL 是一个强大的安全套接字层密码库,nginx不仅支持http协议,还支持https,所以需要在linux安装openssl库。
安装命令: yum install -y openssl openssl-devel
2.3.2 安装Nginx 步骤
-
将Nginx的源码包上传到 Linux
-
解压Nginx
tar -xvf nginx-1.17.8.tar

-
进入到解压之后的目录 nginx-1.17.8

-
执行命令 configure,生成 Mikefile 文件
./configure \
--prefix=/usr/local/nginx \
--pid-path=/var/run/nginx/nginx.pid \
--lock-path=/var/lock/nginx.lock \
--error-log-path=/var/log/nginx/error.log \
--http-log-path=/var/log/nginx/access.log \
--with-http_gzip_static_module \
--http-client-body-temp-path=/var/temp/nginx/client \
--http-proxy-temp-path=/var/temp/nginx/proxy \
--http-fastcgi-temp-path=/var/temp/nginx/fastcgi \
--http-uwsgi-temp-path=/var/temp/nginx/uwsgi \
--http-scgi-temp-path=/var/temp/nginx/scgi
执行命令后, 生成了MakeFile文件

- 创建临时文件目录
mkdir /var/temp/nginx/client -p
- 执行make命令,进行编译
make
- 安装
make install

2.3.3 启动并访问 Nginx
- 进入到nginx 安装目录
cd /usr/local/nginx/

- 进入到 sbin目录,执行
nginx命令
./nginx 启动
./nginx -s stop 关闭
ps aux | grep nginx 查看进程

- 通过浏览器进行访问 ,默认端口 80 (注意:是否关闭防火墙。)

2.4 配置虚拟主机
虚拟主机指的是,在一台服务器中,我们使用Nginx,来配置多个网站.
如何区分不同的网站:
- 端口不同
- 域名不同
2.4.1 通过端口区分不同的虚拟主机
Nginx配置文件
- Nginx配置文件的位置
cd /usr/local/nginx/conf
nginx.conf 就是Nginx的配置文件
- Nginx核心配置文件说明
worker_processes 1; #work的进程数,默认为1
#配置 影响nginx服务器与用户的网络连接
events {
worker_connections 1024; #单个work 最大并发连接数
}
# http块是配置最频繁的部分 可以嵌套多个server,配置代理,缓存,日志定义等绝大多数功能
http {
# 引入mime类型定义文件
include mime.types;
default_type application/octet-stream;
sendfile on;
keepalive_timeout 65; # 超时时间
#server 配置虚拟主机的相关参数 可以有多个,一个server就是一个虚拟主机
server {
# 监听的端口
listen 80;
#监听地址
server_name localhost;
# 默认请求配置
location / {
root html; # 默认网站根目录
index index.html index.htm; # 欢迎页
}
# 错误提示页面
error_page 500 502 503 504 /50x.html;
location = /50x.html {
root html;
}
}
}
使用Notpad,连接Linux
使用notepad++来连接linux,好处是使用notepad++来编辑linux中文件的批量文字,会比直接在linux中操作方便快捷很多.
-
Notepad 插件中安装NppFTP

-
打开NppFTP

-
选择设置

-
配置连接信息

-
连接

配置nginx.conf
- 使用Notpad 在nginx.conf 中添加一个 新的server
http {
include mime.types;
default_type application/octet-stream;
sendfile on;
#tcp_nopush on;
#keepalive_timeout 0;
keepalive_timeout 65;
#gzip on;
server {
listen 80;
server_name localhost;
location / {
root html;
index index.html index.htm;
}
}
# 配置新的server
server {
listen 81; # 修改端口
server_name localhost;
location / {
root html81; # 重新制定一个目录
index index.html index.htm;
}
}
}
- 复制一份 html目录
cp -r html html81

- 重新加载配置文件
sbin/nginx -s reload
- 访问
http://192.168.52.100 访问第一个server
http://192.168.52.100:81/ 访问第二个server
2.4.2 通过域名区分不同的虚拟主机
什么是域名
网址就是域名,是一个网站的地址, 由域名提供商提供,一般需要购买.
www.jd.com

域名级别
- 一级域名
- 比如 .com .org .cn
- 二级域名
- 二级域名是在一级域名前加一级
- 二级域名: baidu.com , zhihu.com
- 三级域名
- www.baidu.com
- image.baidu.com
域名绑定
- 一个域名对应一个ip地址,一个ip地址可以被多个域名绑定。
- 通过 DNS服务器去解析域名
配置域名映射
- 本地测试可以修改hosts文件。修改window的hosts文件:(C:\Windows\System32\drivers\etc)
- 可以配置域名和ip的映射关系,如果hosts文件中配置了域名和ip的对应关系,不需要走dns服务器。
配置一下nginx的映射
192.168.52.100 www.ng.com

- 使用SwitchHosts,修改hosts
-
解压

-
右键 以管理员身份运行

-
配置IP与域名的映射 [外链图片转存失败,源站可能有防盗链机制,建议将图片保存下来直接上传(img-QntghTyb-1614250583589)(…\02_图片\23.jpg)]
配置nginx.conf
#通过域名区分虚拟主机
server {
listen 80;
server_name www.t1.com;
location / {
root html-t1;
index index.html index.htm;
}
}
server {
listen 80;
server_name www.t2.com;
location / {
root html-t2;
index index.html index.htm;
}
}
- 创建 html-t1和 html-t2 目录
cp -r html html-t1
cp -r html html-t2

- 修改一下index.html 中,刷新
sbin/nginx -s reload
- 访问


虽然只有一台服务器,但是这台服务器上运行着多个网站,访问不同的域名 就可访问到不同的网站内容
2.5 反向代理
2.5.1 什么是代理
代理其实就是一个中介,A和B本来可以直连,中间插入一个C,C就是中介。刚开始的时候,代理多数是帮助内网client访问外网server用的.
客户机在发送请求时,不会直接发送给目的主机,而是先发送给代理服务器,代理服务接受客户机请求之后,再向主机发出,并接收目的主机返回的数据再发送给客户机。
2.5.2 正向代理
比如我们国内访问谷歌,直接访问访问不到,我们可以通过一个正向代理服务器,先将请求发送到到代理服,代理服务器能够访问谷歌,这样由代理去谷歌取到返回数据,再返回给我们,这样我们就能访问谷歌了
正向代理代理的是客户端, 服务端不知道实际发起请求的客户端.

2.5.3 反向代理
反向代理和正向代理的区别就是:正向代理代理客户端,反向代理代理服务器。
反向代理是指用代理服务器接收客户端的请求,然后将请求转发给网站内部应用服务器,并将从服务器上得到的结果返回给客户端.
[外链图片转存失败,源站可能有防盗链机制,建议将图片保存下来直接上传(img-1cBQ9u6X-1614250583596)(…\02_图片\36.jpg)]
2.5.4 Nginx实现反向代理
Nginx作为反向代理服务器安装在服务端,Nginx的功能就是把请求转发给后面的应用服务器.

- 配置步骤
-
第一步:简单的使用2个tomcat实例模拟两台http服务器,分别将tomcat的端口改为8080和8081

-
第二步:启动两个tomcat。
-
./bin/startup.sh
访问两个tomcat
http://192.168.52.100:8080/
http://192.168.52.100:8081/
- 第三步:反向代理服务器的配置
#反向代理配置
#upstream中的server是真正处理请求的应用服务器地址
upstream lagou1{
#用server定义HTTP地址
server 192.168.52.100:8080;
}
server {
listen 80;
server_name www.lagou1.com;
location / {
# 利用 proxy_ pass可以将请求代理到upstream命名的HTTP服务
proxy_pass http://lagou1; #转发到的地址
index index.html index.htm;
}
}
upstream lagou2{
#用server定义HTTP地址
server 192.168.52.100:8081;
}
server {
listen 80;
server_name www.lagou2.com;
location / {
proxy_pass http://lagou2;
index index.html index.htm;
}
}
- 第四步:nginx重新加载配置文件
nginx -s reload
-
第五步:配置域名, 在hosts文件中添加域名和ip的映射关系

192.168.52.100 www.lagou1.com 192.168.52.100 www.lagou2.com
通过浏览器输入域名, 访问Nginx代理服务器, Nginx根据域名将请求转发给对应的目标服务器,作为用户我们看到的是服务器的响应结果页面,在整个过程中目标服务器相对于客户端是不可见的,服务端向外暴露的就是Nginx的地址.
2.6 负载均衡
2.6.1 什么是负载均衡
当一个请求发送过来的时候,Nginx作为反向代理服务器,会根据请求找到后面的目标服务器去处理请求,这就是反向代理. 那么, 如果目标服务器有多台的话,找哪一个服务器去处理当前请求呢 ? 这个合理分配请求到服务器的过程就叫做负载均衡.

2.6.2 为什么用负载均衡
当系统面临大量用户访问,负载过高的时候,通常会使用增加服务器数量来进行横向扩展, 负载均衡主要是为了分担访问量,将请求合理分发给不同的服务器, 避免临时的网络堵塞
2.6.3 负载均衡策略
2.6.3.1 轮询
-
默认策略, 每个请求按照时间顺序逐一分配到不同的服务器,如果某一个服务器下线,能自动剔除
-
配置方式
#负载均衡
upstream lagouServer{
# 用server定义 HTTP地址
server 192.168.52.100:8081;
server 192.168.52.100:8082;
}server {
listen 80;
server_name www.lagouNB.com;location / { # 利用 proxy_ pass可以将请求代理到upstream命名的HTTP服务 proxy_pass http://lagouServer; index index.html index.htm; }}#负载均衡
upstream lagouServer{
# 用server定义 HTTP地址
server 192.168.52.100:8081;
server 192.168.52.100:8082;
}server {
listen 80;
server_name www.lagouNB.com;location / { # 利用 proxy_ pass可以将请求代理到upstream命名的HTTP服务 proxy_pass http://lagouServer; index index.html index.htm; }}
2.6.3.2 weight
-
可以根据服务器的实际情况调整服务器权重。权重越高分配的请求越多,权重越低,请求越少。默认是都是1.
#负载均衡
upstream lagouServer{
# 用server定义 HTTP地址
server 192.168.52.100:8081 weight=1;
server 192.168.52.100:8082 weight=10;
}
3.项目部署与发布
3.1 后台项目部署
3.1.1 Linux环境准备
- 需要安装的软件
| 软件 | 版本 |
|---|---|
| JDK | 11 |
| Tomcat | 8.5 |
| MySQL | 5.7 |
| Nginx | 1.17.8 |
-
关闭防火墙
-
使用SQLYog连接Linux上的MySQL, 导入SQL脚本 创建项目所需的数据库

3.1.2 项目打包发布
在平常开发的过程中,不同的环境中项目的相关配置也会有相关的不同,我们在不同的环境中部署就要手动修改为对应环境的配置,这样太麻烦了以及这样也会很容易出错。
接下来我们就通过maven的相关配置来在打包时指定各个环境对应配置文件
1. 修改ssm_dao 子模块
- 修改后的目录结构

2. 第一步: 创建配置文件
在项目的src/main/resources 下面创建filter目录, 再创建 development.properties , product.properties 两个文件
- development是开发配置内容。
jdbc.driver=com.mysql.jdbc.Driver
jdbc.url=jdbc:mysql:///ssm_lagou_edu?characterEncoding=UTF-8
jdbc.username=root
jdbc.password=123456
- product是正式配置内容
jdbc.driver=com.mysql.jdbc.Driver
jdbc.url=jdbc:mysql://192.168.52.100:3306/ssm_lagou_edu?characterEncoding=UTF-8
jdbc.username=JiuYuan
jdbc.password=JiuYuan@123
3. 第二步:配置jdbc.properties 文件
jdbc.properties中的内容不再写死,而是从上面两个文件中获取

jdbc.driver=com.mysql.jdbc.Driver
jdbc.url=${jdbc.url}
jdbc.username=${jdbc.username}
jdbc.password=${jdbc.password}
注意:${jdbc.url} 直接对应上面配置的development.properties或product.properties文件中的名称。
4. 第三步: 配置dao模块的的 pom.xml文件
添加如下配置
<profiles>
<profile>
<id>dev</id>
<properties>
<!-- 测试环境 -->
<env>development</env>
</properties>
<activation>
<activeByDefault>true</activeByDefault>
</activation>
</profile>
<profile>
<id>prod</id>
<properties>
<!-- 正式环境 -->
<env>product</env>
</properties>
</profile>
</profiles>
<build>
<finalName>web</finalName>
<filters>
<filter>src/main/resources/filter/${env}.properties</filter>
</filters>
<resources>
<resource>
<directory>src/main/resources</directory>
<excludes>
<exclude>filter/*.properties</exclude>
</excludes>
<filtering>true</filtering>
</resource>
</resources>
</build>
5. profile说明
- profile可以让我们定义一系列的配置信息,然后指定其激活条件。这样我们就可以定义多个profile,然后每个profile对应不同的激活条件和配置信息,从而达到不同环境使用不同配置信息的效果
- 默认启用的是dev环境配置:
<profiles>
<profile>
<id>dev</id>
<properties>
<!-- 测试环境 -->
<env>development</env>
</properties>
<activation>
<activeByDefault>true</activeByDefault>
</activation>
</profile>
<profile>
<id>prod</id>
<properties>
<!-- 正式环境 -->
<env>product</env>
</properties>
</profile>
</profiles>
- 指定数据库配置文件路径,此路径可以自定义:
<filters>
<filter>src/main/resources/filter/${env}.properties</filter>
</filters>
- 指定资源目录路径
<resources>
<resource>
<directory>src/main/resources</directory>
<!-- 资源根目录排除各环境的配置 -->
<excludes>
<exclude>filter/*.properties</exclude>
</excludes>
<filtering>true</filtering>
</resource>
</resources>
6.第四步: 打包
- 命令打包
打本地包 mvn -Pdev install 或者mvn install(因为本例activeByDefault配的为true)
打产品包 mvn -Pprod install
结果:src/main/resources/config/jdbc.properties根据 mvn -P 参数决定值
- 使用idea打包

7.打包后的文件
-
使用生产环境的配置文件,进行打包

-
打开这个war包,我们会发现 其他子模块都已经被打成jar包,放到了lib文件夹下

8. 发布
-
修改一下项目名称

-
上传到tomcat中,启动测试

-
在部署tomcat的 webapps目录下创建一个 upload文件夹,保存图片
mkdir upload
- log
/usr/tomcat-ssm/logs
tail -f cataline.out
- 访问
http://192.168.52.100:8080/ssm-web/user/login?phone=18211111111&password=123456
- 获取到响应的JSON, 发布成功

3.2 前端项目部署
3.2.1 修改配置文件
- 生产环境配置文件,配置后台URL

VUE_APP_NAME = Edu Boss
VUE_APP_TITLE = Lagou Edu Boss (Dev)
VUE_APP_STORAGE_PREFIX = lagou_edu_boss_dev
#VUE_APP_API_FAKE = /front
VUE_APP_API_FAKE = http://192.168.52.100:8080/ssm-web
#VUE_APP_API_BASE = /boss
VUE_APP_API_BASE = http://192.168.52.100:8080/ssm-web
- 自定义配置文件,配置打包相关信息

将下面内容拷贝到 vue.config.js
module.exports = {
publicPath: process.env.NODE_ENV === "production" ? "/edu-boss/" : "/",
indexPath: "index.html",
assetsDir: "static",
lintOnSave: process.env.NODE_ENV !== "production",
productionSourceMap: false,
devServer: {
open: true,
port: 8081
}
};
3.2.2 打包测试操作
- 打包命令
npm run build
-
在项目下会生成一个 dist 目录

-
在本地tomcat的webapps目录下,创建一个edu-boss文件夹,将dist目录中的文件拷贝到里面

- 测试: 启动本地tomcat ,访问前端项目 路径为:
http://localhost:8081/edu-boss/
3.3.3 发布前端项目
- 解压一个新的tomcat, 修改端口号
#解压
tar xvf apache-tomcat-8.5.50.tar
#改名
mv apache-tomcat-8.5.50 ui-tomcat

#修改端口号
cd ui-tomcat/conf/
vim server.xml


- 上传前端项目到 webapps
//上传 edu-boss.zip ,并解压
unzip edu-boss.zip
//删除edu-boss.zip
rm -rf edu-boss.zip
- 运行前端项目,并访问
./bin/startup.sh
//动态查看日志
tail -f logs/catalina.out
//访问
http://192.168.52.100:8081/edu-boss/
3.3 修改tomcat默认访问项目
- 使用notpad打开前端tomcat的配置文件 server.xml, 找到
Host标签

- 在Host标签内加入
<Context path="" docBase="edu-boss" reloadable="true" debug="0" privileged="true">
</Context>
- 重新启动 并访问前端项目,这个时候只需要直接访问 8081即可
http://192.168.52.100:8081/
3.4 配置反向代理
-
使用notpad打开nginx的配置文件 nginx.conf

-
配置反向代理
#配置ssm项目 反向代理
upstream lagouedu{
server 192.168.52.100:8081;
}
server {
listen 80;
server_name www.edu-boss.com;
location / {
proxy_pass http://lagouedu; #转发的地址
index index.html index.htm;
}
}
-
修改本地hosts, 配置域名映射

-
访问 www.edu-boss.com
