导语
相信大家无论是做前端还是做后端的,都被接口接口文档所折磨过,前端抱怨接口文档和后端给的不一致,后端抱怨写接口文档很麻烦,所以Swagger就诞生了。直接配置即可自动生成接口文档,而且提供了高效的API测试
话不多说直接开干
导入SpringBoot集成Swagger所需要的依赖
       <!--web方便测试-->
        <dependency>
            <groupId>org.springframework.boot</groupId>
            <artifactId>spring-boot-starter-web</artifactId>
        </dependency>
        <!-- swagger2核心包 -->
        <dependency>
            <groupId>io.springfox</groupId>
            <artifactId>springfox-swagger2</artifactId>
            <version>2.9.2</version>
        </dependency>
        <!-- swagger-ui 可视化界面 -->
        <dependency>
            <groupId>io.springfox</groupId>
            <artifactId>springfox-swagger-ui</artifactId>
            <version>2.9.2</version>
        </dependency>
Swagger可视化界面可分为三个区域

Swagger相关配置
package com.example.config;

import org.springframework.context.annotation.Bean;
import org.springframework.context.annotation.Configuration;
import springfox.documentation.builders.RequestHandlerSelectors;
import springfox.documentation.service.ApiInfo;
import springfox.documentation.service.Contact;
import springfox.documentation.spi.DocumentationType;
import springfox.documentation.spring.web.plugins.Docket;
import springfox.documentation.swagger2.annotations.EnableSwagger2;

import java.util.ArrayList;

@Configuration
@EnableSwagger2  //开启Swagger的使用
public class SwaggerConfig {


    @Bean   //Swagger的使用主要是要将docket对象传入IOC容器
    public Docket docket(){


        return new Docket(DocumentationType.SWAGGER_2)
                .apiInfo(apiInfo()) //关于文档的各种信息
                .enable(true)  //使Swagger生效
                .groupName("常安祖")
                .select()//选择扫描的接口
                .apis(RequestHandlerSelectors.basePackage("com.example.controller"))//指定扫描的接口
                .build();
    }


    public ApiInfo apiInfo(){


        Contact contact = new Contact("长安","https://blog.csdn.net/weixin_45647685","[email protected]");//个人的联系方式
        return new ApiInfo("长安的文档", "长安的开发文档", "1.0", "urn:tos",null, "Apache 2.0", "http://www.apache.org/licenses/LICENSE-2.0", new ArrayList());//文档的各种信息
    }
}
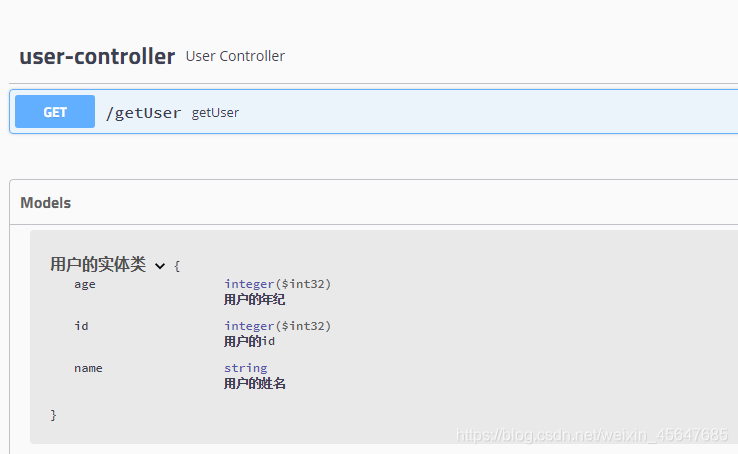
@ApiModel( ) //主要用来标注返回的实体类
@ApiModelProperty( ) //主要用来标注实体类中的属性
案例:
@ApiModel("用户的实体类")
public class User implements Serializable {


    @ApiModelProperty("用户的id")
    private Integer id;

    @ApiModelProperty("用户的姓名")
    private String name;

    @ApiModelProperty("用户的年纪")
    private Integer age;

    public Integer getId() {


        return id;
    }
    public User(Integer id, String name, Integer age) {


        this.id = id;
        this.name = name;
        this.age = age;
    }

    public void setId(Integer id) {


        this.id = id;
    }

    public String getName() {


        return name;
    }

    public void setName(String name) {


        this.name = name;
    }

    public Integer getAge() {


        return age;
    }

    public void setAge(Integer age) {


        this.age = age;
    }
}
@ApiModelProperty用来标注API接口
案例:
package com.yangzihao.controller;

import com.yangzihao.entity.User;
import io.swagger.annotations.ApiModelProperty;
import org.springframework.stereotype.Controller;
import org.springframework.web.bind.annotation.GetMapping;
import org.springframework.web.bind.annotation.RequestMapping;

@RestController
public class UserController {


    @ApiModelProperty("得到一个User")
    @GetMapping("/getUser")
    public User getUser(){


        return new User(1,"测试",18);
    }
}
进入Swagger可视化界面
使用Swagger进行接口测试

执行
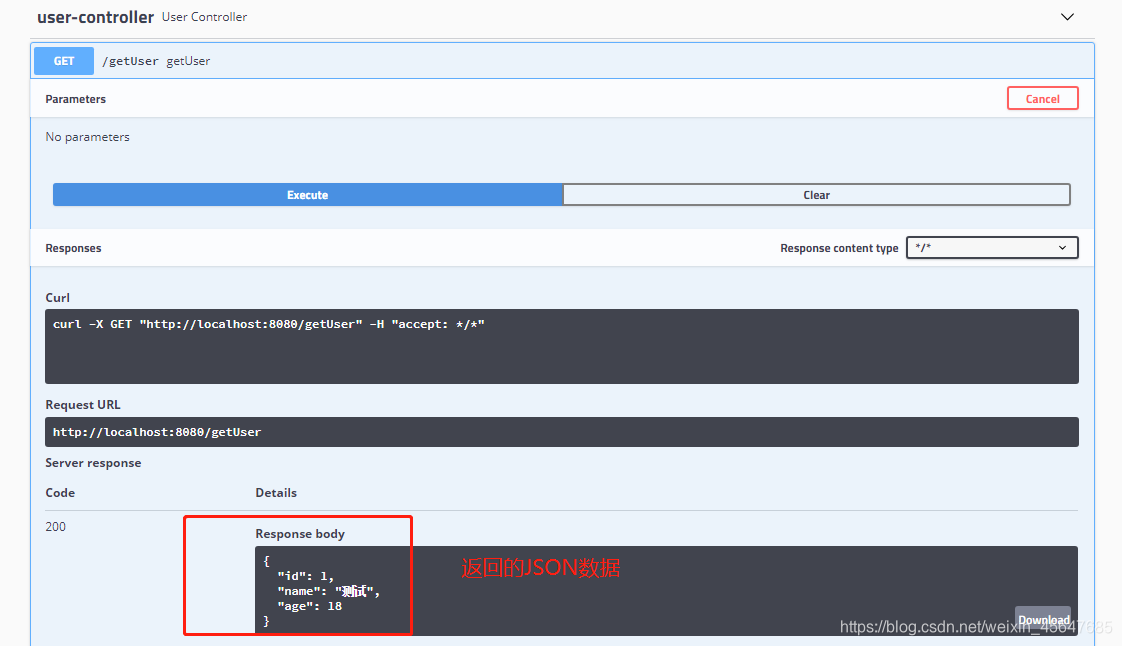
测试成功!!!真的超级好用有木有!!!