配置实验环境
主服务器配置环境
[root@localhost ~]# vim /etc/hostname 设置主服务器名称
master.sevenwin.org
[root@localhost ~]# vim /etc/hosts 设置本地host文件缓存
192.168.8.101 master master.sevenwin.org
192.168.8.102 slave slave.sevenwin.org
[root@localhost ~]# vim /etc/selinux/config 修改沙河安全等级
SELINUX=permissive
[root@localhost ~]# reboot 重新启动生效配置
从服务器配置环境
[root@localhost ~]# vim /etc/hostname 设置从服务器名称
slave.sevenwin.org
[root@localhost ~]# vim /etc/hosts 设置从服务器本地host缓存
192.168.8.101 master master.sevenwin.org
192.168.8.102 slave slave.sevenwin.org
[root@localhost ~]# vim /etc/selinux/config 修改沙河安全等级
SELINUX=permissive
[root@localhost ~]# reboot 重新启动神效配置
主服务器安装MariaDB
[root@m ~]# vim /etc/my.cnf 配置日志
[mysqld]
log-bin=/var/log/mysql/master-bin bin-log 日志存放位置以及名称
server-id=1 ID号,不可与其他服务器冲突
sync_binlog=1 同步二进制日志,事务提交则马上将内存中的二进制日志同步到磁盘
innodb_flush_log_at_trx_commit=1 innodb在事务提交时立即将日志文件写入到磁盘
innodb_support_xa=on 开启分布式事务
[root@m ~]# mkdir /var/log/mysql 穿件日志目录
[root@m ~]# chown -R mysql:mysql /var/log/mysql/ 更改属主属组
[root@m ~]# systemctl enable mariadb 添加开机启动
Created symlink from /etc/systemd/system/multi-user.target.wants/mariadb.service to /usr/lib/systemd/system/mariadb.service.
[root@m ~]# systemctl start mariadb 启动mysql
[root@m ~]# firewall-cmd --add-port=3306/tcp 设置防火墙规则
success
[root@m ~]# firewall-cmd --add-port=3306/tcp --permanent 永久开启3306的tcp端口
success
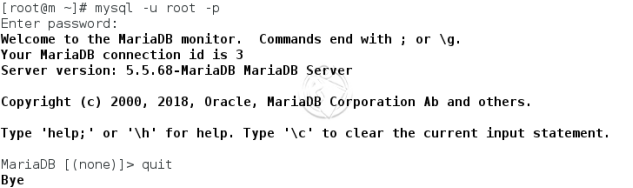
[root@m ~]# mysqladmin -u root password 123 设置数据库密码
进入数据库
MariaDB [(none)]> grant replication client,replication slave on . to ‘nxq’@‘192.168.8.%’ identified by ‘123’; 授权用户
Query OK, 0 rows affected (0.00 sec)
MariaDB [(none)]> flush privileges; 刷新
Query OK, 0 rows affected (0.00 sec)
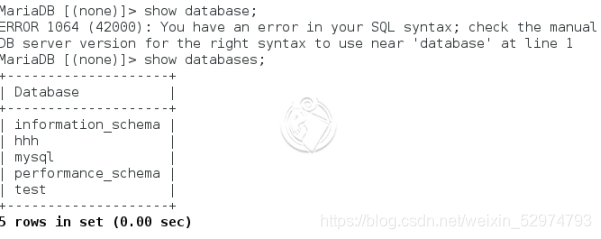
查看主服务器数据库状态

从服务器配置日志
[root@s ~]# vim /etc/my.cnf 配置从服务器日志
[mysqld]
relay-log = relay-bin bin-log日志名称
server-id = 10 ID号(不可重复)
read-only = on 只读
[root@s ~]# systemctl enable mariadb 开机自启动
Created symlink from /etc/systemd/system/multi-user.target.wants/mariadb.service to /usr/lib/systemd/system/mariadb.service.
[root@s ~]# systemctl start mariadb 开启数据库
[root@s ~]# mysqladmin -u root password 123 设置密码
进入数据库

MariaDB [(none)]> change master to master_host=‘192.168.8.101’,master_user=‘nxq’,master_password=‘123’,master_port=3306,master_log_file=‘master-bin.000001’,master_log_pos=1230; 授权
Query OK, 0 rows affected (0.00 sec)
MariaDB [(none)]> start slave; 开启
Query OK, 0 rows affected (0.03 sec)
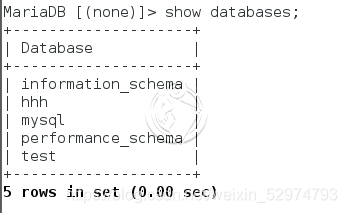
查看从服务器复制状态
MariaDB [(none)]> show slave status \G;
*************************** 1. row ***************************
Slave_IO_State: Waiting for master to send event
Master_Host: 192.168.8.101
Master_User: nxq
Master_Port: 3306
Connect_Retry: 60
Master_Log_File: master-bin.000001
Read_Master_Log_Pos: 1230
Relay_Log_File: relay-bin.000002
Relay_Log_Pos: 530
Relay_Master_Log_File: master-bin.000001
Slave_IO_Running: Yes
Slave_SQL_Running: Yes
Replicate_Do_DB:
Replicate_Ignore_DB:
Replicate_Do_Table:
Replicate_Ignore_Table:
Replicate_Wild_Do_Table:
Replicate_Wild_Ignore_Table:
Last_Errno: 0
Last_Error:
Skip_Counter: 0
Exec_Master_Log_Pos: 1230
Relay_Log_Space: 818
Until_Condition: None
Until_Log_File:
Until_Log_Pos: 0
Master_SSL_Allowed: No
Master_SSL_CA_File:
Master_SSL_CA_Path:
Master_SSL_Cert:
Master_SSL_Cipher:
Master_SSL_Key:
Seconds_Behind_Master: 0
Master_SSL_Verify_Server_Cert: No
Last_IO_Errno: 0
Last_IO_Error:
Last_SQL_Errno: 0
Last_SQL_Error:
Replicate_Ignore_Server_Ids:
Master_Server_Id: 1
1 row in set (0.00 sec)
ERROR: No query specified
验证
主服务器中创建
从服务器查看
实验成功!