文章目录
1, 快速安装, 并查看集群状态
安装包下载:https://www.elastic.co/cn/downloads/elasticsearch
官方文档:https://www.elastic.co/guide/en/elasticsearch/reference/current/index.html
以下使用 cmder终端模拟器 ,来在windows环境使用linux常用命令
1.1 单机启动一个或多个节点
#1, 启动第一个节点
#D:\download\elk-stack\elasticsearch-7.11.2\bin
cd elasticsearch-7.11.2\bin
.\elasticsearch.bat

		MK@DESKTOP-wang /d/download/elk-stack/elasticsearch-7.11.2/bin
		λ ./elasticsearch.bat --help
		Option                Description
		------                -----------
		-E <KeyValuePair     Configure a setting
		-V, --version         Prints Elasticsearch version information and exits
		-d, --daemonize       Starts Elasticsearch in the background
		-h, --help            Show help
		-p, --pidfile <Path  Creates a pid file in the specified path on start
		-q, --quiet           Turns off standard output/error streams logging in console
		-s, --silent          Show minimal output
		-v, --verbose         Show verbose output

		#2,启动第二,三个节点(现在可以只启动一个节点就行,可以作为后续添加节点的场景,数据是自动同步的)
		Linux and macOS:
		./elasticsearch -Epath.data=data2 -Epath.logs=log2
		./elasticsearch -Epath.data=data3 -Epath.logs=log3

		Windows:
		.\elasticsearch.bat -E path.data=data2 -E path.logs=log2
		.\elasticsearch.bat -E path.data=data3 -E path.logs=log3
1.2 查看集群/索引状态:_cat/health,indices
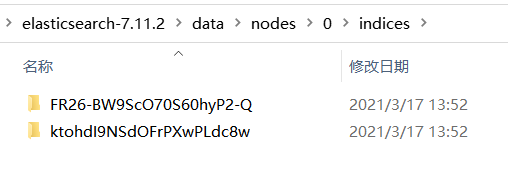
添加了样例数据后,磁盘中数据存放:data/nodes/0/indices/索引名对应的uuid
#0,查看集群版本信息
λ curl localhost:9200/?pretty
{


  "name" : "DESKTOP-WANG",
  "cluster_name" : "elasticsearch",
  "cluster_uuid" : "cpp0VGxDQGqqgSXhP4YYlw",
  "version" : {


    "number" : "7.11.2",
    ...
    "lucene_version" : "8.7.0",
    "minimum_wire_compatibility_version" : "6.8.0",
    "minimum_index_compatibility_version" : "6.0.0-beta1"
  },
  "tagline" : "You Know, for Search"
}

#1,查看集群状态: 多个节点,端口递增(9200, 9201,9202..)
λ curl -X GET "localhost:9200/_cat/health?v=true&pretty"
epoch      timestamp cluster       status node.total node.data shards pri relo init unassign pending_tasks max_task_wait_time active_shards_percent
1615960346 05:52:26  elasticsearch yellow          1         1      2   2    0    0        2             0                  -                 50.0%

#2,查看索引状态
λ curl "localhost:9200/_cat/indices?v=true"
health status index    uuid                   pri rep docs.count docs.deleted store.size pri.store.size
yellow open   bank     ktohdI9NSdOFrPXwPLdc8w   1   1       1000            0    379.2kb        379.2kb
yellow open   customer FR26-BW9ScO70S60hyP2-Q   1   1          1            0      3.8kb          3.8kb
2, 添加/删除 索引数据,并查询
2.1 添加一条数据:接口(索引名/_doc/id值)
#1,添加一条数据
λ curl -X PUT "localhost:9200/customer/_doc/1?pretty" -H 'Content-Type: application/json' -d'
 {
   "name": "John Doe"
 }
 '

#2,查询数据
λ  curl -X GET "localhost:9200/customer/_doc/1?pretty"
返回数据:
{


  "_index" : "customer",
  "_type" : "_doc",
  "_id" : "1",
  "_version" : 1,
  "_seq_no" : 0,
  "_primary_term" : 1,
  "found" : true,
  "_source" : {


    "name" : "John Doe"
  }
}
2.2 批量添加数据:接口(索引名/_bulk)
样例数据 accounts.json 下载:(共1000条json数据)https://github.com/elastic/elasticsearch/blob/master/docs/src/test/resources/accounts.json?raw=true
λ head accounts.json
{

    "index":{

    "_id":"1"}}
{

    "account_number":1,"balance":39225,"firstname":"Amber","lastname":"Duke","age":32,"gender":"M","address":"880 Holmes Lane","employer":"Pyrami","email":"[email protected]","city":"Brogan","state":"IL"}
{

    "index":{

    "_id":"6"}}
{

    "account_number":6,"balance":5686,"firstname":"Hattie","lastname":"Bond","age":36,"gender":"M","address":"671 Bristol Street","employer":"Netagy","email":"[email protected]","city":"Dante","state":"TN"}
{

    "index":{

    "_id":"13"}}
....

#批量添加
λ curl -H "Content-Type: application/json" -XPOST "localhost:9200/bank/_bulk?pretty&refresh" --data-binary "@accounts.json"
2.3 删除数据
#删除一条数据: 根据_id删
curl -X DELETE "localhost:9200/bank/_doc/1?pretty"

#删除多条数据: 根据匹配的条件删
curl -X POST "localhost:9200/test4/_delete_by_query?pretty" -H 'Content-Type: application/json' -d'
{
  "query": {
    "match_all": {}
  }
}
'
#删除整个index
curl -X DELETE "localhost:9200/test4?pretty"
3, 一般查询样例:接口(索引名/_search)
3.1 分页,单词包含,短语包含,复合条件筛选
curl -X GET "localhost:9200/bank/_search?pretty" -H 'Content-Type: application/json' -d'json参数如下'

--单词包含(包含mill 或 lane)
{


  "query": {

     "match": {

     "address": "mill lane" } }
}

--短语包含(包含'mill lane'字符串)
{


  "query": {

     "match_phrase": {

     "address": "mill lane" } }
}

-- 分页
{


  "query": {

     "match_all": {

    } },
  "sort": [
    {

     "age": "asc" }
  ],
  "from": 10,
  "size": 3
}

--复合条件查询:must, must_not, should
{


  "query": {


    "bool": {


      "must": [
        {

     "match": {

     "age": "40" }		     },
		{

     "match": {

    "gender" : "M" }		     },
		{

     "match_phrase": {

     "address": "Ovington Court" } }
      ],
      "must_not": [
        {

     "match": {

     "state": "ID" } }
      ],
      "filter": {


        "range": {


          "balance字段名(工资)": {


            "gte": 20000,
            "lte": 50000
          }
        }
      }
    }
  }
}
3.2 聚合分析查询:类似sql中的count, avg, order by
统计各州的总人数,并计算各州的平均工资,并且按平均工资倒序排列(而非按总人数倒序排)
#Because the request set size=0, the response only contains the aggregation results

curl -X GET "localhost:9200/bank/_search?pretty" -H 'Content-Type: application/json' -d'
{
  "size": 0,
  "aggs": {
    "group_by_state": {
      "terms": {
        "field": "state.keyword",
        "order": {
          "average_balance": "desc"
        }
      },
      "aggs": {
        "average_balance": {
          "avg": {
            "field": "balance"
          }
        }
      }
    }
  }
}
'

返回数据:
  "aggregations" : {


    "group_by_state" : {


      "doc_count_error_upper_bound" : -1,
      "sum_other_doc_count" : 827,
      "buckets" : [
        {


          "key" : "CO",
          "doc_count" : 22,
          "average_balance" : {


            "value" : 32460.35714285714
          }
        },
        {


          "key" : "NE",
          "doc_count" : 16,
          "average_balance" : {


            "value" : 32041.5625
          }
        },
4, 生产环境配置和优化
4.1 系统环境优化
#文件句柄数,使用内存大小,线程数
ulimit -n 65535; echo 'elasticsearch  -  nofile  65535' >> /etc/security/limits.conf
ulimit -u 65535 ; echo 'elasticsearch  -  memlock  unlimited' >> /etc/security/limits.conf
ulimit -l unlimited; echo 'elasticsearch  -  nproc  65535' >> /etc/security/limits.conf

#不用swap缓存
sed -i  's@^/swapfile@#&@'  /etc/fstab
swapoff -a
#sysctl -w vm.swappiness=1
#echo vm.swappiness=1 >> /etc/sysctl.conf

#默认65530, 可能导致 out of memory exceptions.
sysctl -w vm.max_map_count=262144
echo 'vm.max_map_count=262144' >> /etc/sysctl.conf

#默认15,减少以加速识别失败的节点
sysctl -w net.ipv4.tcp_retries2=5
echo 'net.ipv4.tcp_retries2=5' >> /etc/sysctl.conf
4.2 elasticsearch.yml配置
#只有设置了相同的cluster.name的节点,才能加入到同一个集群:默认elasticsearch
cluster.name: els-cluster
node.name: node-117

#默认绑定回环网卡: 127.0.0.1 和 [::1]
network.host: 192.168.1.10

#集群通信端口,默认9300
#/etc/hosts 需要配置域名解析
discovery.seed_hosts: ["node-117", "node-1"]

#初始化时,默认的master节点: 仅当集群第一次启动时才设置,启动后需要删除
#必须与 node.name 相同
#cluster.initial_master_nodes: ["node-1"]