前言
2020 年 9 月 19 日 Vue3 更新了正式版本,自此VUE正式开启了3.x的时代!Vue3也是目前最值得一学的前端框架之一。
一、Vue3 简介及基础环境搭建
1. Vue3 新特性简介
官方网站地址: v3.vuejs.org
Vue3 有哪些新特性呢?

- Vue3采用渐进式开发,向下兼容:Vue3 支持大多数 Vue2 的特性,也就是说咱们使用 Vue2 的语法开发 Vue3,也是没有任何问题的,当然我们并不推荐这种做法;
- 性能的提升,每个人都希望使用的框架更快、更轻,Vue3 做到了,给了开发者一个极致的体验,官方网站给出的数据是:打包大小减少 41%、初次渲染快 55%、更新快 133%、内存使用减少 54%,确实是非常惊艳的提升;
新推出
Composition API
Vue3 采取的新的接口使用方式。这种新的方式叫做Composition API(组合式 API)。而与之相对应的经典 API 也是我们所熟知的 Vue 使用方式叫做Options API(选项式 API)或Options-based API(基于选项的 API)。
- 在经典的
Options API中,我们使用一个具有data,methods等「选项」的 JS 对象来定义一个页面或者组件。这种简单直接的方式,在应用早期阶段,代码和业务逻辑较简单时,非常的友好亲民,这也是 Vue 学习门槛较低而广受开发者亲昵的的一个因素。- 但是,有过开发大型 Vue 应用的开发者应该心有体会。当页面的逻辑越来越多时,我们的组件将变得冗长复杂。很多本可以复用的逻辑和代码,你很难有一种使用起来非常舒适的方式来复用。比如:在 Vue2 中,组件逻辑和代码复用最常用的方式是混入
mixin,这虽然是一种可行的方式,但是这种方式显然从出生和 Vue 框架紧密耦合。当你想要将一个框架无区别的普通 JS 函数或者对象复用到 Vue2 开发的组件中时,你发现一切都是那么的不优雅。基于满足在开发大型 Vue 应用中更优雅地复用已有代码的需求催生下,Vue3
Composition API似乎是顺势而为,并且势在必得。
- 其他新特性:
Teleport瞬移组件、Suspense解决异步加载组件问题 和全局 API 的修改和优化;
- 更好
TypeScript支持, Vue2 并不是特别适应TypeScript,集成困难,痛点太多,但 Vue3 解决了这个问题,Vue3 的源代码就是使用TypeScript进行开发的,所以使用TS自然就更加顺畅无阻。
2. 使用 Vue-cli 搭建 Vue3 开发环境
- 安装最新版本 vue-cli 脚手架工具,只有 V4.5.4 以上版本才有创建 Vue3 的选项
npm install -g @vue/cli
# OR
yarn global add @vue/cli
vue -V
- 使用 vue-cli 命令行
vue create Projv3创建一个项目$ vue create Projv3 # 选择使用 vue3 来构建项目 $ cd Projv3 $ yarn serve
- 使用 vue-cli 图形界面搭建 Vue3 项目
- 安装最新版
Vue-cli就可以使用vue ui这个命令,开启一个 UI 界面- 打开图形界面配置对应文件
二、项目初始结构及重要文件
1. 项目基本目录
|-node_modules       -- 所有的项目依赖包都放在这个目录下
|-public             -- 公共文件夹
---|favicon.ico      -- 网站的显示图标
---|index.html       -- 入口的html文件
|-src                -- 源文件目录,编写的代码基本都在这个目录下
---|assets           -- 放置静态文件的目录,比如logo.pn就放在这里
---|components       -- Vue的组件文件,自定义的组件都会放到这
---|App.vue          -- 根组件,这个在Vue2中也有
---|main.ts          -- 入口文件,因为采用了TypeScript所以是ts结尾
---|shims-vue.d.ts   -- 类文件(也叫定义文件),因为.vue结尾的文件在ts中不认可,所以要有定义文件
|-.browserslistrc    -- 在不同前端工具之间公用目标浏览器和node版本的配置文件,作用是设置兼容性
|-.eslintrc.js       -- Eslint的配置文件,不用作过多介绍
|-.gitignore         -- 用来配置那些文件不归git管理
|-package.json       -- 命令配置和包管理文件
|-README.md          -- 项目的说明文件,使用markdown语法进行编写
|-tsconfig.json      -- 关于TypoScript的配置文件
|-yarn.lock          -- 使用yarn后自动生成的文件,由Yarn管理,安装yarn包时的重要信息存储到yarn.lock文件中
2. package.json 启动介绍
使用
npm run serve或yarn serve运行项目,就是因为有package.json中的scripts起到了作用。{ "scripts": { "serve": "vue-cli-service serve", "build": "vue-cli-service build", "lint": "vue-cli-service lint" } }这三个命令的意思是:
serve: 在开发时用于查看效果的命令build: 打包打码,一般用于生产环境中使用lint: 检查代码中的编写规范
package.json中另外两个比较重要的配置项dependencies和devDependencies,
dependencies下的包是生产环境中必须用到的,当然开发环境也需要;devDependencies是只有开发环境中使用的,上线后这些包就没用了,打包后也不会打包进去的代码。
3. 初识 vue3 入口文件
在 vue3 中,template 根节点中不再必须使用一个标签包裹起来了,允许咱们有多个兄弟标签
// 从 vue 依赖中导入 createAPP API 方法
import {

      createApp } from 'vue'
import App from './App.vue'
import router from './router'
import store from './store'

// 调用 createAPP 方法,这个方法的返回可以被链式调用
const app = createApp(App)
app.use(store).use(router).mount('#app')
<template> <img alt="Vue logo" src="./assets/logo.png"> <HelloWorld msg="Welcome to Your Vue.js + TypeScript App"/> </template> <script> import { defineComponent } from 'vue'; import HelloWorld from './components/HelloWorld.vue'; export default defineComponent({ name: 'App', components: { HelloWorld } }) </script>
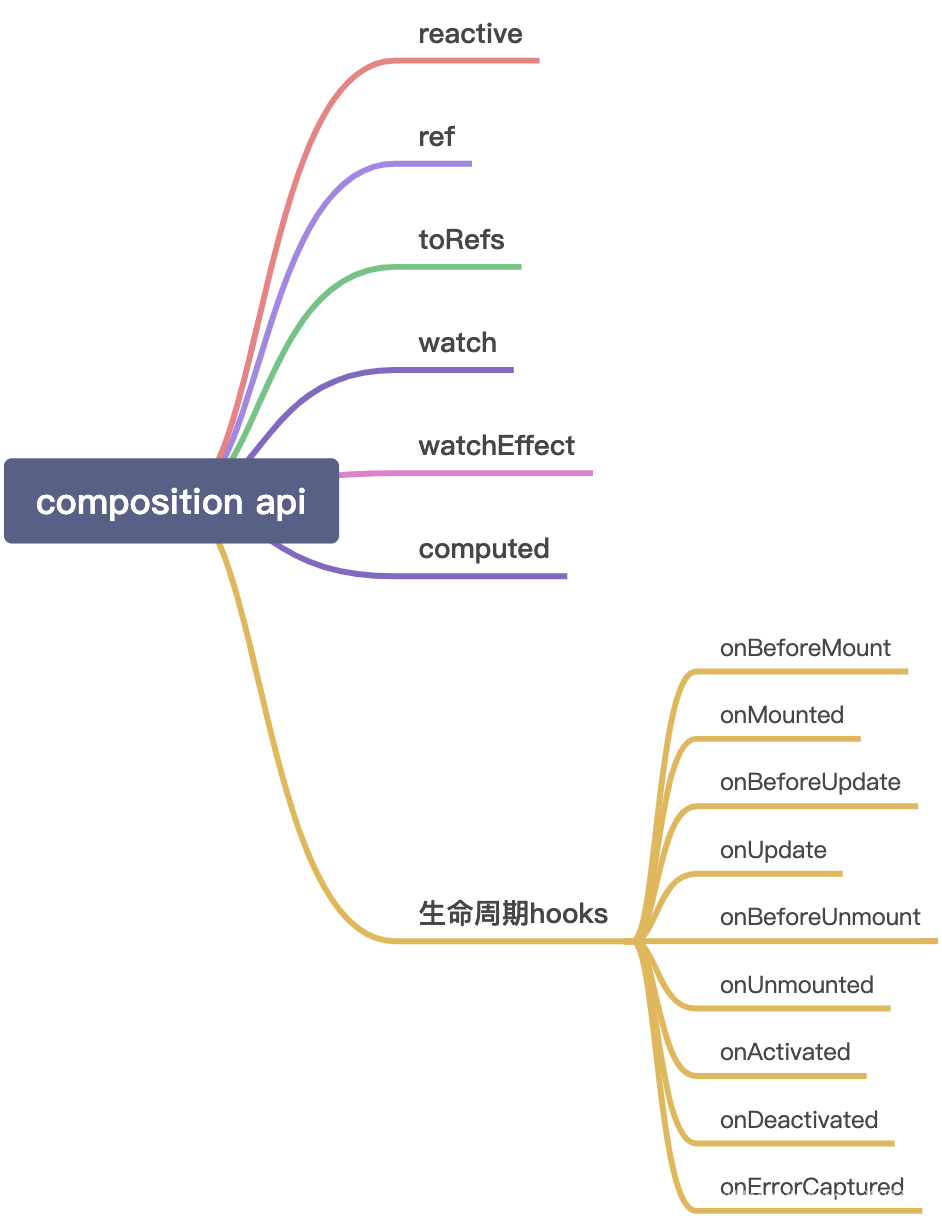
三、Vue3 生命周期钩子函数
1. 生命周期钩子函数介绍
Vue3.x 生命周期简介
- setup() :开始创建组件之前,在
beforeCreate和created之前执行,创建的是data和method- onBeforeMount() : 组件挂载到节点上之前执行的函数;
- onMounted() : 组件挂载完成后执行的函数;
- onBeforeUpdate(): 组件更新之前执行的函数;
- onUpdated(): 组件更新完成之后执行的函数;
- onBeforeUnmount(): 组件卸载之前执行的函数;
- onUnmounted(): 组件卸载完成后执行的函数;
- onActivated(): 被包含在
<keep-alive中的组件,会多出两个生命周期钩子函数,被激活时执行;- onDeactivated(): 比如从 A 组件,切换到 B 组件,A 组件消失时执行;
- onErrorCaptured(): 当捕获一个来自子孙组件的异常时激活钩子函数。
PS: 使用<keep-alive>组件会将数据保留在内存中,比如我们不想每次看到一个页面都重新加载数据,就可以使用<keep-alive>组件解决。
Vue2.x 和 Vue3.x 生命周期对比
Vue2 vue3 beforeCreate setup() created setup() beforeMount onBeforeMount mounted onMounted beforeUpdate onBeforeUpdate updated onUpdated beforeDestroy onBeforeUnmount destroyed onUnmounted activated onActivated deactivated onDeactivated errorCaptured onErrorCaptured
2. 生命周期钩子函数使用
<template>
  <h1>Vue3 - 生命周期钩子函数</h1>
  <h2>响应式拦截数据 data 的值是:{

    { msg }}</h2>
  <p><button @click="changeMsg">点击改变msg</button></p>
</template>

<script>
import { reactive, toRefs, onMounted, onUpdated, onUnmounted } from 'vue'
export default {
  setup () {
    // 项目初始化工作都放在 setUp 中
    console.log('当前应用程序被安装了')
    const data = reactive({
      msg: '学而时习之',
      changeMsg: () => {
        data.msg = '有朋自远方来'
      }
    })
    let timer = 0
    let count = 0
    onMounted(() => {
      console.log('页面挂载完成,触发了 onMounted 钩子函数')
      timer = setInterval(() => {
        console.log('定时器正在运行中!', count++)
      }, 1000)
    })
    onUpdated(() => {
      console.log('数据发生了更新,触发了 update 钩子函数')
    })
    onUnmounted(() => {
      console.log('页面/组件退出,触发了 onUnmounted 钩子函数')
      // 如果不清楚的话,那么这些异步的行为就会常驻在内存中,这一定程度上给我们提供了方便:比如前面 uni.$on 全局通信,
      // 但是一定程度上也会造成常驻内存的不必要消耗,如果不是目的性的使用造成垃圾无法回收,这也叫内存泄漏
      clearInterval(timer)
    })
    return {
      ...toRefs(data)
    }
  }
}
</script>
3. onRenderTracked 和 onRenderTriggered 钩子函数
onRenderTracked直译过来就是状态跟踪,它会跟踪页面上所有响应式变量和方法的状态,也就是我们用return返回去的值,他都会跟踪,只要页面有update的情况,他就会跟踪,然后生成一个event对象,我们通过event对象来查找程序的问题所在;onRenderTriggered直译过来是状态触发,它不会跟踪每一个值,而是给你变化值的信息,并且新值和旧值都会给你明确的展示出来。- 如果把
onRenderTracked比喻成散弹枪,每个值都进行跟踪,那onRenderTriggered就是狙击枪,只精确跟踪发生变化的值,进行针对性调试。
四、 Vue3 数据基础操作
1. defineComponent 构建应用及绑定事件
重点:
- 熟悉
composition API编程- 在
setup生命周期方法中定义事件并返回出去才能被 template 调用
<template>
  <div class="home">
    <h1>This is home page!</h1>
    <p>
      <button @click="sayHello">打招呼</button>
    </p>
   </div>
  </template>

<script>
// Hooks 编程,在 vue 中导入对应的函数方法,我们面向函数式进行编程
// Vue-composition-API 监测 VCA 复合式 API
// Vue3热更新有时候会有问题,所以需要手动的刷新页面
import { defineComponent } from 'vue'
export default defineComponent({
  name: 'Home',
    // setup 钩子函数
    setup () {
     const sayHello = () => {
        console.log('你好,帅哥!')
      }
      // 使用的时候,需要把对象 return 出去,才能在 template 中进行使用
      return {
        sayHello
      }
     }
   })
   </script>
2. 使用 reactive 绑定数据
重点:
- 能够使用
reactive构建 proxy 响应式对象;- 理解 proxy 响应式对象和普通对象之间的区别;
- 注意在
template中使用响应式对象{ { state.msg }}加上前缀;- 理解
getCurrentInstanceAPI 方法获取当前 vue 对象实例;- 注意: ref 构建的对象在 js 中使用
.value获取值
<template>
  <div class="home">
    <h1>This is home page!</h1>
    <h2>{

    { state.msg }}</h2>
    <h2>{

    { info }}</h2>
    <p>
      <button @click="changeMsg">ChangeMsg</button>
    </p>
  </div>
</template>
<script>
// Hooks 编程,在 vue 中导入对应的函数方法,我们面向函数式进行编程
// Vue-composition-API 监测 VCA 复合式 API
// Vue3热更新有时候会有问题,所以需要手动的刷新页面
import { defineComponent, reactive } from 'vue'
export default defineComponent({
  name: 'Home',
  // setup 钩子函数
  setup () {
    // 使用 响应式函数 reactive 构建响应对象 state
    const state = reactive({
      msg: '你好,黑猫警长'
    })
    // state 对象是一个 proxy 拦截对象
    console.log(state)

    // info 是一个普通对象,修改后不会被proxy拦截,进而页面也不会动态更新
    let info = '你好,蜡笔小新'

    const changeMsg = () => {
      state.msg = '黑猫警长,再见!'
      info = '蜡笔小新,再见!'
    }
    // 使用的时候,需要把对象 return 出去,才能在 template 中进行使用
    return {
      state,
      info,
      changeMsg
    }
  }
})
</script>
3. 使用 ref ( torefs ) 绑定数据
重点:
- 能够理解 ref 构建响应式对象的由来
- 能够使用 ref 方法构建响应式对象
- 能够使用 toRefs 转换 reactive 中构建的响应式对象
<template>
<div class="home">
 <h1>This demo-02 for study!</h1>
 <p>
   <!-- 双向数据绑定到 state msg 对象 -->
   <input type="text" v-model="state.msg"/>
 </p>
 <p> 使用  v-model 双向绑定数据的内容是: {

    {state.msg}}</p>

 <p>
   <!-- 双向数据绑定其本质上就是一个语法糖,监听 input 事件,动态修改 state.msg 的值 -->
   <input type="text" ref="myInput" @input="input" :value="state.nmsg"/>
 </p>
 <p> 使用 @input 事件动态实现双向数据绑定的内容是: {

    {state.nmsg}}</p>

 <p>
   <!-- 使用 ref 方法动态定义并双向绑定 hmsg  -->
   <input type="text" v-model="hmsg" @input="hmagInpu"/>
 </p>
 <p>使用 ref 方法动态定义并双向绑定的 hmsg 值是: {

    {hmsg}}</p>

 <h2>使用 toRefs 来实现在模板中不需要追加 state 调用数据</h2>
 <p>msg 的值是:{

    {msg}}</p>
</div>
</template>

<script>
import {  defineComponent, getCurrentInstance, reactive, ref, toRefs } from 'vue'
export default defineComponent({
setup () {
 const state = reactive({
   // 使用 v-model 来双向绑定数据
   msg: '',
   // 使用 input 事件来双向绑定数据
   nmsg: ''
 })
 // 可以使用 getCurrentInstance hook 来拿到当前实例化对象上下文信息,但是,除非极其特殊的情况,否则不建议这样使用
 const { ctx } = getCurrentInstance()
 const input = () => {
   // 在 vue3 中因为是面向 hooks 函数编程,所以,无法通过 this 拿到当前服 vue 实例化对象
   // console.log(this.value)
   // 像使用 vue2 中的 this 一样 使用 ctx(上下文内容信息)
   console.log(ctx.$refs.myInput.value)
   state.nmsg = ctx.$refs.myInput.value
 }

 // 使用 ref 方法来定义一个 响应式监听的对象,在实际开发中我们都是使用这种方法来构建响应式对象
 const hmsg = ref('')
 const hmagInpu = () => {
   // 需要注意的是:在内部使用 hmsg 的值,需要使用 value 来获取对应的值
   console.log('咱们获取到的hmsg值是:' + hmsg.value)
 }
 return {
   state,
   // 使用 toRefs hook 方法方便不使用 state.msg 的方法来访问内容
   ...toRefs(state),
   hmsg,
   input,
   hmagInpu
 }
}
})
</script>
4. computed 计算属性
重点:
- 使用 computed API 方法构建响应式计算属性对象
- 注意在 Vue3 中不推荐使用 filter 过滤器,建议使用 computed 计算属性来替代
<template>
  <div class="home">
    <p>
      <!-- 双向数据绑定到 state msg 对象 -->
      <input type="text" v-model="state.msg"/>
    </p>
    <p> 使用  v-model 双向绑定数据的内容是: {

    {state.msg}}</p>
    <p> 使用 计算属性,当前输入的内容长度是: {

    { cmsg }}</p>
   </div>
   </template>

   <script>
   import { computed, defineComponent, getCurrentInstance, reactive, ref, toRefs } from 'vue'
   export default defineComponent({
   setup () {
 const state = reactive({
      // 使用 v-model 来双向绑定数据
      msg: '',
      // 使用 input 事件来双向绑定数据
      nmsg: '',
      cmsg: computed(() => {
     return state.msg.length
      })
    })
   return {
   // 使用 toRefs hook 方法方便不使用 state.msg 的方法来访问内容
   ...toRefs(state)
 }
}
})
  </script>
5. watch、watchEffect 数据监听
重点:
- 能够使用 watch 实现简单监听数据变化效果
- 能够使用 watch 一次性监听多个响应式数据对象
- 能够使用 watchEffect 监听数据状态变化
<template>
  <h1>Vue3 - watch 和 watchEffect </h1>
  <h2>{

    {msg}}</h2>
<h2><button @click="changeMsg">改变 msg 的值</button></h2>
  </template>
<script>
import { defineComponent, reactive, toRefs, watch, watchEffect } from 'vue'
export default defineComponent({
setup () {
   const data = reactive({
      msg: 'XXXXXXXXXXXXXXXXXXX',
      nmsg: '新的数据请求',
      changeMsg: () => {
        data.msg = 'OOOOOOOOOOOO'
      }
    })
    // watch 监听只能是 getter/efect 函数、ref、reactive对象或数组
    // 简单监听
    watch(data, () => {
      console.log('02-观察整个data中的属性变化', data.msg)
    })
    // 监听指定的信息
    watch(() => data.msg, (newVal, oldVal) => {
      console.log('03-msg的新值是:', newVal)
      console.log('03-msg的旧值是:', oldVal)
    })
    // 监听多个属性
    watch([() => data.msg, () => data.nmsg], (newVal, oldVal) => {
      console.log('04-msg的新值是:', newVal)
      console.log('04-msg的旧值是:', oldVal)
    })
    // 不需要指定监听的属性
    watchEffect(() => {
      // 程序运行的时候,初始化就会执行一次,完成监听准备工作
      console.log('01-watchEffect 监听 data 中数据变化:', data.msg)
    })
    return {
      ...toRefs(data)
    }
   }
  })
</script>
6. TodoList 实现点餐功能
重点:
- 能够使用 Vue3 基础数据操作相关知识,实现点餐基础 TodoList 功能
- js 浮点数相加误差消除简单办法的实现
<template>
  <div class="home">
    <h1>ToDoList 点餐服务</h1>
    <h2>菜单列表:</h2>
    <ul>
      <li v-for="(item, index) in allList" :key="index">
        {

    {item.name}} 价格 {

    {item.price}}
        <button @click="addCheckList(index)">点餐</button>
      </li>
    </ul>
    <h2>已点菜单:</h2>
    <ul>
      <li v-for="(item, index) in checkList" :key="index">
        {

    {item.name}} 价格 {

    {item.price}}
        <button @click="removeCheckList(index)">取消</button>
      </li>
    </ul>
    <h3>你一共点了 {

    {checkListNum}} 道菜,消费 {

    {allPay}} 元</h3>
  </div>
</template>

<script>
import { computed, defineComponent, reactive, toRefs } from 'vue'
export default defineComponent({
  setup () {
    const add = (num1, num2) => {
      const a1 = ('' + num1).split('.')[1] ? ('' + num1).split('.')[1].length : 0
      const a2 = ('' + num2).split('.')[1] ? ('' + num2).split('.')[1].length : 0
      // 全部整成整数进行相加再除去指数
      const m = Math.pow(10, Math.max(a1, a2))
      return (num1 * m + num2 * m) / m
    }
    // 我们一般把相应的 数据状态 、计算属性、 事件行为 都统一封装在 reactive hook 中,以方便统一管理和阅读
    const data = reactive({
      allList: [{
        name: '宫保鸡丁',
        price: 18.88
      }, {
        name: '鱼香茄子',
        price: 8.88
      }, {
        name: '宫保鸡丁',
        price: 28.88
      }],
      checkList: [],
      checkListNum: computed(() => {
        return data.checkList.length
      }),
      allPay: computed(() => {
        let allPay = 0
        data.checkList.map(item => {
          allPay = add(allPay, item.price)
        })
        // 大家要注意哦,在 js 中,浮点数相加会与实际结果有差异,这是为什么呢?因为在 js 编译的过程中,浮点数保存并不是精确的
        return allPay
      }),
      addCheckList: (index) => {
        console.log('你点的菜肴是:', data.allList[index])
        data.checkList.push(data.allList[index])
      },
      removeCheckList: (index) => {
        console.log('你取消了菜肴:', data.checkList[index])
        data.checkList.splice(index, 1)
      }
    })
    return {
      ...toRefs(data)
    }
  }
})
</script>
<style lang="scss" scoped>
li{
  margin: 20px;
}
</style>
五、Vue3 数据通信操作
1. 父子组件 props 、emit 、slot 通信
重点:
- 父组件基于 props 传递数据给子组件
- 子组件基于 事件模拟 触发父组件事件,完成数据通信
- 父组件基于 slot 传递文档结构给子组件
<template>
  <h1>Vue3 - 父子组件通信</h1>
  <h2>{

    {msg}}</h2>

  <h2>-----------父组件传值给子组件---------</h2>
  <h2>---------子组件模拟事件触发父组件定义好的事件-----------</h2>
  <input type="text" v-model="msg" />
  <child :parentMsg="msg" @initEvent="changeMsg">
    <h3 style="color:blue;">这是父组件中slot传递过来的内容</h3>
  </child>

</template>
<script>
import { reactive, toRefs } from 'vue'
import child from '../components/child'

export default {
  components: {
    child
  },
  setup () {
    const data = reactive({
      msg: 'MSG From Home Page !!',
      changeMsg: () => {
        data.msg = '被子组件模拟触发后更新数据'
      }
    })
    return {
      ...toRefs(data)
    }
  }
}
</script>
<style lang="scss" scoped>
*{
  color: red;;
}
</style>
<template> <h2>被调用的 child 组件</h2> <h3>直接接收父组件中传递过来的 props 内容:{ {parentMsg}}</h3> <h3>传递过来内容的长度是:{ {msgLength}}</h3> <slot /> <p> <button @click="changeParentMsg">点击修改父组件的msg</button> </p> </template> <script> import { computed, getCurrentInstance, reactive, toRefs } from 'vue' export default { // 和 vue2 一样,使用 props 直接接收父组件中传递过来的属性值,直接在模板中使用 props: ['parentMsg'], // 需要在 emits 中声明 emits: { // 不验证返回值 // initEvent: null initEvent: ({ email, password }) => { if (email && password) { return true } else { console.error('Invalid submit event payload!') return false } } }, // 可以使用 setup (props, { emit }) setup (props, content) { // 使用上下文对象来获取当前 this 对象也可以拿到 props ,但是我们不建议使用 const { ctx } = getCurrentInstance() // 注意哦,这里只会被调用一次,父组件中的 parentMsg 发生改变了也不会触发这个改变 console.log(ctx.parentMsg) console.log(content) const data = reactive({ // 在 setup 无法拿到this 对象,所以传递一个参数 props 来接收数据 msgLength: computed(() => { return props.parentMsg.length }) }) const changeParentMsg = () => { content.emit('initEvent', {}) } return { ...toRefs(data), changeParentMsg } } } </script> <style lang="scss" scoped> *{ color: green; } </style>
2. store 全局状态管理
重点:
- 定义 vuex store 全局状态管理器
- 能够在 template 中使用 store 中定义的属性
- 能够使用 mapActions 使用 store 中定义的方法
import {

      createStore } from 'vuex'
export default createStore({


  state: {


    username: 'Vuex-username 初始化状态'
  },
  mutations: {


    M_LOGIN (state, name) {


      state.username = name
    },
    M_LOGOUT (state) {


      state.username = '退出状态'
    }
  },
  actions: {


    login ({

      commit }, name) {


      commit('M_LOGIN', name)
    },
    logout ({

      commit }) {


      commit('M_LOGOUT')
    }
  },
  modules: {


  }
})
<template>
  <h1>Vue3 vuex 状态管理器</h1>
  <!-- 在页面中直接使用 $store 来拿到 state 的内容 -->
  <h2>{

    {$store.state.username}}</h2>
  <p>
    <button @click="login('樱桃小丸子')">登陆</button>
    <button @click="logout">退出</button>
  </p>
</template>

<script>
import { defineComponent, getCurrentInstance } from 'vue'
import { useStore, mapActions } from 'vuex'
export default defineComponent({
  // 在 js 中如何拿到 store 的值?
  setup () {
    // 第一种方法直接获取当前实例化对象后拿到对应的 state 内容,但是在 hooks 编程中这种方法不推荐
    const { ctx } = getCurrentInstance()
    console.log('通过当前实例化的对象拿到 store 的内容', ctx.$store.state.username)

    const store = useStore()
    console.log('通过 hook 拿到store 的内容', store.state.username)

    // const login = () => {
    //   store.dispatch('login', '蜡笔小新')
    // }

    // const logout = () => {
    //   store.dispatch('logout')
    // }

    const actions = { ...mapActions(['login', 'logout']) }
    console.log(actions)

    return {
      ...mapActions(['login', 'logout'])
    }
  }
})
</script>
3. provide & inject 跨组件传值
目的:
能够理解
provide在父组件以上如何供应消费数据理解子组件中
inject如何调用定义的的数据provide 选项应该是一个对象或返回一个对象的函数。该对象包含可注入其子孙的属性
provide:Object | () => Object
inject 选项应该是一个字符串数组,或一个对象,对象的 key 是本地的绑定名
inject:Array<string> | { [key: string]: string | Symbol | Object }
provide和inject主要为高阶插件/组件库提供用例,并不推荐直接用于应用程序代码中实际上,你可以把依赖注入看作一部分「大范围有效的 prop」,除了:
祖先组件不需要知道哪些后代组件使用它提供的属性
后代组件不需要知道被注入的属性来自哪里提示:provide 和 inject 绑定一般情况下并不是可响应的,以避免数据通信跨组件后的混乱不可控,当然我们一定要用来传递动态属性内容也是可以的
Vue3 对 provide&inject 封装成了其 composition API 方法,以方便更好的调用,同时也方便我们传递动态数据
<template>
  <h2>Provide&inject使用</h2>
  <input type="text" v-model="golbalProxyData" />
  <injext-child />
</template>

<script>
import { defineComponent, provide, ref } from 'vue'

import injextChild from '../components/inject'

export default defineComponent({
  // 父组件中返回要传给下级的数据
  // provide:Object | () => Object
  provide () {
    return {
      provideMsg: '这里是 provide 中提供的数据源信息'
    }
  },
  components: {
    injextChild
  },
  setup () {
    // 非响应式全局供应信息
    provide('globalMsg', 'provide提供的全局通信信息')
    // 响应式全局供应信息
    const golbalProxyData = ref('初始化的相关数据信息')
    provide('golbalProxyData', golbalProxyData)
    return {
      golbalProxyData
    }
  }
})
</script>
<template> <h2>Inject 子组件</h2> <h3>{ { provideMsg }}</h3> <h3>{ { globalMsg }}</h3> <h3>{ { golbalProxyData }}</h3> </template> <script> import { defineComponent, inject } from 'vue' export default defineComponent({ inject: ['provideMsg'], setup () { console.log('') const globalMsg = inject('globalMsg') const golbalProxyData = inject('golbalProxyData') return { globalMsg, golbalProxyData } } }) </script> <style scoped> *{ color: red; } </style>
4. router 动态路由传参
<template>
  <div class="router">
    <h1>Vue3 路由的基础使用</h1>
    <h3 v-for="(item, index) in feedsList" :key="index">
      <!-- 路由式导航
        <router-link :to=" '/new/' + item.id">{

    {item.title}} - {

    {item.author}} - {

    {item.date}}</router-link>
      -->
      <!-- 使用编程式导航 -->
      <p @click="gotoNew(item.id)">{

    {item.id}} - {

    {item.title}} - {

    {item.author}} - {

    {item.date}}</p>
    </h3>
  </div>
</template>

<script>
import axios from 'axios'
import { getCurrentInstance, onMounted, ref } from 'vue'
import { useRouter } from 'vue-router'
export default {
  setup () {
    const feedsList = ref({})
    onMounted(async () => {
      const res = await axios.get('http://localhost:4000/news-list?num=20&lang=zh')
      console.log(res)
      feedsList.value = res.data.list
    })
    // 获取当前实例化对象,操作对应的业务逻辑
    const { ctx } = getCurrentInstance()
    console.log(ctx)

    const router = useRouter()
    console.log(router)

    const gotoNew = id => {
      // 使用编程式导航跳转到指定页面
      console.log('需要跳转到的页面id是:', id)
      router.push('/new/' + id)
    }
    return {
      feedsList,
      gotoNew
    }
  }
}
</script>
<style lang="scss" scoped>
h3{
  margin: 5px;
}
</style>
六、Vue3 数据复用操作
1. 常规组件定义及使用
重点:
- 理解 组件的定义是为了 抽离复用的一个关键模块
- 组件的使用 components 注册后,在 template 中类似 HTML 标签一样闭合使用
2. 使用 mixins 合并行为变更
重点:
- 理解 mixins 数据复用的意义和一般使用场景,比如:后台管理系统我们可能多次用到表格来展示内容
- 理解 mixins 数据复用可能存在的弊端
const todoMixin = {


  methods: {


    add () {


      this.num++
    },
    muit () {


      this.num--
    }
  }
}
export default todoMixin
<template> <h1>Vue3 - Hooks编程初体验</h1> <h2> <button @click="muit"> - </button> --- <span>{ {num}}</span> --- <button @click="add"> + </button> </h2> </template> <script> import todoCount from '../mixins/todoCount' export default { mixins: [todoCount], data () { return { num: 0 } } } </script> <style lang="scss" scoped> h2{ text-align: center; margin: 20px; button{ font-size: 24px; } span{ color: red; } } </style>
3. 使用 Hooks 代码重用
目的:
- 能够使用 hooks 实现代码复用
- 能够理解 hooks 实现代码复用的优势
// 定义一个纯函数使用的 hooks
import {

      reactive, toRefs } from 'vue'
function useCount () {


  const data = reactive({


    num: 0,
    muit: () => {


      data.num--
    },
    add: () => {


      data.num++
    }
  })
  return {


    ...toRefs(data)
  }
}
// 自定义 hooks ,自定义一个钩子函数,内部的变量、方法独立,不依赖外围状态来实现调用,想咋用咱就咋用
export default useCount
// 在页面中使用 hooks <template> <div class="feeds"> <h1>使用 hooks 实现数据逻辑操作复用</h1> <h2> <button @click="muit"> - </button> --- <span>{ {num}}</span> --- <button @click="add"> + </button> </h2> <h1>调用子组件</h1> <p> <todo-count /> </p> </div> </template> <script> import todoCountHooks from '../hooks/todoCountHook' import { toRefs } from 'vue' import todoCount from '../components/todoCount' export default { components: { todoCount }, setup () { // 直接调用 hooks 中定义的钩子函数,每次调用函数返回一个 对象,工厂函数、构造函数,不会被互相影响 const data = todoCountHooks() return { ...toRefs(data) } } } </script> <style lang="scss" scoped> h2{ text-align: center; margin: 20px; button{ font-size: 24px; } span{ color: red; } } </style>
// 在组件中使用 hooks
<template>
  <div class="box">
    <h3>组件中的页面结构及样式可以随意,复用的 hooks 逻辑很单纯</h3>
    <button @click="add"> + </button>
      --- <span>{

    {num}}</span> ---
    <button @click="muit"> - </button>
    </div>
</template>

<script>
import todoCountHooks from '../hooks/todoCountHook'
import { toRefs } from 'vue'

export default {
  setup () {
    // 直接调用 hooks 中定义的钩子函数,每次调用函数返回一个 对象,工厂函数、构造函数,不会被互相影响
    // 同时,这里要注意哦,我们
    const data = todoCountHooks()
    return {
      ...toRefs(data)
    }
  }
}
</script>
<style lang="scss" scoped>
.box{
  text-align: center;
  background-color: #faf2f1;
  padding: 40px;
}
</style>
4. Teleport 瞬间移动组件的使用
目的:
- 能够使用
Teleport瞬移组件- 理解 瞬移组件 的优势
- 使用目的
Teleport「瞬间移动组件」,也可以叫做「独立组件」,它可以把你写的组件挂载到任何你想挂载的DOM ID上,所以说是很自由很独立的,我们在使用Vue2的时候是做不到这一点的。
- 构建组件
<template>
  <teleport to="#modal">
    <div class="modal">
      <div class="mbox">
        <h2>{

    { title }}</h2>
        <h3>{

    { info }}</h3>
      </div>
    </div>
  </teleport>
</template>
<script>
import { defineComponent, reactive, toRefs } from 'vue'
export default defineComponent({
  setup () {
    const data = reactive({
      title: '',
      info: '这是一个modal弹窗'
    })

    return {
      ...toRefs(data)
    }
  }
})
</script>
<style lang="scss" scoped>
.modal{
  position: fixed;
  top: 0;
  left: 0;
  width: 100%;
  height: 100vh;
  background: rgba($color: #333, $alpha: 0.8);
  display: flex;
  flex-direction: row;
  flex-wrap: nowrap;
  // 交叉轴对齐方式
  align-items: center;
  // 主轴对齐方式
  justify-content: center;
  .mbox{
    width: 600px;
    height: 400px;
    background: #fff;
  }
}
</style>
- 调用组件
在 index.html 中写一个挂载点
<div id="app"></div>
<div id="modal"></div>
在 Home.vue page 页面中直接调用,但是 modal 这个组件就不会挂载在
#app下而在#modal下面了<template> <modal /> </template> <script> import { defineComponent } from 'vue' import modal from '../components/Modal' export default defineComponent({ components: { modal }, setup () { } }) </script>
5. Suspense 异步请求组件使用
目的:
- 能够使用 Suspense 异步请求组件
- 理解 Suspense 的优势及意义
在前端开发中,异步请求组件必不可少,比如:读取远程图片、调用后台接口,这些都需要异步请求。
在 Vue2.x 中,我们一般是根据请求返回的结果状态自行追加逻辑来控制是否显示,这种方法略显笨重,所以Vue3.x 中就给我们提供了
Suspense组件。需要注意的是:如果我们要使用
Suspense的话,要返回一个promise对象,而不是原来的那种JSON对象
- 使用
setTimeout实现异步请求组件请求使用
<template>
  <h2>Suspense异步调用显示的组件</h2>
  <h3>{

    { info }}</h3>
</template>

<script>
import { defineComponent } from 'vue'

export default defineComponent({
  setup () {
    return new Promise((resolve, reject) => {
      const timer = setTimeout(() => {
        clearTimeout(timer)
        return resolve({
          info: '异步请求反馈的info信息'
        })
      }, 2000)
    })
  }
})
</script>
<template> <Suspense> <template #default> <async-show /> </template> <template #fallback> <h1>数据正在请求中...</h1> </template> </Suspense> </template> <script> import { defineComponent, onErrorCaptured } from 'vue' import asyncShow from '../components/asyncShow' export default defineComponent({ components: { asyncShow } }) </script>
- 对异步
axios数据请求实现异步请求组件,同步使用onErrorCaptured生命周期钩子函数监听错误
<template>
  <h2>新闻列表信息如下:</h2>
  <p v-for="(item, index) in newslist" :key="index">{

    { item.title }}</p>
</template>
<script>
import { defineComponent } from 'vue'
import axios from 'axios'
export default defineComponent({
  async setup () {
    const res = await axios.get('http://localhost:4000/news-list?num=20&lang=zh')
    return {
      newslist: res.data.list
    }
  }
})
</script>
<template> <Suspense> <template #default> <async-data /> </template> <template #fallback> <h1>新闻列表数据正在请求中...</h1> </template> </Suspense> </template> <script> import { defineComponent, onErrorCaptured } from 'vue' import asyncData from '../components/asyncData' export default defineComponent({ components: { asyncData }, setup () { onErrorCaptured(error => { console.log('错误拦截钩子函数调用==>', error) return true }) } }) </script>