文章目录
打war包部署到外置tomcat容器
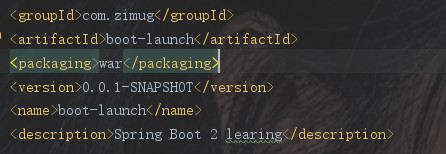
一、修改打包方式
<packaging>war</packaging>
将上面的代码加入到pom.xml文件刚开始的位置,如下:
二、 排除内置tomcat的依赖
我们使用外置的tomcat,自然要将内置的嵌入式tomcat的相关jar排除。
<dependency>
    <groupId>org.springframework.boot</groupId>
    <artifactId>spring-boot-starter-web</artifactId>
    <exclusions>
        <exclusion>
            <groupId>org.springframework.boot</groupId>
            <artifactId>spring-boot-starter-tomcat</artifactId>
        </exclusion>
    </exclusions>
</dependency>
三、新增加一个类继承SpringBootServletInitializer实现configure:
为什么继承该类,SpringBootServletInitializer源码注释:
Note that a WebApplicationInitializer is only needed if you are building a war file and deploying it.
If you prefer to run an embedded web server then you won’t need this at all.
注意,如果您正在构建WAR文件并部署它,则需要WebApplicationInitializer。如果你喜欢运行一个嵌入式Web服务器,那么你根本不需要这个。
public class ServletInitializer extends SpringBootServletInitializer {


    @Override
    protected SpringApplicationBuilder configure(SpringApplicationBuilder builder) {


        //此处的Application.class为带有@SpringBootApplication注解的启动类
        return builder.sources(BootLaunchApplication.class);
    }
}
注意事项:
使用外部Tomcat部署访问的时候,application.properties(或者application.yml)中的如下配置将失效,请使用外置的tomcat的端口,tomcat的webapps下项目名进行访问。
server.port=
server.servlet.context-path=
四、build要有finalName标签
pom.xml中的构建build代码段,要有应用最终构建打包的名称。
<finalName>boot-launch</finalName>
五、打包与运行
war方式打包,打包结果将存储在项目的target目录下面。
mvn clean package -Dmaven.test.skip=true
然后将war包copy到外置Tomcat webapps目录里面。在外置tomcat中运行:${Tomcat_home}/bin/目录下执行startup.bat(windows)或者startup.sh(linux),然后通过浏览器访问应用,测试效果。
需要注意的是
- 在boot-launch.war在tomcat webapps目录里面解压到boot-launch文件夹。所以当你访问应用的时候,必须使用
http://localhost:8888/boot-launch/template/jsp,不能是:http://localhost:8888/template/jsp。会报404错误。 - jsp静态资源引用也必须是:/boot-launch/image/xxxx.png,不能是/image/xxxx.png
- JSP的war包中,webjars的资源使用方式不再被支持